
# 6.3 Nginx與FastCGI
nginx 不能像apache那樣直接執行外部可執行程序,但nginx可以作為代理服務器,將請求轉發給后端服務器,這也是nginx的主要作用之一。其中nginx就支持FastCGI代理,接收客戶端的請求,然后將請求轉發給后端fastcgi進程。下面介紹如何使用C/C++編寫cgi/fastcgi,并部署到nginx中。
通過前面的介紹知道,fastcgi進程由FastCGI進程管理器管理,而不是nginx。這樣就需要一個FastCGI管理,管理我們編寫fastcgi程序。本文使用spawn-fcgi作為FastCGI進程管理器。
## spawn-fcgi
spawn-fcgi是一個通用的FastCGI進程管理器,簡單小巧,原先是屬于lighttpd的一部分,后來由于使用比較廣泛,所以就遷移出來作為獨立項目了。spawn-fcgi使用pre-fork 模型,功能主要是打開監聽端口,綁定地址,然后fork-and-exec創建我們編寫的fastcgi應用程序進程,退出完成工作。fastcgi應用程序初始化,然后進入死循環偵聽socket的連接請求。
### 安裝
* 獲取spawn-fcgi編譯安裝包,在
http://redmine.lighttpd.net/projects/spawn-fcgi/wiki
上可以獲取當前最新的版本。
* 解壓縮spawn-fcgi-x.x.x.tar.gz包。
* 進入解壓縮目錄,執行./configure。
* make & make install
如果遇到以下錯誤:
如果遇到以下錯誤:
```bash
./autogen.sh: x: autoreconf: not found
```
因為沒有安裝automake 工具,ubuntu用下面的命令安裝好就可以了:
```bash
sudo apt-get install autoconf automake libtool 。
```
spawn-fcgi的幫助信息可以通過man spawn-fcgi或spawn-fcgi –h獲得,下面是部分常用spawn-fcgi參數信息:
```bash
f <fcgiapp> 指定調用FastCGI的進程的執行程序位置
-a <addr> 綁定到地址addr。
-p <port> 綁定到端口port。
-s <path> 綁定到unix domain socket
-C <childs> 指定產生的FastCGI的進程數,默認為5。(僅用于PHP)
-P <path> 指定產生的進程的PID文件路徑。
-F <childs> 指定產生的FastCGI的進程數(C的CGI用這個)
-u和-g FastCGI使用什么身份(-u 用戶 -g 用戶組)運行,
CentOS下可以使用apache用戶,其他的根據情況配置,如nobody、www-data等。
```
### 編寫fastgci應用程序
使用C/C++編寫fastcgi應用程序,可以使用FastCGI軟件開發套件或者其它開發框架,如fastcgi++。
本文使用FastCGI軟件開發套件——fcgi
http://www.filewatcher.com/d/Gentoo/distfiles/Other/fcgi-2.4.1-SNAP-0910052249.tar.gz.614929.html
通過此套件可以輕松編寫fastcgi應用程序,安裝fcgi:
```bash
./configue
make
```
如果編譯出現類似以下錯誤:
```bash
cgio.cpp: In destructor 'virtual fcgi_streambuf::~fcgi_streambuf()':
fcgio.cpp:50: error: 'EOF' was not declared in this scope
fcgio.cpp: In member function 'virtual int fcgi_streambuf::overflow(int)':
fcgio.cpp:70: error: 'EOF' was not declared in this scope
fcgio.cpp:75: error: 'EOF' was not declared in this scope
fcgio.cpp: In member function 'virtual int fcgi_streambuf::sync()':
fcgio.cpp:86: error: 'EOF' was not declared in this scope
fcgio.cpp:87: error: 'EOF' was not declared in this scope
fcgio.cpp: In member function 'virtual int fcgi_streambuf::underflow()':
fcgio.cpp:113: error: 'EOF' was not declared in this scope
make[2]: *** [fcgio.lo] Error 1
make[2]: Leaving directory `/root/downloads/fcgi-2.4.1-SNAP-0910052249/libfcgi'
make[1]: *** [all-recursive] Error 1
make[1]: Leaving directory `/root/downloads/fcgi-2.4.1-SNAP-0910052249'
make: *** [all] Error 2
```
解決辦法:在include/fcgio.h文件中加上**
```cpp
#include <cstdio>
```
,然后再次編譯
```bash
sudo make install
```
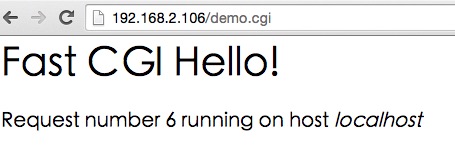
編寫一個fcgi簡單的應用程序:
```cpp
#include <stdio.h>
#include <stdlib.h>
#include <string.h>
#include <unistd.h>
#include "fcgi_stdio.h"
int main(int argc, char *argv[])
{
int count = 0;
while (FCGI_Accept() >= 0) {
printf("Content-type: text/html\r\n");
printf("\r\n");
printf("<title>Fast CGI Hello!</title>");
printf("<h1>Fast CGI Hello!</h1>");
printf("Request number %d running on host <i>%s</i>\n", ++count, getenv("SERVER_NAME"));
}
return 0;
}
```
編譯:
```bash
gcc fcgi_demo.c -o demo -lfcgi
```
這個就是其中一個針對client一個http請求的業務服務應用程序。
需要在后臺跑起來,并且讓spawn負責管理。
```bash
spawn-fcgi -a 127.0.0.1 -p 8081 -f ./demo
```
### 有關nginx的fcgi的配置
```bash
server {
listen 80;
server_name localhost;
#access_log logs/host.access.log main;
location / {
#proxy
#proxy_pass http://backup.com;
root html;
index index.html index.htm;
}
#監聽用戶的demo.cgi請求,通過fastcgi_pass 交給本地8081端口處理
#此時spwan-cgi已經將8081端口交給之前我們寫好的demo進程處理
location /demo {
fastcgi_pass 127.0.0.1:8081;
fastcgi_index demo.cgi;
include fastcgi.conf;
}
#error_page 404 /404.html;
# redirect server error pages to the static page /50x.html
#
error_page 500 502 503 504 /50x.html;
location = /50x.html {
root html;
}
}
```
這樣nginx收到http://localhost/demo請求時,會匹配到location /demo 塊,將請求傳到后端的fastcgi應用程序處理。
- 概要
- 1 分布式存儲fastDFS
- 1.1 fastDFS 通用介紹
- 1.2 fastDFS安裝和使用
- 1.3 基于fastDFS實現分布式
- 2 緩存數據庫redis快速搭建
- 2.1 環境安裝
- 2.2 redis數據類型
- 2.3 redis訂閱發布模式
- 2.4 redis事務
- 2.5 redis備份
- 3 redis詳細攻略
- 3.1 redis簡介
- 3.2 redis使用場景
- 3.3 redis基本操作
- 3.4 redis數據類型
- 3.4.1 字符串
- 3.4.2 HASH-字典
- 3.4.3 List-列表
- 3.4.4 Set-集合
- 3.4.5 Sorted Set-有序集合
- 3.4.6 訂閱-發布
- 3.4.7 事務
- 3.5 redis配置文件
- 3.6 持久化
- 3.7 redis性能測試
- 3.8 redis-C-API
- 3.9 redis-C++-API
- 3.10 總結與建議
- 4 memcache緩存數據庫
- 4.1 什么是memcached
- 4.2 memcached的特征
- 4.3 memcached的內存管理
- 4.4 如何使用memcached
- 4.5 memcached參數詳解
- 4.6 memcached安裝
- 4.7 memcached-C客戶端
- 4.8 memcached-C++客戶端
- 5 Nginx
- 6 FastCGI
- 6.1 CGI
- 6.2 FastCGI
- 6.3 Nginx與FastCGI
- 7 Nginx上部署fastDFS
- 8 項目概要
- 8.1 上傳文件功能
- 8.2 主界面顯示與下載文件功能
- 8.3 注冊功能
- 8.4 登陸功能
- 8.5 文件分類功能
- 8.6 個人網盤功能
- 8.8 秒傳功能