在php原生開發中使用的打印數組一般使用print_r()函數來打印出來,之前在thinkphp5中習慣性使用dump或者echo一時改不過來了,以至于搞了大半天才發現是這個問題。
PHP 7 增加了可以為 unserialize() 提供過濾的特性,可以防止非法數據進行代碼注入,提供了更安全的反序列化數據。
## 定義和用法
file\_get\_contents() 把整個文件讀入一個字符串中。
該函數是用于把文件的內容讀入到一個字符串中的首選方法。如果服務器操作系統支持,還會使用內存映射技術來增強性能。
## 語法
file\_get\_contents(path,include\_path,context,start,max\_length)
| 參數 | 描述 |
| :-- | :-- |
| path | 必需。規定要讀取的文件。 |
| include\_path | 可選。如果您還想在 include\_path(在 php.ini 中)中搜索文件的話,請設置該參數為 '1'。 |
| context | 可選。規定文件句柄的環境。context 是一套可以修改流的行為的選項。若使用 NULL,則忽略。 |
| start | 可選。規定在文件中開始讀取的位置。該參數是 PHP 5.1 中新增的。 |
| max\_length | 可選。規定讀取的字節數。該參數是 PHP 5.1 中新增的。 |
## 定義和用法
file\_exists() 函數檢查文件或目錄是否存在。
如果指定的文件或目錄存在則返回 TRUE,否則返回 FALSE。
## 語法
file\_exists(path)
| 參數 | 描述 |
| :-- | :-- |
| path | 必需。規定要檢查的路徑。 |
案例實例:
~~~
private function path($goods_id){
return '../heutoi/img/'.$goods_id.'/bongan.txt';
}
public function get($goods_id){
$p = $this->path($goods_id);
if(file_exists($p)){
$f = unserialize(file_get_contents($p));
return $f;
}else{
return array();
}
}
~~~
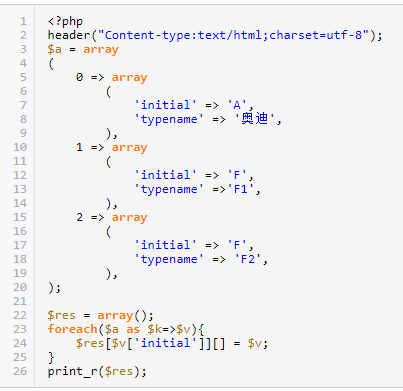
php獲取數組某個數值方法:array[序列值][名字]
示例:~~~
$array[1]['id']
記錄php對數組值分類的代碼案例:

這里記錄一下$_FILES的意思:
$\_FILES\[字段名\]\[name\]——保存的文件在上傳者機器上的文件名,
$\_FILES\[字段名\]\[tmp\_name\]——保存的是文件上傳到服務器臨時文件夾之后的文件名
$\_files主要用在當需要上傳二進制文件的地方,錄入上傳一個abc.mp3文件,則[服務器端](https://www.baidu.com/s?wd=%E6%9C%8D%E5%8A%A1%E5%99%A8%E7%AB%AF&tn=SE_PcZhidaonwhc_ngpagmjz&rsv_dl=gh_pc_zhidao)需要獲得該文件的相關信息,則通過變量$\_files來取得。
$\_FILES\['userfile'\]\['name'\]
客戶端機器文件的原名稱。
$\_FILES\['userfile'\]\['type'\]
文件的 MIME 類型,需要瀏覽器提供該信息的支持,例如“image/gif”。
$\_FILES\['userfile'\]\['size'\]
已上傳文件的大小,單位為字節。
$\_FILES\['userfile'\]\['tmp\_name'\]
文件被上傳后在服務端儲存的臨時文件名。
$\_FILES\['userfile'\]\['error'\]
和該文件上傳相關的[錯誤代碼](https://www.baidu.com/s?wd=%E9%94%99%E8%AF%AF%E4%BB%A3%E7%A0%81&tn=SE_PcZhidaonwhc_ngpagmjz&rsv_dl=gh_pc_zhidao)。\['error'\] 是在 PHP 4.2.0 版本中增加的。
注: 在 PHP 4.1.0 版本以前該數組的名稱為 $HTTP\_POST\_FILES,它并不像 $\_FILES 一樣是自動全局變量。PHP 3 不支持 $HTTP\_POST\_FILES 數組。
如果表單中沒有選擇上傳的文件,則 PHP 變量 $\_FILES\['userfile'\]\['size'\] 的值將為 0,$\_FILES\['userfile'\]\['tmp\_name'\] 將為 none。
這里記錄一個php壓縮圖片上傳的方法吧:
使用多個input 框上傳,這個種方法比較普通,就略過了
使用一個input框上傳多圖
先看代碼:
<form id="uploadForm" method="post" enctype="multipart/form-data" action="">
<textarea id="content" class="form-control" rows="4" name="content">
</textarea>
<input id="myfile_input" type="file" name="myfile[]" multiple="multiple" accept="image/*" />
</form>
1
2
3
4
5
form 表單的重點在 enctype=”multipart/form-data”
input 的重點在于 multiple=”multiple” accept=”image/*”
參數具體介紹自己百度吧.
ps: 這樣設置后,input框彈出文件選擇時,可以多選文件
php 后臺接收處理
普通參數: from 表單的其他參數正常獲取
文件對象:使用$_FILES 對象獲取
if (isset($_FILES['myfile'])){
$total = count($_FILES['myfile']['name']);
// Loop through each file
for ($i = 0; $i < $total; $i++) {
//Get the temp file path
$tmpFileName = $_FILES['myfile']['name'][$i];
$tmp = explode(".", $tmpFileName);
$code = $customer_id . rand(1000, 9999);
$tempFileName = $code . '.' . $tmp[1];
$small_image = $code . '_small' . '.' . $tmp[1];
$url = $_SERVER['DOCUMENT_ROOT'] . "/assert/application/upload/" . $tempFileName;
$small_url = $_SERVER['DOCUMENT_ROOT'] . "/assert/application/upload/" . $small_image;
//Make sure we have a file path
if ($tmpFileName != "") {
// 上傳到本地方式
if (file_exists($url))//當文件存在
{
$tempFileName = $code . '-1' . '.' . $tmp[1];
$small_image = $code . '-1_small' . '.' . $tmp[1];
$url = $_SERVER['DOCUMENT_ROOT'] . "/assert/application/upload/" . $tempFileName;
$small_url = $_SERVER['DOCUMENT_ROOT'] . "/assert/application/upload/" . $small_image;
}
move_uploaded_file($_FILES["myfile"]["tmp_name"][$i], $url);
// 壓縮圖片
$image = new ImgCompress($url, 1);
$image->compressImg($small_url);
}
}
}
1
2
3
4
5
6
7
8
9
10
11
12
13
14
15
16
17
18
19
20
21
22
23
24
25
26
27
28
29
total 獲取到文件數量后循環把文件轉存,存本地,存圖片服務器都可以;
壓縮的話,使用ImgCompress壓縮,ImgCompress是網上分享的一個壓縮類,親測好用,而且壓縮效果不錯。
ImgCompress 源碼:
class ImgCompress
{
private $src;
private $image;
private $imageinfo;
private $percent=0.5;
/*
param $src源圖
param $percent壓縮比例
*/
public function __construct($src,$percent=1)
{
$this->src = $src;
$this->percent = $percent;
}
/*
param string $saveName 圖片名(可不帶擴展名用原圖名)用于保存。或不提供文件名直接顯示
*/
public function compressImg($saveName='')
{
$this->_openImage();
if(!empty($saveName))
{
$this->_saveImage($saveName);//保存
}
else
{
$this->_showImage();
}
}
/*
內部:打開圖片
*/
private function _openImage()
{
list($width, $height, $type, $attr) = getimagesize($this->src);
$this->imageinfo = array(
'width'=>$width,
'height'=>$height,
'type'=>image_type_to_extension($type,false),
'attr'=>$attr
);
$fun = "imagecreatefrom".$this->imageinfo['type'];
$this->image = $fun($this->src);
$this->_thumpImage();
}
/**
* 內部:操作圖片
*/
private function _thumpImage()
{
$new_width = $this->imageinfo['width'] * $this->percent;
$new_height = $this->imageinfo['height'] * $this->percent;
$image_thump = imagecreatetruecolor($new_width,$new_height);
//將原圖復制帶圖片載體上面,并且按照一定比例壓縮,極大的保持了清晰度
imagecopyresampled($image_thump,$this->image,0,0,0,0,$new_width,$new_height,$this->imageinfo['width'],$this->imageinfo['height']);
imagedestroy($this->image);
$this->image = $image_thump;
}
/**
* 輸出圖片:保存圖片則用saveImage()
*/
private function _showImage()
{
header('Content-Type: image/'.$this->imageinfo['type']);
$funcs = "image".$this->imageinfo['type'];
$funcs($this->image);
}
/**
* 保存圖片到硬盤:
* @param string $dstImgName 1、可指定字符串不帶后綴的名稱,使用源圖擴展名 。2、直接指定目標圖片名帶擴展名。
*/
private function _saveImage($dstImgName)
{
if(empty($dstImgName)) return false;
$allowImgs = ['.jpg', '.jpeg', '.png', '.bmp', '.wbmp','.gif']; //如果目標圖片名有后綴就用目標圖片擴展名 后綴,如果沒有,則用源圖的擴展名
$dstExt = strrchr($dstImgName ,".");
$sourseExt = strrchr($this->src ,".");
if(!empty($dstExt)) $dstExt =strtolower($dstExt);
if(!empty($sourseExt)) $sourseExt =strtolower($sourseExt);
//有指定目標名擴展名
if(!empty($dstExt) && in_array($dstExt,$allowImgs))
{
$dstName = $dstImgName;
}
elseif(!empty($sourseExt) && in_array($sourseExt,$allowImgs))
{
$dstName = $dstImgName.$sourseExt;
}
else
{
$dstName = $dstImgName.$this->imageinfo['type'];
}
$funcs = "image".$this->imageinfo['type'];
$funcs($this->image,$dstName);
}
/**
* 銷毀圖片
*/
public function __destruct()
{
imagedestroy($this->image);
}
}
原文鏈接:https://blog.csdn.net/a437629292/article/details/81224133
