<ruby id="bdb3f"></ruby>

    <p id="bdb3f"><cite id="bdb3f"></cite></p>

      <p id="bdb3f"><cite id="bdb3f"><th id="bdb3f"></th></cite></p><p id="bdb3f"></p>
        <p id="bdb3f"><cite id="bdb3f"></cite></p>

          <pre id="bdb3f"></pre>
          <pre id="bdb3f"><del id="bdb3f"><thead id="bdb3f"></thead></del></pre>

          <ruby id="bdb3f"><mark id="bdb3f"></mark></ruby><ruby id="bdb3f"></ruby>
          <pre id="bdb3f"><pre id="bdb3f"><mark id="bdb3f"></mark></pre></pre><output id="bdb3f"></output><p id="bdb3f"></p><p id="bdb3f"></p>

          <pre id="bdb3f"><del id="bdb3f"><progress id="bdb3f"></progress></del></pre>

                <ruby id="bdb3f"></ruby>

                ThinkChat2.0新版上線,更智能更精彩,支持會話、畫圖、視頻、閱讀、搜索等,送10W Token,即刻開啟你的AI之旅 廣告
                1、在運行環境管理菜單中找到【環境變量】選項點擊進入![](https://img.kancloud.cn/b2/f3/b2f3f60c1323da7e86c2ae70529b399c_1366x710.png) 
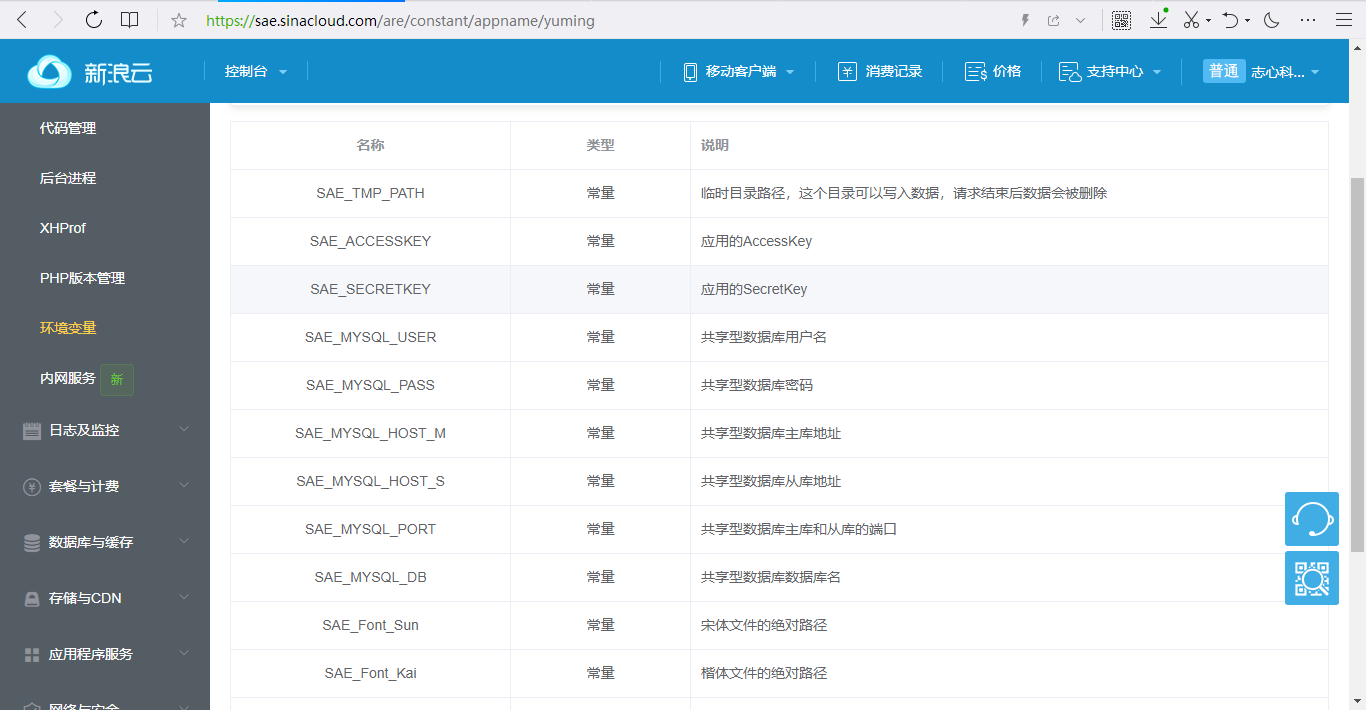
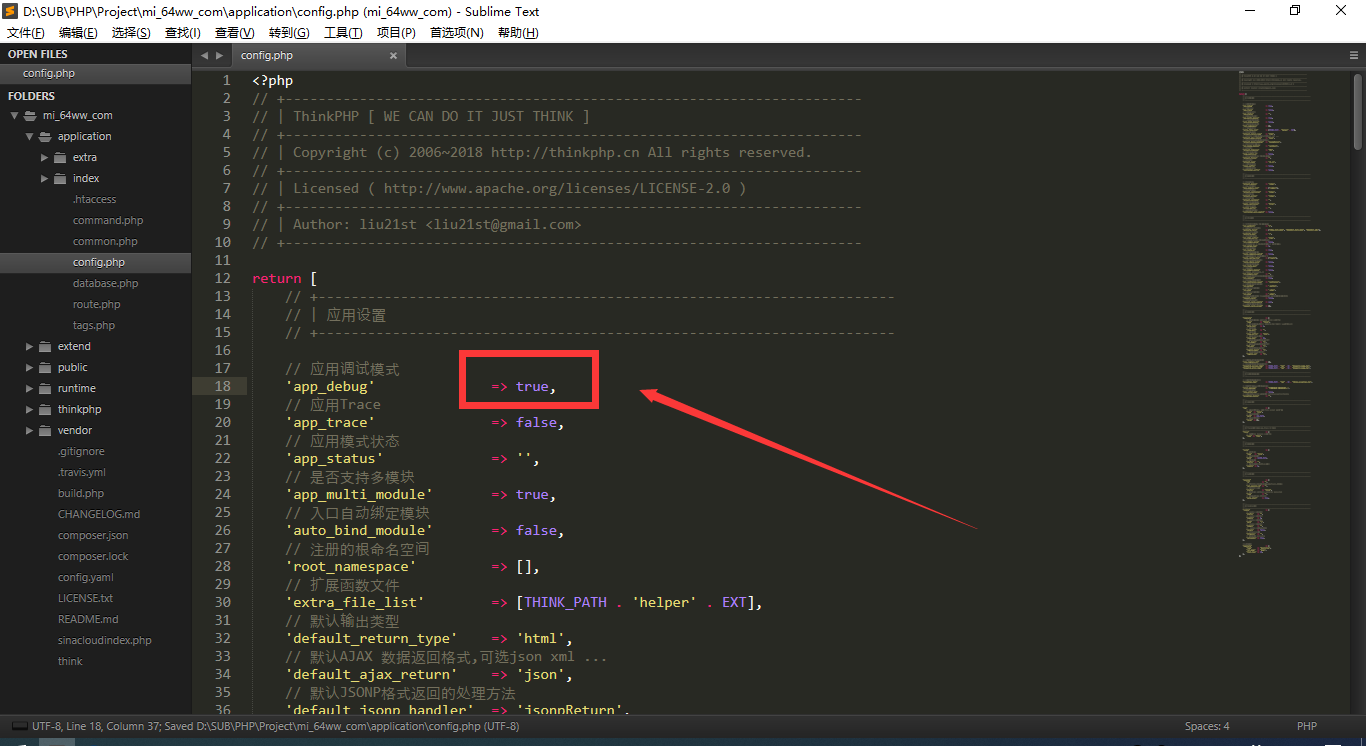
2、在ThinkPHP5框架中找到application/config.php文件,做如下修改 ![](https://img.kancloud.cn/41/6d/416d145121588accee9facf564bab925_1366x746.png) 
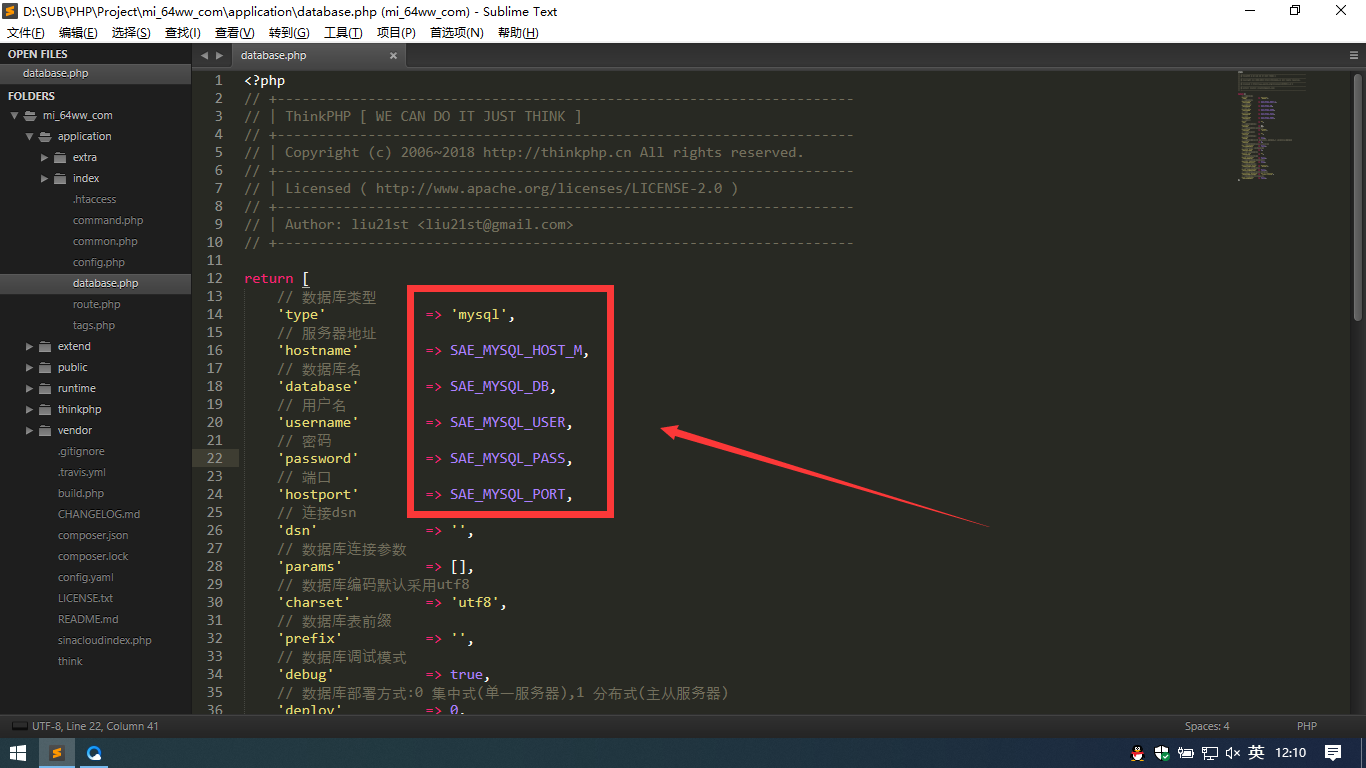
3、在ThinkPHP5框架中找到application/database.php文件,做如下修改 ![](https://img.kancloud.cn/8b/71/8b715b70529b9808a499118f7b5a08f6_1366x768.png) 4、訪問綁定的域名即可看到如下頁面 ![](https://img.kancloud.cn/21/0f/210ffd96aecd5a6276fcd80744f53809_1366x672.png) 
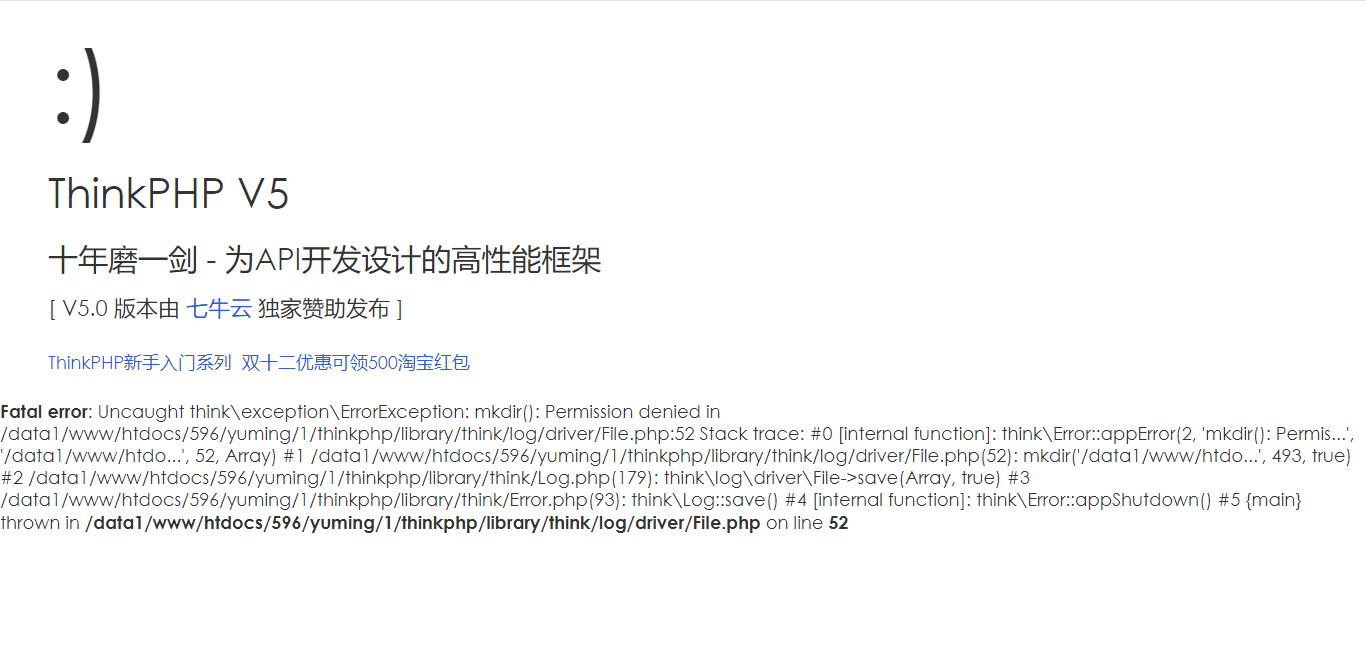
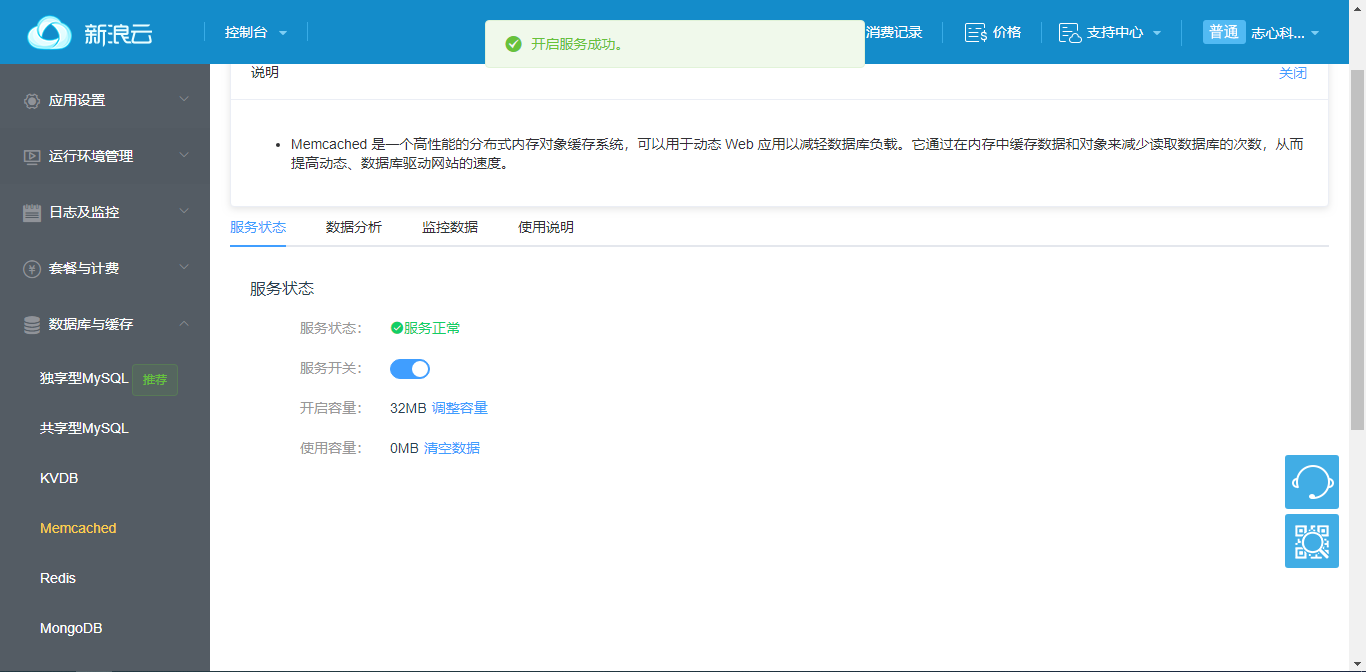
5、到這里ThinkPHP5框架已經部署成功了,但是我們發現頁面出現了錯誤,找不到mkdir()函數,這是因為新浪云SAE禁止用戶直接寫入文件,但是ThinkPHP5需要寫入緩存文件,怎么解決呢?新浪云為我們提供了Memcached,這是一個高性能的分布式內存對象緩存系統,我們可以用它來寫入ThinkPHP5的緩存文件。找到菜單欄中【數據庫與緩存】菜單下的Memcached選項,然后打開服務開關 ![](https://img.kancloud.cn/73/50/73501f884bdcf9f037be2ce82ec6ff68_1366x672.png) 
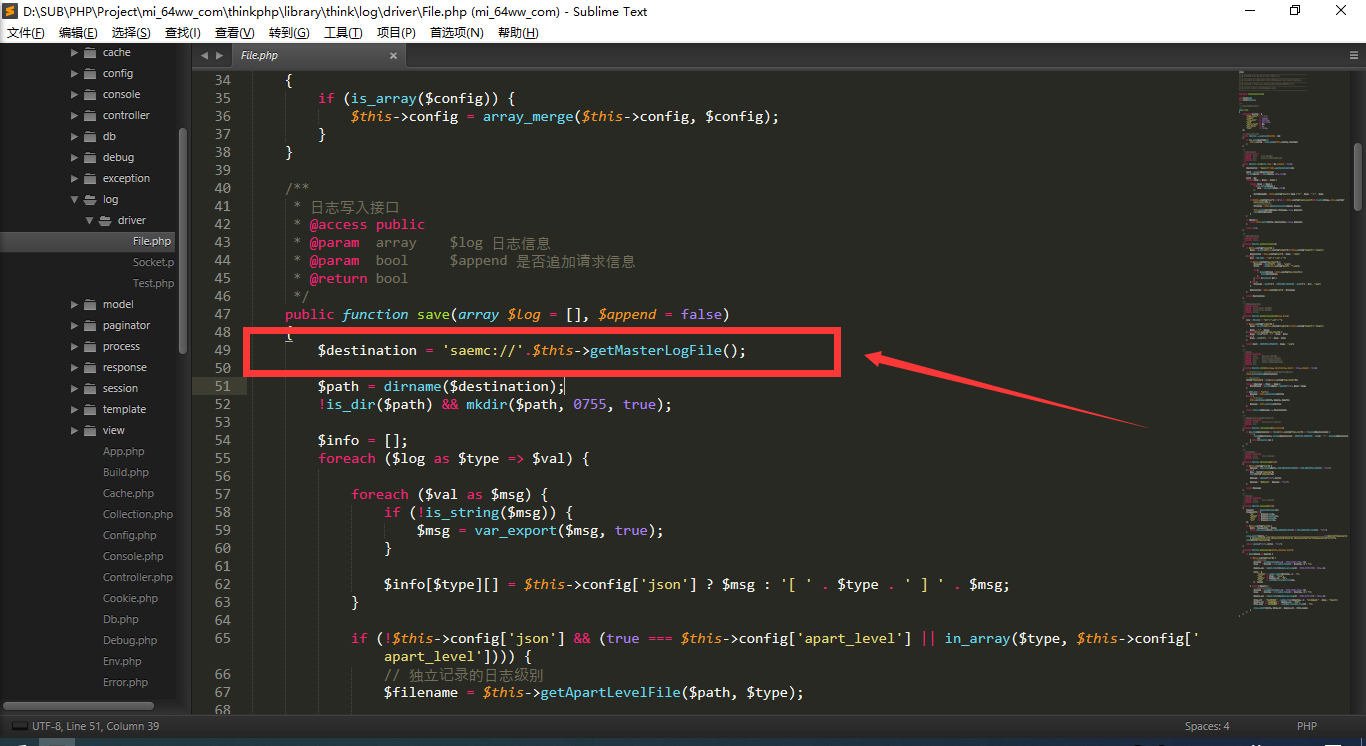
6、在ThinkPHP5框架中找到【thinkphp/library/think/log/driver/File.php】文件,將49行代碼修改為: `$destination = 'saemc://'.$this->getMasterLogFile();` ![](https://img.kancloud.cn/20/68/2068d063567a74dab526d5e553e6983e_1366x746.png) 7、在ThinkPHP5框架中找到【thinkphp/library/think/template/driver/File.php】文件,在28行前面加上一行: `$cacheFile = 'saemc://'.$cacheFile;
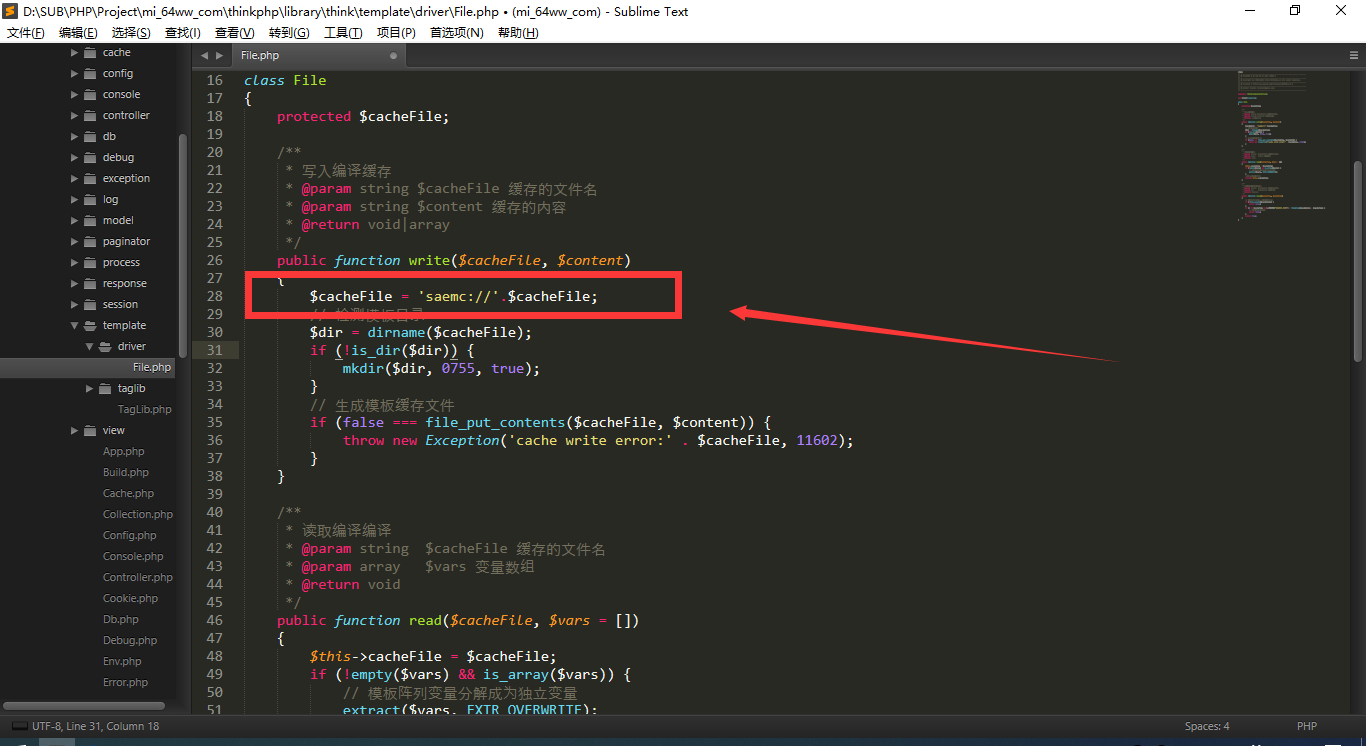
` ![](https://img.kancloud.cn/d1/ea/d1ea956c77888eef897461d3d70d6180_1366x746.png) 將48行改為: `$this->cacheFile = 'saemc://'.$cacheFile;` ![](https://img.kancloud.cn/6c/01/6c0122995b939ecf22c4897397f2d17b_1366x746.png) 8、在ThinkPHP5框架中找到【application/index/controller/Index.php】文件,將第8行改成: `return view('index');` 9、在【application/index】目錄下新建如下目錄和文件【view/index/index.html】,結構如下: ![](https://img.kancloud.cn/4e/84/4e844e70783dcbe7bbd1377dd8e76af2_1366x746.png) 
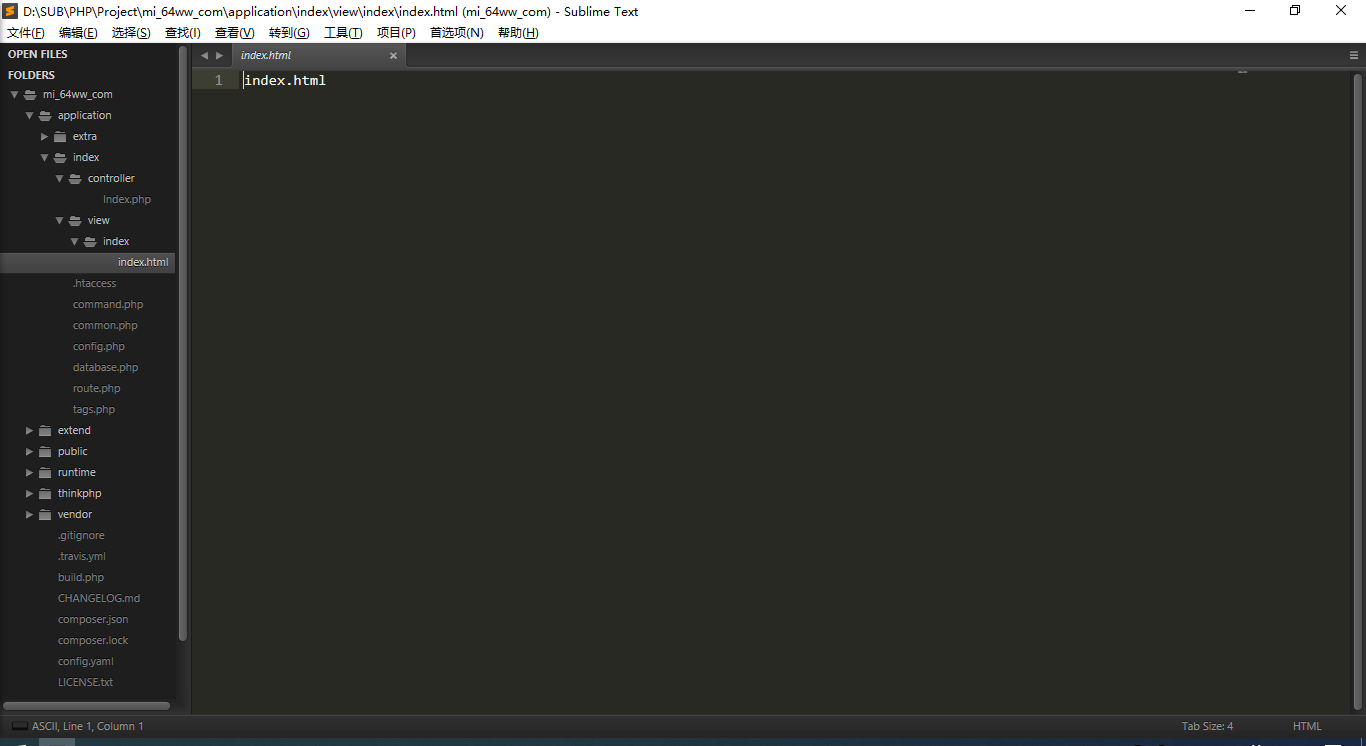
然后訪問http://域名/public,就能看到我們新建的頁面啦! ![](https://img.kancloud.cn/4e/b1/4eb1e62f2c2a0dcab5ca73e221d240a6_1365x668.png) 教程到此結束!步驟三是本文的重點,很多初學者都遇到過該情況不知道如何解決,主要就是緩存配置問題。 感謝大家閱讀本教程!如有問題請聯系作者QQ2217709027。
                  <ruby id="bdb3f"></ruby>

                  <p id="bdb3f"><cite id="bdb3f"></cite></p>

                    <p id="bdb3f"><cite id="bdb3f"><th id="bdb3f"></th></cite></p><p id="bdb3f"></p>
                      <p id="bdb3f"><cite id="bdb3f"></cite></p>

                        <pre id="bdb3f"></pre>
                        <pre id="bdb3f"><del id="bdb3f"><thead id="bdb3f"></thead></del></pre>

                        <ruby id="bdb3f"><mark id="bdb3f"></mark></ruby><ruby id="bdb3f"></ruby>
                        <pre id="bdb3f"><pre id="bdb3f"><mark id="bdb3f"></mark></pre></pre><output id="bdb3f"></output><p id="bdb3f"></p><p id="bdb3f"></p>

                        <pre id="bdb3f"><del id="bdb3f"><progress id="bdb3f"></progress></del></pre>

                              <ruby id="bdb3f"></ruby>

                              哎呀哎呀视频在线观看