[TOC]
# MySQL5.7的安裝歷程
- 安裝環境:Windows 10, 64 位(聯想拯救者R720)
- 安裝版本:mysql-5.7.25-winx64
## 一、下載
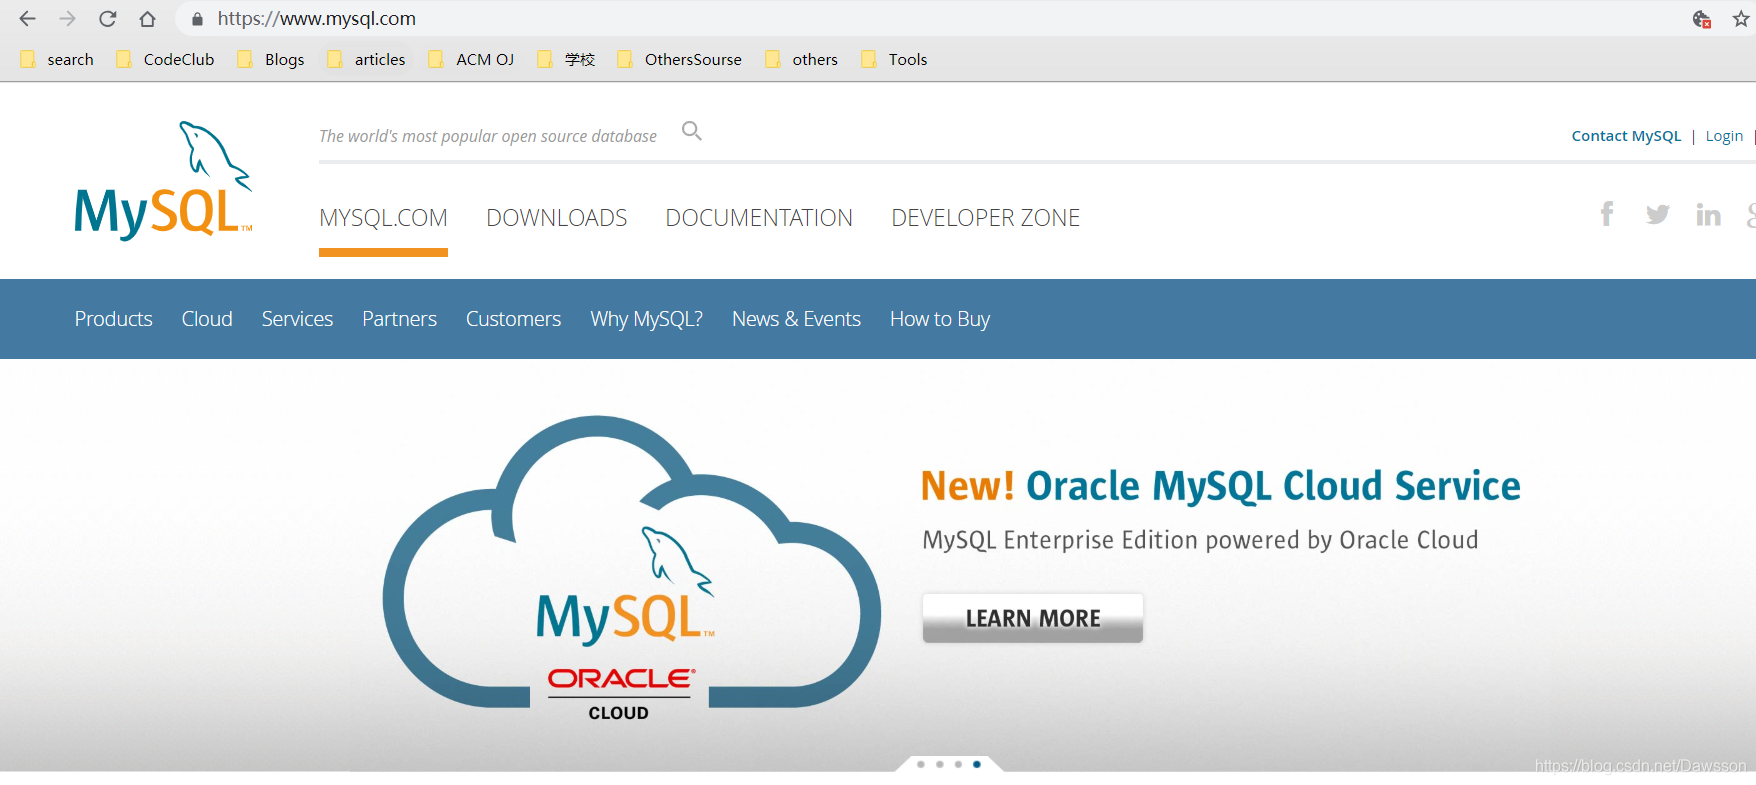
### 1.下載MySQL數據庫可以訪問官方網站:https://www.mysql.com
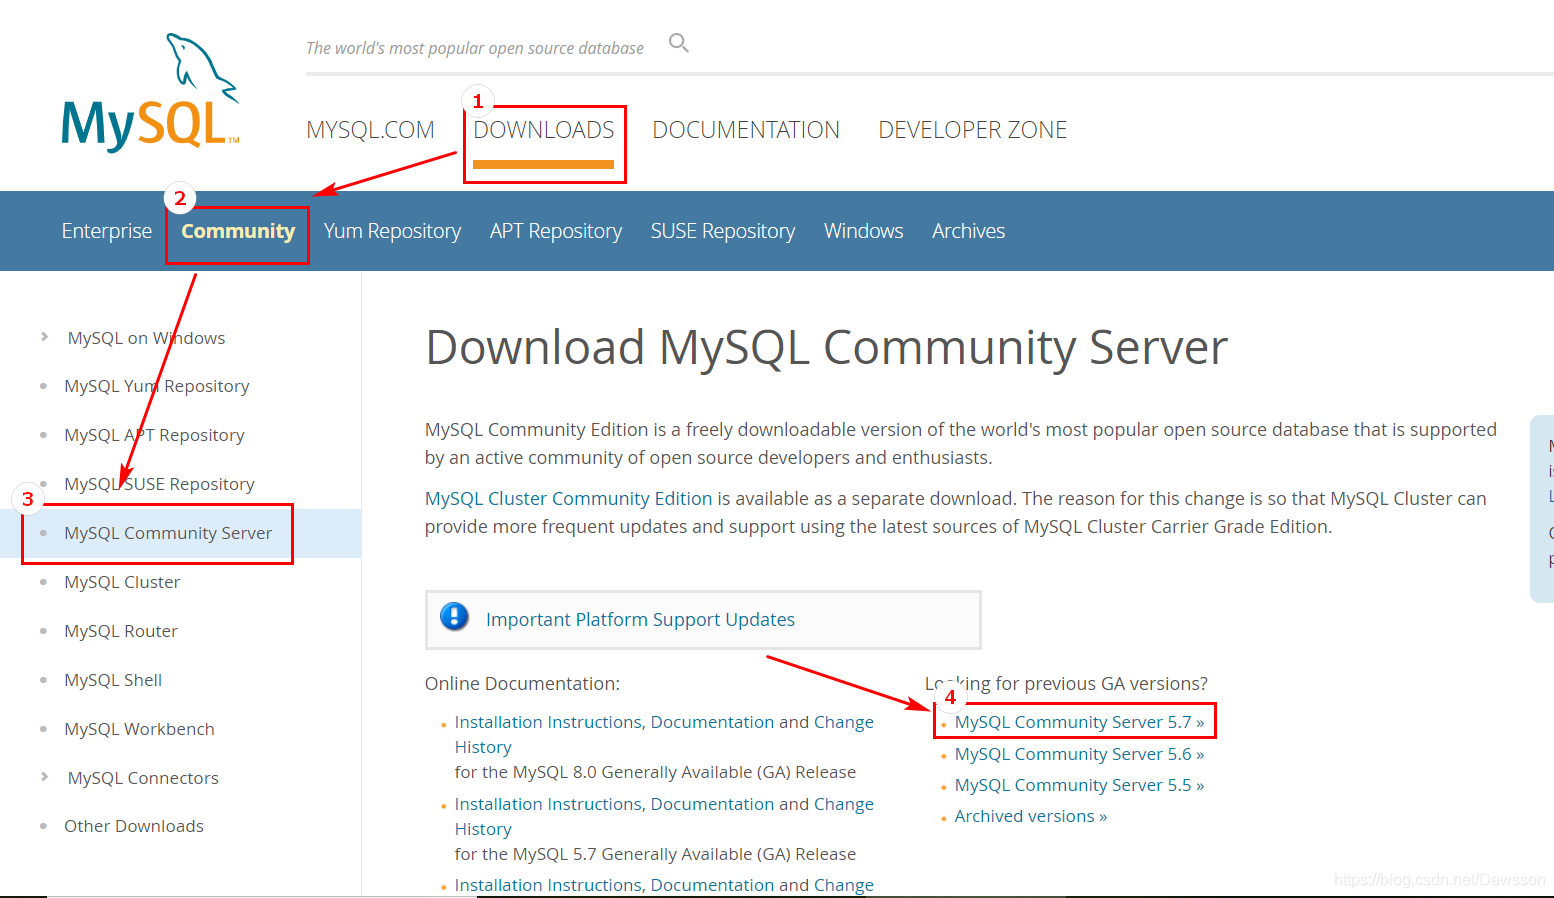
### 2.點擊 DOWNLOADS 模塊下的 --> Community 模塊下的 --> MySQL Community Server 模塊 --> 選擇 MySQL Community Server 5.7 進行下載。
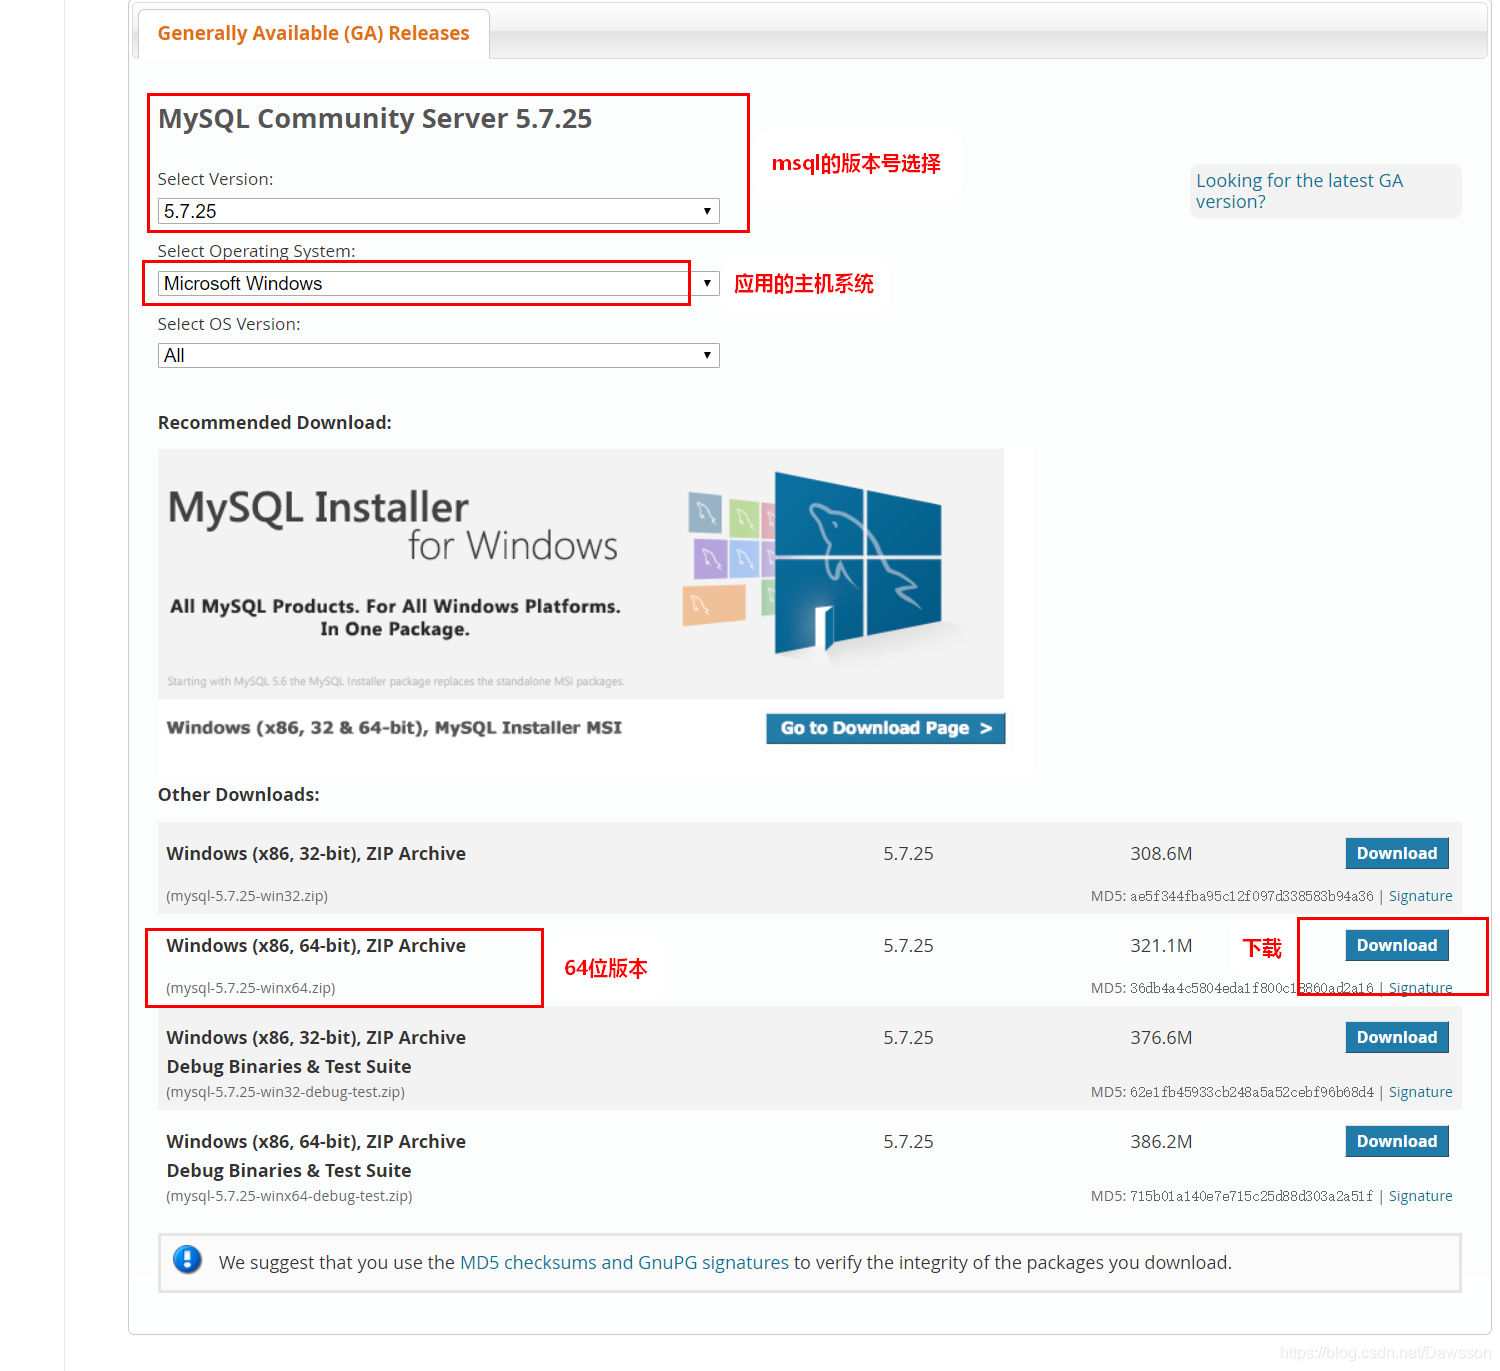
### 3.點擊進入,選擇 MySQ L的版本及主機;根據自己的電腦選擇相應的位數進行下載,本機是 64 位,點擊 download 下載。
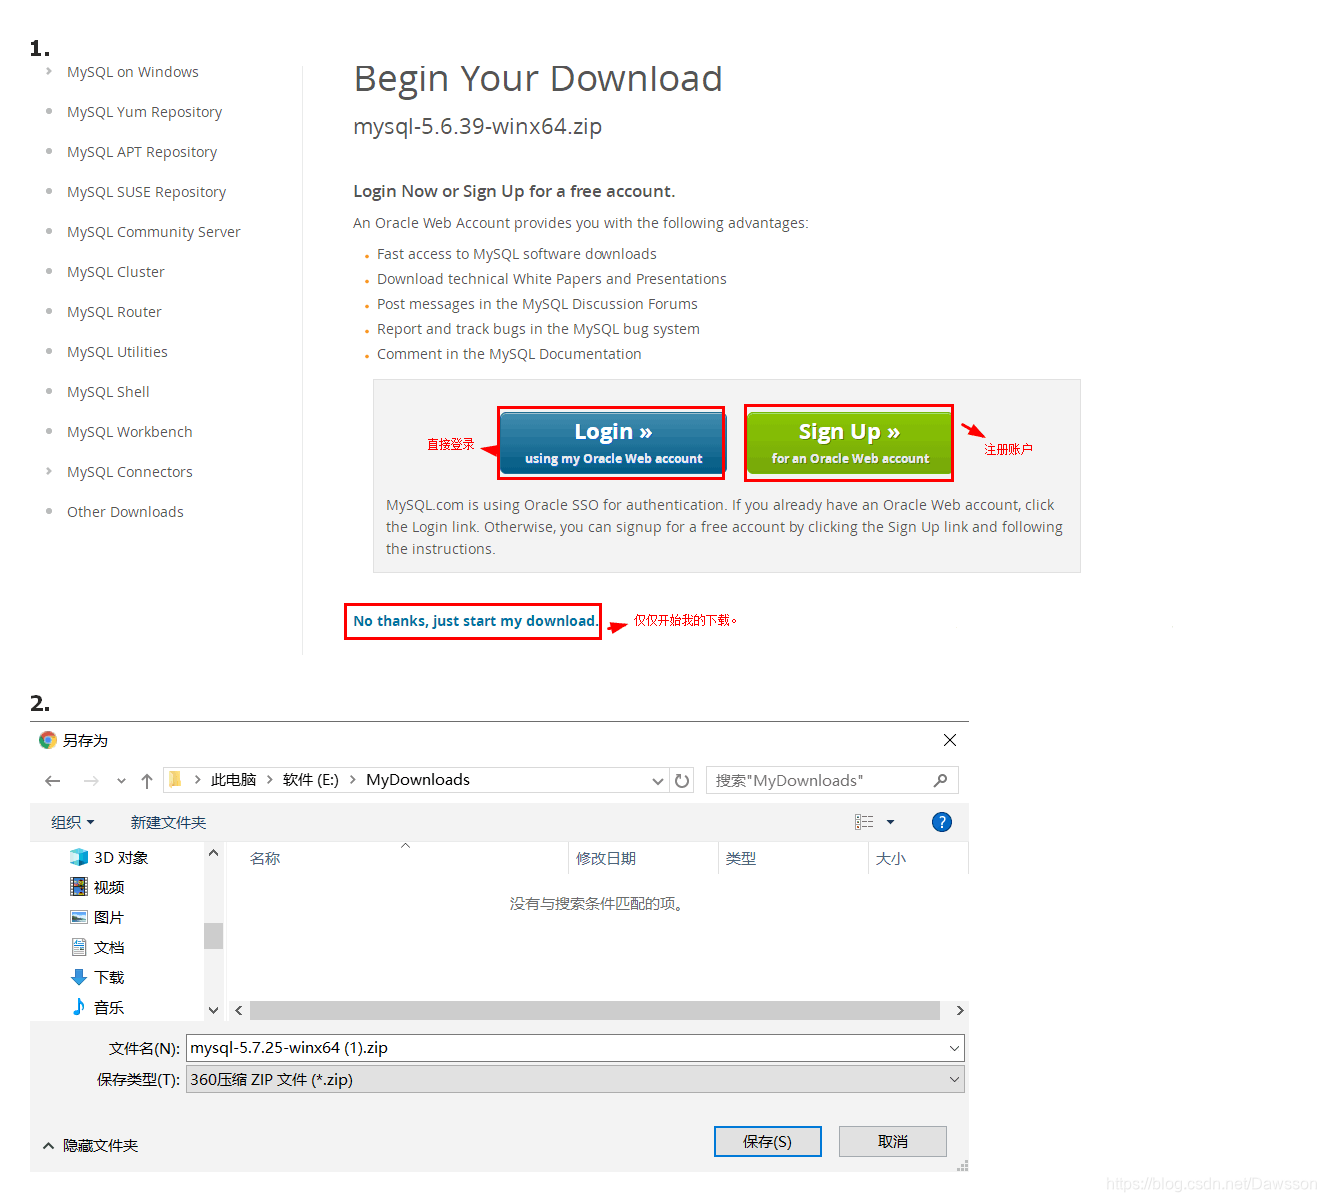
### 4.進入下一個頁面,點擊 No thanks, just start my download,選擇自己要下載保存的目錄,進行下載。
## 二、安裝配置MySql
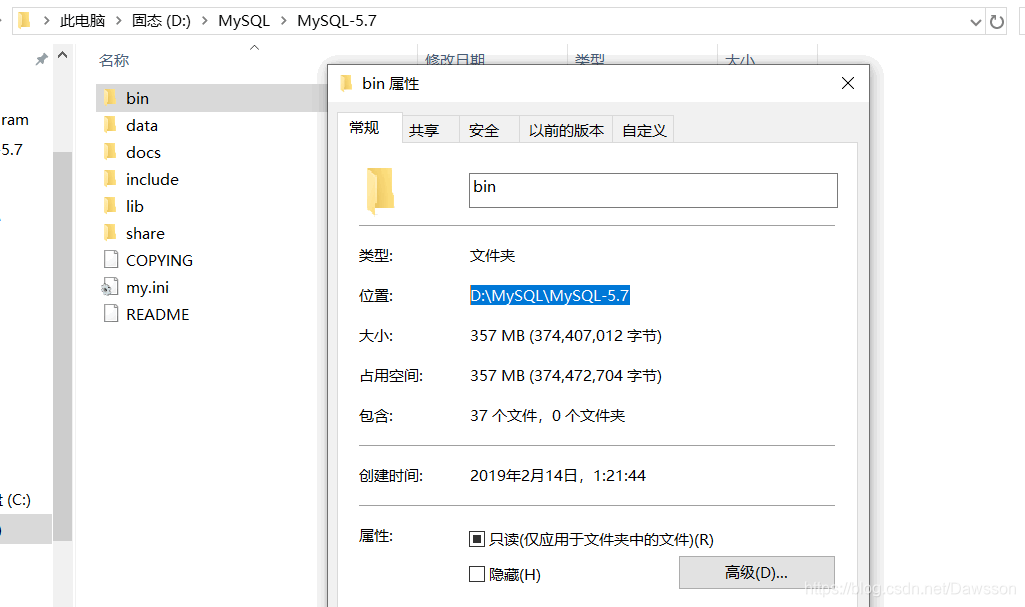
### 1.由于下載的 MySQL 是 zip 格式的,所以需要自己解壓到一個文件夾,然后就進配置就可以用了。
(可以對解壓的文件夾進行重命名)例如我解壓后 MySql 下的 bin 文件夾的目錄為:`D:\MySQL\MySQL-5.7`
**(注:我開始解壓時里面沒有 data 文件夾和 my.ini 文件,是經過后面配置才有的)**
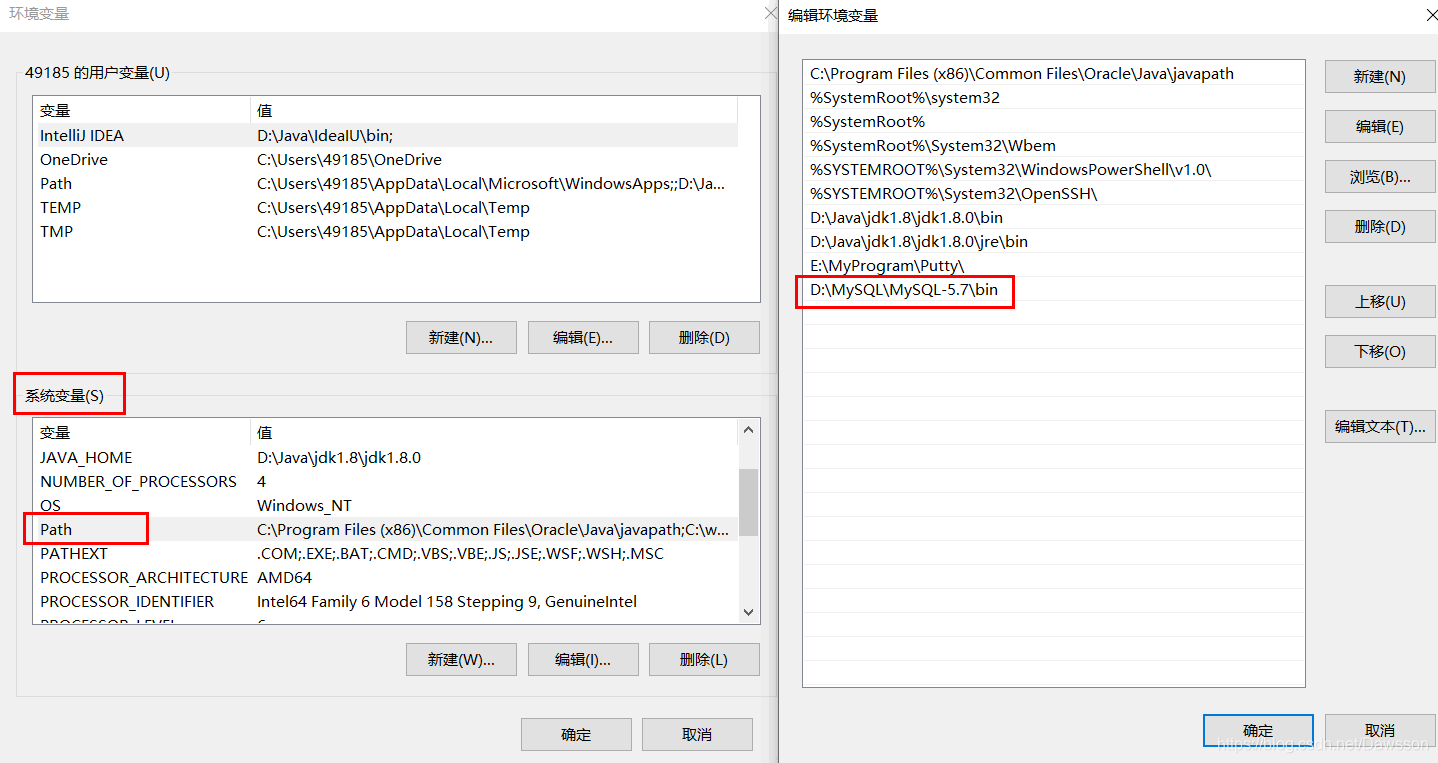
### 2.配置環境變量
1. 進入 `我的電腦 --> 屬性 --> 高級系統設置 --> 高級 --> 環境變量` 或者 `控制面板(查看方式為圖標) --> 系統 --> 高級系統設置 --> 高級 --> 環境變量` ;
2. 在系統變量中編輯 Path;在其后面添加:你的mysql 的 bin文件夾的路徑,例如我的 `D:\MySQL\MySQL-5.7\bin`
### 3.修改配置文件
> 0. 記得先在文件管理器中的查看功能中,勾選查看文件擴展名和隱藏的項目。

1. D:\MySQL\MySQL-5.7 目錄下編輯 my.ini 文件(如果沒有,就需要自己創建)。
在其中修改或添加配置 :
- `basedir=D:\MySQL\MySQL-5.7`(mysql所在目錄)
- `datadir=D:\MySQL\MySQL-5.7\data`(mysql所在目錄\data)
```
# 自定義 mysql-5.7 配置文件 my.ini
[mysql]
# 設置mysql客戶端默認字符集
default-character-set=utf8
[mysqld]
#設置3306端口
port = 3306
# 設置mysql的安裝目錄
basedir=D:\MySQL\MySQL-5.7
# 設置mysql數據庫的數據的存放目錄
datadir=D:\MySQL\MySQL-5.7\data
# 允許最大連接數
max_connections=200
# 服務端使用的字符集默認為8比特編碼的latin1字符集
character-set-server=utf8
# 創建新表時將使用的默認存儲引擎
default-storage-engine=INNODB
#開啟查詢緩存
explicit_defaults_for_timestamp=true
skip-grant-tables
```
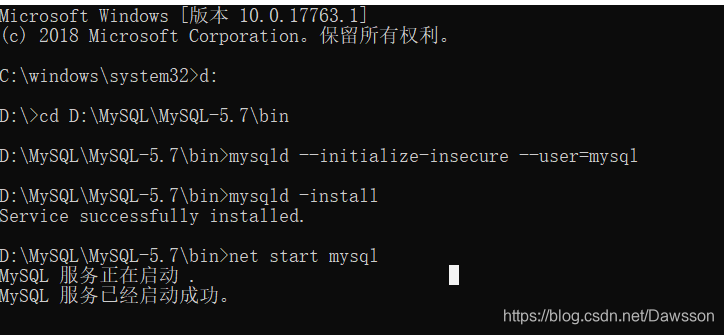
### 4.啟動 MySql 服務
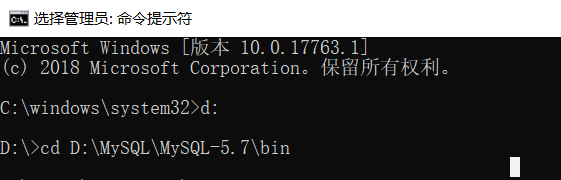
1. 以管理員身份運行cmd(一定要用管理員身份運行,不然權限不夠);
2. 進入 mysql 的 bin 文件夾路徑
3. 自動生成 data 文件目錄,執行命令:
```
mysqld --initialize-insecure --user=mysql
```
4. 安裝 mysql 服務,執行命令:
```
mysqld -install
```
5. 啟動 mysql 服務,執行命令:
```
net start mysql
```
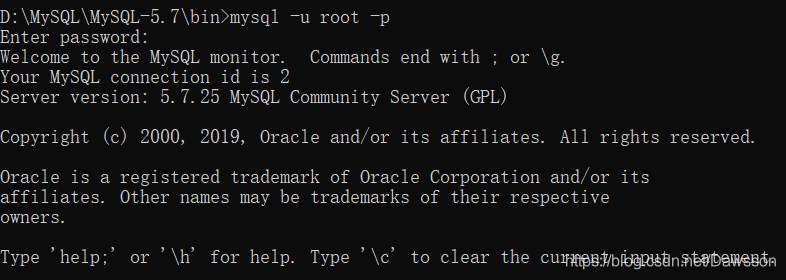
6. 服務啟動成功之后開始登陸,輸入命令:
```
mysql -u root -p
```
(第一次登錄沒有密碼,直接按回車過)!
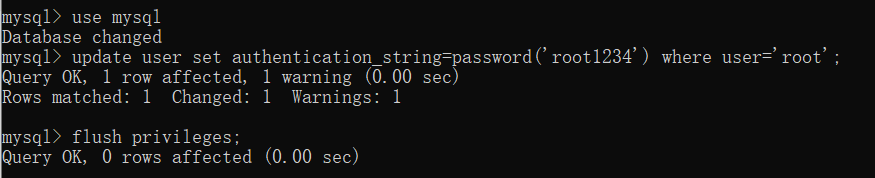
7. 修改密碼,執行命令:
```
use mysql;
update user set authentication_string=password('new_password') where user='root' ;
flush privileges;
```
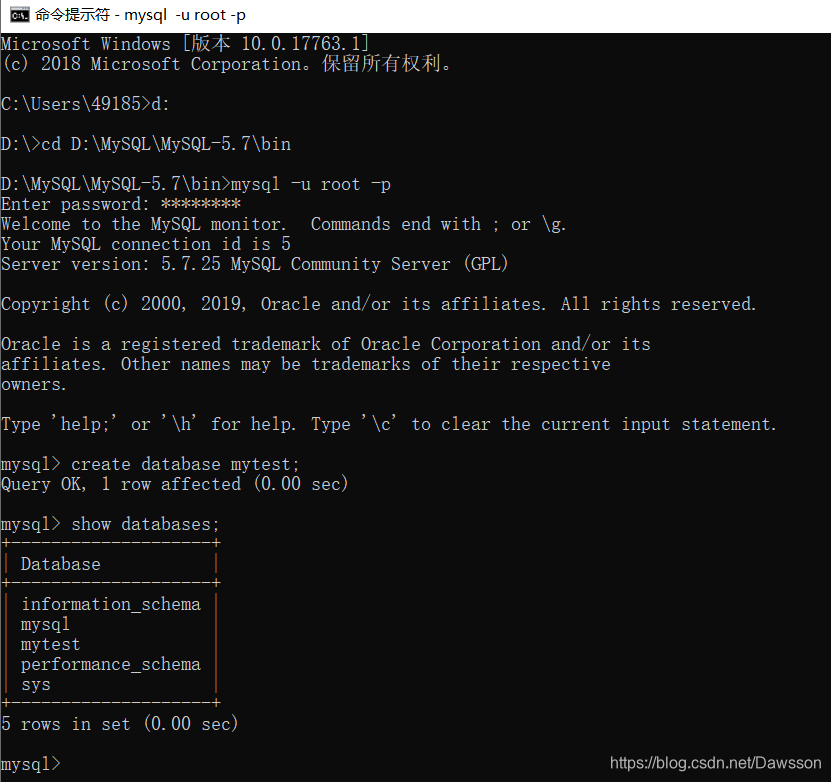
### 5.測試 mysql