依靠習慣我們還將用Ionic 2繼續創建hello,world。
## hello,world
開始之前我們需要先安裝Ionic的命令行工具,后來我們需要用這個工具來創建工程。
~~~
npm install -g ionic@beta
~~~
如果沒有意外,我們將安裝成功,然后可以使用`ionic`命令:
它自帶了一系列的工具來加速我們的開發,這些工具可以在后面的章節中學習到。
~~~
Available tasks: (use --help or -h for more info)
start .......... Starts a new Ionic project in the specified PATH
serve .......... Start a local development server for app dev/testing
platform ....... Add platform target for building an Ionic app
run ............ Run an Ionic project on a connected device
emulate ........ Emulate an Ionic project on a simulator or emulator
build .......... Build (prepare + compile) an Ionic project for a given platform.
plugin ......... Add a Cordova plugin
resources ...... Automatically create icon and splash screen resources (beta)
Put your images in the ./resources directory, named splash or icon.
Accepted file types are .png, .ai, and .psd.
Icons should be 192x192 px without rounded corners.
Splashscreens should be 2208x2208 px, with the image centered in the middle.
upload ......... Upload an app to your Ionic account
share .......... Share an app with a client, co-worker, friend, or customer
lib ............ Gets Ionic library version or updates the Ionic library
setup .......... Configure the project with a build tool (beta)
io ............. Integrate your app with the ionic.io platform services (alpha)
security ....... Store your app's credentials for the Ionic Platform (alpha)
push ........... Upload APNS and GCM credentials to Ionic Push (alpha)
package ........ Use Ionic Package to build your app (alpha)
config ......... Set configuration variables for your ionic app (alpha)
browser ........ Add another browser for a platform (beta)
service ........ Add an Ionic service package and install any required plugins
add ............ Add an Ion, bower component, or addon to the project
remove ......... Remove an Ion, bower component, or addon from the project
list ........... List Ions, bower components, or addons in the project
info ........... List information about the users runtime environment
help ........... Provides help for a certain command
link ........... Sets your Ionic App ID for your project
hooks .......... Manage your Ionic Cordova hooks
state .......... Saves or restores state of your Ionic Application using the package.json file
docs ........... Opens up the documentation for Ionic
generate ....... Generate pages and components
~~~
現在,我們就可以用第一個命令`start`來創建我們的項目。
~~~
ionic start growth-blog-app --v2
~~~
在這個過程中,它將下載Ionic 2項目的基礎項目,并執行安裝命令。
~~~
Creating Ionic app in folder /Users/fdhuang/repractise/growth-blog-app based on tabs project
Downloading: https://github.com/driftyco/ionic2-app-base/archive/master.zip
[=============================] 100% 0.0s
Downloading: https://github.com/driftyco/ionic2-starter-tabs/archive/master.zip
[=============================] 100% 0.0s
Installing npm packages...
~~~
然后到`growth-blog-app`目錄,我們會看到類似于下面的內容:
~~~
.
├── README.md
├── app
│?? ├── app.js
│?? ├── pages
│?? │?? ├── page1
│?? │?? │?? ├── page1.html
│?? │?? │?? ├── page1.js
│?? │?? │?? └── page1.scss
│?? │?? ├── page2
│?? │?? │?? ├── page2.html
│?? │?? │?? ├── page2.js
│?? │?? │?? └── page2.scss
│?? │?? ├── page3
│?? │?? │?? ├── page3.html
│?? │?? │?? ├── page3.js
│?? │?? │?? └── page3.scss
│?? │?? └── tabs
│?? │?? ├── tabs.html
│?? │?? └── tabs.js
│?? └── theme
│?? ├── app.core.scss
│?? ├── app.ios.scss
│?? ├── app.md.scss
│?? ├── app.variables.scss
│?? └── app.wp.scss
├── config.xml
├── gulpfile.js
├── hooks
│?? ├── README.md
│?? └── after_prepare
│?? └── 010_add_platform_class.js
├── ionic.config.json
├── package.json
└── www
└── index.html
~~~
在這2.0版本的Ionic,頁面開始以目錄來劃分,一個頁面路徑下有自己的`html`、`js`、`scss`。
* `tabs`負責這些頁面間跳轉
* `theme`則負責系統相應樣式的修改
* `config.xml`帶有相應的Cordova配置
* `hooks`則對系統添加和編譯時進行一些預處理
* `ionic.config.json`則是ionic的一些相關配置選項
* `package.json`則存放相應的node.js的包的依賴
* `www`目錄用于存放出最后構建出來的內容,以及一些靜態資源
由于Angular 2.0使用的是Typescript,所以在這里我們將用typescript進行展示,因此我們的執行命令變成~~:
~~~
ionic start growth-blog-app --v2 --ts
~~~
`--ts`表示使用的是`typescript`來創建項目,安裝的過程是一樣的,不一樣的是后面寫的代碼。
執行相應的起serve命令,我們就可以開始我們的項目了:
~~~
ionic serve
~~~
這時候Ionic將做一些額外的事,才能啟動我們的服務,如:
* 刪除`www/build`目錄下的文件
* 編譯SASS到CSS
* 編譯文件到HTML
* 編譯字體
* 等等
最后,它將啟動一個Web服務,URL為[http://localhost:8100](http://localhost:8100/)
~~~
Running 'serve:before' gulp task before serve
[20:59:16] Starting 'clean'...
[20:59:16] Finished 'clean' after 6.07 ms
[20:59:16] Starting 'watch'...
[20:59:16] Starting 'sass'...
[20:59:16] Starting 'html'...
[20:59:16] Starting 'fonts'...
[20:59:16] Starting 'scripts'...
[20:59:16] Finished 'scripts' after 43 ms
[20:59:16] Finished 'html' after 51 ms
[20:59:16] Finished 'fonts' after 54 ms
[20:59:16] Finished 'sass' after 738 ms
7.6 MB bytes written (5.62 seconds)
[20:59:22] Finished 'watch' after 6.62 s
[20:59:22] Starting 'serve:before'...
[20:59:22] Finished 'serve:before' after 3.87 μs
Running live reload server: http://localhost:35729
Watching: www/**/*, !www/lib/**/*
√ Running dev server: http://localhost:8100
Ionic server commands, enter:
restart or r to restart the client app from the root
goto or g and a url to have the app navigate to the given url
consolelogs or c to enable/disable console log output
serverlogs or s to enable/disable server log output
quit or q to shutdown the server and exit
ionic $
~~~
接著,就可以打開相應的Web頁面,如下圖所示:
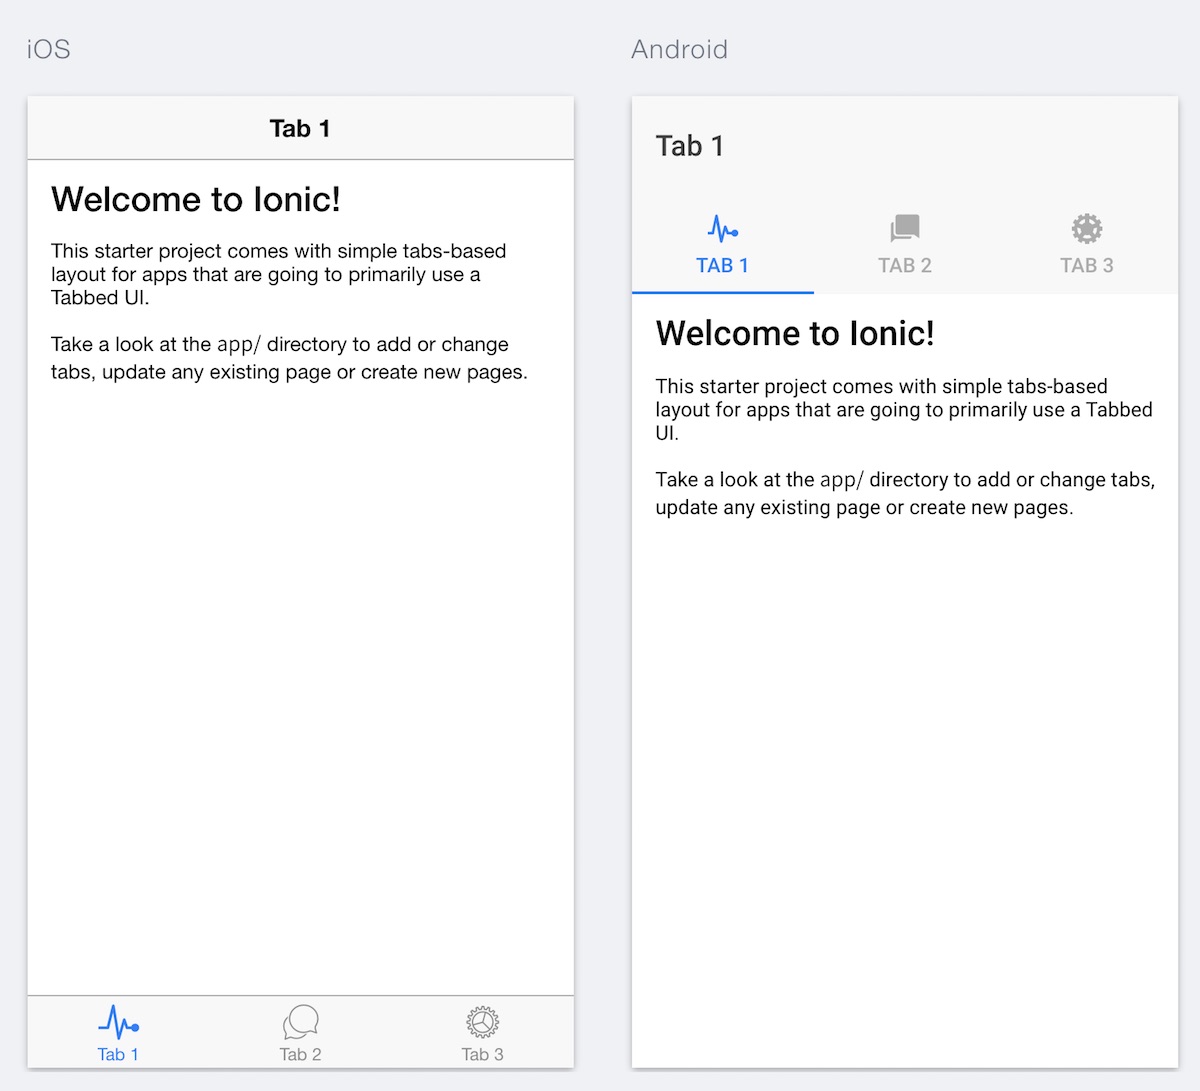
Ionic Web預覽界面
### 構建應用
由于Ionic是基于Cordova的,我們需要安裝Cordova業完成后續的工作。
~~~
sudo npm install -g cordova
~~~
為了構建不同的平臺的應用,我們就需要添加不同的平臺,如:
~~~
ionic platform add android
~~~
上面的命令可以為項目添加Android平臺的支持,過程如下面的日志所示:
~~~
Adding android project...
Creating Cordova project for the Android platform:
Path: platforms/android
Package: io.ionic.starter
Name: V2_Test
Activity: MainActivity
Android target: android-23
Android project created with cordova-android@5.1.1
Running command: /Users/fdhuang/repractise/growth-blog-app/hooks/after_prepare/010_add_platform_class.js /Users/fdhuang/repractise/growth-blog-app
~~~
最近,再執行`run`就可以在對應的平臺上運行,如:
~~~
ionic run android
~~~
## 博客列表頁
現在,讓我們來結合我們的博客APP,做一個相應的展示博客的APP。
### 列表頁
在上一個章節里我們已經有了一個博客詳細的API,我們只需要獲取這個API并顯示即可。不過,讓我們簡單地熟悉一下顯示數據的這部分內容:
~~~
<ion-navbar *navbar>
<ion-title>博客</ion-title>
</ion-navbar>
<ion-content class="blog-list">
<ion-item *ngFor="#blogpost of blogposts">
<h1 *ngIf="blogpost">
{{blogpost.title}}
</h1>
<p *ngIf="blogpost">
{{blogpost.body}}
</p>
</ion-item>
</ion-content>
~~~
上面是一個基本的詳情頁的模板,其中定義了一系列的Ionic自定義標簽,如:
* 顯示在導航欄中的內容
* 顯示APP的內容
* 即將博客成每一項
而從上面的內容中,我們可以看到:我們在ngFor中遍歷了blogposts,然后顯示每篇文章的標題和內容。對應的代碼也就比較簡單了:
~~~
import {Page} from 'ionic-angular';
@Page({
templateUrl: 'build/pages/blog/list/index.html',
providers: [BlogpostServices]
})
export class BlogList {
public blogposts;
constructor() {
}
}
~~~
但是我們要去哪里獲取博客的值呢,先我們我們看完改造后聽BlogList的Controller:
~~~
import {Page} from 'ionic-angular';
import {BlogpostServices} from '../../../services/BlogpostServices';
@Page({
templateUrl: 'build/pages/blog/list/index.html',
providers: [BlogpostServices]
})
export class BlogList {
private blogListService;
public blogposts;
constructor(blogpostServices:BlogpostServices) {
this.blogListService = blogpostServices;
this.initService();
}
private initService() {
this.blogListService.getBlogpostLists().subscribe(
data => {this.blogposts = JSON.parse(data._body);},
err => console.log('Error: ' + JSON.stringify(err)),
() => console.log('Get Blogpost')
);
}
}
~~~
我們初始化了一個blogListService,然后我們調用這個服務去獲取博客列表。
~~~
this.blogListService.getBlogpostLists().subscribe(
data => {this.blogposts = JSON.parse(data._body);},
err => console.log('Error: ' + JSON.stringify(err)),
() => console.log('Get Blogpost')
);
~~~
當我們獲取到數據的時候,我們就解析這個數據,并將這個值賦予blogposts。如果這其中遇到什么錯誤,就會顯示相應的錯誤信息。
現在,讓我們創建一個獲取博客的服務:
~~~
import {Inject} from 'angular2/core';
import {Http} from 'angular2/http';
import 'rxjs/add/operator/map';
export class BlogpostServices {
private http;
constructor(@Inject(Http) http:Http) {
this.http = http
}
getBlogpostLists() {
var url = 'http://127.0.0.1:8000/api/blogpost/?format=json';
return this.http.get(url).map(res => res);
}
}
~~~
### 詳情頁
~~~
ionic g page blog-detail --ts
~~~
~~~
app/pages/blog-detail/
├── blog-detail.html
├── blog-detail.ts
└── blog-detail.scss
~~~
修改`app.ts`添加Route:
~~~
const ROUTES = [
{path: '/app/blog/:id', component: BlogDetailPage}
];
@App({
template: '<ion-nav [root]="rootPage"></ion-nav>',
config: {}
})
@RouteConfig(ROUTES)
export class MyApp {
rootPage:any = TabsPage;
constructor(platform:Platform) {
this.rootPage = TabsPage;
this.initializeApp(platform)
}
private initializeApp(platform:Platform) {
platform.ready().then(() => {
StatusBar.styleDefault();
});
}
}
~~~
添加服務
~~~
getBlogpostDetail(id) {
var url = 'http://localhost:8000/api/blogpost/' + id + '?format=json';
return this.http.get(url).map(res => res);
}
~~~
添加Controller
~~~
import {Page, NavController, NavParams} from 'ionic-angular';
import {BlogpostServices} from "../../services/BlogpostServices";
@Page({
templateUrl: 'build/pages/blog-detail/blog-detail.html',
providers: [BlogpostServices]
})
export class BlogDetailPage {
private navParams;
private blogServices;
private blogpost;
constructor(public nav:NavController, navParams:NavParams, blogServices:BlogpostServices) {
this.nav = nav;
this.navParams = navParams;
this.blogServices = blogServices;
this.initService();
}
private initService() {
let id = this.navParams.get('id');
this.blogServices.getBlogpostDetail(id).subscribe(
data => {
this.blogpost = JSON.parse(data._body);
console.log(this.blogpost);
},
err => console.log('Error: ' + JSON.stringify(err)),
() => console.log('Get Blogpost')
);
}
}
~~~
## Profile
### Json Web Tokens
~~~
pip install djangorestframework-jwt
~~~
~~~
urlpatterns = patterns(
'',
# ...
url(r'^api-token-auth/', 'rest_framework_jwt.views.obtain_jwt_token'),
)
~~~
~~~
constructor(http: Http, nav:NavController) {
this.nav = nav;
this.http = http;
this.local.get('id_token').then(
(data) => {
this.user = this.jwtHelper.decodeToken(data).username;
}
);
}
login(credentials) {
this.contentHeader = new Headers({"Content-Type": "application/json"});
this.http.post(this.LOGIN_URL, JSON.stringify(credentials), {headers: this.contentHeader})
.map(res => res.json())
.subscribe(
data => this.authSuccess(data.token),
err => console.log(err)
);
}
authSuccess(token) {
this.local.set('id_token', token);
this.user = this.jwtHelper.decodeToken(token).username;
}
~~~
~~~
logout() {
this.local.remove('id_token');
this.user = null;
}
~~~
Install Angular JWT
~~~
npm install angular2-jwt
~~~
### Profile
~~~
def list(self, request):
search_param = self.request.query_params.get('username', None)
if search_param is not None:
queryset = User.objects.filter(username__contains=search_param)
serializer = UserSerializer(queryset, many=True)
return Response(serializer.data)
~~~
## 創建博客
權限管理
~~~
SAFE_METHODS = ['GET', 'HEAD', 'OPTIONS']
class IsAuthenticatedOrReadOnly(BasePermission):
"""
The request is authenticated as a user, or is a read-only request.
"""
def has_permission(self, request, view):
if (request.method in SAFE_METHODS or
request.user and
request.user.is_authenticated()):
return True
return False
class BlogpsotSerializer(serializers.HyperlinkedModelSerializer):
class Meta:
model = Blogpost
fields = ('title', 'author', 'body', 'slug', 'id')
# ViewSets define the view behavior.
class BlogpostSet(viewsets.ModelViewSet):
permission_classes = (permissions.IsAuthenticatedOrReadOnly,)
queryset = Blogpost.objects.all()
serializer_class = BlogpsotSerializer
~~~
## TODO
