本章主要實現智能設備管理系統中的門鎖管理功能,主要包括**門鎖詳情展示**,**密碼下發**,**開門記錄列表展示**等功能。
# 3.1 門鎖詳情展示
門鎖詳情展示根據系統為我們提供的get_lock_info接口便可以獲取該門鎖的相關信息。在apis文件夾新建lock.py。vim lock.py
```
import requests
def get_lock_info(access_token, home_id, uuid):
'''
獲取門鎖詳情
:param access_token: 調用接口憑證
:param home_id: 門鎖所在房源id
:param uuid: 門鎖的uuid,唯一
'''
url = 'https://saas-openapi.dding.net/v2/get_lock_info'
headers = {
'Content-type' : 'Application/json',
'User-Agent' : 'PostmanRuntime/7.13.0',
}
query_string = {
'access_token' : access_token,
'home_id' : home_id,
'uuid' : uuid
}
response = requests.request('GET', url, headers=headers, params=query_string)
return response.json()
```
接著我們使用該方法獲取公區門鎖的設備詳情,vim main.py
```
from apis.lock import get_lock_info
def main():
uuid = '157c4b2bfc87abe316378b42cde86141'
home_id = 'testhomeid123'
access_token = '6afc3f360e04f806244af07c6c5eca1cee6065e83565e107fc4896b55ce8f735df5bd9a7d3c5e1e2f96f1fdd1c2ea52483ec2e10e5cc38517a17b1d4aff2ceff'
res = get_lock_info(access_token, home_id, uuid)
print(res)
if __name__ == '__main__':
main()
```
其返回結果為:
```
{
"ReqID": "1SCfOhyh1o9",
"ErrNo": 0,
"ErrMsg": "成功",
"mac": "8D0003672D35",
"sn": "lkjl0026190002800173",
"uuid": "157c4b2bfc87abe316378b42cde86141",
"device_id": 1632908514,
"bind_time": 1567166975,
"onoff_line": 1,
"onoff_time": 1567167226,
"power": 92,
"power_refreshtime": 1567166980,
"brand": "dding",
"model": "DSL-B06",
"name": "D3門鎖",
"lqi": 89,
"lqi_refreshtime": 1567166980327,
"lqi_refreshtime_s": 1567166980,
"center_description": "網關",
"center_uuid": "ccec6095685126a25213657764f7eb2f",
"center_sn": "cnjl0003180100385967",
"parent": "ccec6095685126a25213657764f7eb2f",
"versions": {
"hardware_version": "1.0.0.0",
"app_version": "1.1.3.2",
"protocol_version": "0.0.0.6",
"zigbee_version": "1.0.0.0",
"stm8_version": "1.0.0.0"
},
"model_name": "D3"
}
```
我們可以得到門鎖的信號值,在離線,版本號等等一系列的設備信息,可以將其發送給前端進行展示。
門鎖詳情展示的效果如下:

# 3.2 門鎖下發密碼
門鎖密碼下發主要分為在線密碼下發,離線密碼下發和動態密碼獲取。不同的密碼獲取使用不同的接口,但都大同小異,這里使用在線普通密碼下發作為示例。vim lock.py
```
def add_password(access_token, home_id, uuid, phonenumber, is_default, begin, end):
'''
添加在線密碼
:param access_token: 調用接口憑證
:param home_id: 門鎖所在的房源id
:param uuid: 門鎖的uuid,唯一
:param phonenumber: 租客接收密碼的手機號
:param is_default: 是否超級管理員密碼 0:否 1:是
:param begin: 密碼有效期開始時間戳
:param end: 密碼有效期結束時間戳
'''
url = 'https://saas-openapi.dding.net/v2/add_password'
headers = {
'Content-type' : 'Application/json',
'User-Agent' : 'PostmanRuntime/7.13.0',
}
payload = {
"access_token" : access_token,
"home_id" : home_id,
"uuid" : uuid,
"phonenumber" : phonenumber,
"is_default" : is_default,
"permission_begin" : begin,
"permission_end" : end
}
response = requests.request('POST', url, headers=headers, json=payload)
return response.json()
```
需要說明的是,參數is_default表明下發的密碼是管理員密碼,0為普通在線密碼,1為超管密碼。vim main.py
```
from apis.lock import add_password
def main():
uuid = '157c4b2bfc87abe316378b42cde86141'
home_id = 'testhomeid123'
access_token = '6afc3f360e04f806244af07c6c5eca1cee6065e83565e107fc4896b55ce8f735df5bd9a7d3c5e1e2f96f1fdd1c2ea52483ec2e10e5cc38517a17b1d4aff2ceff'
is_default = 0
phonenumber = 'xxxxxxxxxxx'
begin = 1567094400
end = 1569772800
res = add_password(access_token, home_id, uuid, phonenumber, is_default, begin, end)
print(res)
if __name__ == '__main__':
main()
```
成功下發返回值:1011為該密碼的id值。需要知道的是超級管理密碼的id為999,普通在線密碼id值為1001- 1050。
```
{
"ReqID": "1SCkbhiwcq3",
"ErrNo": 0,
"ErrMsg": "ADD_PASSWORD_SUCCESS",
"id": 1011,
"serviceid": "605642224"
}
```
值得注意的是,添加密碼是耗時網絡IO,建議使用異步的方式。返回值的serviceid是本次下發密碼操作的服務id,當門鎖下發成功后,會產生回調,并且攜帶serviceid字段。因此可以根據回調確定下發密碼操作是否成功。
# 3.3 開門記錄列表展示
根據get_lock_events可以獲取門鎖的開門記錄,根據返回結果可以在展示成開門記錄列表。vim lock.py
```
def get_lock_events(access_token, home_id, uuid, begin, end):
'''
獲取開門記錄列表
:param access_token: 調用接口憑證
:param home_id: 門鎖所在房源id
:param uuid: 門鎖的uuid
:param begin: 記錄的開始時間戳
:param end: 記錄的結束時間戳
'''
url = 'https://saas-openapi.dding.net/v2/get_lock_events'
headers = {
'Content-type': 'Application/json',
'User-Agent': 'PostmanRuntime/7.13.0',
}
query_string = {
'access_token': access_token,
'home_id': home_id,
'uuid': uuid,
'start_time': begin,
'end_time': end
}
response = requests.request('GET', url, headers=headers, params=query_string)
return response.json()
```
vim main.py
```
from apis.lock import get_lock_events
def main():
access_token = '6afc3f360e04f806244af07c6c5eca1cee6065e83565e107fc4896b55ce8f735df5bd9a7d3c5e1e2f96f1fdd1c2ea52483ec2e10e5cc38517a17b1d4aff2ceff'
home_id = 'testhomeid123'
uuid = '157c4b2bfc87abe316378b42cde86141'
begin = 1565798400 #7月15號時間戳
end = 1567094400 #8月30號時間戳
result = get_lock_events(access_token, home_id, uuid, begin, end)
print(result)
#解析獲取結果,展示開門記錄
for lock_event in result['lock_events']:
print(lock_event)
if __name__ == '__main__':
main()
```
返回的結果如下:
```
{'ReqID': '1SCL0f8y4xx', 'ErrNo': 0, 'ErrMsg': '', 'lock_events': [{'time': 1566895241000, 'eventid': 1, 'sourceid': 999, 'source_name': '管理密碼', 'source': 2}, {'time': 1566895219000, 'eventid': 1, 'sourceid': 999, 'source_name': '管理密碼', 'source': 2}, {'time': 1566895205000, 'eventid': 1, 'sourceid': 999, 'source_name': '管理密碼', 'source': 2}, {'time': 1566306744177, 'eventid': 1, 'sourceid': 1010, 'source_name': '密碼 1010', 'source': 2}]}
{'time': 1566895241000, 'eventid': 1, 'sourceid': 999, 'source_name': '管理密碼', 'source': 2}
{'time': 1566895219000, 'eventid': 1, 'sourceid': 999, 'source_name': '管理密碼', 'source': 2}
{'time': 1566895205000, 'eventid': 1, 'sourceid': 999, 'source_name': '管理密碼', 'source': 2}
{'time': 1566306744177, 'eventid': 1, 'sourceid': 1010, 'source_name': '密碼 1010', 'source': 2}
```
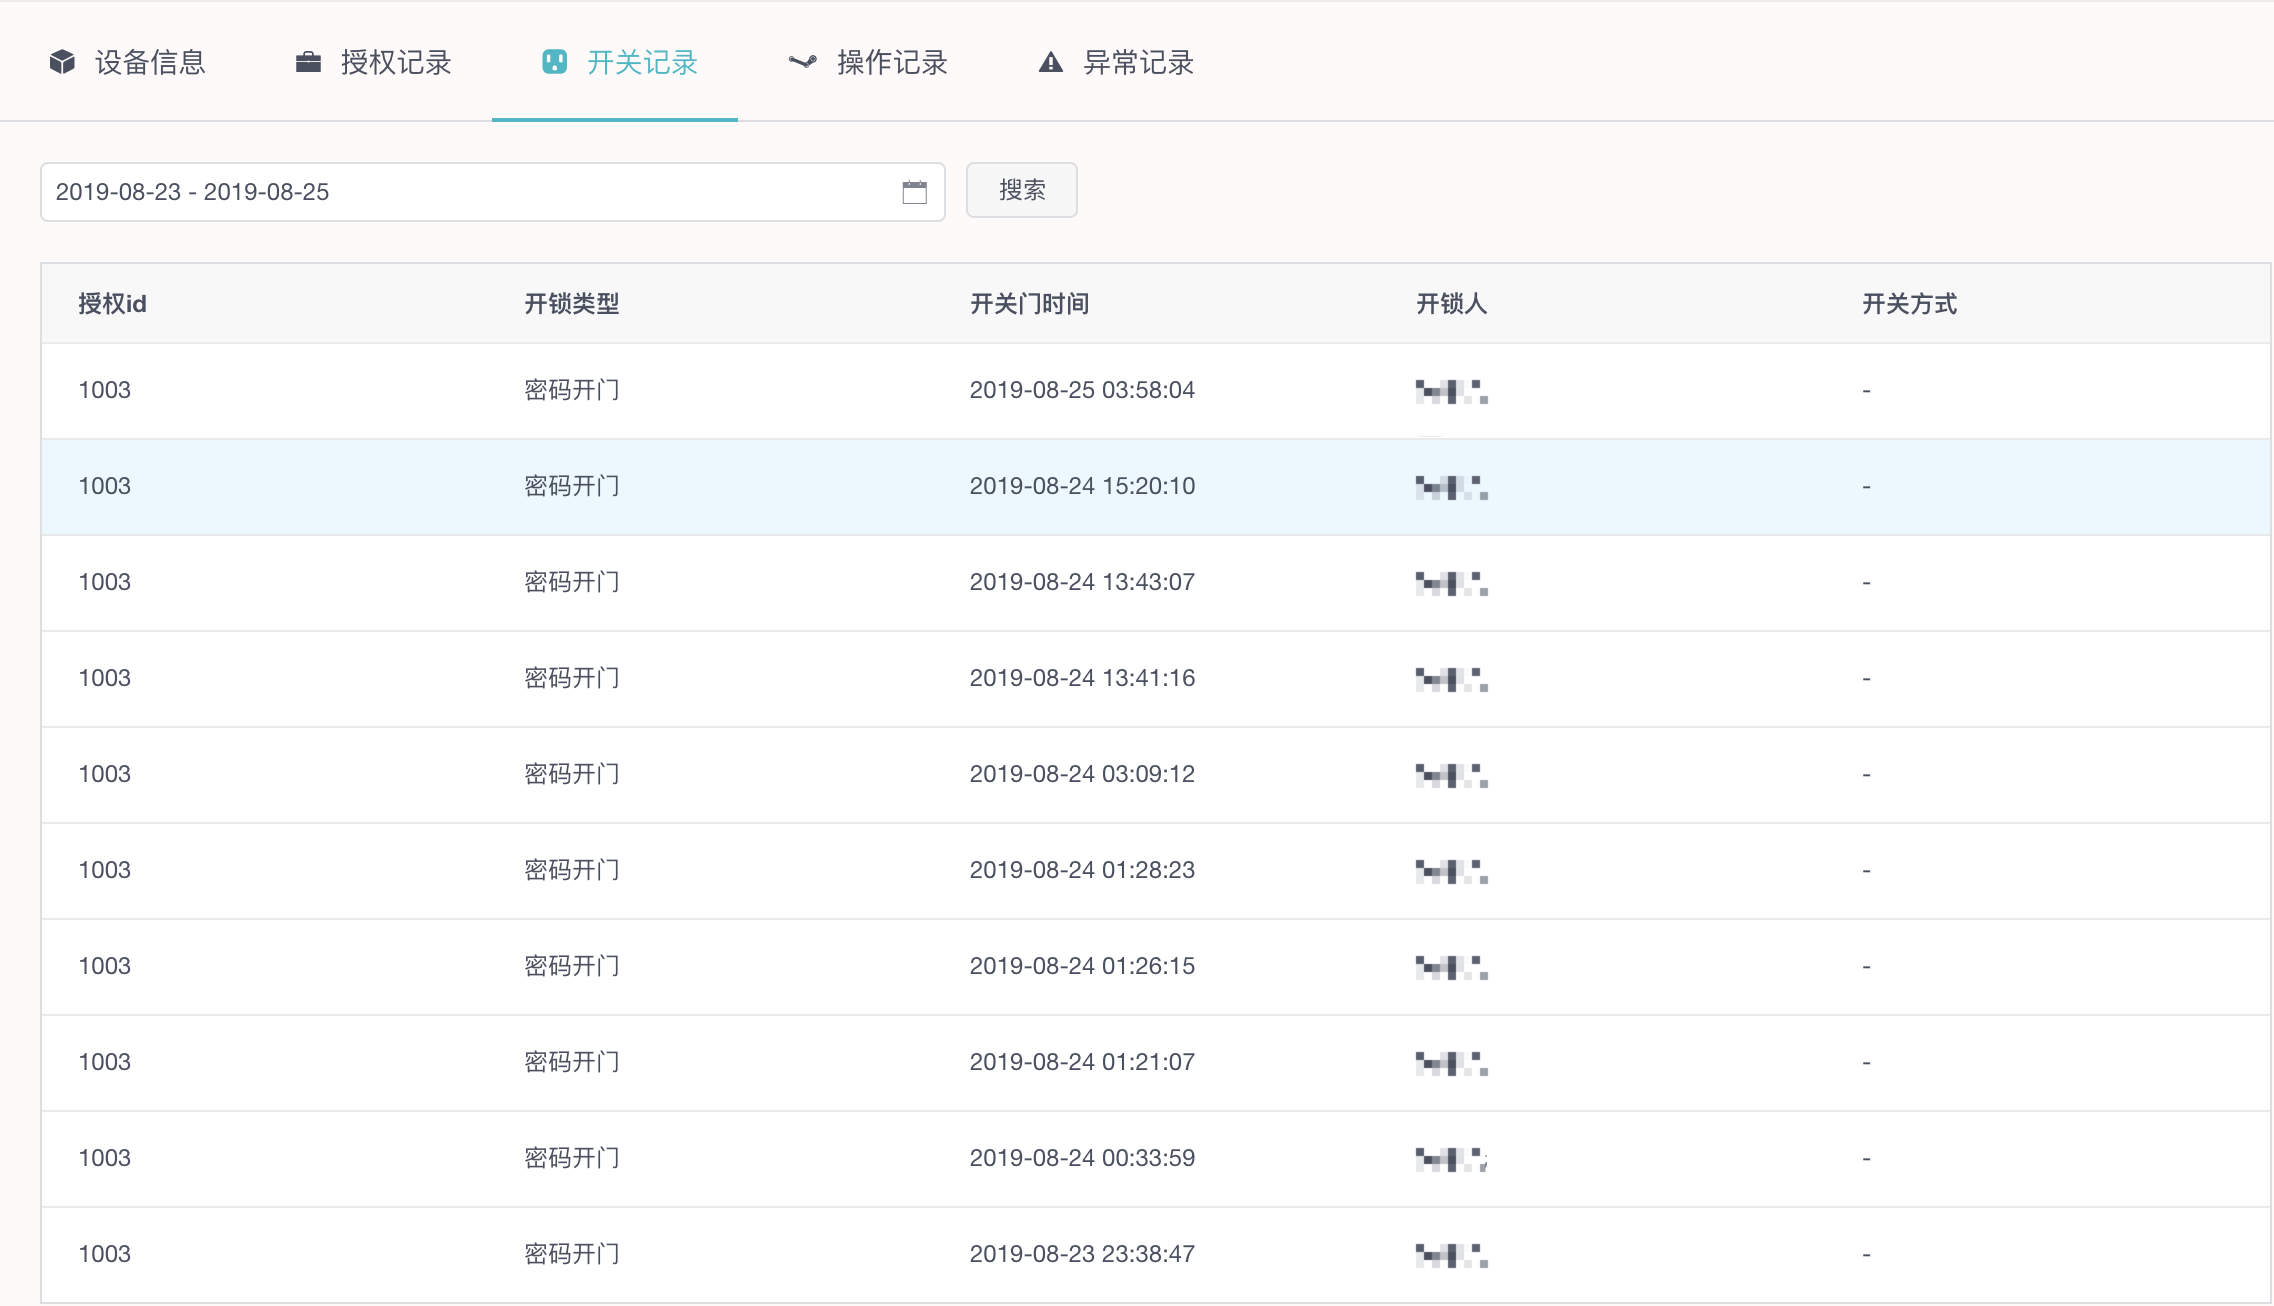
lock_events字段是個列表,里面每個元素是一條開門的記錄。
開門記錄列表展示效果如下:
# 3.4 小結
本章通過門鎖管理的幾個示例展示了如何通過openAP實現智能門鎖管理,當然還有其他的門鎖管理接口可以使用。但使用方法也大同小異,為避免重復,在此不一一贅述。開發者也可以通過接口的組合,定制其他的功能。
