# 做一個SaaS獨立站(2)- 安裝配置
參考: https://tenancyforlaravel.com/docs/v3/quickstart/ 一步一步來:
整個流程大概如下:
> 0,配置好租戶的事件和數據建表,生成租戶,觸發各種bootstrap初始化。
> 1,租戶域名--》識別租戶--》切換租戶數據庫--》切換各種資源--》運行應用--》運行相應任務命令
> 2,主域名--》識別管理中心--》切換主數據庫--》運行管理后臺--》管理租戶
### 第一:先安裝laravel-shop
源碼:https://github.com/summerblue/laravel-shop/tree/L05_8.x
安裝后,簡單運行一下是否正常,然后我們接下來把它改造成SaaS.
### 第二:安裝 archtechx/tenancy
源碼: https://github.com/archtechx/tenancy
```
composer require stancl/tenancy
```
```
php artisan tenancy:install
```
安裝后生成:migrations, config file, route file and a service provider
然后 ,執行數據庫遷移,生成 tenants 租戶表,domains 域名表:
```
php artisan migrate
```

然后,注冊 tenant包的 服務提供者,service provider in`config/app.php`.
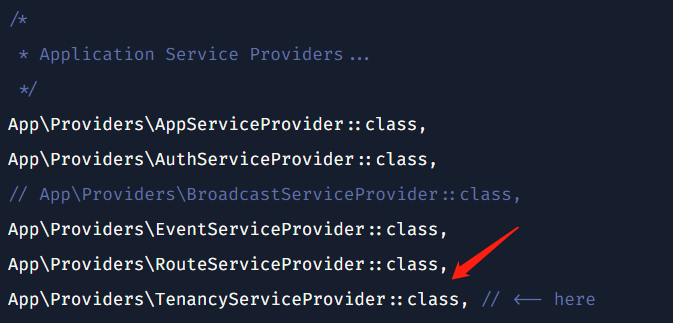
一般來說,會繼承原來的Tenant model, 進一步修改,同時也要在`config/tenancy.php` 配置好 Model:
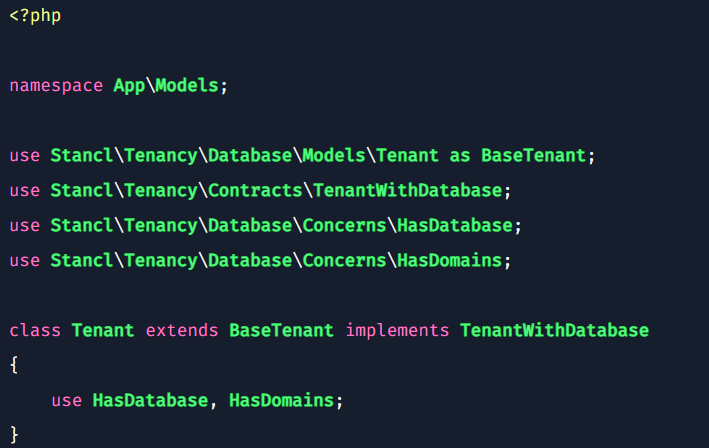
```
'tenant\_model' => \App\Models\Tenant::class,
```
這樣!就算安裝好了!下一步,我們要配置好 SaaS多租戶的功能。
*****
*****
## 第三,配置租戶生成事件(Events):
當新建租戶的時候,會觸發事件任務,例如執行 生成數據庫CreateDatabase,遷移數據migration,填充數據seeder等等,在文件`TenancyServiceProvider`這里是配置 任務:
```
public function events()
{
return [
// Tenant events
Events\CreatingTenant::class => [],
Events\TenantCreated::class => [
JobPipeline::make([
Jobs\CreateDatabase::class,
Jobs\MigrateDatabase::class,
//Jobs\SeedDatabase::class,
CreateFrameworkDirectoriesForTenant::class, //建立租戶文件夾
UpdateAdminMenuForTenant::class //更新租戶數據表
// Your own jobs to prepare the tenant.
// Provision API keys, create S3 buckets, anything you want!
])->send(function (Events\TenantCreated $event) {
return $event->tenant;
})->shouldBeQueued(false), // `false` by default, but you probably want to make this `true` for production.
],
```
## 第四,配置管理中心路由(Central routes):
在`app/Providers/RouteServiceProvider.php` 修改路由,這樣就可以進入管理中心的路由,而不是進入租戶的路由:
~~~php
public function boot()
{
$this->configureRateLimiting();
$this->mapWebRoutes();
$this->mapApiRoutes();
}
protected function mapWebRoutes()
{
foreach ($this->centralDomains() as $domain) {
Route::middleware('web')
->domain($domain)
->namespace($this->namespace)
->group(base_path('routes/web.php'));
}
}
protected function mapApiRoutes()
{
foreach ($this->centralDomains() as $domain) {
Route::prefix('api')
->domain($domain)
->middleware('api')
->namespace($this->namespace)
->group(base_path('routes/api.php'));
}
}
protected function centralDomains(): array
{
return config('tenancy.central_domains');
}
~~~
## 第五,配置租戶路由(Central routes):
在` routes/tenant.php` 配置租戶的路由, `PreventAccessFromCentralDomains`的Middleware中間件是過濾掉不準主域名進入。`InitializeTenancyByDomain`是識別租戶。
~~~php
Route::middleware([
'web',
InitializeTenancyByDomain::class,
PreventAccessFromCentralDomains::class,
])->group(function () {
Route::get('/', function () {
return 'This is your multi-tenant application.
The id of the current tenant is ' . tenant('id');
});
});
~~~
## 第六,配置數據遷移Migrations
手動把` database/migrations` 相關需要遷移的文件 復制到 `database/migrations/tenant` 里面。當執行租戶數據遷移時候就會自動執行,生成租戶需要的數據表:
```
php artisan tenants:migrate
```
## 最后,生成租戶測試:
Tenant 是生成租戶,而Domain是綁定租戶Tenant,訪問域名進行識別租戶:
~~~php
$ php artisan tinker
>>> $tenant1 = App\Models\Tenant::create(['id' => 'foo']);
>>> $tenant1->domains()->create(['domain' => 'foo.localhost']);
>>>
>>> $tenant2 = App\Models\Tenant::create(['id' => 'bar']);
>>> $tenant2->domains()->create(['domain' => 'bar.localhost']);
~~~
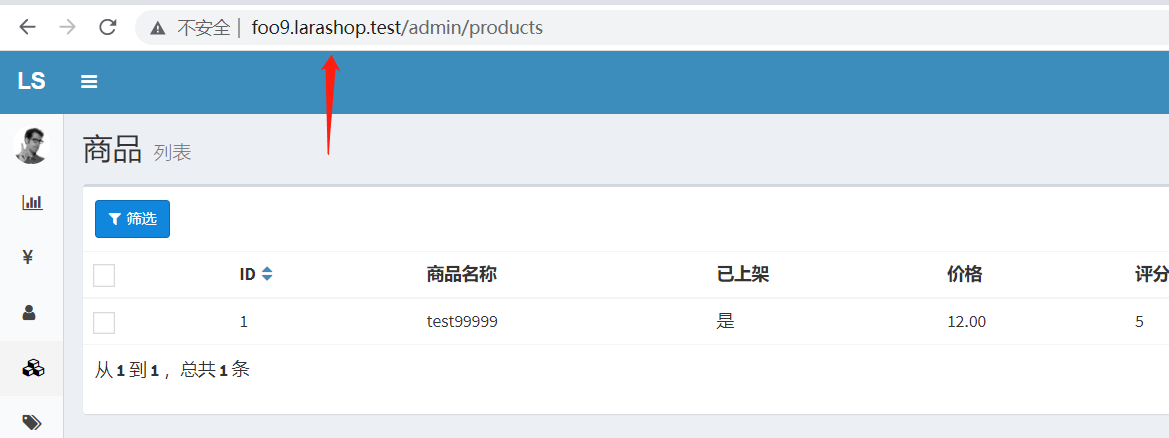
這時候,你可以瀏覽器訪問 'foo.localhost' ,就能夠進入 租戶的應用前端了。
(注:要在hosts綁定域名和本地ip)
租戶的應用前端:

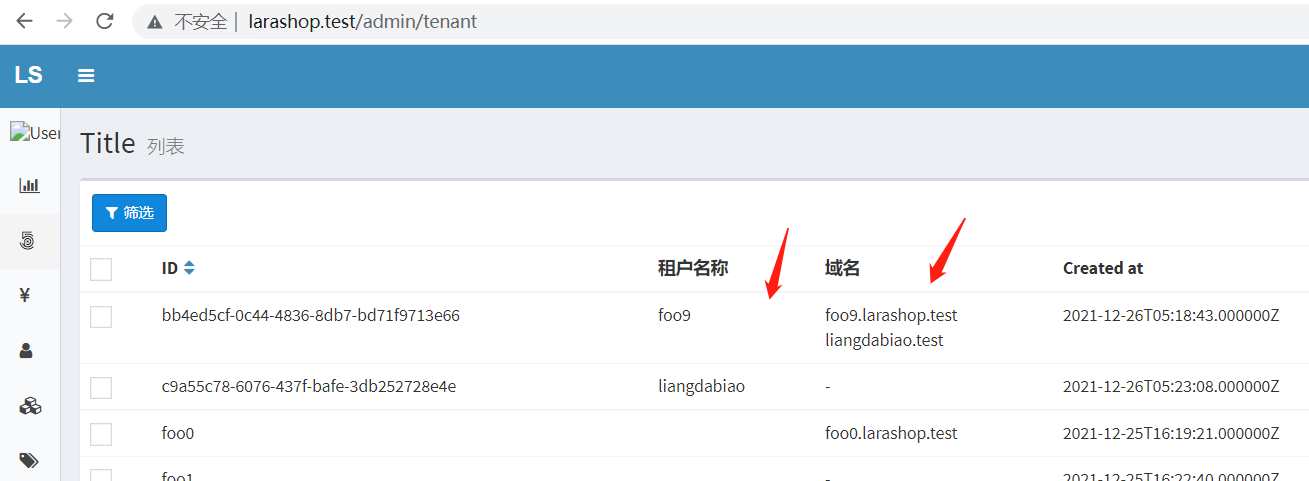
租戶后臺:
管理中心后臺:
*****
同時,可以在代碼里面對租戶進行如下操作:
~~~php
App\Models\Tenant::all()->runForEach(function () {
App\Models\User::factory()->create(); // 切換租戶,執行操作
});
~~~
完成!以上就是多租戶SaaS的基本安裝和配置。下面具體說說配置的知識點。
*****
*****
## 注:配置的知識點:
#### 1,Config/tenancy.php 配置
```
'tenant_model' => \App\Models\Tenant::class, //配置好 Tenant和Domain的class
```
```
'central_domains' => [
str_replace(['https//', 'http//'], '', env('APP_URL')),
], // 配置好 管理中心的URL
```
```
//租戶識別后,啟動資源隔離:
'bootstrappers' => [
Stancl\Tenancy\Bootstrappers\DatabaseTenancyBootstrapper::class,
Stancl\Tenancy\Bootstrappers\CacheTenancyBootstrapper::class,
Stancl\Tenancy\Bootstrappers\FilesystemTenancyBootstrapper::class,
Stancl\Tenancy\Bootstrappers\QueueTenancyBootstrapper::class,
// Stancl\Tenancy\Bootstrappers\RedisTenancyBootstrapper::class, // Note: phpredis is needed
],
```
*****
#### 2, TenancyServiceProvider.php 配置:
** 2.1 Events\TenantCreated (租戶生成時)配置:**
租戶生成時,具體執行的生成任務配置,這里舉例幾個:
```
····
public function events()
{
return [
// Tenant events
Events\CreatingTenant::class => [],
Events\TenantCreated::class => [
JobPipeline::make([
Jobs\CreateDatabase::class, //生成數據庫
Jobs\MigrateDatabase::class, //遷移數據表
//Jobs\SeedDatabase::class, //填充數據
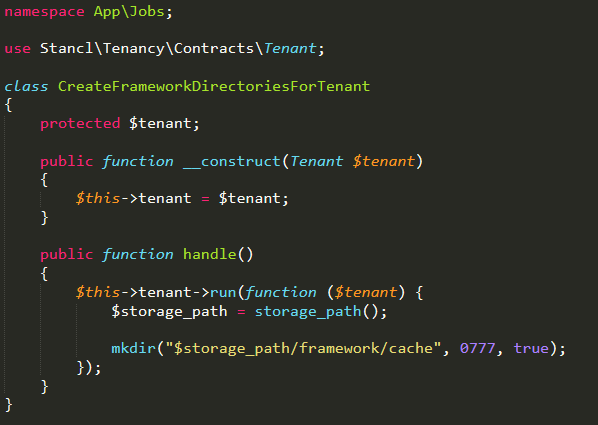
CreateFrameworkDirectoriesForTenant::class, //生成租戶文件夾
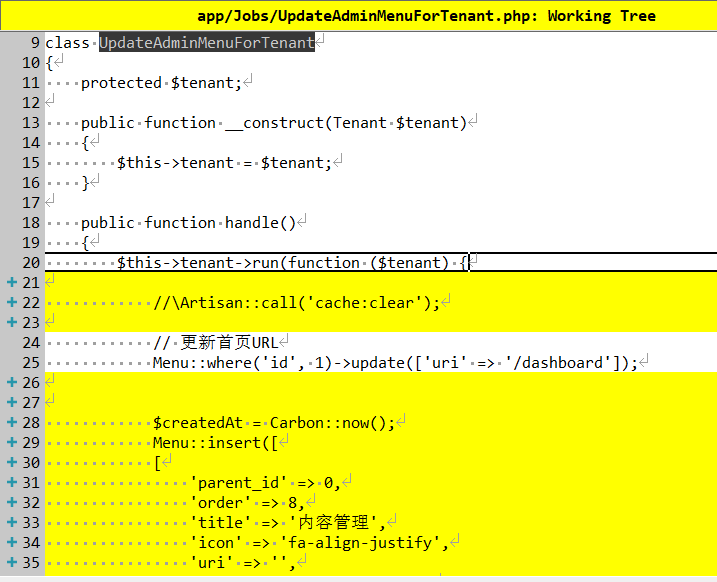
UpdateAdminMenuForTenant::class //更新租戶數據內容
// Your own jobs to prepare the tenant.
// Provision API keys, create S3 buckets, anything you want!
])->send(function (Events\TenantCreated $event) {
return $event->tenant;
})->shouldBeQueued(false), // `false` by default, but you probably want to make this `true` for production.
],
Events\SavingTenant::class => [],
·····
```
例如,更新數據表內容如下:
例如,生成租戶文件夾如下:
*****
*****
** 2.2 boot() 啟動租戶任務配置:**
```
public function boot()
{
$this->bootEvents(); //啟動事件監聽
$this->mapRoutes(); //啟動路由監聽
$this->makeTenancyMiddlewareHighestPriority();
//以下是我們添加的 自定義配置
InitializeTenancyByDomain::$onFail = function () {
return redirect(env('APP_URL')); //租戶訪問失敗,跳轉主訪問
};
TenantAssetsController::$tenancyMiddleware = InitializeTenancyByDomainOrSubdomain::class; // 靜態資源相關.
// 租戶自定義配置.
// @see https://tenancyforlaravel.com/docs/v3/features/tenant-config
TenantConfig::$storageToConfigMap = [
// Do whatever you want.
];
DomainTenantResolver::$shouldCache = true; //租戶路由緩存配置
}
protected function mapRoutes()
{
if (file_exists(base_path('routes/tenant.php'))) {
Route::namespace(static::$controllerNamespace)
->group(base_path('routes/tenant.php'));
}
}
```
*****
*****
#### 3,migration 和 seeder 初始化數據 配置
在`config/tenancy.php` 可以配置相關參數,我的習慣是 不要seeder,直接把有需要的seeder做成 一個migration,直接執行migration。
```
/**
* Parameters used by the tenants:migrate command.
*/
'migration_parameters' => [
'--force' => true, // This needs to be true to run migrations in production.
'--path' => [database_path('migrations/tenant')],
'--realpath' => true,
],
/**
* Parameters used by the tenants:seed command.
*/
'seeder_parameters' => [
'--class' => 'DatabaseSeeder', //'TenantDatabaseSeeder', // root seeder class
//'--force' => true,
],
```
#### 4,路由配置:
這里需要的路由配置有:中心應用路由,管理中心路由,租戶應用路由,租戶管理后臺路由。
4.1 管理中心的路由配置 `app/Admin/routes.php`例子如下 :
```
/**
* 超級管理員可以通過此路由進入租戶后臺.
*/
Route::group([
'prefix' => config('admin.route.prefix'),
'namespace' => config('admin.route.namespace'),
'middleware' => config('admin.route.middleware'),
'domain' => config('tenancy.central_domains')[0], //限定管理中心域名才能進入
], function (Router $router) {
// 租戶管理
$router->resource('/tenant', 'TenantController');
// 域名管理
$router->resource('/domain', 'DomainController')->only(['index', 'destroy', 'show']);
$router->get('/', 'HomeController@index');
$router->get('users', 'UsersController@index');
$router->get('products', 'ProductsController@index');
});
```
4.2 租戶管理中心的路由配置 `app/Admin/routes.php`例子如下 :
```
/**
* 租戶管理員可以通過此路由進入租戶后臺.
*/
Route::middleware([
'web','admin', // 要經過管理員登錄驗證
CheckTenantForMaintenanceMode::class, //檢查是否維護狀態
ScopeSessions::class,
InitializeTenancyByDomain::class, //識別租戶,執行切換資源
PreventAccessFromCentralDomains::class, //防止管理中心訪問的混入
])
->prefix(config('admin.route.prefix'))
->namespace(config('admin.route.namespace'))
->group(function (Router $router) {
$router->get('/', 'HomeController@index');
$router->get('users', 'UsersController@index');
$router->get('products', 'ProductsController@index');
$router->get('products/create', 'ProductsController@create');
$router->post('products', 'ProductsController@store');
$router->get('products/{id}/edit', 'ProductsController@edit');
$router->put('products/{id}', 'ProductsController@update');
// 開啟上帝模式,管理中心是可以直接訪問租戶后臺
$router->get('/god/{token}', function ($token) {
return UserImpersonation::makeResponse($token);
});
});
```
4.3 中心應用路由的路由配置 `routes/web.php`例子如下 :
```
//就是普通平時的路由,不需要解釋
Route::get('/', 'PagesController@root')->name('root');
Auth::routes();
// 在之前的路由里加上一個 verify 參數
Auth::routes(['verify' => true]);
Route::get('products/favorites', 'ProductsController@favorites')->name('products.favorites');
// auth 中間件代表需要登錄,verified中間件代表需要經過郵箱驗證
Route::group(['middleware' => ['auth', 'verified']], function() {
Route::get('user_addresses', 'UserAddressesController@index')->name('user_addresses.index');
```
4.4 租戶應用的路由配置 `routes/tenant.php`例子如下 :
```
Route::middleware([
'web',
InitializeTenancyByDomain::class, //識別租戶,切換資源
PreventAccessFromCentralDomains::class, //防止中心應用的訪問混入
])->group(function () {
Route::get('/', 'PagesController@root')->name('root');
Auth::routes(); // 按正常的用戶驗證就可以
// 在之前的路由里加上一個 verify 參數
Auth::routes(['verify' => true]);
Route::get('products/favorites', 'ProductsController@favorites')->name('products.favorites');
// auth 中間件代表需要登錄,verified中間件代表需要經過郵箱驗證
Route::group(['middleware' => ['auth', 'verified']], function() {
Route::get('user_addresses', 'UserAddressesController@index')->name('user_addresses.index');
·····
····
```
*****
### 路由知識點:
中心central 和 租戶tenants 路由 的 相互限制方式:
```
'domain' => config('tenancy.central_domains')[0], //限定管理中心域名才能進入
```
```
PreventAccessFromCentralDomains::class, //防止中心應用的訪問混入
```
*****
## 租戶基本命令:
1,租戶命令:
```
php artisan tenants:migrate
php artisan tenants:migrate --seed
php artisan tenants:migrate-fresh --seed
php artisan tenants:seed --tenants=XXXX
php artisan tenants:run larabbs:calculate-active-user
php artisan tenants:run email:send --tenants=8075a580-1cb8-11e9-8822-49c5d8f8ff23 --option="queue=1"?--option="subject=New Feature"?--argument="body=We have launched a new feature. ..."
```
2,cron Kernel 配置租戶執行命令方式:
```
$schedule->command('tenants:run larabbs:calculate-active-user')->everyMinute()->withoutOverlapping();
```
*****
## 多租戶的圖片資源使用方式:
默認是不對的地址:
```
http://foo9.larashop.test/storage/images/%E5%BE%AE%E4%BF%A1%E5%9B%BE%E7%89%87\_20211116190644.jpg
```
正確的圖片地址應該是這樣,有 `tenancy/assets` :
```
http://foo9.larashop.test/tenancy/assets/images/%E5%BE%AE%E4%BF%A1%E5%9B%BE%E7%89%87\_20211116190644.jpg
```
所以要圖片資源的函數方法:
```
public function tenancyUrl($path)?{
????????if (URL::isValidUrl($path)) {
????????????return $path;
????????}
????????if (tenant()) {
????????????return tenant_asset($path); // 這里是關鍵,會轉換租戶地址
????????}
????????return $this->getStorage()->url($path);
????}
```
*****
## 其他資源的隔離注意:
隊列,redis, redis緩存 , 多租戶, 文件獨立 等都需要注意隔離的配置。
#### 例如:文件緩存的報錯, 有些資源是需要用tenant-aware的,如配置利用redis。
> This cache store does not support tagging
> Hi. If you want your cache to be tenant-aware, you need to use a driver that supports tagging, e.g. Redis.
> If you don't need tenant-aware cache, comment out the CacheTenancyBootstrapper in your tenancy.php config file.
*****
### 代碼的github地址:
為了方便參考,這里提供我的github地址,有相關代碼參考:https://github.com/liangdabiao/laravel-shop-saas
所有賬號密碼都是 admin admin
后臺 /admin
*****
同時也可以參考我的論壇SaaS代碼,另一種方式:https://github.com/liangdabiao/bbs-saas-skeleton
