[toc]
# Nginx安裝和端口轉發
## 1.下載相應的依賴,準備安裝包
```shell
yum -y install make zlib zlib-devel gcc-c++ libtool openssl openssl-devel pcre-devel
```
上傳安裝包到 /usr/local/src路徑下 [nginx-1.16.1.tar.gz]
下載地址http://nginx.org/download/nginx-1.16.1.tar.gz
## 2.解壓安裝包,配置安裝模塊
```shell
//解壓
tar -zxvf nginx-1.16.1.tar.gz
//進入解壓后的文件
cd nginx-1.16.1
// 指定安裝目錄
./configure --prefix=/data/work/nginx --with-stream --with-http_ssl_module
```

```shell
//編譯(通過gcc進行編譯)
make
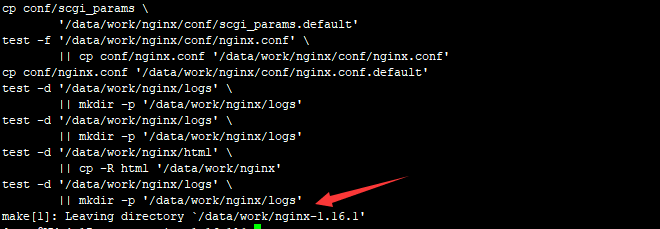
//編譯安裝
make install
```
```shell
//進入安裝目錄,查看詳細信息
cd nginx
```
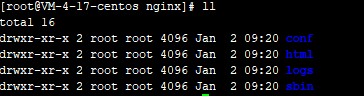
conf:配置文件文件夾,其中nginx.conf是核心配置文件
html:里邊包含了歡迎首頁(index.html)和錯誤頁(50x.html)
logs:記錄日志目錄
sbin:里邊有nginx文件,啟動文件
至此,nginx 安裝完成!
### 補裝模塊
> 有些小伙伴安裝nginx的時候`configure`配置沒有安裝SSL模塊。當然,這些都是經常需要安裝的部分,在本教程中前面的部分中已經安裝了。如果缺失再按照這里的方法進行安裝。
```
./configure --with-http_ssl_module --with-stream --prefix=/data/work/nginx
## 不要執行make install
make
```
覆蓋原先nginx目錄中的nginx文件。
```
cp objs/nginx /data/work/nginx/sbin/nginx
```
## 3.Nginx一些簡單命令
### 1.啟動
```shell
#切換到sbin目錄下,執行 ./nginx 簡單啟動,默認配置文件 最常用的方式
/data/work/nginx/sbin/nginx -c /userxxxxxxx/local/nginx/conf/nginx.conf
#其中 -c 是指定配置文件,指定任意目錄的配置文件
//查看
ps -ef | grep nginx
```
啟動后默認的開啟服務端口是80,在瀏覽器直接輸入IP可以出現如下圖頁面。如果80端口未開放的話,自行修改。

### 2.關閉
```shell
//找出nginx進程
ps -ef | grep nginx
//執行命令,pid是主進程的pid
kill -QUIT 主pid
//注意在安裝目錄sbin下
./nginx -s reload
```
### 3.查看版本
```shell
-v:小寫,顯示nginx版本
/usr/local/nginx/sbin/nginx -v
-V:大寫,顯示nginx版本、編譯器版本和配置參數
/usr/local/nginx/sbin/nginx -V
```
## 4.配置修改與做數據庫端口映射
找到/usr/local/nginx/conf路徑下的nginx.conf文件修改

改成你想要的端口,并重啟nginx,這樣之后在頁面輸入ip+端口就可以直接訪問如上的nginx服務器成功啟動頁面
有個這樣的場景,我想讓在訪問服務器3307端口的時候正好是訪問數據庫的3306端口,我們可以通過nginx做端口的轉發。修改配置如下,看圖應該就能看懂吧。

```shell
events {
worker_connections 1024;
}
stream {
upstream mysql {
server 139.196.33.93:3306;
}
upstream oracle {
server 139.196.33.93:1521;
}
server {
listen 3307;
proxy_pass mysql;
}
server {
listen 1525;
proxy_pass oracle;
}
}
```
現在數據庫就可以通過其他端口連接了連接了
- ?寫在前面
- 部署管理思想
- 更新說明
- ?第一章 基礎環境部署
- 1-1 linux防火墻管理
- 1-2 服務器初始化
- 1-3 存儲管理
- 文件刪除空間釋放問題
- 定時清理日志
- 1-4 JDK安裝
- 1-5 無外網環境部署
- 1-6 切換阿里云yum源
- 1-7 使用ssh隧道解決網絡問題
- 1-8 使用Axure+svn+httpd搭建自己的在線畫圖工具
- linux svn環境搭建
- 1-9 編譯環境安裝
- ??第二章 快速部署篇
- 2-1 一個命令快速安裝mysql
- mysql windows版本安裝
- mysql源碼版的一鍵部署
- mysql配置
- 自動化失敗
- mysql異常處理
- Oracle表結構轉mysql表結構
- 修改字段注釋沒那么簡單!
- 2-2 基于linux腳本的基礎環境發布
- 2-3 docker
- 2-4 nodejs部署
- 2-5 基于Alibaba Cloud Toolkit的Springboot發布腳本
- 2-6 elasticsearch部署
- es6.x部署
- es7.x部署
- ik分詞器部署
- 內存調優
- 回收空間
- 2-7 Oracle生產安裝
- ??第三章 系統APM
- 3-1 Zabbix安裝
- 修改默認端口
- 踩坑記錄
- 3-2 Grafana部署
- 3-3 Kibana部署
- ??第四章 中間件部署
- 4-1 nginx
- nginx安裝部署
- nginx動靜分離配置,這個雷你踩過嗎?
- 圖解nginx304緩存策略
- nginx日志切割
- 4-2 activemq升級
- 4-3 redis安裝
- 4-4 Canal部署
- 報錯解決
- Canal+Rabbitmq實現同步
- canal數據同步到es
- 4-5 SpringCloud Alibaba
- nacos
- 新建項目
- seata
- 4-6 rabbitmq安裝
- 第五章 高可用架構
- 5-1 mysql主從復制
- 主從復制配置
- 5-2 mysql數據自動備份
- ??第六章 數據ETL
- 6-1 dataX
- 第七章 持續集成
- 7-1 基于Docker+Jekins+Git實現企業持續集成、部署
- 7-2 安裝jekins
- 安裝maven
- 7-3 jvm-sandbox自動化測試
- jvm-sandbox-repeater Windows開發環境安裝
- 第八章 JVM調優
- jps:查詢正在運行的虛擬機進程
- jstat:查看JVM統計信息
- jinfo:實時查看和修改JVM配置參數
- 第七章 域名申請與管理
- SSL證書申請
- 第九章 業務插件部署
- 6-1 ffmpeg
- 第十章 云服務器
- 騰訊云
- 阿里云
- 其他
- 其他作品
- 簡歷內推
- 聯系我內推