# 1.服務器環境準備
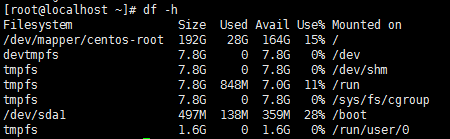
a.使用*df -h* 命令查看服務器分區情況,防止將服務器系統分區盤塞滿:
b.使用*java -version*命令確保服務器已經安裝jdk,因為es使用java進行開發的,需要jdk環境:

# 2.es下載
先下載并解壓適合你操作系統的 Elasticsearch 版本,從 elastic 的官網[*elastic.co/downloads/elasticsearch*](https://www.elastic.co/downloads/elasticsearch)獲取最新版本的 Elasticsearch。
* 對于Windows操作系統,請下載ZIP文件。
* 對于UNIX操作系統,請下載TAR文件。
* 對于Debian操作系統,請下載DEB文件。
* 對于Red Hat和其他Linux發行版,請下載RPM文件。
* APT和Yum實用程序也可用于在許多Linux發行版中用來安裝Elasticsearch。
## a.下載tar的方式進行安裝:
將下載好的壓縮包上傳到linux服務器上:

使用命令解壓壓縮包:
# *tar -zvxf elasticsearch-7.11.2-linux-x86_64.tar.gz*

進入 elasticsearch-7.11.2/bin 目錄,使用*./elasticsearch*命令啟動es:
問題1:可能會出現jdk版本不匹配,新版es是自帶jdk,所以我們可以直接修改bin/elasticsearch :

解決:
# *vim bin/elasticsearch*
```
# 指定jdk11
export JAVA_HOME=/opt/software/jdk/jdk-11.0.1
export PATH=$JAVA_HOME/bin:$PATH
# 添加jdk判斷
if [ -x "$JAVA_HOME/bin/java" ]; then
JAVA="/opt/software/jdk/jdk-11.0.1/bin/java"
else
JAVA=`which java`
fi
```
問題2:es安裝好之后,使用root啟動會報錯:can not run elasticsearch as root
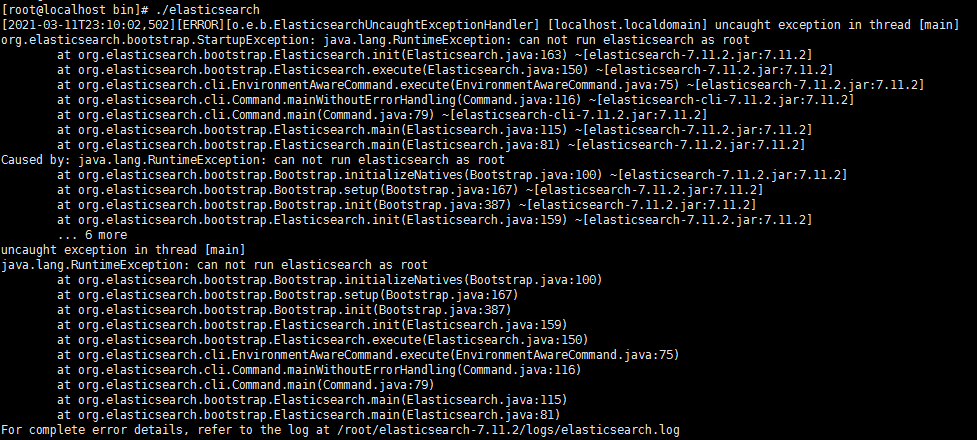
原因:
為了安全不允許使用root用戶啟動
解決:
es5之后的都不能使用添加啟動參數或者修改配置文件等方法啟動了,必須要創建用戶
問題3:
ERROR: \[3\] bootstrap checks failed
\[1\]: max file descriptors \[4096\] for elasticsearch process is too low, increase to at least \[65536\]
\[2\]: memory locking requested for elasticsearch process but memory is not locked
\[3\]: max virtual memory areas vm.max\_map\_count \[65530\] is too low, increase to at least \[262144\]
解決:
【1】編輯 /etc/security/limits.conf,追加以下內容;
* soft nofile 65536
* hard nofile 65536
此文件修改后需要重新登錄用戶,才會生效
【2】編輯 /etc/sysctl.conf,追加以下內容:
vm.max_map_count=655360
【3】保存后,執行:
*sysctl -p*
【4】重新啟動,成功。
*bin/elasticsearch -d *或者*bin/elasticsearch &* (后臺啟動方式)
## b.采用rpm方式安裝:
由于ES不在yum的本地源,所以我們需要添加ES的yum配置。
注意:Elasticsearch v7.11.2版本后的RPM可以直接官網下載,使用如下面命令:
# *wget https://artifacts.elastic.co/downloads/elasticsearch/elasticsearch-7.11.2-x86_64.rpm*
# *wget https://artifacts.elastic.co/downloads/elasticsearch/elasticsearch-7.11.2-x86_64.rpm.sha512*
# *shasum -a 512 -c elasticsearch-7.11.2-x86_64.rpm.sha512 *
# *sudo rpm --install elasticsearch-7.11.2-x86_64.rpm*
### (1)下載并安裝ES的yum公鑰
#*rpm --import https://packages.elastic.co/GPG-KEY-elasticsearch*
如果以上命令執行報錯:

先執行命令:#*wget https://packages.elastic.co/GPG-KEY-elasticsearch --no-check-certificate*

然后執行命令:
#*rpm --import GPG-KEY-elasticsearch*

### (2)配置ES的yum源(添加elasticsearch的repo配置文件)
#*?vim /etc/yum.repos.d/elasticsearch.repo*
添加如下配置文件內容:
` [elasticsearch]
name=Elasticsearch repository for 7.x packages
baseurl=https://artifacts.elastic.co/packages/7.x/yum
gpgcheck=1
gpgkey=https://artifacts.elastic.co/GPG-KEY-elasticsearch
enabled=0
autorefresh=1
type=rpm-md`
命令模式輸入**:wq**保存
效果如下圖:

### (3) yum安裝ES
# *sudo yum install --enablerepo=elasticsearch elasticsearch*
