### 第一步:登錄公眾號平臺([https://mp.weixin.qq.com](https://mp.weixin.qq.com/))和智慧充電站后臺
#
### 第二步:
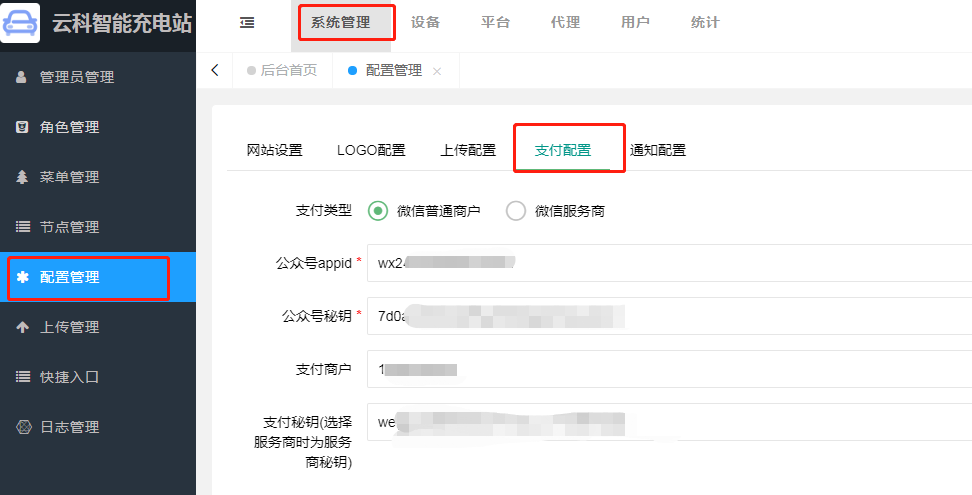
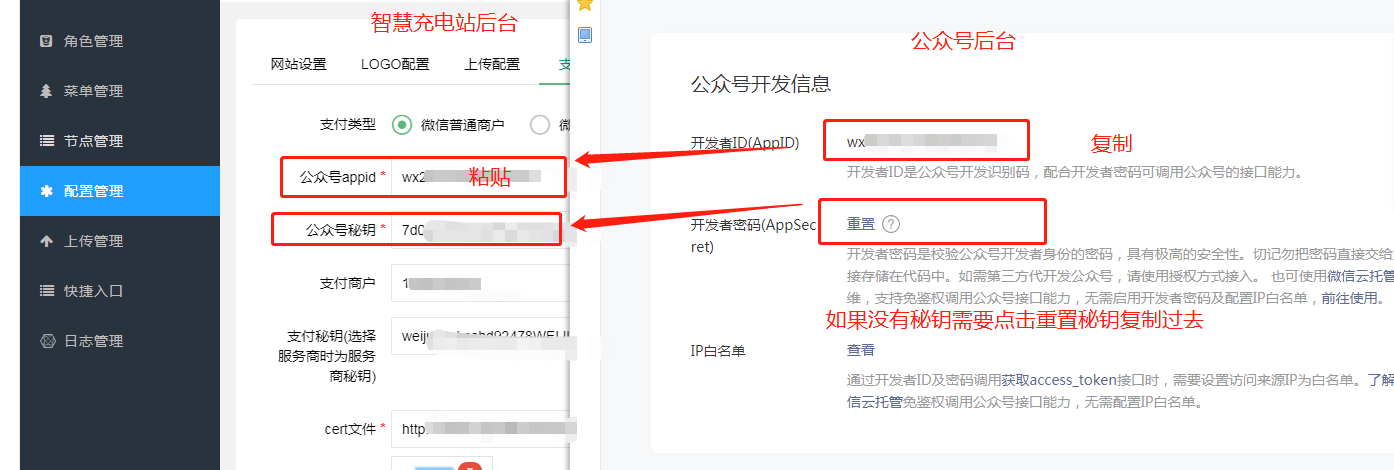
打開后臺的【系統管理】-【配置管理】-【支付配置】設置公眾號(AppId)和公眾號(AppSecret),這兩個必須填寫,否則頁面無法打開(支付信息可以暫時不填),如下圖所示。如果是特約商戶(支付類型選擇微信服務商)
#
微信公眾號平臺找到【設置與開發】-【基本配置】-【開發設置】,獲取公眾號(AppId)和公眾號(AppSecret),如下圖所示
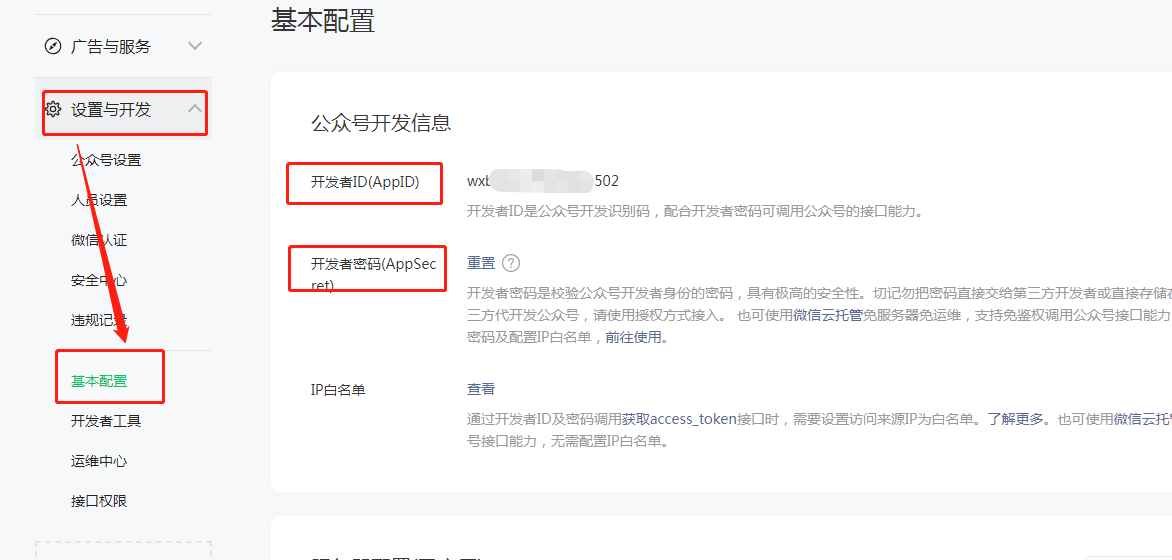
#
配置好保存,商戶信息可以隨便配置幾個數字保存一下,等要配置支付的時候再修改
#
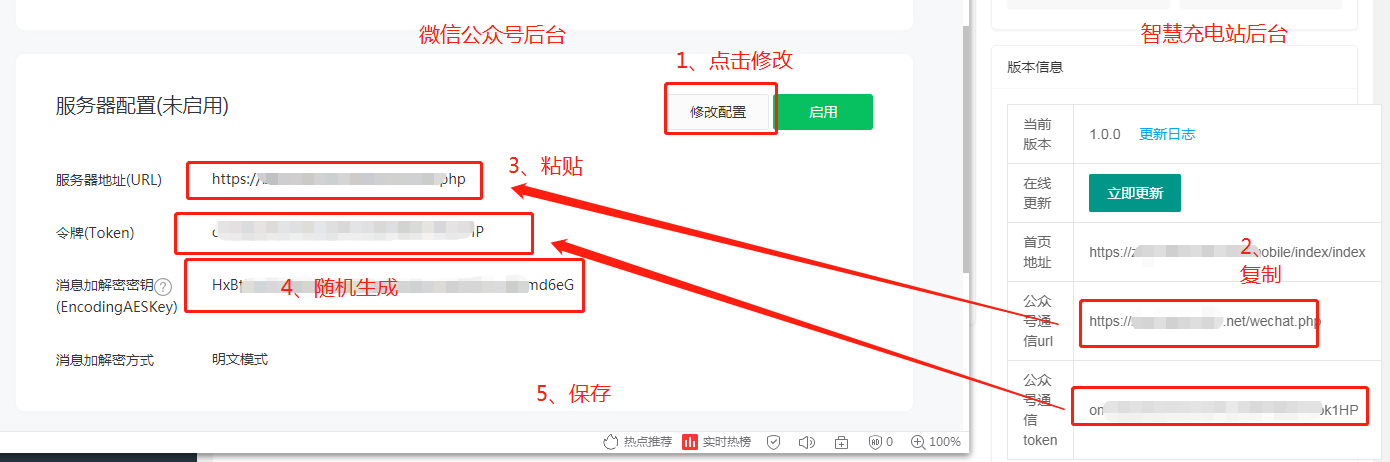
### 第三步:配置服務器配置信息,微信公眾號平臺找到【設置與開發】-【基本配置】-【服務器配置】配置相關域名。如下圖所示
微信公眾號平臺打開下圖位置
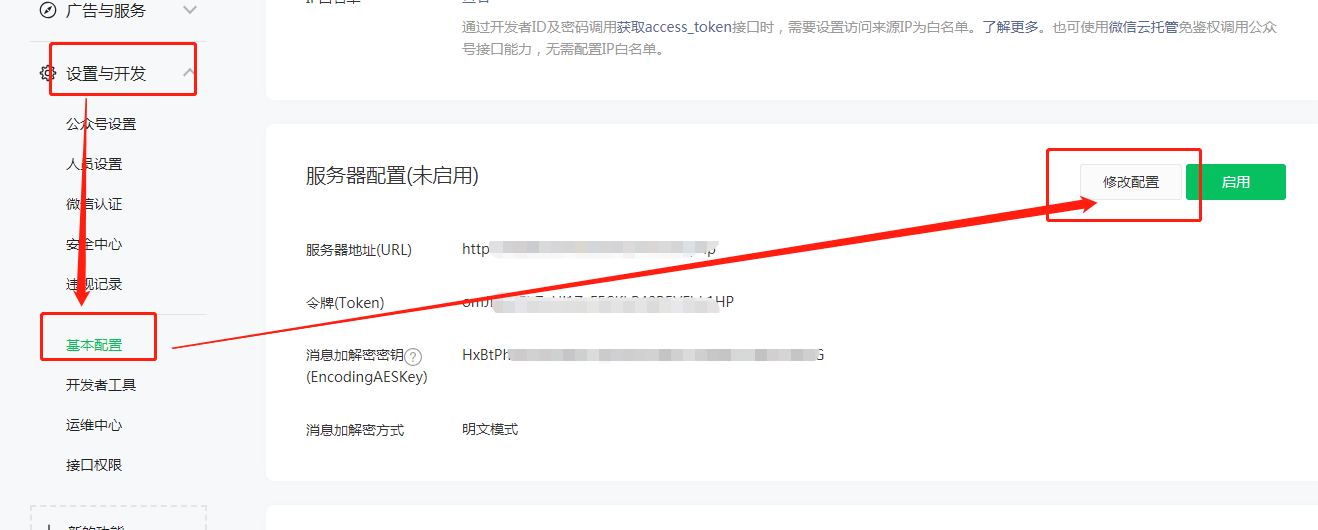
#
智慧充電站打開下圖位置
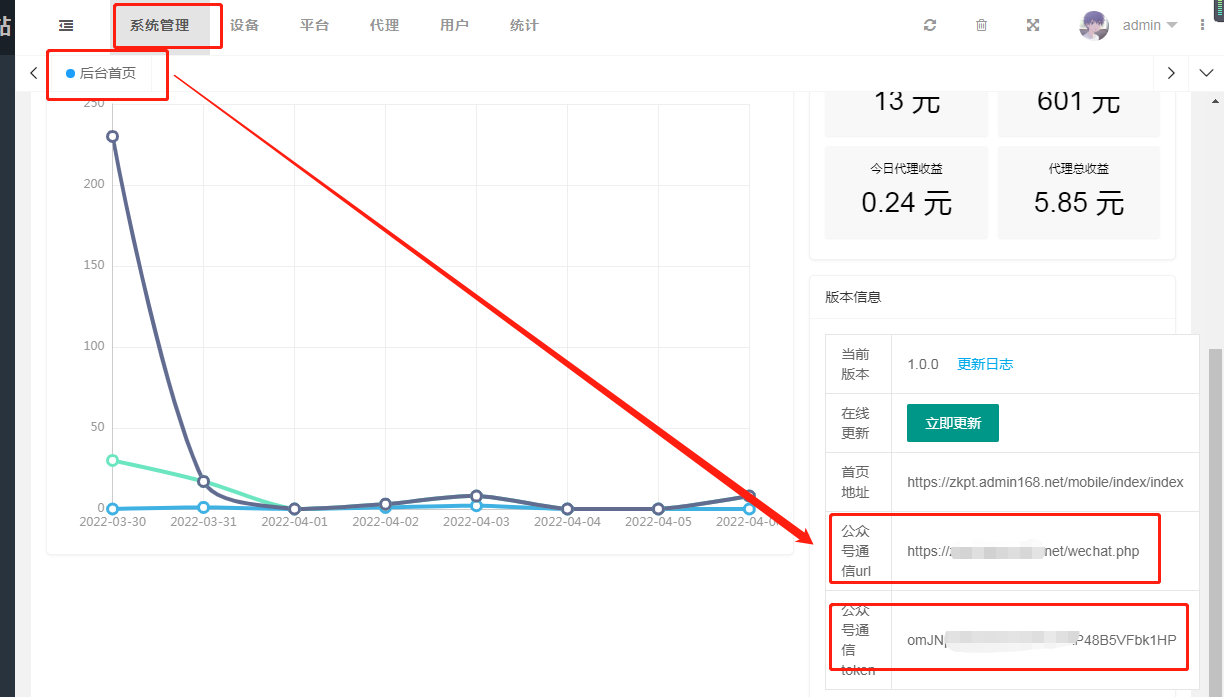
#
給 智慧充電站 的信息復制到 微信公眾號 上;如下圖所示
#
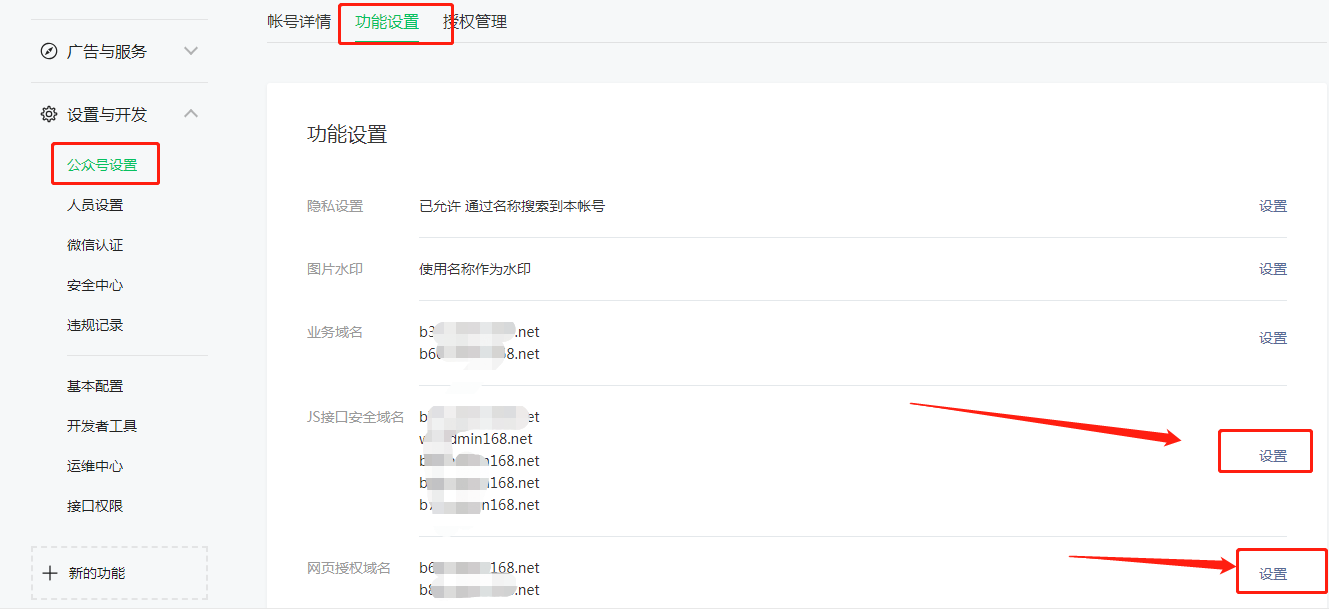
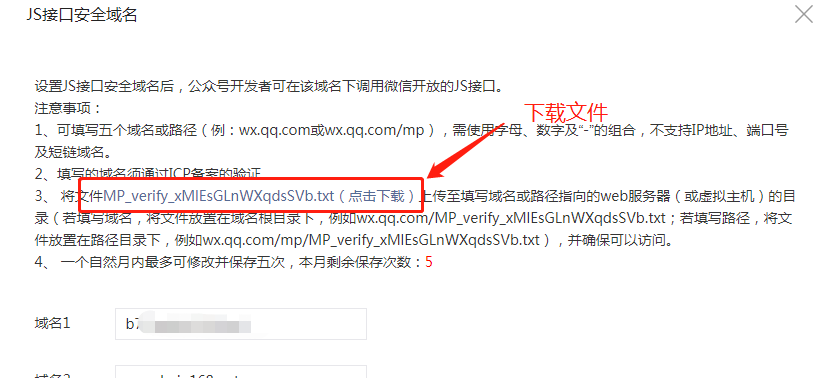
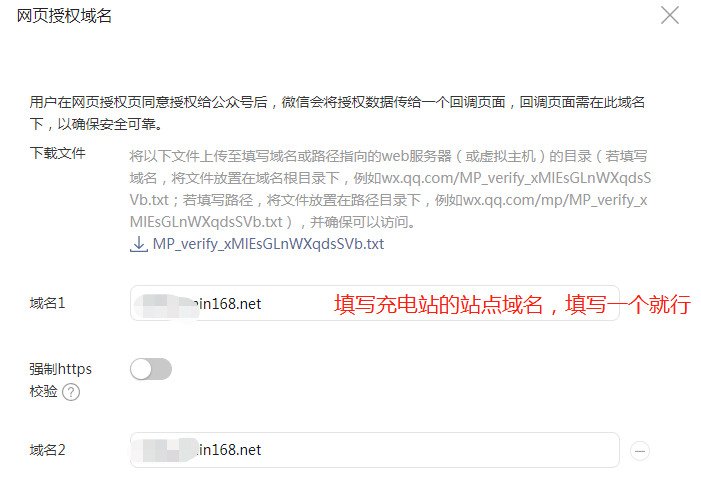
### 第三步:配置js接口安全域名和網頁授權域名,微信公眾號平臺找到【設置與開發】-【公眾號設置】-【功能設置】,如下圖所示,點擊設置
#
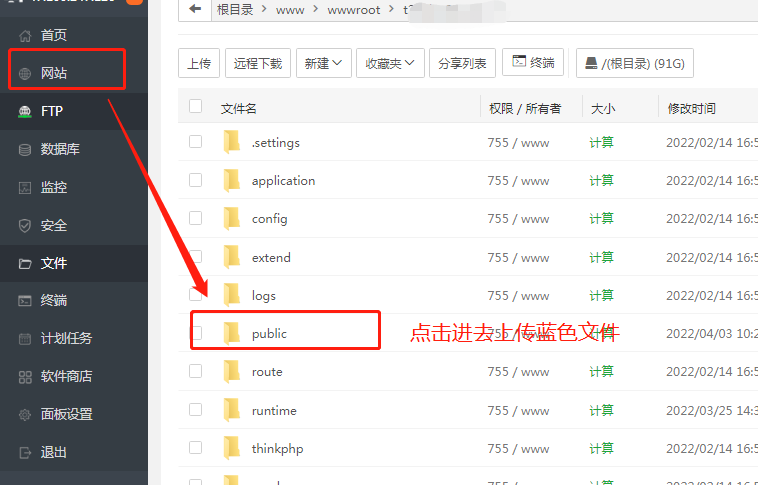
下載藍色文件,上傳到寶塔的站點域名public下,如下圖所示
#
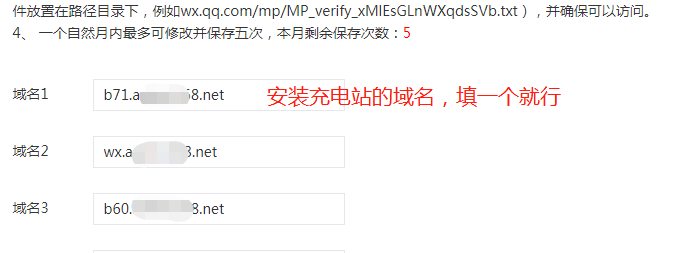
上傳好后,微信公眾號輸入安裝的域名,如下圖所示
#
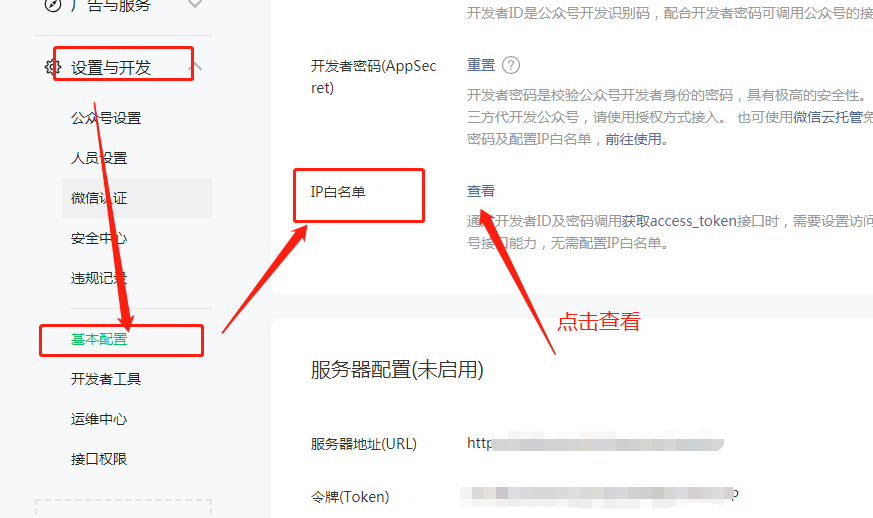
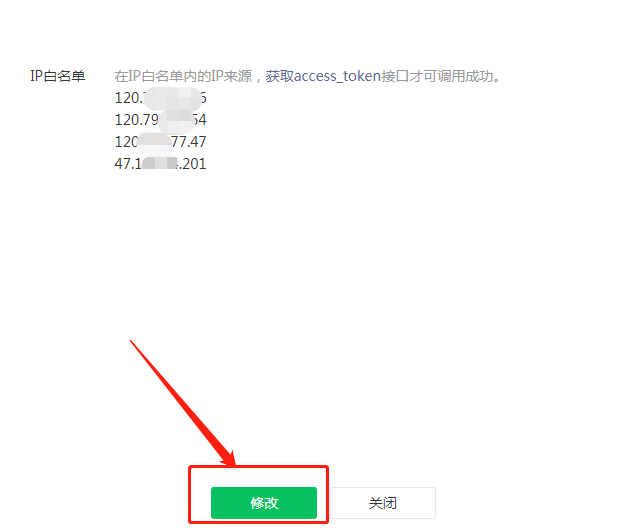
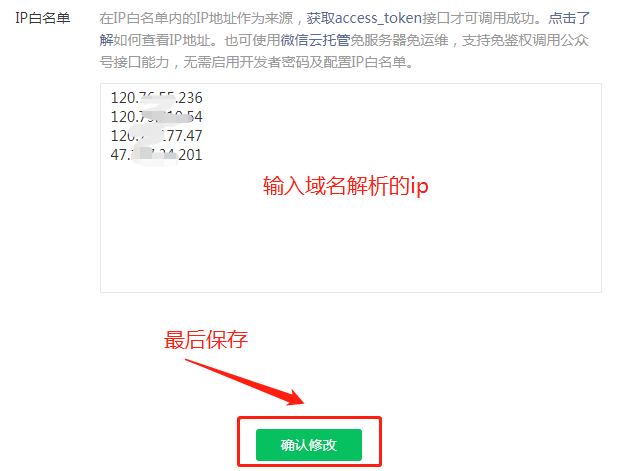
### 第四步:配置白名單,微信公眾號平臺找到【設置與開發】-【基本配置】-【白名單】配置ip信息,如下圖所示