<ruby id="bdb3f"></ruby>

    <p id="bdb3f"><cite id="bdb3f"></cite></p>

      <p id="bdb3f"><cite id="bdb3f"><th id="bdb3f"></th></cite></p><p id="bdb3f"></p>
        <p id="bdb3f"><cite id="bdb3f"></cite></p>

          <pre id="bdb3f"></pre>
          <pre id="bdb3f"><del id="bdb3f"><thead id="bdb3f"></thead></del></pre>

          <ruby id="bdb3f"><mark id="bdb3f"></mark></ruby><ruby id="bdb3f"></ruby>
          <pre id="bdb3f"><pre id="bdb3f"><mark id="bdb3f"></mark></pre></pre><output id="bdb3f"></output><p id="bdb3f"></p><p id="bdb3f"></p>

          <pre id="bdb3f"><del id="bdb3f"><progress id="bdb3f"></progress></del></pre>

                <ruby id="bdb3f"></ruby>

                企業??AI智能體構建引擎,智能編排和調試,一鍵部署,支持知識庫和私有化部署方案 廣告
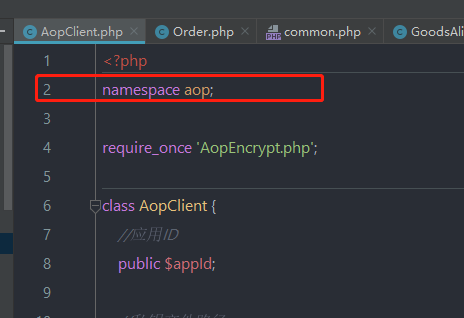
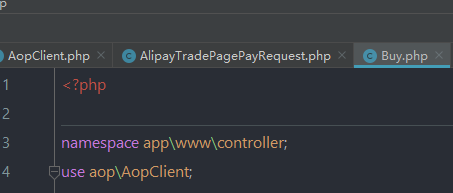
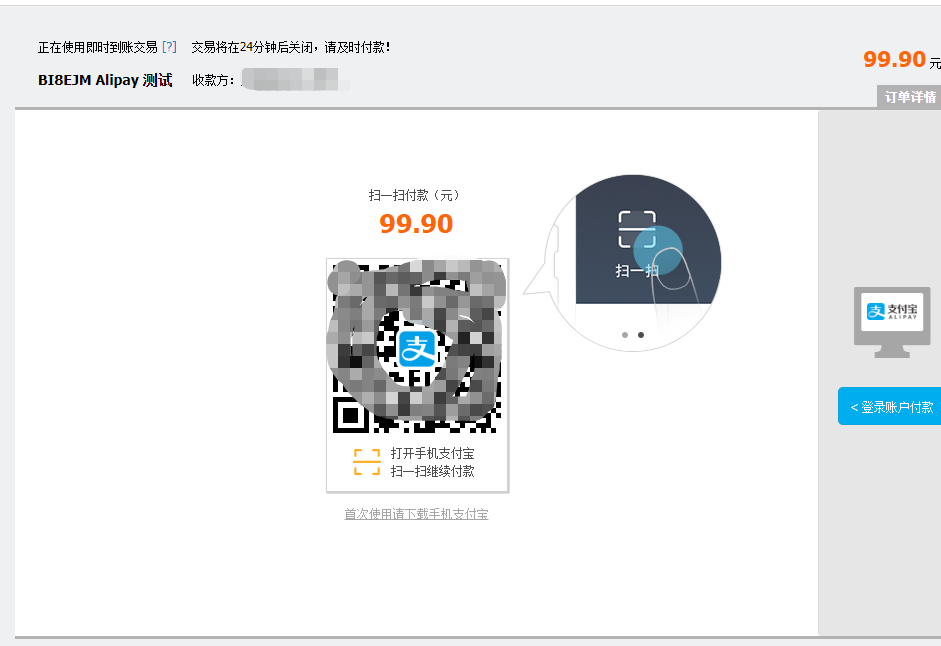
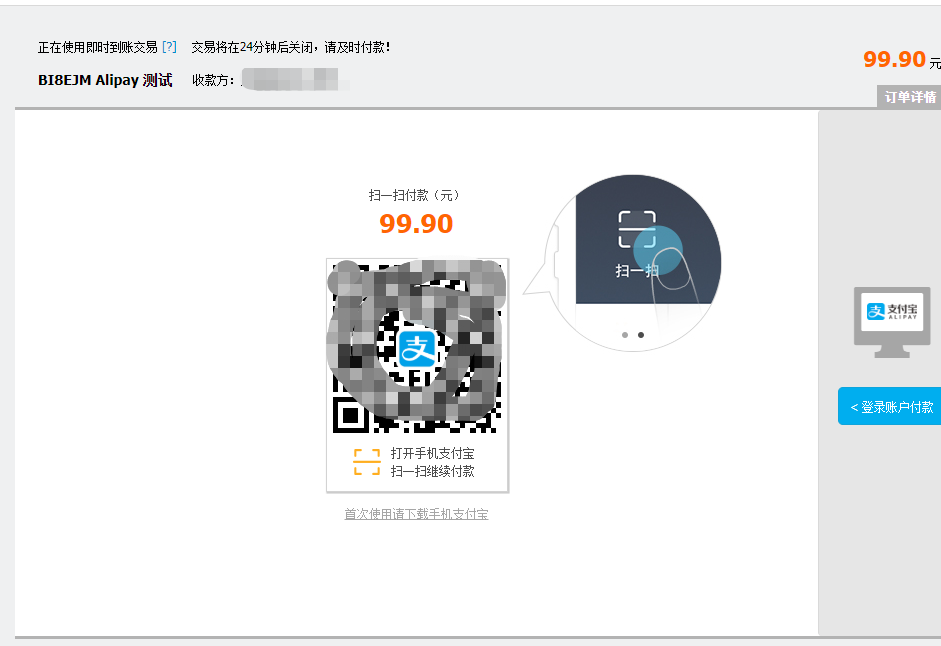
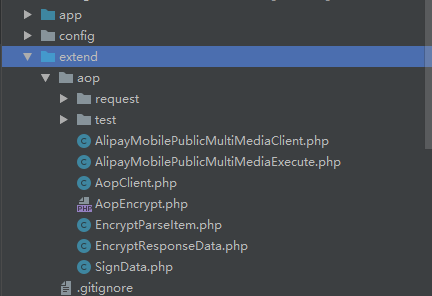
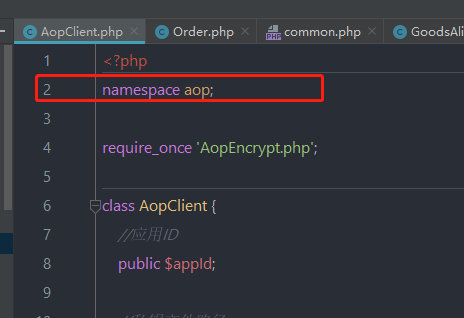
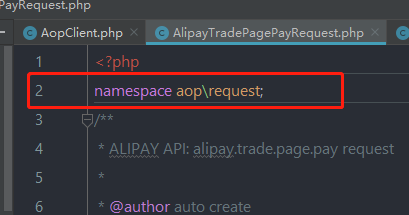
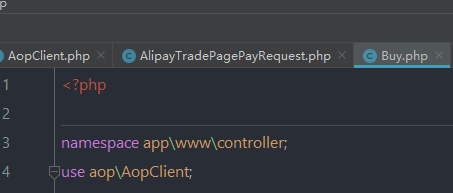
                第一步   下載 Alipay 的PHP SDK? :[https://docs.open.alipay.com/54/103419/](https://docs.open.alipay.com/54/103419/) 第二步   解壓下載都到的壓縮包:   解壓后得到的文件內容如圖   ![?![](https://img2018.cnblogs.com/blog/1760333/201909/1760333-20190920115001230-1861552594.png)](images/screenshot_1602687677306.png) 第三步、上傳得到的目錄中的**aop**?文件夾到?thinkphp 6.0?的?**extend**?目錄,如下圖: ![](https://img.kancloud.cn/46/01/46016fd7a9782330fd1c4997d71c4a0f_432x296.png)   ![](https://img2018.cnblogs.com/blog/1760333/201909/1760333-20190920115220068-1468132154.png) ?第四步、修改?AopClient.php?文件,加入命名空間?**aop?**具體修改如下圖   在第二行位置,也就是最開始的位置,加入代碼: ~~~ namespace aop; ~~~ ![](https://img.kancloud.cn/4b/a0/4ba0267beacc6a9d1f38825ec428a3de_464x318.png)   ![](https://img2018.cnblogs.com/blog/1760333/201909/1760333-20190920115434768-906573047.png) ?第五步、修改 PC?支付文件?**AlipayTradePagePayRequest.php**?同樣是加入命名空間**namespace aop\\request**,具體如下:   在第二行位置,也就是最開始的位置,加入代碼: ~~~ namespace aop\request; ~~~ ![](https://img.kancloud.cn/70/d8/70d8ed987e7c29a244a72eafdb862cae_409x215.png)   ![](https://img2018.cnblogs.com/blog/1760333/201909/1760333-20190920115814853-1191504165.png) ?第六步、使用PC支付接口,生成支付鏈接   PS:接口方法這不是統一定義、而是在購買控制器中直接定義的,如要統一可以創建公共控制器或其他方法統一。   1.在?確認訂單的控制器 ,我這里是 Buy?中引入支付方法。 12use&nbsp;aop\AopClient;use&nbsp;aop\request\AlipayTradePagePayRequest; ![](https://img.kancloud.cn/c8/2f/c82f3cc0cb6e93f8a8ac3225afef5dc6_453x193.png)   ![](https://img2018.cnblogs.com/blog/1760333/201909/1760333-20190920120404172-1951003452.png)   2.創建私有方法 $alipay\_config ,替換下面紅色的內容部分,為你的信息,具體信息在你的支付寶開發者平臺獲取,地址:[https://openhome.alipay.com/platform/appManage.htm#/apps](https://openhome.alipay.com/platform/appManage.htm#/apps) 1234567private&nbsp;$alipay_config&nbsp;=&nbsp;array(&nbsp;&nbsp;&nbsp;&nbsp;'app_id'&nbsp;=&gt;&nbsp;'你的app_id',&nbsp;&nbsp;&nbsp;&nbsp;'notify_url'=&gt;"https://xxx.com/xxx/ 這是你的異步通知地址",&nbsp;&nbsp;&nbsp;&nbsp;'merchant_private_key'&nbsp;=&gt;&nbsp;'你的私鑰',&nbsp;&nbsp;&nbsp;&nbsp;'gatewayUrl'&nbsp;=&gt;&nbsp;"https://openapi.alipay.com/gateway.do",&nbsp;&nbsp;&nbsp;&nbsp;'public_key'&nbsp;=&gt;&nbsp;"你的公鑰",); ?  3.配置、引入 aop 123456789$aop&nbsp;=&nbsp;new&nbsp;AopClient();$aop-&gt;gatewayUrl =&nbsp;"https://openapi.alipay.com/gateway.do";$aop-&gt;appId =&nbsp;$this-&gt;alipay_config['appid'];$aop-&gt;method =&nbsp;'alipayTradePagePay';$aop-&gt;charset =&nbsp;'utf-8';$aop-&gt;signType =&nbsp;'RSA2';&nbsp;$aop-&gt;alipayrsaPublicKey =&nbsp;$this-&gt;alipay_config['public_key'];$aop-&gt;rsaPrivateKey&nbsp;&nbsp;&nbsp;&nbsp;&nbsp; =&nbsp;$this-&gt;alipay_config['private_key'];   4.生成? biz\_content?內容,具體內容可根據自己需求增刪,具體文檔參考:[https://docs.open.alipay.com/api\_1/alipay.trade.page.pay/](https://docs.open.alipay.com/api_1/alipay.trade.page.pay/)?     參數解釋:       out\_trade\_no :訂單號,阿里要求是唯一的。       product\_code?:銷售產品碼,與支付寶簽約的產品碼名稱。注:目前僅支持**FAST\_INSTANT\_TRADE\_PAY**       total\_amount :支付金額       subject :訂單名稱       timeout\_express :?支付過期時間,訂單創建后多久過期,這里?設置 30m?意思是,訂單創建后 30?分鐘后過期,過期了這個就不能支付了,這里只是alipay這里不能支付,不要搞暈了。 1234567$biz_content&nbsp;= json_encode([&nbsp;&nbsp;&nbsp;&nbsp;'out_trade_no'=&gt; rand(11111111,99999999),&nbsp;&nbsp;&nbsp;&nbsp;'product_code'=&gt;&nbsp;'FAST_INSTANT_TRADE_PAY',&nbsp;&nbsp;&nbsp;&nbsp;'total_amount'=&gt; 99.9,&nbsp;&nbsp;&nbsp;&nbsp;'subject'=&gt;&nbsp;'BI8EJM Alipay 測試',&nbsp;&nbsp;&nbsp;&nbsp;'timeout_express'=&gt;'30m',]);   5.?引入 PC?支付?并顯示?支付鏈接 1234567$payRequest=&nbsp;new&nbsp;AlipayTradePagePayRequest();&nbsp;$payRequest-&gt;setReturnUrl(url('index/index'));$payRequest-&gt;setNotifyUrl($this-&gt;alipay_config['notify_url']);$payRequest-&gt;setBizContent($biz_content);$response&nbsp;=&nbsp;$aop-&gt;sdkExecute($payRequest);&lt;br&gt;echo&nbsp;'&lt;a href="'.'https://openapi.alipay.com/gateway.do?'.$response.'"&gt;   至此,支付鏈接生成就完畢了。 第七步、測試打開支付鏈接 ![](https://img.kancloud.cn/ad/d6/add6330e8e712fadf8677e1fdba0c734_623x189.png)   ![](https://img2018.cnblogs.com/blog/1760333/201909/1760333-20190920122308548-1720803877.png)   點擊:立即支付?成功跳轉到支付頁面 ![](https://img.kancloud.cn/58/82/58820297a0c45b73f9f543dc8ec7a71f_941x646.png) ![](https://img2018.cnblogs.com/blog/1760333/201909/1760333-20190920122913016-486370674.png) 第八步、異曲同工。   這里僅僅展示了 PC?的支付,說好的手機支付呢?手機支付一樣,你只需要在手機支付接口文件中,指定命名空間,然后引入手機支付方法即可,希望你能順利完成。
                  <ruby id="bdb3f"></ruby>

                  <p id="bdb3f"><cite id="bdb3f"></cite></p>

                    <p id="bdb3f"><cite id="bdb3f"><th id="bdb3f"></th></cite></p><p id="bdb3f"></p>
                      <p id="bdb3f"><cite id="bdb3f"></cite></p>

                        <pre id="bdb3f"></pre>
                        <pre id="bdb3f"><del id="bdb3f"><thead id="bdb3f"></thead></del></pre>

                        <ruby id="bdb3f"><mark id="bdb3f"></mark></ruby><ruby id="bdb3f"></ruby>
                        <pre id="bdb3f"><pre id="bdb3f"><mark id="bdb3f"></mark></pre></pre><output id="bdb3f"></output><p id="bdb3f"></p><p id="bdb3f"></p>

                        <pre id="bdb3f"><del id="bdb3f"><progress id="bdb3f"></progress></del></pre>

                              <ruby id="bdb3f"></ruby>

                              哎呀哎呀视频在线观看