# 7 自定義Nginx模塊
##7.1 ngx_command_t 數組
commands 數組用于定義模塊的配置文件參數,每一個數組元素都是`ngx_command_t`類型,數組的結尾是用`ngx_numm_command`表示。Nginx在解析配置文件中的一個配置項時首先會遍歷所有的模塊,對于每一個模塊而言,即通過遍歷commands數組進行,另外,在數組中檢查到ngx_numm_command時,會停止使用當前模塊解析該配置項。每一個ngx_command_t結構體定義個如下配置:
```cpp
typedef struct ngx_command_s ngx_command_t;
struct ngx_command_s {
//配置項名稱,如"gzip"
ngx_str_t name;
//配置項類型,type將制定配置項可以出現的位置,
//例如:出現在server{}活location{}中,等等
ngx_uint_t type;
//出現了name中指定的配置項后,將會調用set方法處理配置項的參數
char *(*set)(ngx_conf_t *cf, ngx_command_t *cmd, void *conf);
//在配置文件中的偏移量
ngx_uint_t conf;
//通常用于使用預設的解析方法解析配置項,這是配置模塊的一個優秀的設計,
//需要與conf配合使用
ngx_uint_t offset;
//配置項讀取后的處理方法,必須是ngx_conf_post_t結構的指針
void *post;
};
```
ngx_null_command只是一個空的ngx_command_s:
```cpp
#define ngx_null_command {ngx_null_string, 0, NULL, 0, 0, NULL}
```
也就是說,對于我們在nginx.cong 中編寫的配置項mytest來說,nginx首先會遍歷所有的模塊(modules),而對于每個模塊,會遍歷他所對應的ngx_command_t數組,試圖找到關于我們配置項目mytest的解析方式。
```cpp
static ngx_command_t ngx_http_mytest_commands[] =
{
{
ngx_string("mytest"),
NGX_HTTP_MAIN_CONF | NGX_HTTP_SRV_CONF | NGX_HTTP_LOC_CONF | NGX_HTTP_LMT_CONF | NGX_CONF_NOARGS,
ngx_http_mytest,
NGX_HTTP_LOC_CONF_OFFSET,
0,
NULL
},
ngx_null_command
};
```
##7.2 command中用于處理配置項參數的set方法
```cpp
static char *
ngx_http_mytest(ngx_conf_t *cf, ngx_command_t *cmd, void *conf)
{
ngx_http_core_loc_conf_t *clcf;
//首先找到mytest配置項所屬的配置塊,clcf貌似是location塊內的數據
//結構,其實不然,它可以是main、srv或者loc級別配置項,也就是說在每個
//http{}和server{}內也都有一個ngx_http_core_loc_conf_t結構體
clcf = ngx_http_conf_get_module_loc_conf(cf, ngx_http_core_module);
//http框架在處理用戶請求進行到NGX_HTTP_CONTENT_PHASE階段時,如果
//請求的主機域名、URI與mytest配置項所在的配置塊相匹配,就將調用我們
//實現的ngx_http_mytest_handler方法處理這個請求
clcf->handler = ngx_http_mytest_handler;
return NGX_CONF_OK;
}
```
關于ngx_http_conf_get_module_loc_conf 的定義可以參考:
http://lxr.nginx.org/source/src/http/ngx_http_config.h#0065
>本質: 就是設置`ngx_http_mytest_handler`, 匹配項被選中的時候, 應該如何解析。
##7.3 定義ngx_http_module_t接口
這部分的代碼, 是用于http框架的, 相當于http框架的回掉函數, 由于這里并不需要框架做任何操作。
```cpp
static ngx_http_module_t ngx_http_mytest_module_ctx =
{
NULL, /* preconfiguration */
NULL, /* postconfiguration */
NULL, /* create main configuration */
NULL, /* init main configuration */
NULL, /* create server configuration */
NULL, /* merge server configuration */
NULL, /* create location configuration */
NULL /* merge location configuration */
};
```
##7.4 定義處理“mytest”command的handler
我們這里需要定義配置項被匹配之后的處理方法.
```cpp
static ngx_int_t ngx_http_mytest_handler(ngx_http_request_t *r)
{
//必須是GET或者HEAD方法,否則返回405 Not Allowed
if (!(r->method & (NGX_HTTP_GET | NGX_HTTP_HEAD)))
{
return NGX_HTTP_NOT_ALLOWED;
}
//丟棄請求中的包體
ngx_int_t rc = ngx_http_discard_request_body(r);
if (rc != NGX_OK)
{
return rc;
}
//設置返回的Content-Type。注意,ngx_str_t有一個很方便的初始化宏
//ngx_string,它可以把ngx_str_t的data和len成員都設置好
ngx_str_t type = ngx_string("text/plain");
//返回的包體內容
ngx_str_t response = ngx_string("Hello World!");
//設置返回狀態碼
r->headers_out.status = NGX_HTTP_OK;
//響應包是有包體內容的,所以需要設置Content-Length長度
r->headers_out.content_length_n = response.len;
//設置Content-Type
r->headers_out.content_type = type;
//發送http頭部
rc = ngx_http_send_header(r);
if (rc == NGX_ERROR || rc > NGX_OK || r->header_only)
{
return rc;
}
//構造ngx_buf_t結構準備發送包體
ngx_buf_t *b;
b = ngx_create_temp_buf(r->pool, response.len);
if (b == NULL)
{
return NGX_HTTP_INTERNAL_SERVER_ERROR;
}
//將Hello World拷貝到ngx_buf_t指向的內存中
ngx_memcpy(b->pos, response.data, response.len);
//注意,一定要設置好last指針
b->last = b->pos + response.len;
//聲明這是最后一塊緩沖區
b->last_buf = 1;
//構造發送時的ngx_chain_t結構體
ngx_chain_t out;
//賦值ngx_buf_t
out.buf = b;
//設置next為NULL
out.next = NULL;
//最后一步發送包體,http框架會調ngx_http_finalize_request方法
//結束請求
return ngx_http_output_filter(r, &out);
}
```
##7.5 定義ngx_module_t中的mytest模塊
定義HTTP模塊方式很簡單,例如:
```cpp
ngx_module_t ngx_http_mytest_module;
```
其中ngx_module_t是一個Nginx模塊的數據結構,下面來分析一下Nginx模塊中的所有成員:
```cpp
typedef struct ngx_module_s ngx_module_t;
struct ngx_module_s {
/*
下面的ctx_index、index、spare0,spare1,
spare2,spare3,version變量不需要再定義時候賦值,
可以用Nginx準備好的宏NGX_MODULE_V1來定義,
已經定義好了這7個值
#define NGX_MODULE_V1 0,0,0,0,0,0,1
對于一類模塊(由下面的type成員決定類別)而言,
ctx_index表示當前模塊在這類模塊中的序號。
這個成員常常是由管理這類模塊的一個Nginx核心模塊設置的,
對于所有的HTTP模塊而言,ctx_index是由
核心模塊ngx_http_module設置的。
ctx_index非常重要,Nginx的模塊化設計非常依賴于各個模塊的順序,
他們既用于表達優先級,也用于表明每個模塊的位置,
借以幫助Nginx框架快速獲得某個模塊的數據.
*/
ngx_uint_t ctx_index;
/*
index表示當前模塊在ngx_module數組中的序號。
注意,ctx_index表示的是當前模塊在一類模塊中的序號,
而index表示當前模塊在所有模塊中的序號,同樣很關鍵.
Nginx啟動時會根據ngx_modules數組設置各模塊的index值,
例如:
ngx_max_module = 0;
for(i = 0; ngx_module[i]; i++) {
ngx_modules[i]->index = ngx_max_module++;
}
*/
ngx_uint_t index;
//spare系列的保留變量,暫未使用
ngx_uint_t spare0;
ngx_uint_t spare1;
ngx_uint_t spare2;
ngx_uint_t spare3;
//模塊的版本,便于將來的拓展,目前只有一種,默認為1
ngx_uint_t version;
/*
ctx用于指向一類模塊的上下文結構體,
為什么需要ctx呢?因為前面說過,
Nginx模塊有許多種類,不同類模塊之間的功能差別很大。
例如,
事件類型的模塊主要處理I/O事件的相關功能,
HTTP類型的模塊主要處理HTTP應用層的功能。
這樣每個模塊都有了自己的特性,
而ctx會指向特定類型模塊的公共接口。
例如,
在HTTP模塊中,ctx需要指向ngx_http_module_t結構體
*/
void *ctx;
/*
commands處理nginx.conf中的配置項
*/
ngx_command_t *commands;
/*
type表示該模塊的類型,它與ctx指針是緊密相關的。
在官方Nginx中,它的取值范圍有以下5種:
NGX_HTTP_MODULE
NGX_CORE_MODULE
NGX_CONF_MODULE
NGX_EVENT_MODULE
NGX_MAIL_MODULE
*/
ngx_uint_t type;
/*
在Nginx的啟動、停止過程中,以下7個函數指針表示7個
執行點分別用調用這7種方法。對于任意一個方法而言,
如果不需要Nginx再某個時刻執行它,那么簡單地把它設為NULL
空指針即可。
*/
/*
雖然從字面上理解應當在master進程啟動的時,回調
init_master,但到目前為止,框架代碼從來不會調動它,
所以設置為NULL
*/
ngx_int_t (*init_master)(ngx_log_t *log);
/*
init_module回調方法在初始化所有模塊時候被調用。
在master/worker模式下,這個階段將在啟動worker子進程前完成。
*/
ngx_int_t (*init_module)(ngx_cycle_t *cycle);
/*
init_process 回調方法在正常服務前被調用。
在master/worker模式下,多個worker子進程已經產生。
在每個worker進程的初始化過程會調用所有模塊的init_process函數
*/
ngx_int_t (*init_process)(ngx_cycle_t *cycle);
/*
由于Nginx暫時不支持多線程模式,所以init_thread在框架中
沒有被調用過,設置為NULL
*/
ngx_int_t (*init_thread)(ngx_cycle_t *cycle);
/*
同上、exit_thread也不支持,設為NULL
*/
void (*exit_thread)(ngx_cycle_t *cycle);
/*
exit_process回調方法在服務停止前被調用。
在/master/worker模式下,worker進程會在退出前調用
*/
void (*exit_process)(ngx_cycle_t *cycle);
/*
exit_master回調方法將在master進程退出前被調用
*/
void (*exit_master)(ngx_cycle_t *cycle);
/*
一下8個spare_hook變量也是保留字段,目前沒有使用,
但可用Nginx提供的NGX_MODULE_V1_PADDING宏來填充
#define NGX_MODULE_V1_PADDING 0,0,0,0,0,0,0,0
*/
uintptr_t spare_hook0;
uintptr_t spare_hook1;
uintptr_t spare_hook2;
uintptr_t spare_hook3;
uintptr_t spare_hook4;
uintptr_t spare_hook5;
uintptr_t spare_hook6;
uintptr_t spare_hook7;
};
```
所以在定義一個HTTP模塊的時候,務必把type字段設置為NGX_HTTP_MODULE.
對于下列回調方法:init_module、init_process、exit_process、exit_master
調用他們的是Nginx框架代碼。換句話說,這4個回調方法與HTTP框架無關。
即使nginx.conf中沒有設置http{...}這種開啟HTTP功能的配置項,這些
回調方法仍然會被調用。因此,通常開發HTTP模塊時候都把他們設置為NULL。
這樣Nginx不作為web服務器使用時,不會執行HTTP模塊的任何代碼。
定義HTTP時候,最重要的是要設置ctx和commands這兩個成員。
對于HTTP類型模塊來說,ngx_module_中的ctx指針必須指向ngx_http_module_t接口。
所以最終我們定義個ngx_module_t 模塊如下:
```cpp
ngx_module_t ngx_http_mytest_module =
{
NGX_MODULE_V1,
&ngx_http_mytest_module_ctx, /* module context */
ngx_http_mytest_commands, /* module directives */
NGX_HTTP_MODULE, /* module type */
NULL, /* init master */
NULL, /* init module */
NULL, /* init process */
NULL, /* init thread */
NULL, /* exit thread */
NULL, /* exit process */
NULL, /* exit master */
NGX_MODULE_V1_PADDING
};
```
這樣, mytest 模塊在編譯的時候, 就可以被加入到ngx_modules的全局數組中了。
## 7.6 完整代碼 ngx_http_mytest_module.c
所以全部的編碼工作完畢,最終的代碼應該如下:
```cpp
#include <ngx_config.h>
#include <ngx_core.h>
#include <ngx_http.h>
#include <sys/types.h>
#include <unistd.h>
//定義處理用戶請求hello world handler
static ngx_int_t ngx_http_mytest_handler(ngx_http_request_t *r)
{
//必須是GET或者HEAD方法,否則返回405 Not Allowed
if (!(r->method & (NGX_HTTP_GET | NGX_HTTP_HEAD)))
{
return NGX_HTTP_NOT_ALLOWED;
}
//丟棄請求中的包體
ngx_int_t rc = ngx_http_discard_request_body(r);
if (rc != NGX_OK)
{
return rc;
}
//設置返回的Content-Type。注意,ngx_str_t有一個很方便的初始化宏
//ngx_string,它可以把ngx_str_t的data和len成員都設置好
ngx_str_t type = ngx_string("text/plain");
//返回的包體內容
ngx_str_t response = ngx_string("Hello World!");
//設置返回狀態碼
r->headers_out.status = NGX_HTTP_OK;
//響應包是有包體內容的,所以需要設置Content-Length長度
r->headers_out.content_length_n = response.len;
//設置Content-Type
r->headers_out.content_type = type;
//發送http頭部
rc = ngx_http_send_header(r);
if (rc == NGX_ERROR || rc > NGX_OK || r->header_only)
{
return rc;
}
//構造ngx_buf_t結構準備發送包體
ngx_buf_t *b;
b = ngx_create_temp_buf(r->pool, response.len);
if (b == NULL)
{
return NGX_HTTP_INTERNAL_SERVER_ERROR;
}
//將Hello World拷貝到ngx_buf_t指向的內存中
ngx_memcpy(b->pos, response.data, response.len);
//注意,一定要設置好last指針
b->last = b->pos + response.len;
//聲明這是最后一塊緩沖區
b->last_buf = 1;
//構造發送時的ngx_chain_t結構體
ngx_chain_t out;
//賦值ngx_buf_t
out.buf = b;
//設置next為NULL
out.next = NULL;
//最后一步發送包體,http框架會調用ngx_http_finalize_request方法
//結束請求
return ngx_http_output_filter(r, &out);
}
//定義command用于處理配置項參數的set方法
static char *
ngx_http_mytest(ngx_conf_t *cf, ngx_command_t *cmd, void *conf)
{
ngx_http_core_loc_conf_t *clcf;
//首先找到mytest配置項所屬的配置塊,clcf貌似是location塊內的數據
//結構,其實不然,它可以是main、srv或者loc級別配置項,也就是說在每個
//http{}和server{}內也都有一個ngx_http_core_loc_conf_t結構體
clcf = ngx_http_conf_get_module_loc_conf(cf, ngx_http_core_module);
//http框架在處理用戶請求進行到NGX_HTTP_CONTENT_PHASE階段時,如果
//請求的主機域名、URI與mytest配置項所在的配置塊相匹配,就將調用我們
//實現的ngx_http_mytest_handler方法處理這個請求
clcf->handler = ngx_http_mytest_handler;
return NGX_CONF_OK;
}
//定義ngx mytest 配置匹配的command
static ngx_command_t ngx_http_mytest_commands[] =
{
{
ngx_string("mytest"),
NGX_HTTP_MAIN_CONF | NGX_HTTP_SRV_CONF | NGX_HTTP_LOC_CONF | NGX_HTTP_LMT_CONF | NGX_CONF_NOARGS,
ngx_http_mytest,
NGX_HTTP_LOC_CONF_OFFSET,
0,
NULL
},
ngx_null_command
};
//定義ngx_http_module_t接口
static ngx_http_module_t ngx_http_mytest_module_ctx =
{
NULL, /* preconfiguration */
NULL, /* postconfiguration */
NULL, /* create main configuration */
NULL, /* init main configuration */
NULL, /* create server configuration */
NULL, /* merge server configuration */
NULL, /* create location configuration */
NULL /* merge location configuration */
};
//定義mytest模塊
ngx_module_t ngx_http_mytest_module =
{
NGX_MODULE_V1,
&ngx_http_mytest_module_ctx, /* module context */
ngx_http_mytest_commands, /* module directives */
NGX_HTTP_MODULE, /* module type */
NULL, /* init master */
NULL, /* init module */
NULL, /* init process */
NULL, /* init thread */
NULL, /* exit thread */
NULL, /* exit process */
NULL, /* exit master */
NGX_MODULE_V1_PADDING
};
```
## 7.7 配置文件 config
但是之后我們還需要給該模塊相同目錄下提供一個配置文件"config"表示在nginx編譯的時候的一些編譯選項。
```bash
ngx_addon_name=ngx_http_mytest_module
HTTP_MODULES="$HTTP_MODULES ngx_http_mytest_module"
NGX_ADDON_SRCS="$NGX_ADDON_SRCS $ngx_addon_dir/ngx_http_mytest_module.c"
```
所以我們的模塊編寫完畢了,當前目錄應該有兩個文件
```bash
ls
config ngx_http_mytest_module.c
```
## 7.8 重新編譯Nginx 并添加自定義模塊
進入Nginx源碼目錄
執行
```bash
./configure --prefix=/usr/local/nginx --add-module=/home/ace/openSource_test/nginx_module_http_test
```
--add-module為剛才自定義模塊源碼的目錄
```bash
make
sudo make install
```
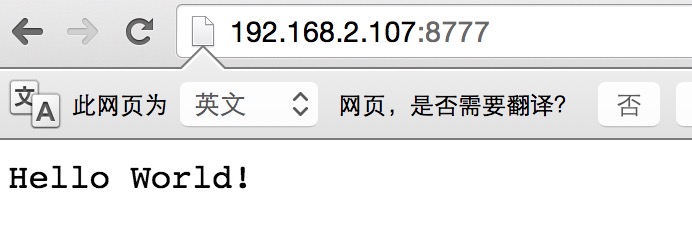
## 測試自定義模塊
修改nginx.conf文件
```php
server {
listen 8777;
server_name localhost;
location / {
mytest;#我們自定義模塊的名稱
}
}
```
重新啟動nginx
打開瀏覽器輸入地址和端口