### 1.Nginx 安裝
```
yum install nginx
```
* 因為都默認都占用80端口,所以開啟服務前先關掉apache
```
[root@VM_0_11_centos www]# systemctl stop httpd.service
[root@VM_0_11_centos www]# service nginx start
Redirecting to /bin/systemctl start nginx.service
```
### 2.虛擬域名配置
* 打開配置文件 `/etc/nginx/nginx.conf`
* 可以看到,用戶的自定義配置可以寫在 `/etc/nginx/conf.d/*.conf`
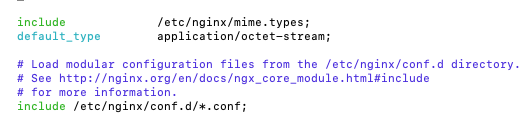
* 所以我們在`/etc/nginx/conf.d/`創建`yijia.conf`.編寫如下。
```
server {
listen 80;
server_name yijia.com;
root /data/www;
index index.html index.htm;
}
```
### 3.偽靜態設置
* 只需要修改yijia .conf
```
server {
listen 80;
server_name yijia.com;
root /data/www;
index index.html index.htm;
location / {
rewrite ^(.*)\.htmp$ /index.html;
}
}
```

### 4.反向代理
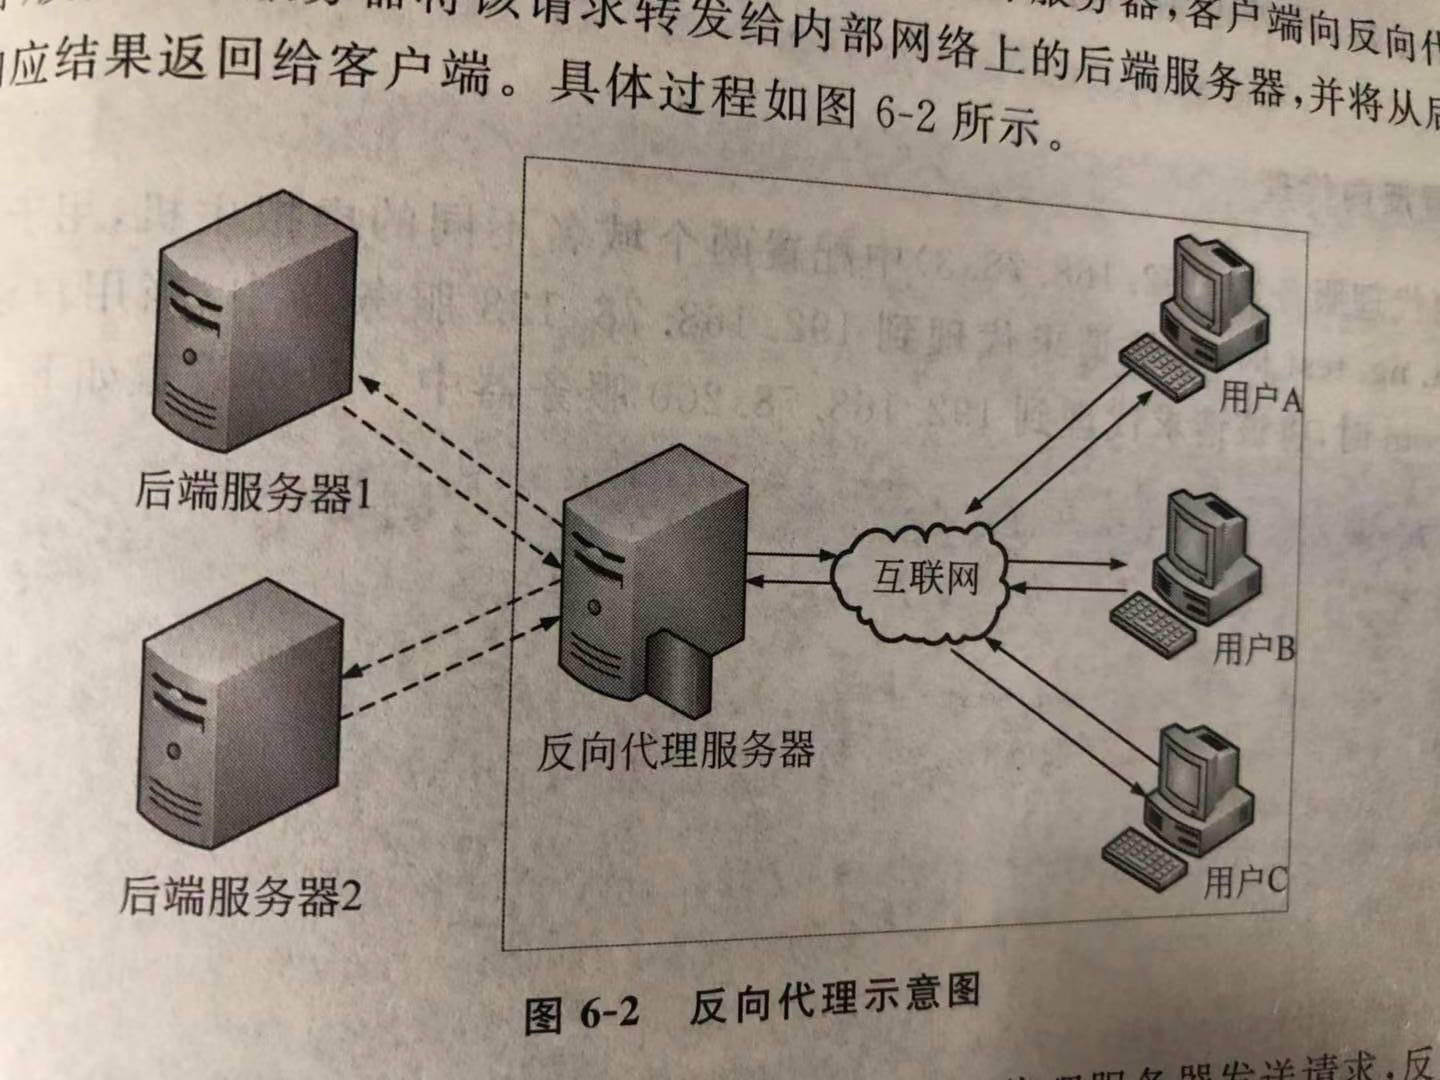
* 使用`proxy_pass`進行轉發至目標服務器。
* 修改yijia.conf
```
server {
listen 80;
server_name yijia.com;
root /data/www;
index index.html index.htm;
location / {
rewrite ^(.*)\.htmp$ /index.html;
#使用proxy_pass進行轉發設置,轉發至本機。
proxy_pass http://118.25.114.209;
}
}
server {
listen 80;
server_name proxyb.com;
location / {
rewrite ^(.*)\.htmp$ /index.html;
#使用proxy_pass進行轉發設置,轉發baidu。
proxy_pass http://www.baidu.com;
}
```
* 在客戶機上設置`hosts`把`proxyb.com`指向`nginx`所在服務器。
* 然后訪問`proxyb.com`會轉發至百度。
### 5.nginx 負載均衡
* 在upstream中配置負載服務器組。
```
#負載均衡組
upstream web_server{
#本機
server 118.25.114.209;
#taobao
server 140.205.94.189;
}
server {
listen 80;
server_name yijia.com;
location / {
#轉發到負載均衡組
proxy_pass http://web_server;
}
}
```
### 6.加權輪詢
> 可以設置負載均衡組中服務器訪問的權重。
> 使用weight設置權重。
```
upstream web_server{
#本機
server 118.25.114.209 weight=1 max_fails=2 fail_timeout=2;
#taobao
server 140.205.94.189 weight=3 ;
}
```
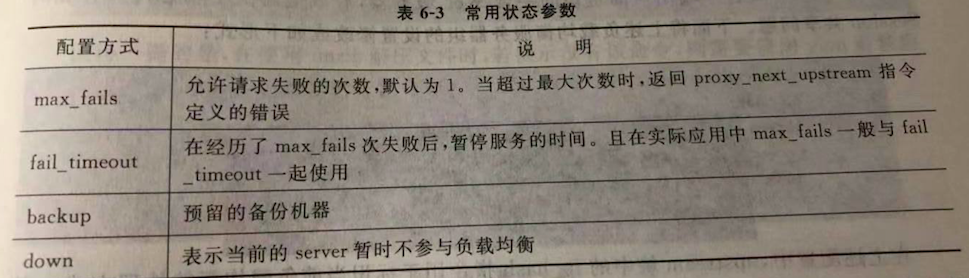
### 7.ip_hash負載均衡
> 按照IP的hash結果分配服務器。可以使同一個IP客戶端用戶固定訪問某一臺服務器,解決了session共享問題。
```
upstream web_server{
ip_bash;
#本機
server 118.25.114.209 weight=1 max_fails=2 fail_timeout=2;
#taobao
server 140.205.94.189 weight=3 ;
}
```
