我們在該應用中使用**EF Core**。EF Core 是一個由微軟提供的**對象關系映射**(**ORM**) 提供程序。ORM 提供了抽象,讓您感覺像是在使用代碼實體對象而不是數據庫表。我們將在\[*第 6 章*\] 《使用數據訪問基礎架構》中介紹 ABP 的 EF Core 集成。現在,我們先了解如何使用它。
1. 首先,我們將實體添加到`DbContext`類并定義實體和數據庫表之間的映射;
2. 然后,我們將使用 EF Core 的**Code First**方法創建對應的數據庫表;
3. 接下來,我們再看 ABP 的**種子數據**系統,并插入一些初始數據;
4. 最后,我們會將數據庫表結構和種子數據遷移到數據庫中,以便為應用程序做好準備。
讓我們從定義`DbSet`實體的屬性開始。
## 將實體添加到 DbContext 類
EF的`DbContext`有兩個主要用途:
1. 定義實體和數據庫表之間映射;
2. 訪問數據庫和執行數據庫相關實體的操作。
*在.EntityFrameworkCore*項目中打開`ProductManagementDbContext`該類,添加以下屬性:
```
public DbSet<Product> Products { get; set; }
public DbSet<Category> Categories { get; set; }
```
EF Core 可以使用基于屬性名稱和類型的約定進行大部分映射。如果要自定義默認的映射配置或額外的配置,有兩種方法:**數據注釋**(屬性)和**Fluent API**。
在數據注釋方法中,我們向實體屬性添加特性,例如`[Required]`和`[StringLength]`,非常方便,也很容易理解。
與Fluent API相比,數據注釋容易受限,比如,當你需要使用EF Core的自定義特性時,他會讓你的領域層依賴EF Core的NuGet包,比如`[Index]`和`[Owned]`
在本章中,我更傾向 Fluent API 方法,它使實體更干凈,并將所有 ORM 邏輯放在基礎設施層中。
## 將實體映射到數據庫表
類`ProductManagementDbContext`(在\*.EntityFrameworkCore\*項目中)包含一個`OnModelCreating`方法用來配置實體到數據庫表的映射。當你首先創建您的解決方案時,此方法看起來如下所示:
```
protected override void OnModelCreating(ModelBuilder builder)
{
????base.OnModelCreating(builder);
????builder.ConfigurePermissionManagement();
????builder.ConfigureSettingManagement();
????builder.ConfigureIdentity();
????...configuration of the other modules
????/* Configure your own tables/entities here */
}
```
再添加`Category`和`Product`實體的配置和映射關系:
```
builder.Entity<Category>(b =>
{
??????b.ToTable("Categories");
??????b.Property(x => x.Name)
????????????.HasMaxLength(CategoryConsts.MaxNameLength)
????????????.IsRequired();
??????b.HasIndex(x => x.Name);
});
builder.Entity<Product>(b =>
{
??????b.ToTable("Products");
??????b.Property(x => x.Name)
????????????.HasMaxLength(ProductConsts.MaxNameLength)
????????????.IsRequired();
??????b.HasOne(x => x.Category)
???????????.WithMany()
???????????.HasForeignKey(x => x.CategoryId)
???????????.OnDelete(DeleteBehavior.Restrict)
???????????.IsRequired();
b.HasIndex(x => x.Name).IsUnique();
});
```
我們使用`CategoryConsts.MaxNameLength`設置表`Category`的`Name`字段的最大長度。`Name`字段也是必填屬性。最后,我們為屬性定義了一個唯一的數據庫索引,因為它有助于按`Name`字段搜索。
`Product`映射類似于`Category`。此外,它還定義了`Category`實體與`Product`實體之間的關系;一個`Product`實體屬于一個`Category`實體,而一個`Category`實體可以有多個`Product`實體。
您可以參考 EF Core 文檔進一步了解 Fluent API 的所有詳細信息和其他選項。
映射配置完成后,我們就可以創建數據庫遷移,把我們新加的實體轉換成數據庫結構。
## 添加遷移命令
當你創建一個新的實體或對現有實體進行更改,還應該同步到數據庫中。EF Core 的**Code First**就是用來同步數據庫和實體結構的強大工具。通常,我們需要先生成遷移腳本,然后執行遷移命令。遷移會對數據庫的架構進行增量更改。有兩種方法可以生成新遷移:
### 1 使用 Visual Studio
如果你正在使用Visual Studio,請打開視圖|包管理器控制臺菜單:
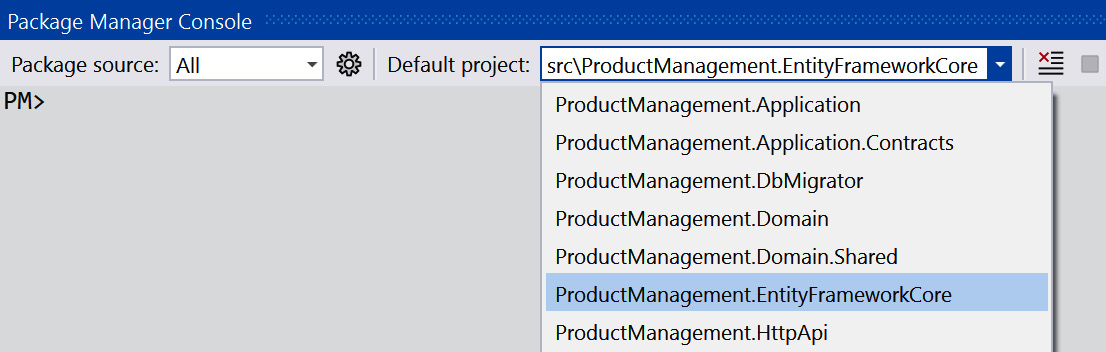
>[warning] 選擇.EntityFrameworkCore項目作為默認項目,并右鍵設置.Web項目作為啟動項目
現在,您可以在 控制臺中鍵入以下命令:
```
Add-Migration "Added_Categories_And_Products"
```
此命令的輸出應類似于:
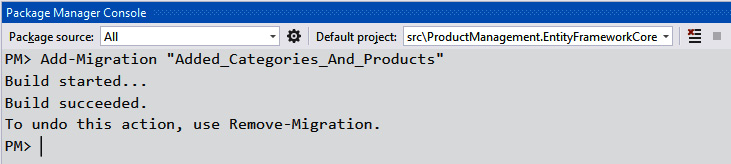
如果你得到一個諸如*No DbContext was found in assembly...* 之類的錯誤,請確保您已將\*.EntityFrameworkCore\*項目設置為默認項目。
如果一切順利,會在.EntityFrameworkCore項目的Migrations文件夾中添加一個新的遷移類。
### 2 在命令行中
如果您不使用Visual Studio,你可以使用 EF Core命令行工具。如果尚未安裝,請在命令行終端中執行以下命令:
```
dotnet tool install --global dotnet-ef
```
現在,在.EntityFrameworkCore項目的根目錄中打開一個命令行終端,然后輸入以下命令:
```
dotnet ef migrations add "Added_Categories_And_Products"
```
一個新的遷移類會添加到.EntityFrameworkCore項目的Migrations文件夾中。
## 種子數據
種子數據系統用于遷移數據庫時添加一些初始數據。例如,身份模塊在數據庫中創建一個管理員用戶,該用戶具有登錄應用程序的所有權限。
雖然種子數據在我們的場景中不是必需的,這里我想將一些產品類別和產品的初始化數據添加到數據庫中,以便更輕松地開發和測試應用程序。
關于 EF Core 種子數據
本節使用 ABP 的種子數據系統,而 EF Core 有自己的種子數據功能。ABP 種子數據系統允許您在代碼中**注入運行時服務并實現高級邏輯**,適用于**開發、測試和生產環境**。但是,對于簡單的開發和測試,使用 EF Core 的種子數據基本夠用。請查看[官方文檔](https://docs.microsoft.com/en-us/ef/core/modeling/data-seeding)。
在ProductManagement.Domain項目的Data文件夾中創建一個`ProductManagementDataSeedContributor`類:
```
using ProductManagement.Categories;
using ProductManagement.Products;
using System;
using System.Threading.Tasks;
using Volo.Abp.Data;
using Volo.Abp.DependencyInjection;
using Volo.Abp.Domain.Repositories;
namespace ProductManagement.Data
{
????public class ProductManagementDataSeedContributor :
???????????IDataSeedContributor, ITransientDependency
????{
????????private readonly IRepository<Category,?Guid>_categoryRepository;
????????private readonly IRepository<Product,?Guid>_productRepository;
????????public ProductManagementDataSeedContributor(
????????????IRepository<Category, Guid> categoryRepository,
????????????IRepository<Product, Guid> productRepository)
????????{
????????????_categoryRepository = categoryRepository;
????????????_productRepository = productRepository;
????????}
????????public async Task SeedAsync(DataSeedContext?????????????????????context)
????????{
????????????/***** TODO: Seed initial data here *****/
????????}
????}
}
```
該類實現了`IDataSeedContributor`接口,ABP 會自動發現并調用其`SeedAsync`方法。您也可以實現構造函數注入并使用類中的任何服務(例如本示例中的存儲庫)。
然后,在`SeedAsync`方法內部編碼:
```
if (await _categoryRepository.CountAsync() > 0)
{
????return;
}
var monitors = new Category { Name = "Monitors" };
var printers = new Category { Name = "Printers" };
await _categoryRepository.InsertManyAsync(new[] { monitors, printers });
var monitor1 = new Product
{
????Category = monitors,
????Name = "XP VH240a 23.8-Inch Full HD 1080p IPS LED ?Monitor",
????Price = 163,
????ReleaseDate = new DateTime(2019, 05, 24),
????StockState = ProductStockState.InStock
};
var monitor2 = new Product
{
????Category = monitors,
????Name = "Clips 328E1CA 32-Inch Curved Monitor, 4K UHD",
????Price = 349,
????IsFreeCargo = true,
????ReleaseDate = new DateTime(2022, 02, 01),
????StockState = ProductStockState.PreOrder
};
var printer1 = new Product
{
????Category = monitors,
????Name = "Acme Monochrome Laser Printer, Compact All-In One",
????Price = 199,
????ReleaseDate = new DateTime(2020, 11, 16),
????StockState = ProductStockState.NotAvailable
};
await _productRepository.InsertManyAsync(new[] { monitor1, monitor2, printer1 });
```
我們創建了兩個類別和三種產品并將它們插入到數據庫中。每次您運行DbMigrator應用時都會執行此類。同時,我們檢查`if (await _categoryRepository.CountAsync() > 0)`以防止數據重復插入。
種子數據和數據庫表結構準備就緒, 下面進入正式遷移。
## 遷移數據庫
>[warning] EF Core 和 ABP 遷移有何區別?
ABP 啟動模板中包含一個在開發和生產環境中非常有用的DbMigrator控制臺項目。當您運行它時,所有待處理的遷移都將應用到數據庫中,并執行數據初始化。
它**支持多租戶/多數據庫的場景**,這是使用`Update-Database`無法實現的。
>[warning] 為什么要從主應用中分離出遷移項目?
在生產環境中部署和執行時,通常作為**持續部署**(**CD**) 管道的一個環節。從主應用中分離出遷移功能有個好處,主應用不需要更改數據庫的權限。此外,如果不做分離可能會遇到數據庫遷移和執行的并發問題。
將.DbMigrator項目設置為啟動項目,然后*按 Ctrl*+*F5* 運行該項目,待應用程序退出后,您可以檢查*Categories*和*Products*表是否已插入數據庫中(如果您使用 Visual Studio,則可以使用**SQL Server 對象資源管理器**連接到**LocalDB**并瀏覽數據庫)。
數據庫已準備好了。接下來我們將在 UI 上顯示產品數據。
- 前言
- 第一部分
- 第1章 現代軟件開發和 ABP 框架
- 企業級 Web 開發的挑戰
- ABP框架的能力清單
- 第2章 ABP框架入門
- 安裝 ABP CLI
- 創建新解決方案
- 運行解決方案
- 探索預構建模塊
- 第3章 逐步開發開發ABP應用
- 創建解決方案
- 定義領域對象
- EFCore和數據庫映射
- 定義應用服務
- 測試產品
- 產品列表
- 創建產品
- 編輯產品
- 刪除產品
- 第4章 探索 EventHub解決方案
- 應用介紹
- 架構探索
- 方案運行
- 第二部分
- 第5章 探索ABP基礎架構
- 了解模塊化
- 使用依賴注入系統
- 配置應用程序
- 實現選項模式
- 日志系統
- 第6章 數據訪問基礎架構
- 定義實體
- 定義倉儲庫
- EF Core集成
- 了解 UoW
- 第7章 探索橫切關注點
- 認證授權
- 用戶驗證
- 異常處理
- 第8章 體驗 ABP 的功能和服務
- 獲取當前用戶
- 使用數據過濾
- 控制審計日志
- 緩存數據
- 本地化用戶界面
- 第三部分
- 第9章 理解領域驅動設計
- 介紹 DDD
- 構建基于 DDD 的 解決方案
- 處理多個應用程序
- 了解執行流程
- DDD的通用原則
- 第10章 領域層 Domain
- 領域事件案例分析
- 聚合和實體的設計原則和實踐
- 實現領域服務
- 落地存儲庫
- 構建規約(Specification)
- 領域事件
- 第11章 應用層 Application
- 落地應用服務
- 設計 DTO
- 理解各層的職責
- 第四部分
- 第12章 MVC/Razor 頁面
- 主題系統
- 綁定和壓縮
- 導航菜單
- Bootstrap標簽助手
- 創建表單并驗證
- 使用模態窗口
- 使用JS API
- 調用HTTP API
- 第13章 Blazor WebAssembly UI
- 什么是Blazor
- ABP Blazor UI
- 驗證用戶身份
- 理解主題系統
- 使用菜單
- 使用基本服務
- 使用UI服務
- 消費HTTP API
- 使用全局腳本和樣式
- 第14章 HTTP API 和實時服務
- 構建HTTP API
- 使用HTTP API
- 使用SignalR
- 第五部分
- 第15章 落地模塊化
- 理解模塊化
- 構建支付模塊
- 安裝模塊
- 第16章 實現多租戶
- 理解多租戶
- 多租戶基礎設施
- 使用功能系統
- 何時使用多租戶
- 第17章 構建自動化測試
- 了解ABP測試基礎設施
- 構建單元測試
- 構建集成測試