# 1. 前言
學習之前首先到官網看看[https://tensorflow.google.cn/js](https://tensorflow.google.cn/js),下面關于它的介紹來自官網:
> TensorFlow.js 是一個 JavaScript 庫,用于在瀏覽器和 Node.js 訓練和部署機器學習模型。
廢話不多說,先進入環境配置。
# 2. 環境
如果是HTML頁面中需要,可以直接引入:
~~~
<script src="https://cdn.jsdelivr.net/npm/@tensorflow/tfjs@2.0.0/dist/tf.min.js"></script>
~~~
可以npm或者yarn進行安裝,使用:
~~~
npm install @tensorflow/tfjs
~~~
或:
~~~
yarn add @tensorflow/tfjs
~~~
當然,如果是Linux系統,同樣可以選擇使用gpu版本:
~~~
npm install @tensorflow/tfjs-node-gpu
~~~
## 2.1 本地React環境構建
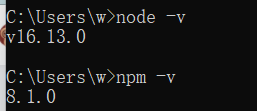
因為支持npm和yarn,這里就使用前段時間所使用過的React的方式來開發。首先確保node和npm都安裝成功:
然后,使用命令:
```
npx create-react-app my-app
```
但是因為有段時間沒有用了,這里需要重新安裝下create-react-app,所以先卸載:
```
yarn global remove create-react-app
```
然后安裝即可,即:
```
npm install -g create-react-app
```

然后使用:
```
npx create-react-app my-app
```

然后就可以根據提示來啟動項目:
```
Inside that directory, you can run several commands:
npm start
Starts the development server.
npm run build
Bundles the app into static files for production.
npm test
Starts the test runner.
npm run eject
Removes this tool and copies build dependencies, configuration files
and scripts into the app directory. If you do this, you can’t go back!
We suggest that you begin by typing:
cd my-app
npm start
Happy hacking!
```
本地也可以看見創建的項目文件:

這里為了編輯方便直接使用VS打開這個項目。
## 2.2 本地TensorFlowJS環境構建
在此基礎上需要安裝tensorflow.js。即:
```
npm install @tensorflow/tfjs
```

# 3. 測試
導入包:
```
import * as tf from '@tensorflow/tfjs'
```
此軟件包與您在瀏覽器中使用的軟件包相同。在此軟件包中,運算在 CPU 上以原生 JavaScript 運行。此軟件包比其他軟件包小得多,因為它不需要 TensorFlow 二進制文件,但是速度要慢得多。
## 3.1 案例:

# 4. 后記
但是本質上來說還是和Python版本的一樣。語言的差異在這里并不大。故而,這里還是需要將Python版本的再次回顧和深入一下才能繼續嘗試在JS版本的Tensorflow。
