
1、教程網址:
[https://piaosanlang.gitbooks.io/spiders/content/](https://piaosanlang.gitbooks.io/spiders/content/)
### 創建項目
在開始爬取之前,您必須創建一個新的`Scrapy`項目。 進入您打算存儲代碼的目錄中,運行下列命令:
~~~
scrapy startproject tutorial
~~~
運行過程:
該命令將會創建包含下列內容的 tutorial 目錄:
這些文件分別是:
~~~
scrapy.cfg: 項目的配置文件;(用于發布到服務器)
tutorial/: 該項目文件夾。之后將在此編寫Python代碼。
tutorial/items.py: 項目中的item文件;(定義結構化數據字段field).
tutorial/pipelines.py: 項目中的pipelines文件;(用于存放執行后期數據處理的功能,定義如何存儲結構化數據)
tutorial/settings.py: 項目的設置文件;(如何修改User-Agent,設置爬取時間間隔,設置代理,配置中間件等等)
tutorial/spiders/: 放置spider代碼的目錄;(編寫爬取網站規則)
~~~
### 定義Item
Item 定義結構化數據字段,用來保存爬取到的數據;其使用方法和python字典類似
可以通過創建一個`scrapy.Item`類, 并且定義類型為`scrapy.Field`的類屬性來定義一個Item。
首先根據需要從[騰訊招聘](http://hr.tencent.com/position.php?&start=0#a)獲取到的數據對item進行建模。 我們需要從`騰訊招聘`中獲取 職位名稱、`職位詳情頁url`、職位類別、人數、工作地點以及發布時間。 對此,在item中定義相應的字段。編輯`tutorial`目錄中的`items.py`文件:
~~~
import scrapy
class RecruitItem(scrapy.Item):
name = scrapy.Field()
detailLink = scrapy.Field()
catalog = scrapy.Field()
recruitNumber = scrapy.Field()
workLocation = scrapy.Field()
publishTime = scrapy.Field()
~~~
### 編寫第一個爬蟲(Spider)
Spider是開發者編寫用于從單個網站(或者一些網站)爬取數據的類。
創建一個Spider,必須繼承 'scrapy.Spider' 類, 需要定義以下三個屬性:
* name:
spider名字;必須是唯一的
* start\_urls:
初始的URL列表
* parse(self, response):
每個初始URL完成下載后被調用
這個函數要完成的功能:
~~~
1.負責解析返回的網頁數據(response.body),提取結構化數據(生成item)
2.生成需要下一頁的請求URL。
~~~
以下為我們的第一個Spider代碼,保存在 tutorial/spiders 目錄下的 tencent\_spider.py 文件中:
~~~
import scrapy
class RecruitSpider(scrapy.spiders.Spider):
name = "tencent"
allowed_domains = ["hr.tencent.com"]
start_urls = [
"http://hr.tencent.com/position.php?&start=0#a"
]
def parse(self, response):
f = open('tengxun.txt', 'wb')
f.write(response.body)
f.close()
~~~
### 爬取
進入項目的根目錄,執行下列命令啟動spider:
~~~
scrapy crawl tencent
~~~
crawl tencent 啟動用于爬取 tencent 的spider,您將得到類似的輸出:
現在,查看當前目錄,會注意到有文件被創建了: tengxun.txt,正如我們的 parse 方法里做的一樣。
**注意,在剛啟動的時候會有一段error信息,不用理會**
在第六天作業里面有說明原因
~~~
2016-08-11 13:07:35 [boto] ERROR: Caught exception reading instance data
Traceback (most recent call last):
File "/usr/lib/python2.7/dist-packages/boto/utils.py", line 210, in retry_url
r = opener.open(req, timeout=timeout)
File "/usr/lib/python2.7/urllib2.py", line 429, in open
response = self._open(req, data)
File "/usr/lib/python2.7/urllib2.py", line 447, in _open
'_open', req)
File "/usr/lib/python2.7/urllib2.py", line 407, in _call_chain
result = func(*args)
File "/usr/lib/python2.7/urllib2.py", line 1228, in http_open
return self.do_open(httplib.HTTPConnection, req)
File "/usr/lib/python2.7/urllib2.py", line 1198, in do_open
raise URLError(err)
URLError: <urlopen error timed out>
~~~
### 剛才發生了什么?
Scrapy為Spider的 start\_urls 屬性中的每個URL創建了`scrapy.Request`對象,并將 parse 方法作為回調函數(callback)賦值給了Request。
Request對象經過調度,執行生成`scrapy.http.Response`對象并送回給`parse()`方法。
### 提取Item
#### Selectors選擇器簡介
`Scrapy Selectors`內置`XPath`和`CSS Selector`表達式機制
XPath表達式的例子及對應的含義:
~~~
/html/head/title: 選擇<HTML>文檔中 <head> 標簽內的 <title> 元素
/html/head/title/text(): 選擇上面提到的 <title> 元素的文字
//td: 選擇所有的 <td> 元素
//div[@class="mine"]: 選擇所有具有 class="mine" 屬性的 div 元素
~~~
Selector有四個基本的方法:
~~~
xpath(): 傳入xpath表達式,返回該表達式所對應的所有節點的selector list列表 。
css(): 傳入CSS表達式,返回該表達式所對應的所有節點的selector list列表.
extract(): 序列化該節點為unicode字符串并返回list。
re(): 根據傳入的正則表達式對數據進行提取,返回unicode字符串list列表。
~~~
### 嘗試Selector選擇器
為了介紹Selector的使用方法,接下來我們將要使用內置的 scrapy shell 。Scrapy Shell需要您預裝好IPython(一個擴展的Python終端)。
您需要進入項目的根目錄,執行下列命令來啟動shell:
~~~
scrapy shell "http://hr.tencent.com/position.php?&start=0#a"
~~~
注解: 當您在終端運行Scrapy時,請一定記得給url地址加上引號,否則包含參數的url(例如 & 字符)會導致Scrapy運行失敗。
shell的輸出類似:
當shell載入后,將得到一個包含response數據的本地`response`變量。輸入`response.body`將輸出response的包體, 輸出`response.headers`可以看到response的包頭。
* 當輸入`response.selector`時, 將獲取到一個response 初始化的類`Selector`的對象
* 此時,可以通過使用 response.selector.xpath() 或 response.selector.css() 來對 response 進行查詢。
* 或者,scrapy也對 response.selector.xpath() 及 response.selector.css() 提供了一些快捷方式, 例如 response.xpath() 或 response.css()
讓我們來試試:
~~~
response.xpath('//title')
[<Selector xpath='//title' data=u'<title>\u804c\u4f4d\u641c\u7d22 | \u793e\u4f1a\u62db\u8058 | Tencent \u817e\u8baf\u62db\u8058</title'>]
response.xpath('//title').extract()
[u'<title>\u804c\u4f4d\u641c\u7d22 | \u793e\u4f1a\u62db\u8058 | Tencent \u817e\u8baf\u62db\u8058</title>']
print response.xpath('//title').extract()[0]
<title>職位搜索 | 社會招聘 | Tencent 騰訊招聘</title>
response.xpath('//title/text()')
<Selector xpath='//title/text()' data=u'\u804c\u4f4d\u641c\u7d22 | \u793e\u4f1a\u62db\u8058 | Tencent \u817e\u8baf\u62db\u8058'>
response.xpath('//title/text()')[0].extract()
u'\u804c\u4f4d\u641c\u7d22 | \u793e\u4f1a\u62db\u8058 | Tencent \u817e\u8baf\u62db\u8058'
print response.xpath('//title/text()')[0].extract()
職位搜索 | 社會招聘 | Tencent 騰訊招聘
response.xpath('//title/text()').re('(\w+):')
[u'\u804c\u4f4d\u641c\u7d22',
u'\u793e\u4f1a\u62db\u8058',
u'Tencent',
u'\u817e\u8baf\u62db\u8058']
~~~
### 提取數據
現在,我們來嘗試從這些頁面中提取些有用的數據。
我們可以通過XPath選擇該頁面中網站列表里所有`lass=even`元素:
~~~
site = response.xpath('//*[@class="even"]')
~~~
職位名稱:
~~~
print site[0].xpath('./td[1]/a/text()').extract()[0]
TEG15-運營開發工程師(深圳)
~~~
職位名稱詳情頁:
~~~
print site[0].xpath('./td[1]/a/@href').extract()[0]
position_detail.php?id=20744&keywords=&tid=0&lid=0
~~~
職位類別:
~~~
print site[0].xpath('./td[2]/text()').extract()[0]
技術類
~~~
對于`.xpath()`調用返回`selector`組成的`list`, 因此可以拼接更多的 .xpath() 來進一步獲取某個節點。
~~~
for sel in response.xpath('//*[@class="even"]'):
name = sel.xpath('./td[1]/a/text()').extract()[0]
detailLink = sel.xpath('./td[1]/a/@href').extract()[0]
catalog = sel.xpath('./td[2]/text()').extract()[0]
recruitNumber = sel.xpath('./td[3]/text()').extract()[0]
workLocation = sel.xpath('./td[4]/text()').extract()[0]
publishTime = sel.xpath('./td[5]/text()').extract()[0]
print name, detailLink, catalog,recruitNumber,workLocation,publishTime
~~~
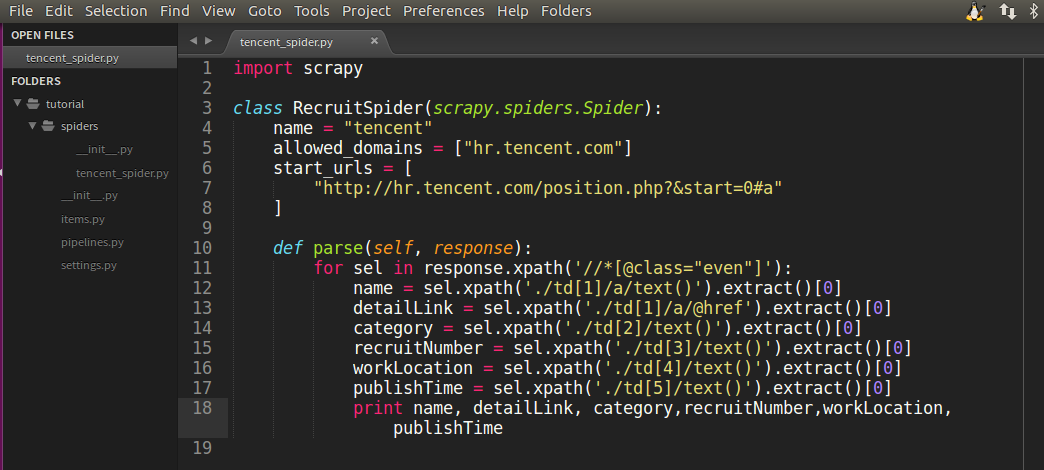
在我們的`tencent_spider.py`文件修改成如下代碼:
~~~
import scrapy
class RecruitSpider(scrapy.spiders.Spider):
name = "tencent"
allowed_domains = ["hr.tencent.com"]
start_urls = [
"http://hr.tencent.com/position.php?&start=0#a"
]
def parse(self, response):
for sel in response.xpath('//*[@class="even"]'):
name = sel.xpath('./td[1]/a/text()').extract()[0]
detailLink = sel.xpath('./td[1]/a/@href').extract()[0]
catalog = sel.xpath('./td[2]/text()').extract()[0]
recruitNumber = sel.xpath('./td[3]/text()').extract()[0]
workLocation = sel.xpath('./td[4]/text()').extract()[0]
publishTime = sel.xpath('./td[5]/text()').extract()[0]
print name, detailLink, catalog,recruitNumber,workLocation,publishTime
~~~
如圖所示:
現在嘗試再次爬取`hr.tencent.com`,您將看到爬取到的網站信息被成功輸出:
~~~
scrapy crawl tencent
~~~
運行過程:
### 使用item
Item 對象是自定義的python字典。可以使用標準的字典語法來獲取到其每個字段的值。
輸入 `scrapy shell'
~~~
import scrapy
class RecruitItem(scrapy.Item):
name = scrapy.Field()
detailLink = scrapy.Field()
catalog = scrapy.Field()
recruitNumber = scrapy.Field()
workLocation = scrapy.Field()
publishTime = scrapy.Field()
item = RecruitItem()
item['name'] = 'sanlang'
item['name']
'sanlang'
~~~
一般來說,Spider將會將爬取到的數據以Item對象返回。所以為了將爬取的數據返回,最終`tencent_spider.py`代碼將是:
~~~
import scrapy
from tutorial.items import RecruitItem
class RecruitSpider(scrapy.spiders.Spider):
name = "tencent"
allowed_domains = ["hr.tencent.com"]
start_urls = [
"http://hr.tencent.com/position.php?&start=0#a"
]
def parse(self, response):
for sel in response.xpath('//*[@class="even"]'):
name = sel.xpath('./td[1]/a/text()').extract()[0]
detailLink = sel.xpath('./td[1]/a/@href').extract()[0]
catalog = sel.xpath('./td[2]/text()').extract()[0]
recruitNumber = sel.xpath('./td[3]/text()').extract()[0]
workLocation = sel.xpath('./td[4]/text()').extract()[0]
publishTime = sel.xpath('./td[5]/text()').extract()[0]
print name, detailLink, catalog,recruitNumber,workLocation,publishTime
item = RecruitItem()
item['name']=name.encode('utf-8')
item['detailLink']=detailLink.encode('utf-8')
item['catalog']=catalog.encode('utf-8')
item['recruitNumber']=recruitNumber.encode('utf-8')
item['workLocation']=workLocation.encode('utf-8')
item['publishTime']=publishTime.encode('utf-8')
yield item
~~~
現在對`hr.tencent.com`進行爬取將會產生 RecruitItem 對象:
運行過程:
### 保存爬取到的數據
最簡單存儲爬取的數據的方式是使用`Feed exports`:
~~~
scrapy crawl tencent -o items.json
~~~
該命令將采用 JSON 格式對爬取的數據進行序列化,生成 items.json 文件。
如果需要對爬取到的item做更多更為復雜的操作,您可以編寫 Item Pipeline 。 類似于我們在創建項目時對Item做的,用于您編寫自己的 tutorial/pipelines.py 也被創建。 不過如果您僅僅想要保存item,您不需要實現任何的pipeline。
- thinkphp
- thinkphp筆記
- 后臺登陸退出
- config配置
- 隱藏后臺模塊
- 單獨調用騰訊云行為驗證碼
- api接口跨域問題
- api接口創建案例代碼
- 使用gateway worker
- 使用swoole代碼筆記
- 使用隊列 think-queue筆記
- 后臺布局
- MySQL
- 1、關于lnmp mysql的一個坑
- 2、mysql實現group by后取各分組的最新一條
- 其他
- 搞笑的注釋代碼
- 分頁類
- nodejs 打包網址為exe
- 免費天氣預報API接口
- Ajax
- 簡單的ajax分頁1
- 通用ajax-post提交
- 引用的類庫文件
- Auth.php
- Auth.php權限控制對應的數據庫表結構
- Layui.php
- Pinyin.php
- Random.php
- Tree.php
- Tree2.php
- Js-Jq
- Git的使用
- 3、bootstrap-datetimepicker實現兩個時間范圍輸入
- CentOS安裝SSR做梯子
- Python爬蟲
- 1、安裝Gerapy
- 2、安裝Scrapy
- 3、Scrapy使用
- 4、Scrapy框架,爬取網站返回json數據(spider源碼)
- 0、Python pip更換國內源(一句命令換源)
- 服務器運維
- 1、寶塔使用webhook更新服務器代碼
- 2、搭建內網穿透
- 3、數據庫主從同步
- 4、數據庫復制
- hui-Shop問題
- 1、前端模板的注意事項
- 2、模板標簽