
# 快速入門(一):基礎
本章介紹了`ThinkPHP5.0`的安裝及基本使用,并給出了一個最簡單的示例帶你了解如何開始開發,主要包含:
- - [簡介](http://www.hmoore.net/thinkphp/thinkphp5_quickstart/145249#u7B80u4ECB)
- [官網下載](http://www.hmoore.net/thinkphp/thinkphp5_quickstart/145249#u5B98u7F51u4E0Bu8F7D)
- [Composer安裝和更新](http://www.hmoore.net/thinkphp/thinkphp5_quickstart/145249#composer-)
- [Git下載和更新](http://www.hmoore.net/thinkphp/thinkphp5_quickstart/145249#git-)
- [目錄結構](http://www.hmoore.net/thinkphp/thinkphp5_quickstart/145249#u76EEu5F55u7ED3u6784)
- [運行環境](http://www.hmoore.net/thinkphp/thinkphp5_quickstart/145249#u8FD0u884Cu73AFu5883)
- [入口文件](http://www.hmoore.net/thinkphp/thinkphp5_quickstart/145249#u5165u53E3u6587u4EF6)
- [調試模式](http://www.hmoore.net/thinkphp/thinkphp5_quickstart/145249#u8C03u8BD5u6A21u5F0F)
- [控制器](http://www.hmoore.net/thinkphp/thinkphp5_quickstart/145249#u63A7u5236u5668)
- [視圖](http://www.hmoore.net/thinkphp/thinkphp5_quickstart/145249#u89C6u56FE)
- [讀取數據](http://www.hmoore.net/thinkphp/thinkphp5_quickstart/145249#u8BFBu53D6u6570u636E)
- [總結](http://www.hmoore.net/thinkphp/thinkphp5_quickstart/145249#u603Bu7ED3)
> #### 在學習`ThinkPHP5.0`之前,如果你還不理解面向對象和命名空間的概念,建議首先去PHP手冊惡補下PHP的相關基礎知識,否則將成為你學習5.0的最大障礙。
## 簡介
`ThinkPHP`是一個快速、簡單的基于`MVC`和面向對象的輕量級`PHP`開發框架,遵循`Apache2`開源協議發布,從誕生以來一直秉承簡潔實用的設計原則,在保持出色的性能和至簡的代碼的同時,尤其注重開發體驗和易用性,并且擁有眾多的原創功能和特性,為`WEB`應用和`API`開發提供了強有力的支持。
> `ThinkPHP5.0`版本是一個顛覆和重構版本,也是`ThinkPHP`十周年獻禮版本,基于`PHP5.4`設計(完美支持`PHP7`),采用全新的架構思想,引入了很多的`PHP`新特性,優化了核心,減少了依賴,支持`Composer`,實現了真正的惰性加載,并且為`API`開發做了深入的支持,在功能、性能以及靈活性方面都較為突出。
## 官網下載
ThinkPHP最新的穩定版本可以在([官方網站下載頁](http://thinkphp.cn/down/framework.html))下載,不過官網下載版本并不是實時更新的,我們會在每個版本更新發布的時候重新打包,如果你需要實時更新版本,請使用`Git`版本庫或者`Composer`安裝。
## Composer安裝和更新
ThinkPHP`5.0`支持使用`Composer`安裝和更新,如果還沒有安裝 `Composer`,你可以按 [Composer安裝](http://www.hmoore.net/thinkphp/composer/35669) 中的方法安裝。在 `Linux` 和 `Mac OS X` 中可以運行如下命令:
```
<pre class="calibre18">
```
curl -sS <span class="hljs-string">https:</span><span class="hljs-comment">//getcomposer.org/installer | php</span>
mv composer.phar <span class="hljs-regexp">/usr/</span>local<span class="hljs-regexp">/bin/</span>composer
```
```
在 `Windows` 中,你需要下載并運行 [Composer-Setup.exe](https://getcomposer.org/Composer-Setup.exe)。
> ### 提示:
>
> - - - - - -
>
> 如果遇到任何問題或者想更深入地學習 Composer,請參考 [Composer 官方文檔(英文)](https://getcomposer.org/doc/),看云上有 [Composer 的中文版本](http://www.hmoore.net/thinkphp/composer)。
如果你已經安裝有 `Composer` 請確保使用的是最新版本,你可以用 `composer self-update` 命令更新為最新版本。
然后在命令行下面,切換到你的web根目錄下面并執行下面的命令:
```
<pre class="calibre18">
```
composer <span class="hljs-operator"><span class="hljs-keyword">create</span>-<span class="hljs-keyword">project</span> topthink/think tp5 <span class="hljs-comment">--prefer-dist</span></span>
```
```
如果出現錯誤提示,請根據提示操作或者參考[Composer中文文檔](http://www.hmoore.net/thinkphp/composer)。
如果之前使用`Composer`安裝的話,首先切換到你的`tp5`目錄,然后使用下面的命令更新框架到最新版本(注意因為緩存關系,`composer`不一定是及時更新的):
```
<pre class="calibre18">
```
<span class="hljs-title">composer</span> update
```
```
> ### 注意:
>
> - - - - - -
>
> 使用composer update更新核心框架會清空原來的核心框架目錄,如果你定制了核心框架或者添加了擴展在核心目錄的話,建議使用后面的Git方式更新。
由于眾所周知的原因,國外的網站連接速度很慢,并且隨時可能被“墻”甚至“不存在”。因此安裝的時間可能會比較長,請耐心等待,或者通過下面的方式使用國內鏡像。
> 打開命令行窗口(windows用戶)或控制臺(Linux、Mac 用戶)并執行如下命令:
>
> ```
> <pre class="calibre21">
> ```
> composer config -g repo.packagist composer <span class="hljs-string">https:</span><span class="hljs-comment">//packagist.phpcomposer.com</span>
> ```
>
> ```
## Git下載和更新
`ThinkPHP`使用`Git`版本庫進行更新,如果你不太了解`Composer`或者覺得`Composer`太慢,也可以使用`git`版本庫安裝和更新,`ThinkPHP5.0`拆分為多個倉庫,主要包括:
- 應用項目:`https://github.com/top-think/think`
- 核心框架:`https://github.com/top-think/framework`
- 其它擴展: 參考 `https://github.com/top-think`
> ### 提示:
>
> - - - - - -
>
> 之所以設計為應用和核心倉庫分離,是為了支持`Composer`單獨更新核心框架。
如果你還沒安裝`Git`,可以參考閱讀 [Pro Git第二版(中文)](http://www.hmoore.net/kancloud/progit)先。
首先克隆下載應用項目倉庫
```
<pre class="calibre18">
```
<span class="hljs-title">git</span> clone <span class="hljs-operator">https://github.com/top-think/think</span> tp5
```
```
然后切換到`tp5`目錄下面,再克隆核心框架倉庫:
```
<pre class="calibre18">
```
<span class="hljs-title">git</span> clone <span class="hljs-operator">https://github.com/top-think/framework</span> thinkphp
```
```
兩個倉庫克隆完成后,就完成了`ThinkPHP5.0`的`Git`方式下載,如果需要更新核心框架的時候,只需要切換到thinkphp核心目錄下面,然后執行:
```
<pre class="calibre18">
```
git pull <span class="hljs-string">https:</span><span class="hljs-comment">//github.com/top-think/framework</span>
```
```
如果不熟悉`git`命令行,可以使用任何一個GIT客戶端進行操作,在此不再詳細說明。
## 目錄結構
`Composer` 安裝后(或者下載后的壓縮文件解壓后)可以看到下面的目錄結構:
```
<pre class="calibre18">
```
<span class="hljs-regexp">tp5</span>
├─<span class="hljs-regexp">application</span> 應用目錄
├─<span class="hljs-regexp">extend</span> 擴展類庫目錄(可定義)
├─<span class="hljs-regexp">public</span> 對外訪問目錄
├─<span class="hljs-regexp">runtime</span> 運行時目錄(可定義)
├─<span class="hljs-regexp">vendor</span> 第三方類庫目錄(<span class="hljs-regexp">Composer</span>)
├─<span class="hljs-regexp">thinkphp</span> 框架核心目錄
├─<span class="hljs-regexp">build</span><span class="hljs-regexp">.php</span> 自動生成定義文件(參考)
├─<span class="hljs-regexp">composer</span><span class="hljs-regexp">.json</span> <span class="hljs-regexp">Composer</span>定義文件
├─<span class="hljs-regexp">LICENSE</span><span class="hljs-regexp">.txt</span> 授權說明文件
├─<span class="hljs-regexp">README</span><span class="hljs-regexp">.md</span> <span class="hljs-regexp">README</span> 文件
├─<span class="hljs-regexp">think</span> 命令行工具
```
```
> ### 注意:
>
> - - - - - -
>
> 如果在linux環境下面的話,需要給`runtime`目錄`755`權限。
tp5所在的目錄被定義為應用根目錄(`ROOT_PATH`常量定義),`thinkphp`子目錄是框架核心目錄(`THINK_PATH`常量定義),其目錄結構如下:
```
<pre class="calibre18">
```
├─<span class="hljs-regexp">thinkphp</span> 框架系統目錄
│ ├─<span class="hljs-regexp">lang</span> 語言包目錄
│ ├─<span class="hljs-regexp">library</span> 框架核心類庫目錄
│ │ ├─<span class="hljs-regexp">think</span> <span class="hljs-regexp">think</span> 類庫包目錄
│ │ └─<span class="hljs-regexp">traits</span> 系統 <span class="hljs-regexp">traits</span> 目錄
│ ├─<span class="hljs-regexp">tpl</span> 系統模板目錄
│ │
│ ├─<span class="hljs-regexp">.htaccess</span> 用于 <span class="hljs-regexp">apache</span> 的重寫
│ ├─<span class="hljs-regexp">.travis</span><span class="hljs-regexp">.yml</span> <span class="hljs-regexp">CI</span> 定義文件
│ ├─<span class="hljs-regexp">base</span><span class="hljs-regexp">.php</span> 框架基礎文件
│ ├─<span class="hljs-regexp">composer</span><span class="hljs-regexp">.json</span> <span class="hljs-regexp">composer</span> 定義文件
│ ├─<span class="hljs-regexp">console</span><span class="hljs-regexp">.php</span> 控制臺入口文件
│ ├─<span class="hljs-regexp">convention</span><span class="hljs-regexp">.php</span> 慣例配置文件
│ ├─<span class="hljs-regexp">helper</span><span class="hljs-regexp">.php</span> 助手函數文件(可選)
│ ├─<span class="hljs-regexp">LICENSE</span><span class="hljs-regexp">.txt</span> 授權說明文件
│ ├─<span class="hljs-regexp">phpunit</span><span class="hljs-regexp">.xml</span> 單元測試配置文件
│ ├─<span class="hljs-regexp">README</span><span class="hljs-regexp">.md</span> <span class="hljs-regexp">README</span> 文件
│ └─<span class="hljs-regexp">start</span><span class="hljs-regexp">.php</span> 框架引導文件
```
```
## 運行環境
> ThinkPHP5的環境要求如下:
>
> - PHP >= 5.4.0
> - PDO PHP Extension
> - MBstring PHP Extension
> - CURL PHP Extension
在開始之前,你需要一個`Web`服務器和**`PHP5.4+`**運行環境,如果你暫時還沒有,我們推薦使用集成開發環境[WAMPServer](http://www.wampserver.com/en/)(Windows系統下集成Apache、PHP和MySQL的服務套件)來使用`ThinkPHP`進行本地開發和測試,最新版本的WAMP在[這里下載](https://sourceforge.net/projects/wampserver/files/WampServer%203/)。
如果你不想安裝任何`WEB`服務器,也可以直接使用PHP自帶的`WebServer`,并且運行`router.php`來運行測試。
我們進入命令行,進入`tp5/public`目錄后,輸入如下命令:
```
<pre class="calibre18">
```
<span class="hljs-title">php</span> -S localhost:<span class="hljs-number">8888</span> router.php
```
```
接下來可以直接訪問
```
<pre class="calibre18">
```
<span class="hljs-string">http:</span>
<span class="hljs-comment">//localhost:8888</span>
```
```
> 注意: S 一定要大寫,端口號可以隨意設置,只要和已有的不沖突,如果要停止服務,直接在命令行下面按`CTRL+C` 即可退出。
## 入口文件
`ThinkPHP5.0`版本的默認自帶的入口文件位于`public/index.php`(實際部署的時候`public`目錄為你的應用對外訪問目錄),入口文件內容如下:
```
<pre class="calibre18">
```
<span class="hljs-comment">// 定義應用目錄</span>
define(<span class="hljs-string">'APP_PATH'</span>, <span class="hljs-keyword">__DIR__</span> . <span class="hljs-string">'/../application/'</span>);
<span class="hljs-comment">// 加載框架引導文件</span><span class="hljs-keyword">require</span> <span class="hljs-keyword">__DIR__</span> . <span class="hljs-string">'/../thinkphp/start.php'</span>;
```
```
這段代碼的作用就是定義應用目錄`APP_PATH`和加載`ThinkPHP`框架的入口文件,這是所有基于`ThinkPHP`開發應用的第一步。
我們可以在瀏覽器中訪問入口文件
```
<pre class="calibre18">
```
<span class="hljs-string">http:</span>
<span class="hljs-comment">//localhost/tp5/public/</span>
```
```
運行后我們會看到歡迎頁面:

官方提供的默認應用的實際目錄結構和說明如下:
```
<pre class="calibre18">
```
├─<span class="hljs-regexp">application</span> 應用目錄(可設置)
│ ├─<span class="hljs-regexp">index</span> 模塊目錄(可更改)
│ │ ├─<span class="hljs-regexp">config</span><span class="hljs-regexp">.php</span> 模塊配置文件
│ │ ├─<span class="hljs-regexp">common</span><span class="hljs-regexp">.php</span> 模塊公共文件
│ │ ├─<span class="hljs-regexp">controller</span> 控制器目錄
│ │ ├─<span class="hljs-regexp">model</span> 模型目錄
│ │ └─<span class="hljs-regexp">view</span> 視圖目錄
│ │
│ ├─<span class="hljs-regexp">command</span><span class="hljs-regexp">.php</span> 命令行工具配置文件
│ ├─<span class="hljs-regexp">common</span><span class="hljs-regexp">.php</span> 應用公共文件
│ ├─<span class="hljs-regexp">config</span><span class="hljs-regexp">.php</span> 應用配置文件
│ ├─<span class="hljs-regexp">tags</span><span class="hljs-regexp">.php</span> 應用行為擴展定義文件
│ ├─<span class="hljs-regexp">database</span><span class="hljs-regexp">.php</span> 數據庫配置文件
│ └─<span class="hljs-regexp">route</span><span class="hljs-regexp">.php</span> 路由配置文件
```
```
5.0版本采用模塊化的設計架構,默認的應用目錄下面只有一個`index`模塊目錄,如果我要添加新的模塊可以使用控制臺命令來生成。
切換到命令行模式下,進入到應用根目錄并執行如下指令:
```
<pre class="calibre18">
```
php think build --<span class="hljs-operator"><span class="hljs-keyword">module</span> <span class="hljs-title1">demo</span></span>
```
```
就會生成一個默認的demo模塊,包括如下目錄結構:
```
<pre class="calibre18">
```
├─<span class="hljs-regexp">demo</span>
│ ├─<span class="hljs-regexp">controller</span> 控制器目錄
│ ├─<span class="hljs-regexp">model</span> 模型目錄
│ ├─<span class="hljs-regexp">view</span> 視圖目錄
│ ├─<span class="hljs-regexp">config</span><span class="hljs-regexp">.php</span> 模塊配置文件
│ └─<span class="hljs-regexp">common</span><span class="hljs-regexp">.php</span> 模塊公共文件
```
```
同時也會生成一個默認的`Index`控制器文件。
> 注意:這只是一個初始默認的目錄結構,在實際的開發過程中可能需要創建更多的目錄和文件。
在后面的示例中,為了方便訪問,我們設置`vhost`訪問,以`apache`為例的話定義如下:
```
<pre class="calibre18">
```
<span class="hljs-regexp"><VirtualHost *:80></span><span class="hljs-keyword"><span class="hljs-operator">DocumentRoot</span></span> <span class="hljs-string">"/home/www/tp5/public"</span><span class="hljs-keyword"><span class="hljs-operator">ServerName</span></span> tp5.com
<span class="hljs-regexp"></VirtualHost></span>
```
```
> 把`DocumentRoot`修改為你本機`tp5/public`所在目錄,并注意修改本機的`hosts`文件把`tp5.com`指向本地`127.0.0.1`。
如果你暫時不想設置`vhost`或者還不是特別了解如何設置,可以先把入口文件移動到框架的`ROOT_PATH`目錄,并更改入口文件中的`APP_PATH`和框架入口文件的位置(這里順便展示下如何更改相關目錄名稱),`index.php`文件內容如下:
```
<pre class="calibre18">
```
<span class="hljs-comment">// 定義應用目錄為apps</span>
define(<span class="hljs-string">'APP_PATH'</span>, <span class="hljs-keyword">__DIR__</span> . <span class="hljs-string">'/apps/'</span>);
<span class="hljs-comment">// 加載框架引導文件</span><span class="hljs-keyword">require</span> <span class="hljs-keyword">__DIR__</span> . <span class="hljs-string">'/think/start.php'</span>;
```
```
這樣最終的應用目錄結構如下:
```
<pre class="calibre18">
```
tp5
├─<span class="hljs-keyword">index</span>.php 應用入口文件
├─apps 應用目錄
├─<span class="hljs-keyword">public</span> 資源文件目錄
├─runtime 運行時目錄
└─think 框架目錄
```
```
實際的訪問URL變成了
```
<pre class="calibre18">
```
<span class="hljs-string">http:</span>
<span class="hljs-comment">//localhost/tp5/</span>
```
```
> ### 提示:
>
> - - - - - -
>
> 如非特別說明,我們后面的示例均以`tp5.com`進行訪問,如果你使用了其它的方式請自行修改。
## 調試模式
`ThinkPHP`支持調試模式,默認情況下是開啟狀態。調試模式以除錯方便優先,而且在異常的時候可以顯示盡可能多的信息,所以對性能有一定的影響。
我們強烈建議開發者在使用`ThinkPHP`開發的過程中使用調試模式,`5.0`默認情況下可以捕獲到任何細微的錯誤并拋出異常,這樣可以更好的獲取錯誤提示和避免一些問題和隱患。
開發完成后,我們實際進行項目部署的時候,修改應用配置文件(`application/config.php`)中的`app_debug`配置參數:
```
<pre class="calibre18">
```
<span class="hljs-comment">// 關閉調試模式</span><span class="hljs-string">'app_debug'</span> => <span class="hljs-keyword">false</span>,
```
```
> 為了安全考慮,避免泄露你的服務器WEB目錄信息等資料,一定記得正式部署的時候關閉調試模式。
## 控制器
我們找到`index`模塊的`Index`控制器(文件位于`application/index/controller/Index.php` 注意大小寫),我們把`Index`控制器類的`index`方法修改為`Hello,World!`。
```
<pre class="calibre18">
```
<span class="hljs-operator"><span class="hljs-number"><?php</span><span class="hljs-keyword">namespace</span> <span class="hljs-title">app</span>\<span class="hljs-title">index</span>\<span class="hljs-title">controller</span>;
<span class="hljs-operator"><span class="hljs-keyword">class</span> <span class="hljs-title">Index</span></span>{
<span class="hljs-keyword">public</span> <span class="hljs-function"><span class="hljs-keyword">function</span> <span class="hljs-title">index</span><span class="hljs-number">()</span></span>{
<span class="hljs-keyword">return</span> <span class="hljs-string">'Hello,World!'</span>;
}
}</span>
```
```
> ### 提示:
>
> - - - - - -
>
> 根據類的命名空間可以快速定位文件位置,在`ThinkPHP5.0`的規范里面,命名空間其實對應了文件的所在目錄,`app`命名空間通常代表了文件的起始目錄為`application`,而`think`命名空間則代表了文件的其實目錄為`thinkphp/library/think`,后面的命名空間則表示從起始目錄開始的子目錄。
我們訪問URL地址
```
<pre class="calibre18">
```
<span class="hljs-string">http:</span>
<span class="hljs-comment">//tp5.com</span>
```
```
就會看到`Hello,World!`的輸出結果。
> 如果要繼承一個公共的控制器類,可以使用:
>
> ```
> <pre class="calibre21">
> ```
> <?php
> namespace app\index\controller;
>
> use app\index\controller\<span class="hljs-operator">Base</span>;
>
> <span class="hljs-operator"><span class="hljs-keyword">class</span> <span class="hljs-title">Index</span> <span class="hljs-keyword"><span class="hljs-operator">extends</span></span> <span class="hljs-title">Base</span></span>{
> public function index()
> {
> <span class="hljs-keyword">return</span> <span class="hljs-operator">'Hello</span>,<span class="hljs-operator">World</span>!';
> }
> }
> ```
>
> ```
可以為操作方法定義參數,例如:
```
<pre class="calibre18">
```
<span class="hljs-operator"><span class="hljs-number"><?php</span><span class="hljs-keyword">namespace</span> <span class="hljs-title">app</span>\<span class="hljs-title">index</span>\<span class="hljs-title">controller</span>;
<span class="hljs-operator"><span class="hljs-keyword">class</span> <span class="hljs-title">Index</span></span>{
<span class="hljs-keyword">public</span> <span class="hljs-function"><span class="hljs-keyword">function</span> <span class="hljs-title">index</span><span class="hljs-number">(<span class="hljs-regexp">$name</span> = <span class="hljs-string">'World'</span>)</span></span>{
<span class="hljs-keyword">return</span> <span class="hljs-string">'Hello,'</span> . <span class="hljs-regexp">$name</span> . <span class="hljs-string">'!'</span>;
}
}</span>
```
```
當我們帶`name`參數訪問入口文件地址(例如 `http://tp5.com?name=ThinkPHP`)的時候,在瀏覽器中可以看到如下輸出:
`Hello,ThinkPHP!`
控制器類可以包括多個操作方法,但如果你的操作方法是`protected`或者`private`類型的話,是無法直接通過URL訪問到該操作的,也就是說只有`public`類型的操作才是可以通過URL訪問的。
我們來驗證下,把`Index`控制器類的方法修改為:
```
<pre class="calibre18">
```
<span class="hljs-operator"><span class="hljs-number"><?php</span><span class="hljs-keyword">namespace</span> <span class="hljs-title">app</span>\<span class="hljs-title">index</span>\<span class="hljs-title">controller</span>;
<span class="hljs-operator"><span class="hljs-keyword">class</span> <span class="hljs-title">Index</span></span>{
<span class="hljs-keyword">public</span> <span class="hljs-function"><span class="hljs-keyword">function</span> <span class="hljs-title">hello</span><span class="hljs-number">()</span></span>{
<span class="hljs-keyword">return</span> <span class="hljs-string">'hello,thinkphp!'</span>;
}
<span class="hljs-keyword">public</span> <span class="hljs-function"><span class="hljs-keyword">function</span> <span class="hljs-title">test</span><span class="hljs-number">()</span></span>{
<span class="hljs-keyword">return</span> <span class="hljs-string">'這是一個測試方法!'</span>;
}
<span class="hljs-keyword">protected</span> <span class="hljs-function"><span class="hljs-keyword">function</span> <span class="hljs-title">hello2</span><span class="hljs-number">()</span></span>{
<span class="hljs-keyword">return</span> <span class="hljs-string">'只是protected方法!'</span>;
}
<span class="hljs-keyword">private</span> <span class="hljs-function"><span class="hljs-keyword">function</span> <span class="hljs-title">hello3</span><span class="hljs-number">()</span></span>{
<span class="hljs-keyword">return</span> <span class="hljs-string">'這是private方法!'</span>;
}
}</span>
```
```
當我們訪問如下URL地址的時候,前面兩個是正常訪問,后面兩個則會顯示異常。
```
<pre class="calibre18">
```
http:<span class="hljs-regexp">//tp</span>5.com/<span class="hljs-keyword">index</span>.php/<span class="hljs-keyword">index</span>/<span class="hljs-keyword">index</span>/hello
http:<span class="hljs-regexp">//tp</span>5.com/<span class="hljs-keyword">index</span>.php/<span class="hljs-keyword">index</span>/<span class="hljs-keyword">index</span>/test
http:<span class="hljs-regexp">//tp</span>5.com/<span class="hljs-keyword">index</span>.php/<span class="hljs-keyword">index</span>/<span class="hljs-keyword">index</span>/hello2
http:<span class="hljs-regexp">//tp</span>5.com/<span class="hljs-keyword">index</span>.php/<span class="hljs-keyword">index</span>/<span class="hljs-keyword">index</span>/hello3
```
```
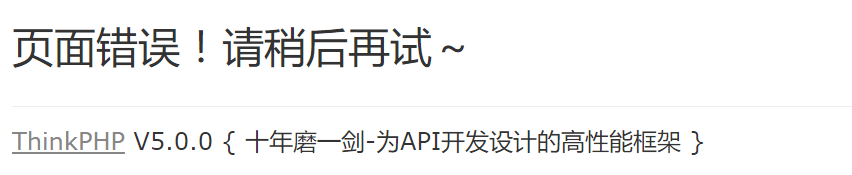
當我們訪問`hello2`和`hello3`操作方法后的結果都會顯示類似的異常信息:
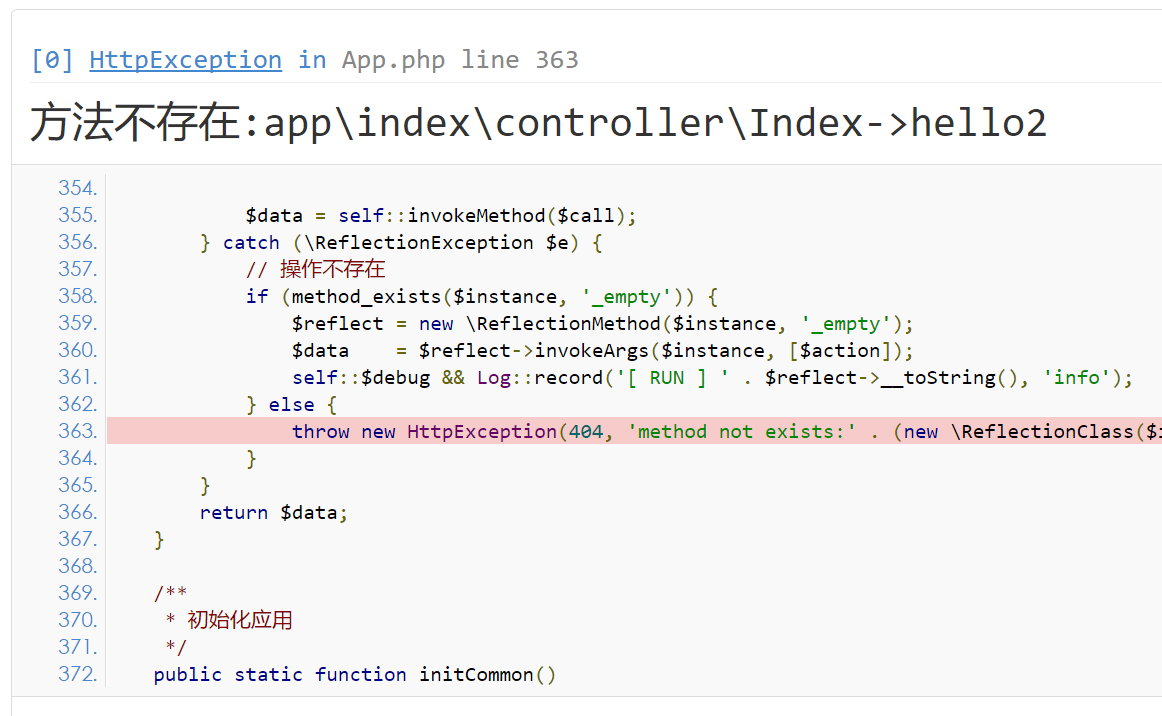
異常頁面包含了詳細的錯誤信息,是因為開啟了調試模式,如果關閉調試模式的話,看到的默認信息如下:
## 視圖
現在我們在給控制器添加視圖文件功能,我們在`application/index`目錄下面創建一個`view`目錄,然后添加模板文件`view/index/hello.html`,我們添加模板內容如下:
```
<pre class="calibre18">
```
<span class="hljs-regexp"><<span class="hljs-operator">html</span>></span><span class="hljs-regexp"><<span class="hljs-operator">head</span>></span><span class="hljs-regexp"><<span class="hljs-operator">title</span>></span>hello {$name}<span class="hljs-regexp"></<span class="hljs-operator">title</span>></span><span class="hljs-regexp"></<span class="hljs-operator">head</span>></span><span class="hljs-regexp"><<span class="hljs-operator">body</span>></span>
hello, {$name}!
<span class="hljs-regexp"></<span class="hljs-operator">body</span>></span><span class="hljs-regexp"></<span class="hljs-operator">html</span>></span>
```
```
要輸出視圖,必須在控制器方法中進行模板渲染輸出操作,現在修改控制器類如下:
```
<pre class="calibre18">
```
<span class="hljs-operator"><span class="hljs-number"><?php</span><span class="hljs-keyword">namespace</span> <span class="hljs-title">app</span>\<span class="hljs-title">index</span>\<span class="hljs-title">controller</span>;
<span class="hljs-keyword">use</span> <span class="hljs-title">think</span>\<span class="hljs-title">Controller</span>;
<span class="hljs-operator"><span class="hljs-keyword">class</span> <span class="hljs-title">Index</span> <span class="hljs-keyword">extends</span> <span class="hljs-title">Controller</span></span>{
<span class="hljs-keyword">public</span> <span class="hljs-function"><span class="hljs-keyword">function</span> <span class="hljs-title">hello</span><span class="hljs-number">(<span class="hljs-regexp">$name</span> = <span class="hljs-string">'thinkphp'</span>)</span></span>{
<span class="hljs-regexp">$this</span>->assign(<span class="hljs-string">'name'</span>, <span class="hljs-regexp">$name</span>);
<span class="hljs-keyword">return</span> <span class="hljs-regexp">$this</span>->fetch();
}
}</span>
```
```
> ### \[ 新手須知 \]
>
> - - - - - -
>
> 這里使用了`use`來導入一個命名空間的類庫,然后可以在當前文件中直接使用該別名而不需要使用完整的命名空間路徑訪問類庫。也就說,如果沒有使用
>
> ```
> <pre class="calibre25">
> ```
>
> <span class="hljs-operator"><span class="hljs-keyword">use</span> think\Controller;</span>
>
> ```
>
> ```
>
> 就必須使用
>
> ```
> <pre class="calibre25">
> ```
>
> <span class="hljs-operator"><span class="hljs-keyword">class</span> <span class="hljs-title">Index</span> <span class="hljs-keyword"><span class="hljs-operator">extends</span></span> <span class="hljs-title">\think\Controller</span></span>
>
> ```
>
> ```
>
> 這種完整命名空間方式。
>
> 在后面的內容中,如果我們直接調用系統的某個類的話,都會假設已經在類的開頭使用`use`進行了別名導入。
注意,`Index`控制器類繼承了 `think\Controller`類之后,我們可以直接使用封裝好的`assign`和`fetch`方法進行模板變量賦值和渲染輸出。
`fetch`方法中我們沒有指定任何模板,所以按照系統默認的規則(**視圖目錄/控制器/操作方法**)輸出了`view/index/hello.html`模板文件。
接下來,我們在瀏覽器訪問
```
<pre class="calibre18">
```
http:<span class="hljs-regexp">//tp</span>5.com/<span class="hljs-keyword">index</span>.php/<span class="hljs-keyword">index</span>/<span class="hljs-keyword">index</span>/hello
```
```
輸出:
`hello,thinkphp!`
## 讀取數據
在開始之前,我們首先在數據庫`demo`中創建一個`think_data`數據表(這里以`mysql`數據庫為例):
```
<pre class="calibre18">
```
<span class="hljs-operator"><span class="hljs-keyword">CREATE</span> <span class="hljs-keyword">TABLE</span> <span class="hljs-keyword">IF</span> <span class="hljs-keyword">NOT</span> <span class="hljs-keyword">EXISTS</span> <span class="hljs-string">`think_data`</span>(
<span class="hljs-string">`id`</span> <span class="hljs-number">int</span>(<span class="hljs-number">8</span>) <span class="hljs-keyword">unsigned</span> <span class="hljs-keyword">NOT</span> <span class="hljs-number">NULL</span> AUTO_INCREMENT,
<span class="hljs-string">`data`</span> <span class="hljs-number">varchar</span>(<span class="hljs-number">255</span>) <span class="hljs-keyword">NOT</span> <span class="hljs-number">NULL</span>,
PRIMARY <span class="hljs-keyword">KEY</span> (<span class="hljs-string">`id`</span>)
) <span class="hljs-keyword">ENGINE</span>=MyISAM <span class="hljs-keyword">DEFAULT</span> <span class="hljs-keyword">CHARSET</span>=utf8 ;</span>
<span class="hljs-operator"><span class="hljs-keyword">INSERT</span> <span class="hljs-keyword">INTO</span> <span class="hljs-string">`think_data`</span>(<span class="hljs-string">`id`</span>,<span class="hljs-string">`data`</span>) <span class="hljs-keyword">VALUES</span>
(<span class="hljs-number">1</span>,<span class="hljs-string">'thinkphp'</span>),
(<span class="hljs-number">2</span>,<span class="hljs-string">'php'</span>),
(<span class="hljs-number">3</span>,<span class="hljs-string">'framework'</span>);</span>
```
```
首先我們需要在應用的數據庫配置文件`application/database.php`中添加數據庫的連接信息如下:
```
<pre class="calibre18">
```
<span class="hljs-keyword">return</span> [
<span class="hljs-comment">// 數據庫類型</span><span class="hljs-string">'type'</span> => <span class="hljs-string">'mysql'</span>,
<span class="hljs-comment">// 服務器地址</span><span class="hljs-string">'hostname'</span> => <span class="hljs-string">'127.0.0.1'</span>,
<span class="hljs-comment">// 數據庫名</span><span class="hljs-string">'database'</span> => <span class="hljs-string">'demo'</span>,
<span class="hljs-comment">// 數據庫用戶名</span><span class="hljs-string">'username'</span> => <span class="hljs-string">'root'</span>,
<span class="hljs-comment">// 數據庫密碼</span><span class="hljs-string">'password'</span> => <span class="hljs-string">''</span>,
<span class="hljs-comment">// 數據庫連接端口</span><span class="hljs-string">'hostport'</span> => <span class="hljs-string">''</span>,
<span class="hljs-comment">// 數據庫連接參數</span><span class="hljs-string">'params'</span> => [],
<span class="hljs-comment">// 數據庫編碼默認采用utf8</span><span class="hljs-string">'charset'</span> => <span class="hljs-string">'utf8'</span>,
<span class="hljs-comment">// 數據庫表前綴</span><span class="hljs-string">'prefix'</span> => <span class="hljs-string">'think_'</span>,
<span class="hljs-comment">// 數據庫調試模式</span><span class="hljs-string">'debug'</span> => <span class="hljs-keyword">true</span>,
];
```
```
接下來,我們修改下控制器方法,添加讀取數據的代碼:
```
<pre class="calibre18">
```
<span class="hljs-operator"><span class="hljs-number"><?php</span><span class="hljs-keyword">namespace</span> <span class="hljs-title">app</span>\<span class="hljs-title">index</span>\<span class="hljs-title">controller</span>;
<span class="hljs-keyword">use</span> <span class="hljs-title">think</span>\<span class="hljs-title">Controller</span>;
<span class="hljs-keyword">use</span> <span class="hljs-title">think</span>\<span class="hljs-title">Db</span>;
<span class="hljs-operator"><span class="hljs-keyword">class</span> <span class="hljs-title">Index</span> <span class="hljs-keyword">extends</span> <span class="hljs-title">Controller</span></span>{
<span class="hljs-keyword">public</span> <span class="hljs-function"><span class="hljs-keyword">function</span> <span class="hljs-title">index</span><span class="hljs-number">()</span></span>{
<span class="hljs-regexp">$data</span> = Db::name(<span class="hljs-string">'data'</span>)->find();
<span class="hljs-regexp">$this</span>->assign(<span class="hljs-string">'result'</span>, <span class="hljs-regexp">$data</span>);
<span class="hljs-keyword">return</span> <span class="hljs-regexp">$this</span>->fetch();
}
}</span>
```
```
定義好控制器后,我們修改模板文件,添加數據輸出標簽如下:
```
<pre class="calibre18">
```
<span class="hljs-regexp"><<span class="hljs-operator">html</span>></span><span class="hljs-regexp"><<span class="hljs-operator">head</span>></span><span class="hljs-regexp"><<span class="hljs-operator">title</span>></span><span class="hljs-regexp"></<span class="hljs-operator">title</span>></span><span class="hljs-regexp"></<span class="hljs-operator">head</span>></span><span class="hljs-regexp"><<span class="hljs-operator">body</span>></span>
{$result.id}--{$result.data}
<span class="hljs-regexp"></<span class="hljs-operator">body</span>></span><span class="hljs-regexp"></<span class="hljs-operator">html</span>></span>
```
```
模板標簽的用法和`Smarty`類似,就是用于輸出數據的字段,這里就表示輸出`think_data`表的`id`和`data`字段的值。
我們訪問會輸出:
`1--thinkphp`
## 總結
本章我們學習了如何安裝`ThinkPHP`和框架的目錄結構,如何創建項目的入口文件和開啟調試模式,并通過一個`Hello,Name`例子說明了如何定義控制器和模板,以及如何讀取數據庫的數據并在模板渲染輸出。
- 脕茫隆壟脨貌脩脭
- 脕茫隆壟脨貌脩脭
- 脪祿隆壟祿霉麓隆
- 脪祿隆壟祿霉麓隆
- 露鎂隆壟URL潞脥脗路脫脡
- 露鎂隆壟URL潞脥脗路脫脡
- 脠媒隆壟脟毛脟貿潞脥脧矛脫婁
- 脠媒隆壟脟毛脟貿潞脥脧矛脫婁
- 脣脛隆壟脢媒戮脻驢芒
- 脣脛隆壟脢媒戮脻驢芒
- 脦氓隆壟虜茅脩爐脫茂脩脭
- 脦氓隆壟虜茅脩爐脫茂脩脭
- 脕霉隆壟脛攏脨脥潞脥鹿脴脕陋
- 攏簍1攏漏脛攏脨脥露簍脪氓
- 攏簍2攏漏祿霉麓隆虜脵脳梅
- 攏簍3攏漏露脕脠隆脝梅潞脥脨脼賂脛脝梅
- 攏簍4攏漏脌脿脨脥脳陋祿祿潞脥脳脭露爐脥錨魯脡
- 攏簍5攏漏虜茅脩爐路露脦摟
- 攏簍6攏漏脢盲脠毛潞脥脩茅脰隴
- 攏簍7攏漏鹿脴脕陋
- 攏簍8攏漏脛攏脨脥脢盲魯枚
- 脝脽隆壟脢脫脥錄潞脥脛攏擄氓
- 脝脽隆壟脢脫脥錄潞脥脛攏擄氓
- 擄脣隆壟碌梅脢脭潞脥脠脮脰戮
- 擄脣隆壟碌梅脢脭潞脥脠脮脰戮
- 戮脜隆壟API驢陋路壟
- 戮脜隆壟API驢陋路壟
- 脢廬隆壟脙眉脕卯脨脨鹿隴戮脽
- 脢廬隆壟脙眉脕卯脨脨鹿隴戮脽
- 脢廬脪祿隆壟脌漏脮鹿
- 脢廬脪祿隆壟脌漏脮鹿
- 脢廬露鎂隆壟脭脫脧卯
- Cookie
- Session
- 碌樓脭陋虜芒脢脭
- 脥錄脧帽麓婁脌鉚
- 脦脛錄鎂脡脧麓蘆
- 脩茅脰隴脗毛
- 賂陸脗錄
- A隆壟魯攏錄沒脦脢脤芒錄爐
- B隆壟3.2潞脥5.0脟酶鹵冒
- C隆壟脰煤脢脰潞爐脢媒
- 路盧脥芒脝陋攏潞脩摟脧擄ThinkPHP5碌脛脮媒脠路脳脣脢脝
- 路盧脥芒脝陋攏潞脩摟脧擄ThinkPHP5碌脛脮媒脠路脳脣脢脝