
# 用于 NumPy 用戶的 Cython
> 原文: [http://docs.cython.org/en/latest/src/userguide/numpy_tutorial.html](http://docs.cython.org/en/latest/src/userguide/numpy_tutorial.html)
本教程針對的是根本沒有 Cython 經驗的 NumPy 用戶。如果您對 Cython 有一些了解,可能需要跳到“高效索引”部分。
考慮的主要方案是 NumPy 最終用途而不是 NumPy / SciPy 開發。原因是 Cython 不能(還)能夠以高級方式支持關于維數的通用功能。對于 SciPy 開發而言,這種限制比更具體的“最終用戶”功能要嚴格得多。有關詳細信息,請參閱最后一節。
本教程的風格不適合所有人,所以你也可以考慮:
* Kurt Smith 在 SciPy 2015 上的[視頻教程。這次演講的幻燈片和筆記本是 github](https://www.youtube.com/watch?v=gMvkiQ-gOW8&t=4730s&ab_channel=Enthought) 上的[。](https://github.com/kwmsmith/scipy-2015-cython-tutorial)
* 基本的 Cython 文檔(參見 [Cython 首頁](https://cython.readthedocs.io/en/latest/index.html))。
## Cython 一覽
Cython 是一個編譯器,它將類似 Python 的代碼文件編譯為 C 代碼。不過,''Cython 不是 Python 到 C 的翻譯''。也就是說,它不會占用您的完整程序并“將其轉換為 C” - 相反,結果充分利用了 Python 運行時環境。一種看待它的方式可能是你的代碼仍然是 Python,因為它在 Python 運行時環境中運行,而不是編譯為解釋的 Python 字節碼,而是編譯為本機機器代碼(但是增加了額外的語法以便于嵌入更快的類 C 代碼)。
這有兩個重要的后果:
* 速度。多少在很大程度上取決于所涉及的計劃。典型的 Python 數值程序往往會獲得很少的收益,因為大部分時間花在以高級方式使用的較低級別 C 上。然而,當添加鍵入信息時,for 循環風格的程序可以獲得許多數量級(并且因此可以作為現實替代方案)。
* 輕松調用 C 代碼。 Cython 的目的之一是允許輕松包裝 C 庫。在 Cython 中編寫代碼時,您可以像使用 Python 代碼一樣輕松調用 C 代碼。
很少有 Python 構造尚不支持,雖然使 Cython 編譯所有 Python 代碼是一個明確的目標,你可以在 [限制](limitations.html#cython-limitations) 中看到與 Python 的差異。
## 您的 Cython 環境
使用 Cython 包含以下步驟:
1. 寫一個`.pyx`源文件
2. 運行 Cython 編譯器以生成 C 文件
3. 運行 C 編譯器以生成編譯庫
4. 運行 Python 解釋器并要求它導入模塊
但是,有幾個選項可以自動執行這些步驟:
1. [SAGE](http://sagemath.org) 數學軟件系統為從交互式命令行或筆記本界面(如 Maple / Mathematica)使用 Cython 和 NumPy 提供了出色的支持。參見[本文檔](https://doc.sagemath.org/html/en/developer/coding_in_cython.html)。
2. Cython 可以作為 Jupyter 筆記本中的擴展,使得編譯和使用 Cython 代碼只需在單元格頂部只有一個`%%cython`。有關更多信息,請參閱 [使用 Jupyter 筆記本](../quickstart/build.html#jupyter-notebook) 。
3. pythonmport 的一個版本隨 Cython 一起提供,因此您可以動態地將 pyx 文件導入 Python 并自動編譯(參見 [使用 pyximport](source_files_and_compilation.html#pyximport)進行編譯)。
4. Cython 支持 distutils,因此您可以非常輕松地創建自動化過程的構建腳本,這是 Cython 實現的庫和包的首選方法。參見 [Basic setup.py](source_files_and_compilation.html#basic-setup-py)。
5. 手動編譯(見下文)
注意
如果使用除 SAGE 之外的其他交互式命令行環境(如 IPython 或 Python 本身),則在重新編譯模塊時重新啟動該進程非常重要。再次發出“導入”聲明是不夠的。
## 安裝
如果您已經有一個 C 編譯器,那么就這樣做:
```py
pip install Cython
```
否則,請參見 [安裝頁面](../quickstart/install.html#install) 。
在撰寫本文時,SAGE 附帶了比本教程所要求的更早版本的 Cython。因此,如果使用 SAGE,您應該下載最新的 Cython 然后執行
```py
$ cd path/to/cython-distro
$ path-to-sage/sage -python setup.py install
```
這將把最新的 Cython 安裝到 SAGE 中。
## 手動編譯
由于知道發生了什么總是很重要,我將在這里描述手動方法。第一次運行 Cython:
```py
$ cython yourmod.pyx
```
這會創建`yourmod.c`,這是 Python 擴展模塊的 C 源代碼。一個有用的附加開關是`-a`,它將生成一個文檔`yourmod.html`,它顯示哪個 Cython 代碼逐行轉換為哪個 C 代碼。
然后我們編譯 C 文件。這可能會因您的系統而異,但 C 文件應該像 Python 一樣構建。用于編寫擴展的 Python 文檔應該有一些細節。在 Linux 上,這通常意味著:
```py
$ gcc -shared -pthread -fPIC -fwrapv -O2 -Wall -fno-strict-aliasing -I/usr/include/python2.7 -o yourmod.so yourmod.c
```
`gcc`應該可以訪問 NumPy C 頭文件,因此如果它們未安裝在`/usr/include/numpy`或類似文件中,您可能需要為這些文件傳遞另一個選項。如果你寫的話,你只需要提供 NumPy 標題:
```py
cimport numpy
```
在您的 Cython 代碼中。
這會在同一目錄中創建`yourmod.so`,Python 可以使用普通的`import yourmod`語句導入該目錄。
## 第一個 Cython 程序
您可以通過下載 [Jupyter 筆記本](https://github.com/cython/cython/blob/master/docs/examples/userguide/numpy_tutorial/numpy_and_cython.ipynb)輕松執行本教程的代碼。
下面的代碼在 numpy 中相當于這個函數:
```py
def compute_np(array_1, array_2, a, b, c):
return np.clip(array_1, 2, 10) * a + array_2 * b + c
```
我們會說`array_1`和`array_2`是整數類型的 2D NumPy 數組,`a`,`b`和`c`是三個 Python 整數。
這個函數使用 NumPy 并且已經非常快了,所以使用 Cython 再次執行它可能有點過分。這是出于演示目的。盡管如此,我們將證明我們以更加冗長的代價實現了比 NumPy 更好的速度和內存效率。
此代碼計算函數,其中循環在展開的兩個維度上。它既是有效的 Python 又是有效的 Cython 代碼。我將其稱為 Python 版本的`compute_py.py`和 Cython 版本的`compute_cy.pyx` - Cython 使用`.pyx`作為其文件后綴(但它也可以編譯`.py`文件)。
```py
import numpy as np
def clip(a, min_value, max_value):
return min(max(a, min_value), max_value)
def compute(array_1, array_2, a, b, c):
"""
This function must implement the formula
np.clip(array_1, 2, 10) * a + array_2 * b + c
array_1 and array_2 are 2D.
"""
x_max = array_1.shape[0]
y_max = array_1.shape[1]
assert array_1.shape == array_2.shape
result = np.zeros((x_max, y_max), dtype=array_1.dtype)
for x in range(x_max):
for y in range(y_max):
tmp = clip(array_1[x, y], 2, 10)
tmp = tmp * a + array_2[x, y] * b
result[x, y] = tmp + c
return result
```
這應該被編譯為為 Linux 系統生成`compute_cy.so`(在 Windows 系統上,這將是`.pyd`文件)。我們運行 Python 會話來測試 Python 版本(從`.py` -file 導入)和編譯的 Cython 模塊。
```py
In [1]: import numpy as np
In [2]: array_1 = np.random.uniform(0, 1000, size=(3000, 2000)).astype(np.intc)
In [3]: array_2 = np.random.uniform(0, 1000, size=(3000, 2000)).astype(np.intc)
In [4]: a = 4
In [5]: b = 3
In [6]: c = 9
In [7]: def compute_np(array_1, array_2, a, b, c):
...: return np.clip(array_1, 2, 10) * a + array_2 * b + c
In [8]: %timeit compute_np(array_1, array_2, a, b, c)
103 ms ± 4.16 ms per loop (mean ± std. dev. of 7 runs, 10 loops each)
In [9]: import compute_py
In [10]: compute_py.compute(array_1, array_2, a, b, c)
1min 10s ± 844 ms per loop (mean ± std. dev. of 7 runs, 1 loop each)
In [11]: import compute_cy
In [12]: compute_cy.compute(array_1, array_2, a, b, c)
56.5 s ± 587 ms per loop (mean ± std. dev. of 7 runs, 1 loop each)
```
還沒有那么大的差別;因為 C 代碼仍然完全符合 Python 解釋器的作用(例如,意味著為每個使用的數字分配了一個新對象)。
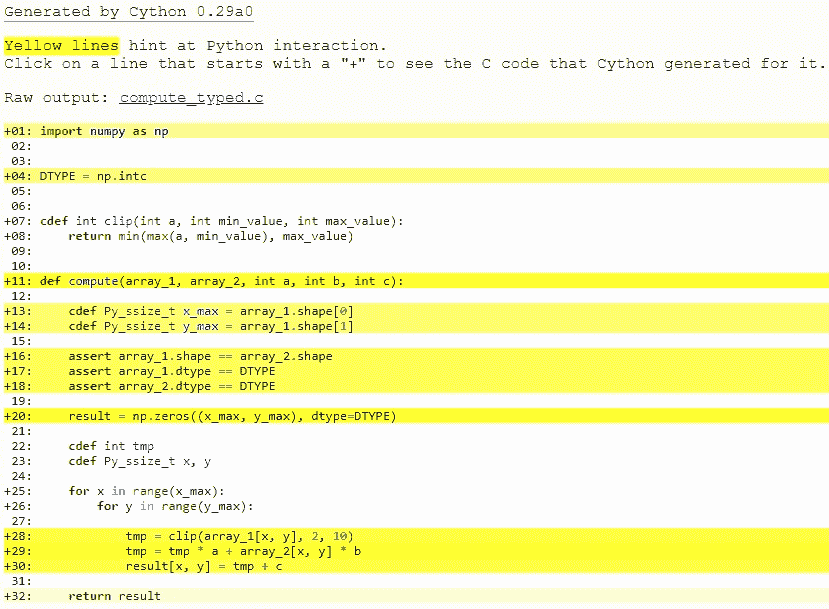
從命令行調用 Cython 時可以使用`-a`查看 Python 交互和生成的 C 代碼,使用 Jupyter Notebook 時使用`%%cython -a`,或者在使用`setup.py`時使用`cythonize('compute_cy.pyx', annotate=True)`。查看生成的 html 文件,看看即使是最簡單的語句也需要什么。你很快就明白了。我們需要給 Cython 更多信息;我們需要添加類型。
## 添加類型
要添加類型,我們使用自定義 Cython 語法,因此我們現在正在破壞 Python 源兼容性。這是`compute_typed.pyx`。 _ 閱讀評論!_
```py
import numpy as np
# We now need to fix a datatype for our arrays. I've used the variable
# DTYPE for this, which is assigned to the usual NumPy runtime
# type info object.
DTYPE = np.intc
# cdef means here that this function is a plain C function (so faster).
# To get all the benefits, we type the arguments and the return value.
cdef int clip(int a, int min_value, int max_value):
return min(max(a, min_value), max_value)
def compute(array_1, array_2, int a, int b, int c):
# The "cdef" keyword is also used within functions to type variables. It
# can only be used at the top indentation level (there are non-trivial
# problems with allowing them in other places, though we'd love to see
# good and thought out proposals for it).
cdef Py_ssize_t x_max = array_1.shape[0]
cdef Py_ssize_t y_max = array_1.shape[1]
assert array_1.shape == array_2.shape
assert array_1.dtype == DTYPE
assert array_2.dtype == DTYPE
result = np.zeros((x_max, y_max), dtype=DTYPE)
# It is very important to type ALL your variables. You do not get any
# warnings if not, only much slower code (they are implicitly typed as
# Python objects).
# For the "tmp" variable, we want to use the same data type as is
# stored in the array, so we use int because it correspond to np.intc.
# NB! An important side-effect of this is that if "tmp" overflows its
# datatype size, it will simply wrap around like in C, rather than raise
# an error like in Python.
cdef int tmp
# Py_ssize_t is the proper C type for Python array indices.
cdef Py_ssize_t x, y
for x in range(x_max):
for y in range(y_max):
tmp = clip(array_1[x, y], 2, 10)
tmp = tmp * a + array_2[x, y] * b
result[x, y] = tmp + c
return result
```
此時,查看為`compute_cy.pyx`和`compute_typed.pyx`生成的 C 代碼。單擊這些行以展開它們并查看相應的 C.
特別是看一下`for-loops`:在`compute_cy.c`中,這些是要設置的~20 行 C 代碼,而在`compute_typed.c`中使用正常的 C for 循環。
在構建完這個并繼續我的(非正式)基準測試后,我得到:
```py
In [13]: %timeit compute_typed.compute(array_1, array_2, a, b, c)
26.5 s ± 422 ms per loop (mean ± std. dev. of 7 runs, 1 loop each)
```
因此添加類型確實使代碼更快,但是沒有接近 NumPy 的速度?
發生的事情是,在這段代碼中花費的大部分時間用在以下行中,并且這些行的執行速度比純 Python 要慢:
```py
tmp = clip(array_1[x, y], 2, 10)
tmp = tmp * a + array_2[x, y] * b
result[x, y] = tmp + c
```
那么是什么讓這些線條比純 Python 版本慢得多?
`array_1`和`array_2`仍然是 NumPy 數組,所以 Python 對象,并期望 Python 整數作為索引。這里我們傳遞 C int 值。所以每次 Cython 到達這一行時,它必須將所有 C 整數轉換為 Python int 對象。由于這條線經常被調用,它超過了之前從`range()`創建的純 C 循環的速度優勢。
此外,`tmp * a + array_2[x, y] * b`返回一個 Python 整數,`tmp`是一個 C 整數,因此 Cython 必須再次進行類型轉換。最后,這些類型的轉換會加起來。并使我們的計算非常緩慢。但是這個問題可以通過使用內存視圖輕松解決。
## 使用內存視圖進行高效索引
仍有兩個瓶頸會降低性能,即數組查找和分配,以及 C / Python 類型轉換。 `[]` -operator 仍然使用完整的 Python 操作 - 我們想要做的是直接以 C 速度訪問數據緩沖區。
我們需要做的是輸入`ndarray`對象的內容。我們使用 memoryview 執行此操作。 [中有一個專門用于它的 Cython 文檔](memoryviews.html#memoryviews) 中的頁面。
簡而言之,內存視圖是 C 結構,可以保存指向 NumPy 數組的數據的指針以及所有必要的緩沖區元數據,以提供有效和安全的訪問:維度,步幅,項目大小,項目類型信息等...它們也支持切片,所以即使 NumPy 數組在內存中不連續,它們也能正常工作。它們可以由 C 整數索引,從而允許快速訪問 NumPy 數組數據。
以下是如何聲明整數的內存視圖:
```py
cdef int [:] foo # 1D memoryview
cdef int [:, :] foo # 2D memoryview
cdef int [:, :, :] foo # 3D memoryview
... # You get the idea.
```
在我們的示例中,沒有數據從 NumPy 數組復制到 memoryview。顧名思義,它只是記憶的“視圖”。因此,我們可以使用視圖`result_view`進行有效索引,最后返回保存我們操作數據的真實 NumPy 數組`result`。
以下是如何在我們的代碼中使用它們:
`compute_memview.pyx`
```py
import numpy as np
DTYPE = np.intc
cdef int clip(int a, int min_value, int max_value):
return min(max(a, min_value), max_value)
def compute(int[:, :] array_1, int[:, :] array_2, int a, int b, int c):
cdef Py_ssize_t x_max = array_1.shape[0]
cdef Py_ssize_t y_max = array_1.shape[1]
# array_1.shape is now a C array, no it's not possible
# to compare it simply by using == without a for-loop.
# To be able to compare it to array_2.shape easily,
# we convert them both to Python tuples.
assert tuple(array_1.shape) == tuple(array_2.shape)
result = np.zeros((x_max, y_max), dtype=DTYPE)
cdef int[:, :] result_view = result
cdef int tmp
cdef Py_ssize_t x, y
for x in range(x_max):
for y in range(y_max):
tmp = clip(array_1[x, y], 2, 10)
tmp = tmp * a + array_2[x, y] * b
result_view[x, y] = tmp + c
return result
```
讓我們看看現在訪問速度有多快。
```py
In [22]: %timeit compute_memview.compute(array_1, array_2, a, b, c)
22.9 ms ± 197 μs per loop (mean ± std. dev. of 7 runs, 10 loops each)
```
請注意這種變化的重要性。我們現在比 Python 的解釋版快 3081 倍,比 NumPy 快 4.5 倍。
Memoryviews 也可以與切片一起使用,甚至可以與 Python 數組一起使用。查看 [內存視圖頁面](memoryviews.html#memoryviews) ,看看它們能為您做些什么。
## 進一步調整索引
數組查找仍然受到兩個因素的影響:
1. 進行邊界檢查。
2. 檢查負指數并正確處理。上面的代碼是明確編碼的,因此它不使用負索引,并且(希望)總是在邊界內訪問。
使用裝飾器,我們可以停用這些檢查:
```py
...
cimport cython
@cython.boundscheck(False) # Deactivate bounds checking
@cython.wraparound(False) # Deactivate negative indexing.
def compute(int[:, :] array_1, int[:, :] array_2, int a, int b, int c):
...
```
現在沒有執行邊界檢查(并且,作為一個副作用,如果你'碰巧'訪問越界,你將在最好的情況下崩潰你的程序,在最壞的情況下會損壞數據)。可以通過多種方式切換邊界檢查模式,有關詳細信息,請參閱 [編譯器指令](source_files_and_compilation.html#compiler-directives) 。
```py
In [23]: %timeit compute_index.compute(array_1, array_2, a, b, c)
16.8 ms ± 25.4 μs per loop (mean ± std. dev. of 7 runs, 100 loops each)
```
我們比 NumPy 版本(6.2x)更快。 NumPy 編寫得很好,但不會懶惰地執行操作,導致在內存中進行大量的中間復制操作。我們的版本具有非常高的內存效率和緩存友好性,因為我們可以在一次運行中執行數據操作。
警告
速度需要一些成本。特別是將類型對象(如我們的示例代碼中的`array_1`,`array_2`和`result_view`)設置為`None`會很危險。將這些對象設置為`None`是完全合法的,但您可以使用它們檢查它們是否為 None。所有其他用途(屬性查找或索引)都可能會破壞或損壞數據(而不是像在 Python 中那樣引發異常)。
實際規則有點復雜,但主要信息很明確:不要使用類型化對象而不知道它們未設置為`None`。
## 將 NumPy 數組聲明為連續
為了獲得額外的速度增益,如果您知道您提供的 NumPy 陣列在內存中是連續的,則可以將 memoryview 聲明為連續的。
我們舉例說明一個有 3 個維度的數組。如果你想給 Cython 提供數據是 C-contiguous 的信息,你必須像這樣聲明 memoryview:
```py
cdef int [:,:,::1] a
```
如果你想給 Cython 提供數據是 Fortran 連續的信息,你必須像這樣聲明 memoryview:
```py
cdef int [::1, :, :] a
```
如果所有這些對你沒有意義,你可以跳過這一部分,聲明數組是連續的約束你的函數的用法,因為它拒絕數組切片作為輸入。如果您仍然想了解連續數組的全部內容,可以在 StackOverflow 上看到[這個答案。](https://stackoverflow.com/questions/26998223/what-is-the-difference-between-contiguous-and-non-contiguous-arrays)
為了給出數字,這里是通過將 memoryviews 聲明為連續來獲得的速度增益:
```py
In [23]: %timeit compute_contiguous.compute(array_1, array_2, a, b, c)
11.1 ms ± 30.2 μs per loop (mean ± std. dev. of 7 runs, 100 loops each)
```
我們現在的速度比 NumPy 版快 9 倍,比純 Python 版快 6300 倍!
## 使功能更清潔
聲明類型可以使您的代碼非常詳細。如果您不介意 Cython 推斷變量的 C 類型,可以使用文件頂部的`infer_types=True`編譯器指令。它會為你節省很多打字。
請注意,由于類型聲明必須發生在頂部縮進級別,因此 Cython 不會推斷在其他縮進級別中第一次聲明的變量類型。它會改變我們代碼的含義。這就是為什么我們仍然必須手動聲明`tmp`,`x`和`y`變量的類型。
實際上,在使用融合類型時,手動給出`tmp`變量的類型會很有用。
```py
# cython: infer_types=True
import numpy as np
cimport cython
DTYPE = np.intc
cdef int clip(int a, int min_value, int max_value):
return min(max(a, min_value), max_value)
@cython.boundscheck(False)
@cython.wraparound(False)
def compute(int[:, ::1] array_1, int[:, ::1] array_2, int a, int b, int c):
x_max = array_1.shape[0]
y_max = array_1.shape[1]
assert tuple(array_1.shape) == tuple(array_2.shape)
result = np.zeros((x_max, y_max), dtype=DTYPE)
cdef int[:, ::1] result_view = result
cdef int tmp
cdef Py_ssize_t x, y
for x in range(x_max):
for y in range(y_max):
tmp = clip(array_1[x, y], 2, 10)
tmp = tmp * a + array_2[x, y] * b
result_view[x, y] = tmp + c
return result
```
我們現在進行速度測試:
```py
In [24]: %timeit compute_infer_types.compute(array_1, array_2, a, b, c)
11.5 ms ± 261 μs per loop (mean ± std. dev. of 7 runs, 100 loops each)
```
瞧,速度沒變。
## 更通用的代碼
所有這些速度提升都很好,但添加類型會限制我們的代碼。目前,這意味著我們的函數只能與具有`np.intc`類型的 NumPy 數組一起使用。是否可以使我們的代碼適用于多種 NumPy 數據類型?
是的,借助稱為融合類型的新功能。您可以在 [文檔](fusedtypes.html#fusedtypes) 的這一部分了解更多相關信息。它類似于 C ++的模板。它在編譯時生成多個函數聲明,然后根據提供的參數類型在運行時選擇正確的聲明。通過比較 if 條件中的類型,還可以根據特定數據類型執行完全不同的代碼路徑。
在我們的例子中,由于我們不再訪問 NumPy 的輸入數組的 dtype,我們使用那些`if-else`語句來知道我們應該為輸出數組使用什么 NumPy 數據類型。
在這種情況下,我們的功能現在適用于整數,雙精度和浮點數。
```py
# cython: infer_types=True
import numpy as np
cimport cython
ctypedef fused my_type:
int
double
long long
cdef my_type clip(my_type a, my_type min_value, my_type max_value):
return min(max(a, min_value), max_value)
@cython.boundscheck(False)
@cython.wraparound(False)
def compute(my_type[:, ::1] array_1, my_type[:, ::1] array_2, my_type a, my_type b, my_type c):
x_max = array_1.shape[0]
y_max = array_1.shape[1]
assert tuple(array_1.shape) == tuple(array_2.shape)
if my_type is int:
dtype = np.intc
elif my_type is double:
dtype = np.double
elif my_type is cython.longlong:
dtype = np.longlong
result = np.zeros((x_max, y_max), dtype=dtype)
cdef my_type[:, ::1] result_view = result
cdef my_type tmp
cdef Py_ssize_t x, y
for x in range(x_max):
for y in range(y_max):
tmp = clip(array_1[x, y], 2, 10)
tmp = tmp * a + array_2[x, y] * b
result_view[x, y] = tmp + c
return result
```
我們可以檢查輸出類型是否正確:
```py
>>>compute(array_1, array_2, a, b, c).dtype
dtype('int32')
>>>compute(array_1.astype(np.double), array_2.astype(np.double), a, b, c).dtype
dtype('float64')
```
We now do a speed test:
```py
In [25]: %timeit compute_fused_types.compute(array_1, array_2, a, b, c)
11.5 ms ± 258 μs per loop (mean ± std. dev. of 7 runs, 100 loops each)
```
在編譯時創建更多版本的函數。因此有意義的是,與以前一樣使用整數執行此函數的速度不會改變。
## 使用多個線程
Cython 支持 OpenMP。它周圍也有一些很好的包裝器,比如函數`prange()`。您可以在 [使用并行](parallelism.html#parallel) 中查看有關 Cython 和并行性的更多信息。由于我們進行元素操作,因此我們可以輕松地在多個線程之間分配工作。重要的是不要忘記將正確的參數傳遞給編譯器以啟用 OpenMP。使用 Jupyter 筆記本時,你應該像這樣使用單元格魔術:
```py
%%cython --force
# distutils: extra_compile_args=-fopenmp
# distutils: extra_link_args=-fopenmp
```
必須釋放 GIL(參見 [釋放 GIL](external_C_code.html#nogil)),這就是我們聲明`clip()`函數`nogil`的原因。
```py
# tag: openmp
# You can ignore the previous line.
# It's for internal testing of the cython documentation.
# distutils: extra_compile_args=-fopenmp
# distutils: extra_link_args=-fopenmp
import numpy as np
cimport cython
from cython.parallel import prange
ctypedef fused my_type:
int
double
long long
# We declare our plain c function nogil
cdef my_type clip(my_type a, my_type min_value, my_type max_value) nogil:
return min(max(a, min_value), max_value)
@cython.boundscheck(False)
@cython.wraparound(False)
def compute(my_type[:, ::1] array_1, my_type[:, ::1] array_2, my_type a, my_type b, my_type c):
cdef Py_ssize_t x_max = array_1.shape[0]
cdef Py_ssize_t y_max = array_1.shape[1]
assert tuple(array_1.shape) == tuple(array_2.shape)
if my_type is int:
dtype = np.intc
elif my_type is double:
dtype = np.double
elif my_type is cython.longlong:
dtype = np.longlong
result = np.zeros((x_max, y_max), dtype=dtype)
cdef my_type[:, ::1] result_view = result
cdef my_type tmp
cdef Py_ssize_t x, y
# We use prange here.
for x in prange(x_max, nogil=True):
for y in range(y_max):
tmp = clip(array_1[x, y], 2, 10)
tmp = tmp * a + array_2[x, y] * b
result_view[x, y] = tmp + c
return result
```
我們可以以最小的努力獲得可觀的速度:
```py
In [25]: %timeit compute_prange.compute(array_1, array_2, a, b, c)
9.33 ms ± 412 μs per loop (mean ± std. dev. of 7 runs, 100 loops each)
```
我們現在比純 Python 版本快 7558 倍,比 NumPy 快 11.1 倍!
## 然后去哪兒?
* 如果你想學習如何在 Cython 中使用 [BLAS](https://www.netlib.org/blas/) 或 [LAPACK](https://www.netlib.org/lapack/) ,你可以在 SciPy 2015 上觀看 [Ian Henriksen 的演示。](https://www.youtube.com/watch?v=R4yB-8tB0J0&t=693s&ab_channel=Enthought)
* 如果你想學習如何在 Cython 中使用 Pythran 作為后端,你可以在 [Pythran 中看到如何作為 NumPy 后端](numpy_pythran.html#numpy-pythran) 。請注意,使用 Pythran 僅適用于 [舊緩沖區語法](../tutorial/numpy.html#working-numpy) ,尚未使用內存視圖。
- Cython 3.0 中文文檔
- 入門
- Cython - 概述
- 安裝 Cython
- 構建 Cython 代碼
- 通過靜態類型更快的代碼
- Tutorials
- 基礎教程
- 調用 C 函數
- 使用 C 庫
- 擴展類型(又名.cdef 類)
- pxd 文件
- Caveats
- Profiling
- Unicode 和傳遞字符串
- 內存分配
- 純 Python 模式
- 使用 NumPy
- 使用 Python 數組
- 進一步閱讀
- 相關工作
- 附錄:在 Windows 上安裝 MinGW
- 用戶指南
- 語言基礎
- 擴展類型
- 擴展類型的特殊方法
- 在 Cython 模塊之間共享聲明
- 與外部 C 代碼連接
- 源文件和編譯
- 早期綁定速度
- 在 Cython 中使用 C ++
- 融合類型(模板)
- 將 Cython 代碼移植到 PyPy
- Limitations
- Cython 和 Pyrex 之間的區別
- 鍵入的內存視圖
- 實現緩沖協議
- 使用并行性
- 調試你的 Cython 程序
- 用于 NumPy 用戶的 Cython
- Pythran 作為 Numpy 后端