
# 練習 0:起步
> 原文:[Exercise 0. The Setup](https://archive.fo/ZfhWN)
> 譯者:[飛龍](https://github.com/wizardforcel)
> 協議:[CC BY-NC-SA 4.0](http://creativecommons.org/licenses/by-nc-sa/4.0/)
> 自豪地采用[谷歌翻譯](https://translate.google.cn/)
## Windows,手動安裝
[非常長的指南](https://archive.fo/p1ZHn)
## Windows,VirtualBox 虛擬機(`.ova`格式的預配置映像)
### 你需要什么
+ VitualBox,虛擬機播放器。
+ putty,終端模擬器。
+ 預配置的 VirtualBox Debian 映像。
## 這樣做
+ 下載并安裝 [VirtualBox](http://download.virtualbox.org/virtualbox/4.1.18/VirtualBox-4.1.18-78361-Win.exe)
+ 下載并安裝 [Putty](http://the.earth.li/~sgtatham/putty/latest/x86/putty-0.62-installer.exe)。
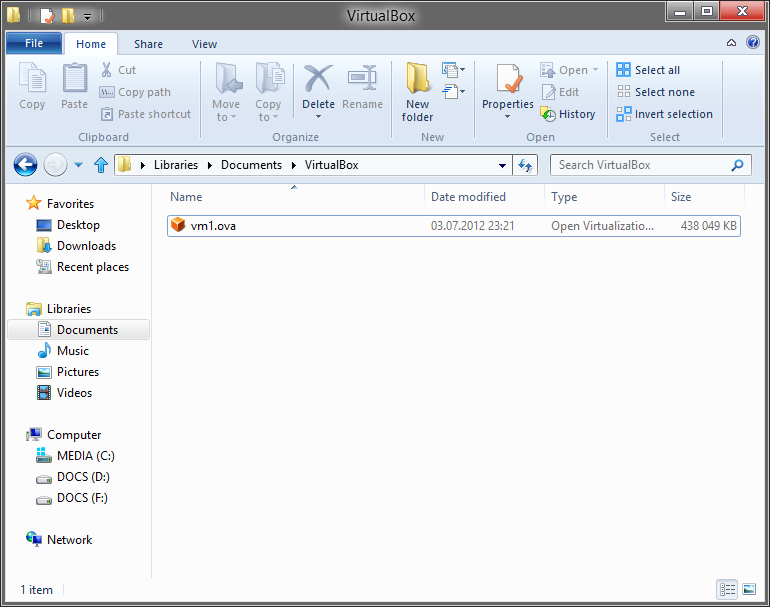
+ 下載此文件:<https://docs.google.com/open?id=0Bw1iG1X4Li39ZlhkQmgtM1BhV2s>
另一個鏈接:<http://thepiratebay.se/search/vm1.ova/0/99/0>
或另一個鏈接:<http://www.fileconvoy.com/dfl.php?id=g280b501145101ce4999185763996254d441643a34>
```
md5: 7ac8a6059460f7f3e39aee7c4ee2c230
sha256: 18d8f31d0894c89865d5306b0cb3284d8889e15d155c7435fc7888f3dbafa3ec
```
+ 打開文件
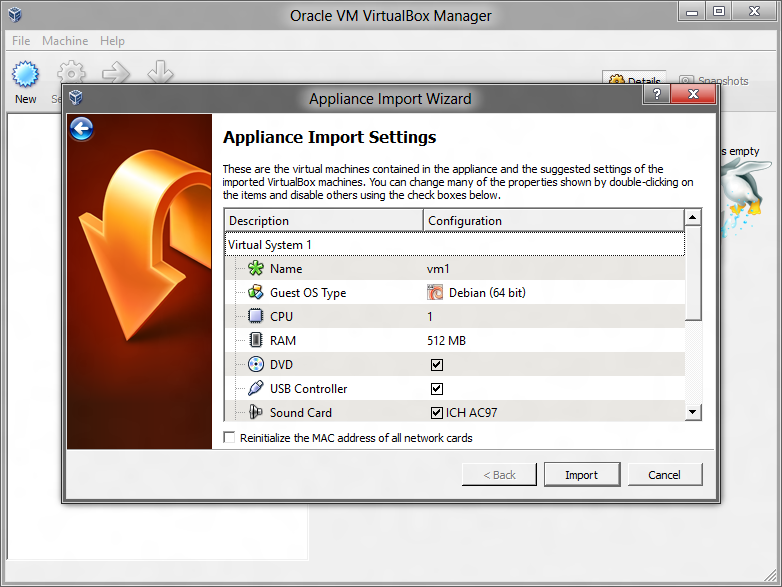
+ 點擊`Import`
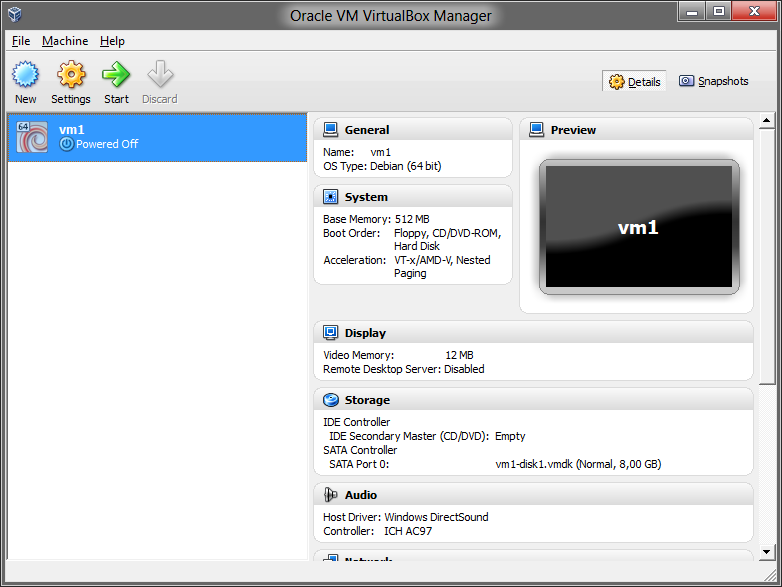
+ 選擇`vm1`并點擊`Start`
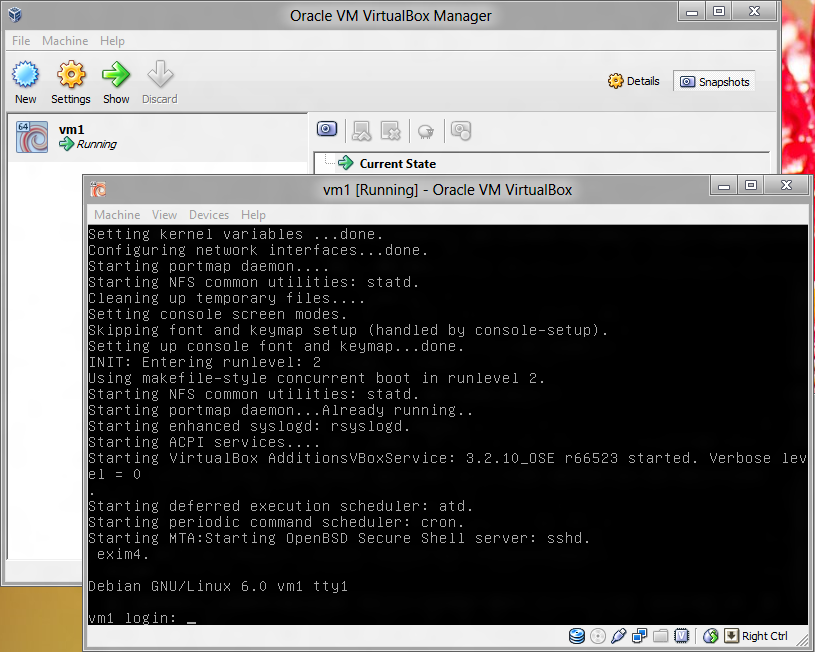
+ 等待`vm1`啟動
+ 啟動`putty`,在`Host Name`或者`IP Address`中輸入`localhost`。之后點擊`Open`
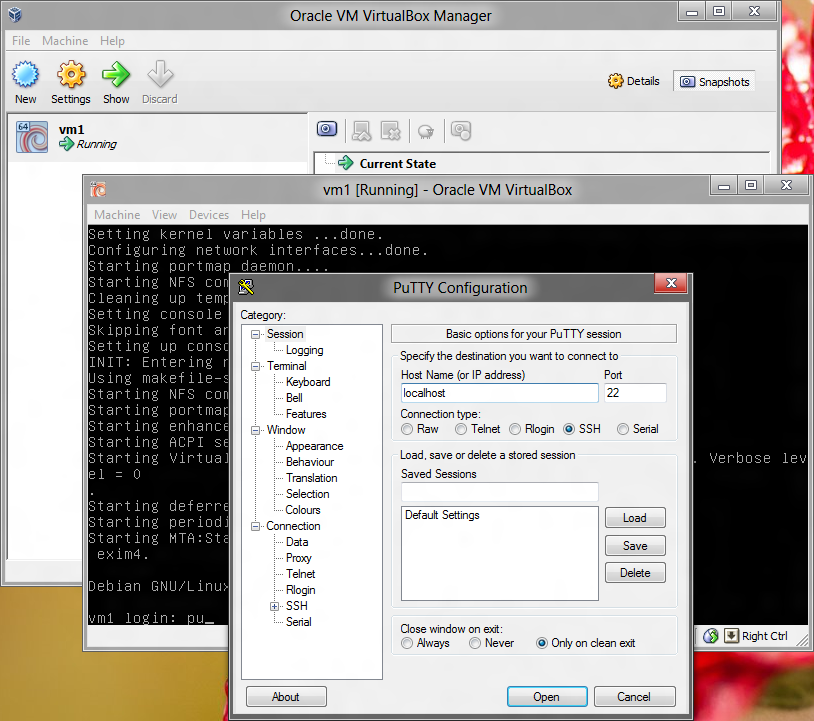
+ 輸入`user1`, `<ENTER>`, `123qwe`, `<ENTER>`。
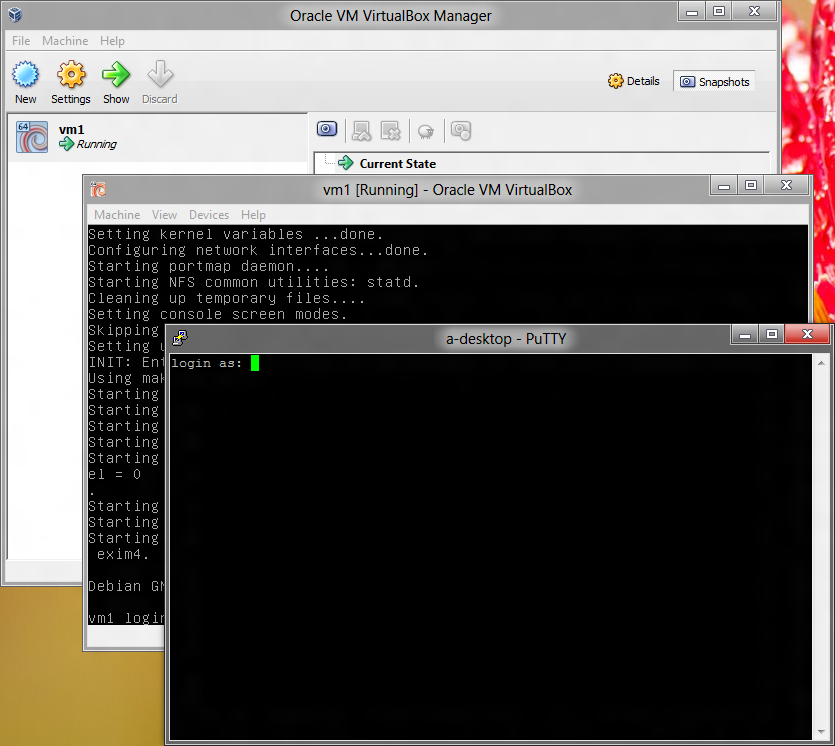
+ 恭喜,你現在登入了`vm1`。

## Linux
你已經使用 Linux 了,你還需要什么嘛?開個玩笑。你可以嚴格遵循我的指南,或者隨意在你的系統上做實驗。
## Mac OS
以后我會在這里把步驟補上。
- 笨辦法學 Linux 中文版
- 練習 0:起步
- 練習 1:文本編輯器,vim
- 練習 2:文本瀏覽器,少即是多
- 練習 3:Bash:Shell、.profile、.bashrc、.bash_history
- 練習 4:Bash:處理文件,pwd,ls,cp,mv,rm,touch
- 練習 5:Bash:環境變量,env,set,export
- 練習 6:Bash:語言設置,LANG,locale,dpkg-reconfigure locales
- 練習 7:Bash:重定向,stdin,stdout,stderr,<,>,>>,|,tee,pv
- 練習 8:更多的重定向和過濾:head,tail,awk,grep,sed
- 練習 9:Bash:任務控制,jobs,fg
- 練習 10:Bash:程序退出代碼(返回狀態)
- 練習 11:總結
- 練習 12:文檔:man,info
- 練習 13:文檔:Google
- 練習 14:包管理:Debian 包管理工具aptitude
- 練習 15:系統啟動:運行級別,/etc/init.d,rcconf,update-rc.d
- 練習 16:處理進程,ps,kill
- 練習 17:任務調度:cron,at
- 練習 18:日志:/var/log,rsyslog,logger
- 練習 19:文件系統:掛載,mount,/etc/fstab
- 練習 20:文件系統:修改和創建文件系統,tune2fs,mkfs
- 練習 21:文件系統:修改根目錄,chroot
- 練習 22:文件系統:移動數據,tar,dd
- 練習 23:文件系統:權限,chown,chmod,umask
- 練習 24:接口配置,ifconfig,netstat,iproute2,ss,route
- 練習 25:網絡:配置文件,/etc/network/interfaces
- 練習 26:網絡:封包過濾配置,iptables
- 練習 27:安全 Shell,ssh,sshd,scp
- 練習 28:性能:獲取性能情況,uptime,free,top
- 練習 29:內核:內核消息,dmesg
- 練習 30:打磨、洗練、重復:總復習
- 下一步做什么
- Debian 手動安裝