
首先,我們新建一個數據庫`guns_test`,并分別在`guns`數據庫和`guns_test`數據庫中分別新增同樣結構的兩個表`test`,sql文件如下,也可以在`src/test/sql`下找到這個sql文件
```
DROP DATABASE IF EXISTS guns_test;
CREATE DATABASE IF NOT EXISTS guns_test DEFAULT CHARSET utf8 COLLATE utf8_general_ci;
use guns_test;
SET NAMES utf8mb4;
SET FOREIGN_KEY_CHECKS = 0;
-- ----------------------------
-- Table structure for test
-- ----------------------------
DROP TABLE IF EXISTS `test`;
CREATE TABLE `test` (
`aaa` int(11) NOT NULL AUTO_INCREMENT,
`bbb` varchar(255) DEFAULT NULL,
PRIMARY KEY (`aaa`) USING BTREE
) ENGINE=InnoDB AUTO_INCREMENT=12 DEFAULT CHARSET=utf8 ROW_FORMAT=DYNAMIC;
SET FOREIGN_KEY_CHECKS = 1;
```
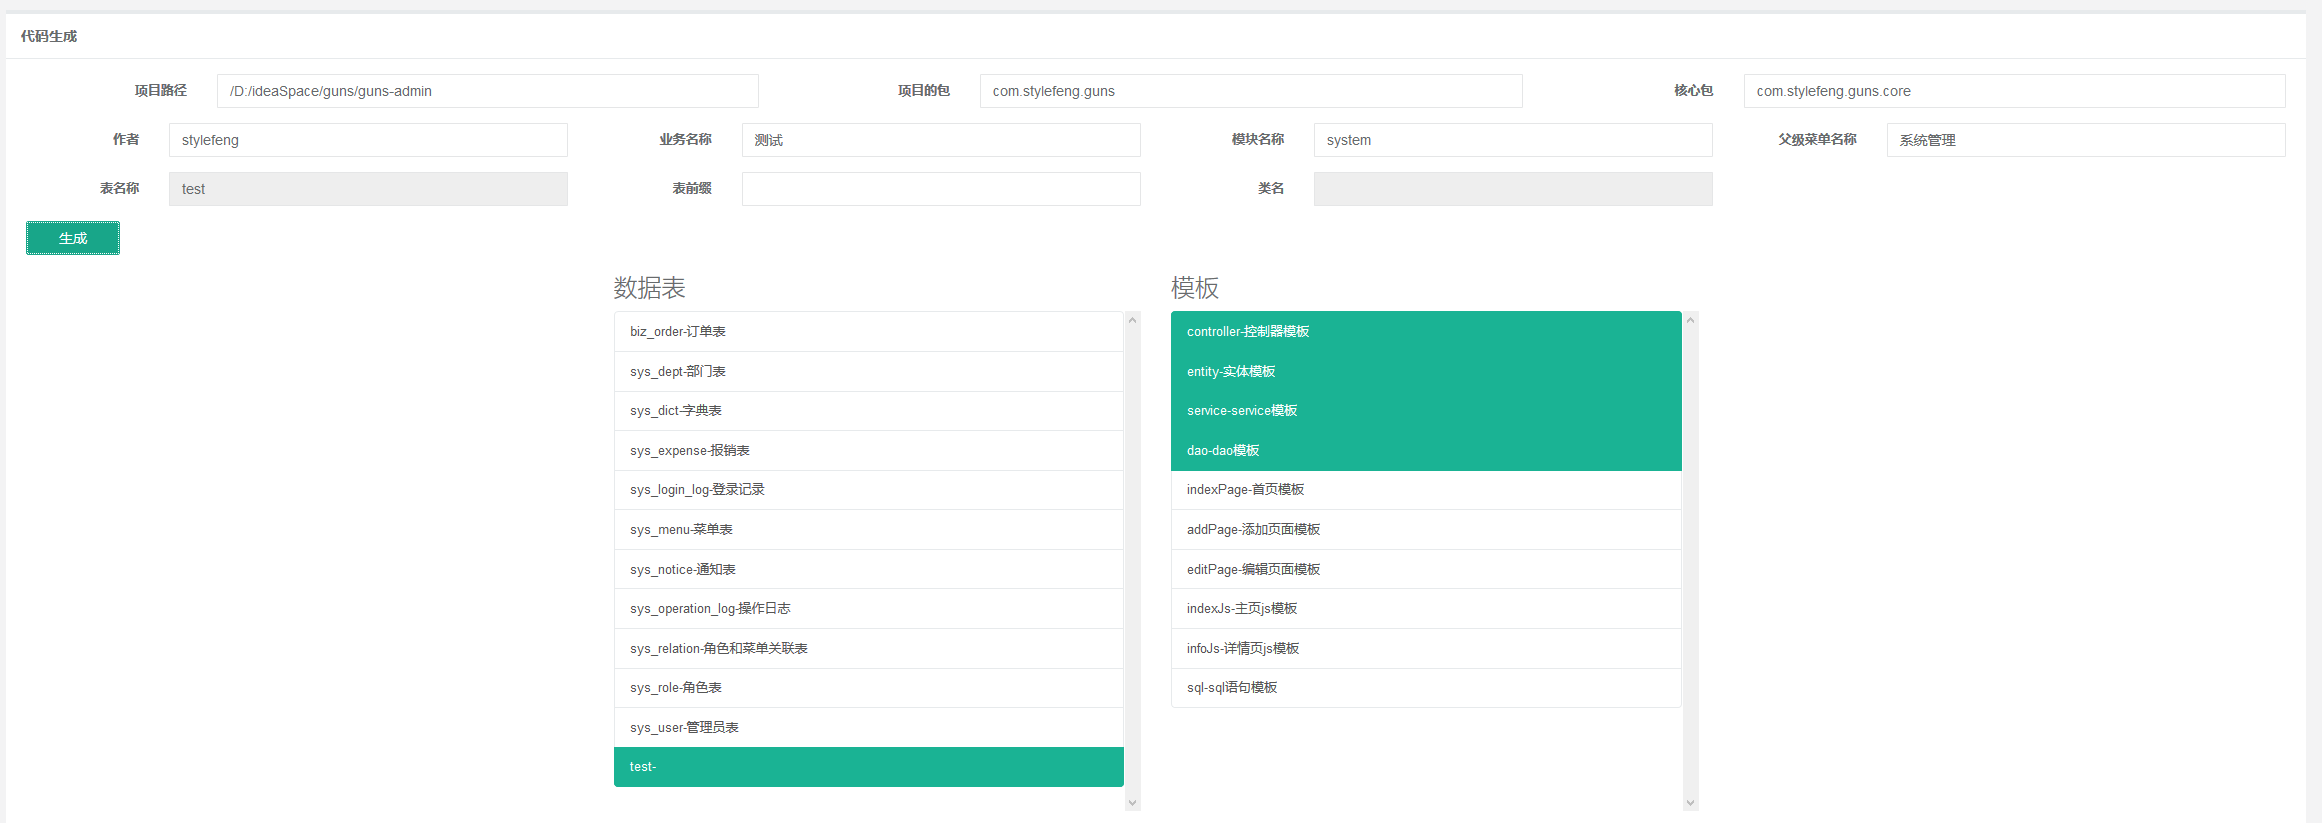
> 1.對表進行代碼生成,方便測試兩個數據源
> 2.打開application.yml中的多數據源開關
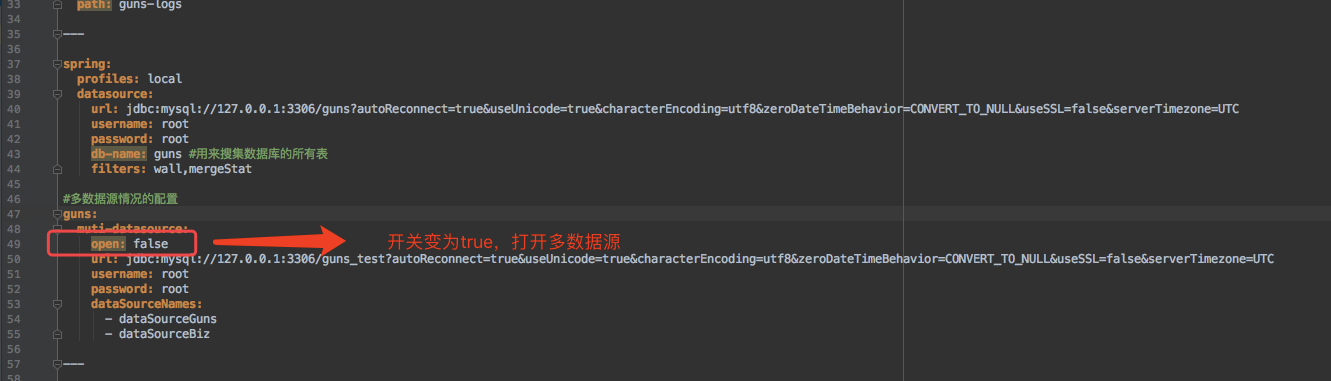
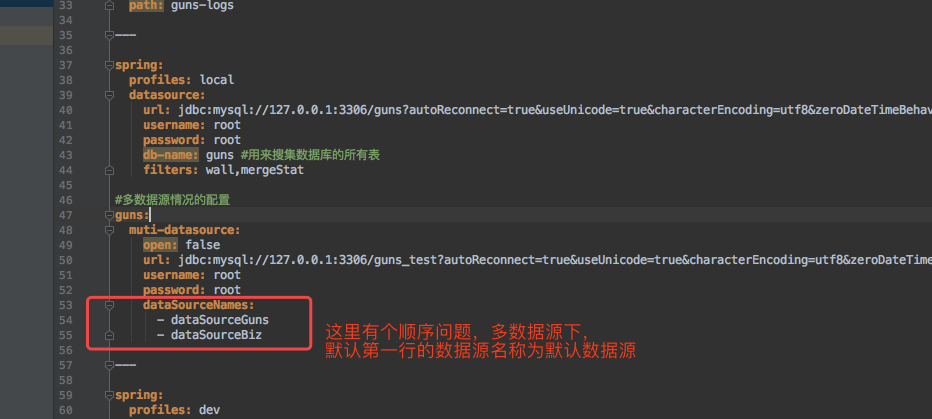
> 3.配置application.yml中的多數據源的連接信息
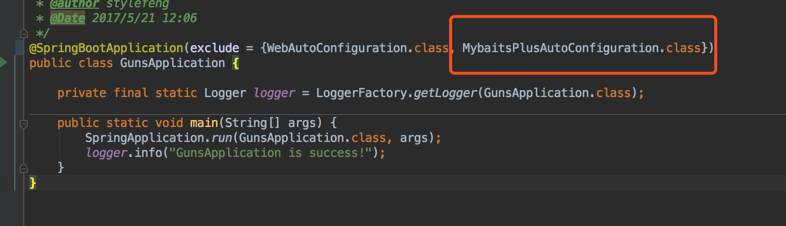
**另外注意,如果想開啟多數據源,需要關閉kernel-core中mybatis-plus中的自動配置!!重要!!如下!!**
> 4.編寫測試多數據源的代碼,注意觀察`@DataSource注解`,這些代碼都可以在`cn.stylefeng.guns.multi`包中找到
```
package cn.stylefeng.guns.multi.service;
/**
* <p>
* 服務類
* </p>
*
* @author fengshuonan
* @since 2018-07-10
*/
public interface TestService {
/**
* 測試多數據源的業務
*
* @author stylefeng
* @Date 2017/6/23 23:02
*/
void testBiz();
/**
* 測試多數據源的業務
*
* @author stylefeng
* @Date 2017/6/23 23:02
*/
void testGuns();
}
```
```
package cn.stylefeng.guns.multi.service.impl;
import cn.stylefeng.guns.core.common.constant.DatasourceEnum;
import cn.stylefeng.guns.multi.entity.Test;
import cn.stylefeng.guns.multi.mapper.TestMapper;
import cn.stylefeng.guns.multi.service.TestService;
import cn.stylefeng.roses.core.mutidatasource.annotion.DataSource;
import org.springframework.beans.factory.annotation.Autowired;
import org.springframework.stereotype.Service;
import org.springframework.transaction.annotation.Transactional;
/**
* <p>
* 服務實現類
* </p>
*
* @author fengshuonan
* @since 2018-07-10
*/
@Service
public class TestServiceImpl implements TestService {
@Autowired
private TestMapper testMapper;
@Override
@DataSource(name = DatasourceEnum.DATA_SOURCE_BIZ)
@Transactional
public void testBiz() {
Test test = new Test();
test.setBbb("bizTest");
testMapper.insert(test);
}
@Override
@DataSource(name = DatasourceEnum.DATA_SOURCE_GUNS)`
@Transactional
public void testGuns() {
Test test = new Test();
test.setBbb("gunsTest");
testMapper.insert(test);
}
}
```
```
package cn.stylefeng.guns.multi.test;
import cn.stylefeng.guns.base.BaseJunit;
import cn.stylefeng.guns.multi.service.TestService;
import org.junit.Test;
import org.springframework.beans.factory.annotation.Autowired;
/**
* 業務測試
*
* @author fengshuonan
* @date 2017-06-23 23:12
*/
public class BizTest extends BaseJunit {
@Autowired
TestService testService;
@Test
public void test() {
testService.testGuns();
testService.testBiz();
}
}
```
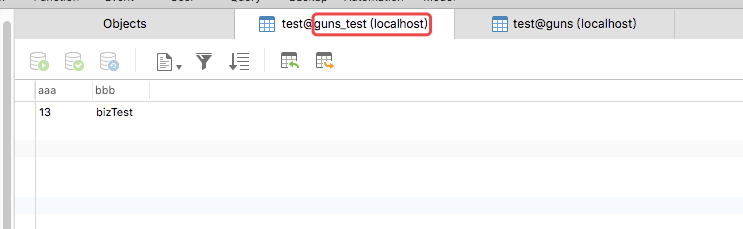
> 5.執行`BizTest`這個測試類,可以看出,兩條數據同時插入了不同的數據庫中的兩張表中

多數據源的原理就是一個項目同時配置了兩個`DataSource`,并把這兩個`DataSource`放到`DynamicDataSource`綁定,使用AOP進行動態切換當前操作的數據源。
**若想深入了解多數據源的配置和原理可參考`MybatisPlusConfig類`和`MultiSourceExAop類`,也可參考視頻教程第`7節 多數據源配置和使用`,內有詳細的講解**
- Guns 技術文檔 v5.1
- 1. 序言
- 1.1 文檔簡介
- 1.2 Guns教程
- 1.3 獲取幫助
- 2. 使用手冊
- 2.1 下載項目
- 2.2 導入項目
- 2.2.1 eclipse導入
- 2.2.2 IDEA導入
- 2.3 運行項目
- 2.4 打包部署
- 3. 開發手冊
- 3.1 了解Guns
- 3.1.1 模塊結構
- 3.1.2 包結構說明
- 3.2 實戰開發
- 3.2.1 建表
- 3.2.2 代碼生成
- 3.3.3 添加菜單與分配權限
- 3.3.4 編寫業務代碼
- 3.3 權限控制與校驗
- 3.3.1 用戶,角色和資源
- 3.3.2 如何對資源進行權限控制
- 3.3.3 前端頁面對權限資源的顯示
- 3.4 多數據源的使用
- 3.5 如何分頁
- 3.5.1 簡單查詢的分頁
- 3.5.2 復雜查詢的分頁
- 3.5.3 獲取前端表格插件傳值
- 3.6 數據范圍
- 3.6.1 介紹
- 3.6.2 如何使用
- 3.6.3 原理
- 3.7 guns-rest模塊的使用
- 3.7.1 關于jwt鑒權
- 3.7.2 關于傳輸數據的簽名
- 3.7.3 guns-rest模塊的運行流程
- 3.7.4 運行原理
- 3.8 工作流
- 3.9 日志記錄
- 3.9.1 業務日志
- 3.9.2 異常日志
- 3.10 如何使用緩存
- 3.10.1 用工具類操作
- 3.10.2 用spring cache操作緩存
- 3.11 使用枚舉
- 3.12 spring boot熱部署
- 3.12.1 重新加載html
- 3.12.2 重新加載java類
- 4. 擴展與高級配置
- 4.1 修改項目名和包名
- 4.1.1 修改項目名
- 4.1.2 修改包名
- 4.2 放過接口權限驗證
- 4.3 靜態資源和模板位置的變更
- 4.4 三個或更多數據源如何配置
- 4.5 添加登錄驗證碼
- 4.6 spring profile
- 4.7 多機器部署開啟spring session
- 4.8 使用Redis
- 4.9 XSS過濾器
- 4.9.1 介紹
- 4.9.2 原理
- 4.9.3 放過過濾
- 5. 核心思想
- 5.1 分包
- 5.2 統一異常攔截
- 5.2.1 介紹
- 5.2.2 優點
- 5.2.3 關于性能
- 5.3 結果包裝器
- 5.3.1 如何使用
- 5.3.2 ConstantFactory
- 5.4 前端思想
- 5.4.1 布局
- 5.4.2 標簽
- 5.4.3 手動新增標簽頁
- 6. 常見問題答疑
- 6.1 默認的系統登錄賬號和密碼是多少
- 6.2 權限異常
- 6.3 為何分頁是前端實現
- 6.4 關于${ctxPath}
- 6.5 放過某些url的權限驗證
- 6.6 主頁的搜索功能
- 6.7 運行sql報錯
- 6.8 關于打包
- 6.9 查詢結果的駝峰轉化問題
- 6.10 為何使用beetl
- 6.11 為何有的業務沒有service層
- 6.12 為何既有dao,又有mapper
- 6.13 提示@spring.active@錯誤