# Hello World
前后端分離框如何快速進入開發,請參照下面hello world實現demo
### 一、后臺服務代碼實現
~~~
@RestController
@RequestMapping("/test/jeecgDemo")
@Slf4j
public class JeecgDemoController {
/**
* hello world
*
* @param id
* @return
*/
@GetMapping(value = "/hello")
public Result<String> hello() {
Result<String> result = new Result<String>();
result.setResult("Hello World!");
result.setSuccess(true);
return result;
}
}
~~~
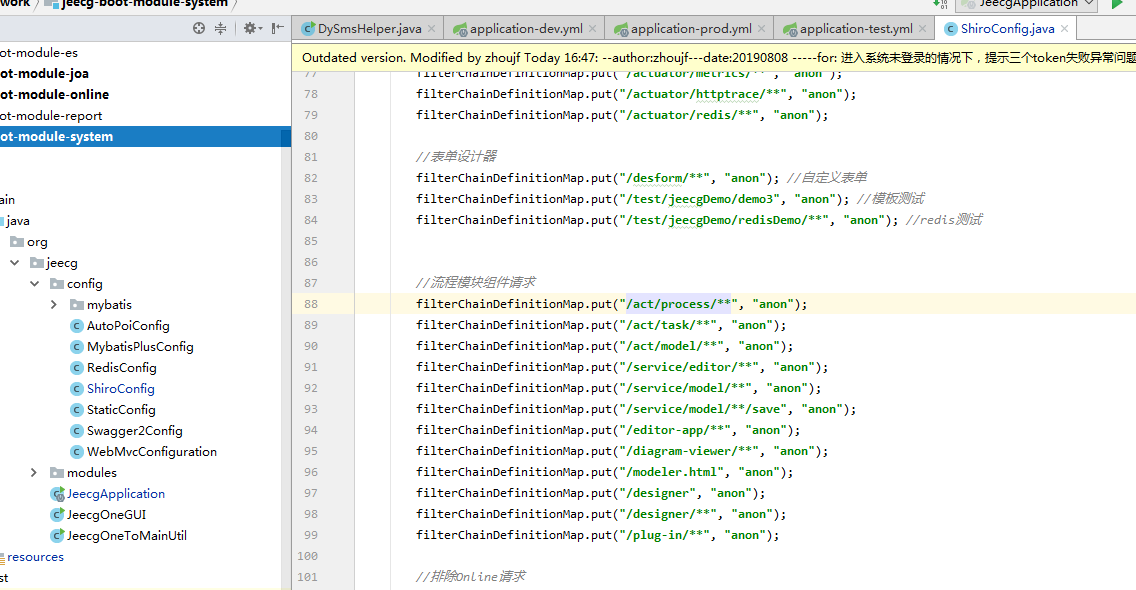
訪問請求http://localhost:8080/jeecg-boot/test/jeecgDemo/hello 會提示token無效,
所以需要配置下攔截器ShiroConfig排除。
~~~
配置文件: jeecg-boot-base/jeecg-boot-base-core/org.jeecg.config.shiro.ShiroConfig
加入配置:filterChainDefinitionMap.put("/test/jeecgDemo/hello", "anon");
~~~
再訪問http://localhost:8080/jeecg-boot/test/jeecgDemo/hello,會返回結果如下:
~~~
{
"success": true,
"message": null,
"code": null,
"result": "Hello World!",
"timestamp": 1548833208562
}
~~~
### 二、前臺vue頁面實現
(1)創建vue頁面src/views/jeecg/helloworld.vue
調用后臺請求,獲取返回的Hello World! 輸出到頁面,頁面代碼如下:
~~~
<template>
<div>
{{ msg }}
</div>
</template>
<script>
import {getAction} from '@/api/manage'
export default {
data () {
return {
msg: ""
}
},
methods: {
hello () {
var url = "/test/jeecgDemo/hello"
getAction(url).then((res) => {
if (res.success) {
this.msg = res.result;
}
})
}
},
created() {
this.hello();
}
}
</script>
~~~
#### 代碼說明:
1、data() 方法中定義數據對象msg
2、數據對象msg輸出到頁面,表達式如下:
{{ msg }}
3、定義一個方法,發起請求獲取后臺響應,后臺實現的是get方法,引入getAction方法
~~~
import {getAction} from '@/api/manage'
~~~
定義方法調用:
~~~
hello () {
var url = "/test/jeecgDemo/hello"
getAction(url).then((res) => {
if (res.success) {
this.msg = res.result;
}
})
}
~~~
4、Vue生命周期 created 中調用方法
~~~
created() {
this.hello();
}
~~~
hello方法中
this.msg = res.result;
把請求返回的Hello World! 賦值給msg數據對象,msg值改變則頁面顯示也改變。
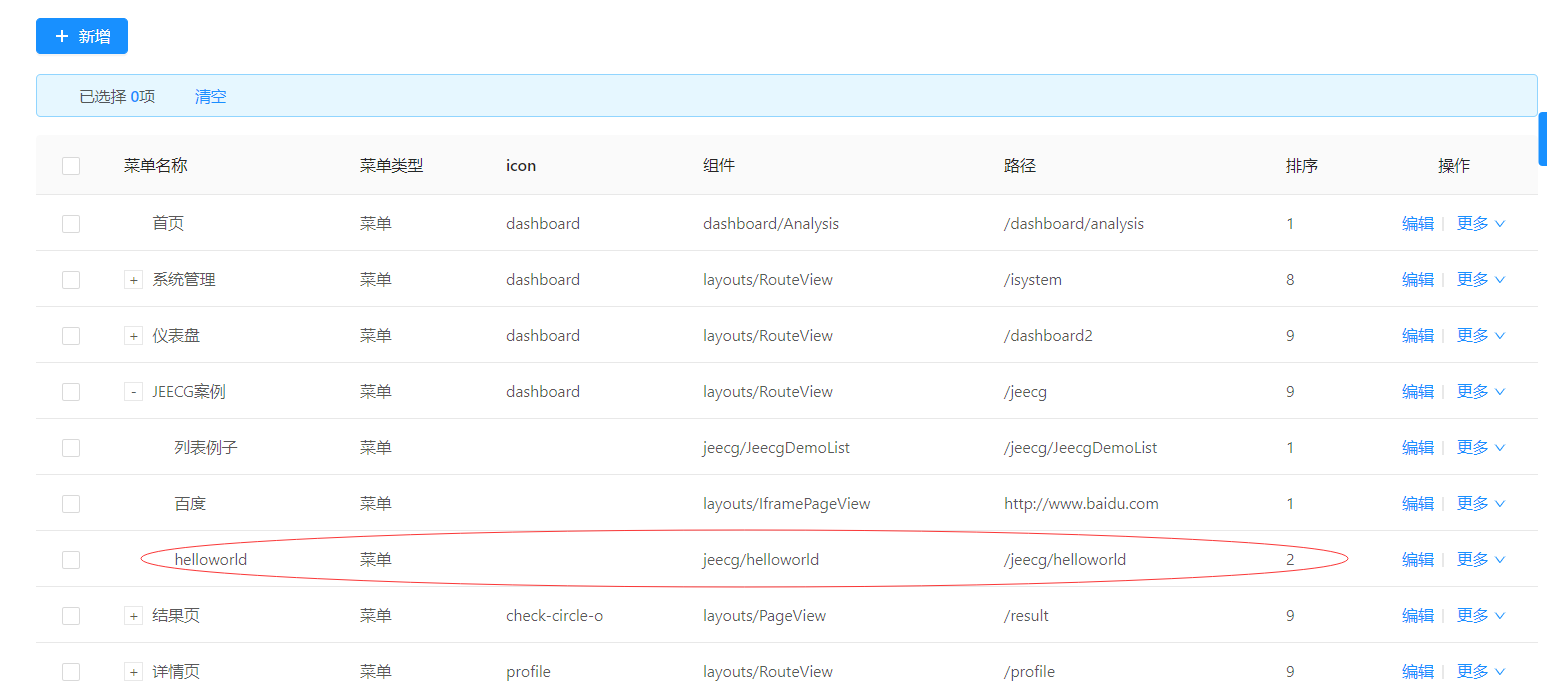
### 三、配置菜單
1. 配置helloword菜單【系統管理】-【菜單管理】
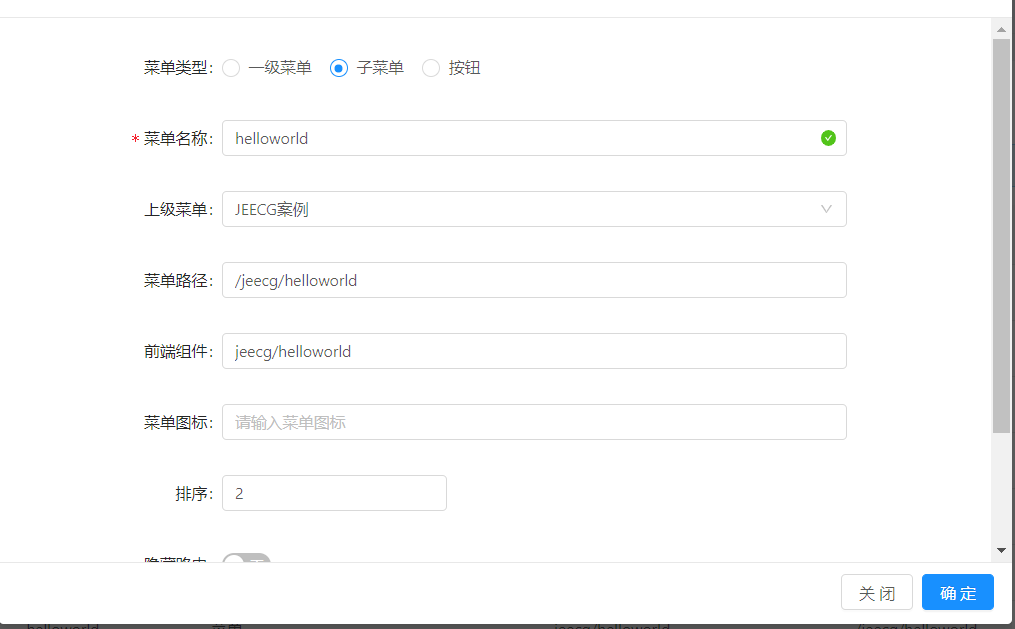
* 其中前端組件配置相對src/views/目錄下的 目錄名+文件名
* 例如頁面src/views/jeecg/helloworld.vue 前端組件配置 jeecg/helloworld
2. 用戶角色授權【系統管理】-【角色管理】-授權
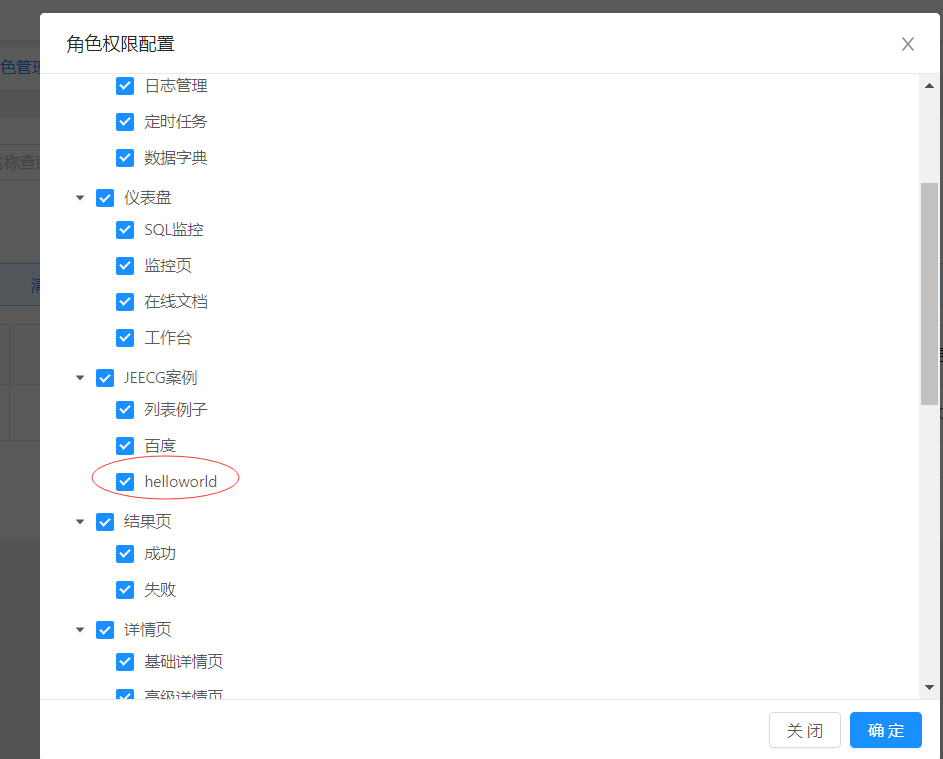
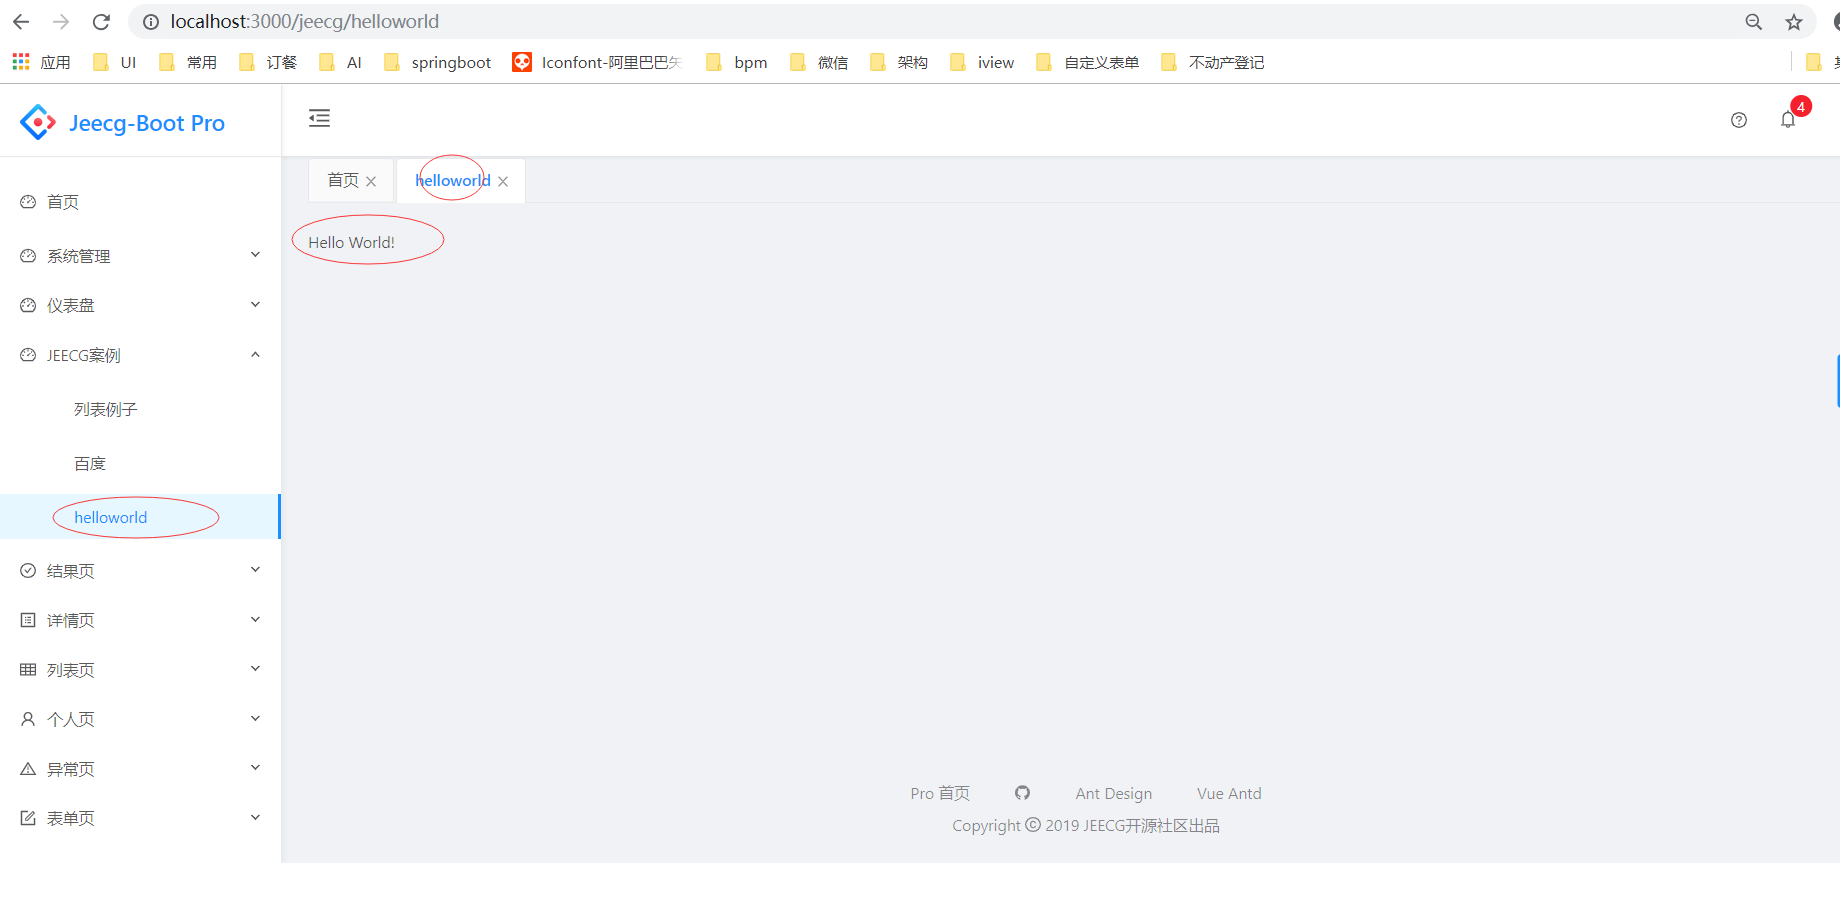
點擊菜單訪問頁面展示Hello World!
