<ruby id="bdb3f"></ruby>

    <p id="bdb3f"><cite id="bdb3f"></cite></p>

      <p id="bdb3f"><cite id="bdb3f"><th id="bdb3f"></th></cite></p><p id="bdb3f"></p>
        <p id="bdb3f"><cite id="bdb3f"></cite></p>

          <pre id="bdb3f"></pre>
          <pre id="bdb3f"><del id="bdb3f"><thead id="bdb3f"></thead></del></pre>

          <ruby id="bdb3f"><mark id="bdb3f"></mark></ruby><ruby id="bdb3f"></ruby>
          <pre id="bdb3f"><pre id="bdb3f"><mark id="bdb3f"></mark></pre></pre><output id="bdb3f"></output><p id="bdb3f"></p><p id="bdb3f"></p>

          <pre id="bdb3f"><del id="bdb3f"><progress id="bdb3f"></progress></del></pre>

                <ruby id="bdb3f"></ruby>

                ThinkChat2.0新版上線,更智能更精彩,支持會話、畫圖、視頻、閱讀、搜索等,送10W Token,即刻開啟你的AI之旅 廣告
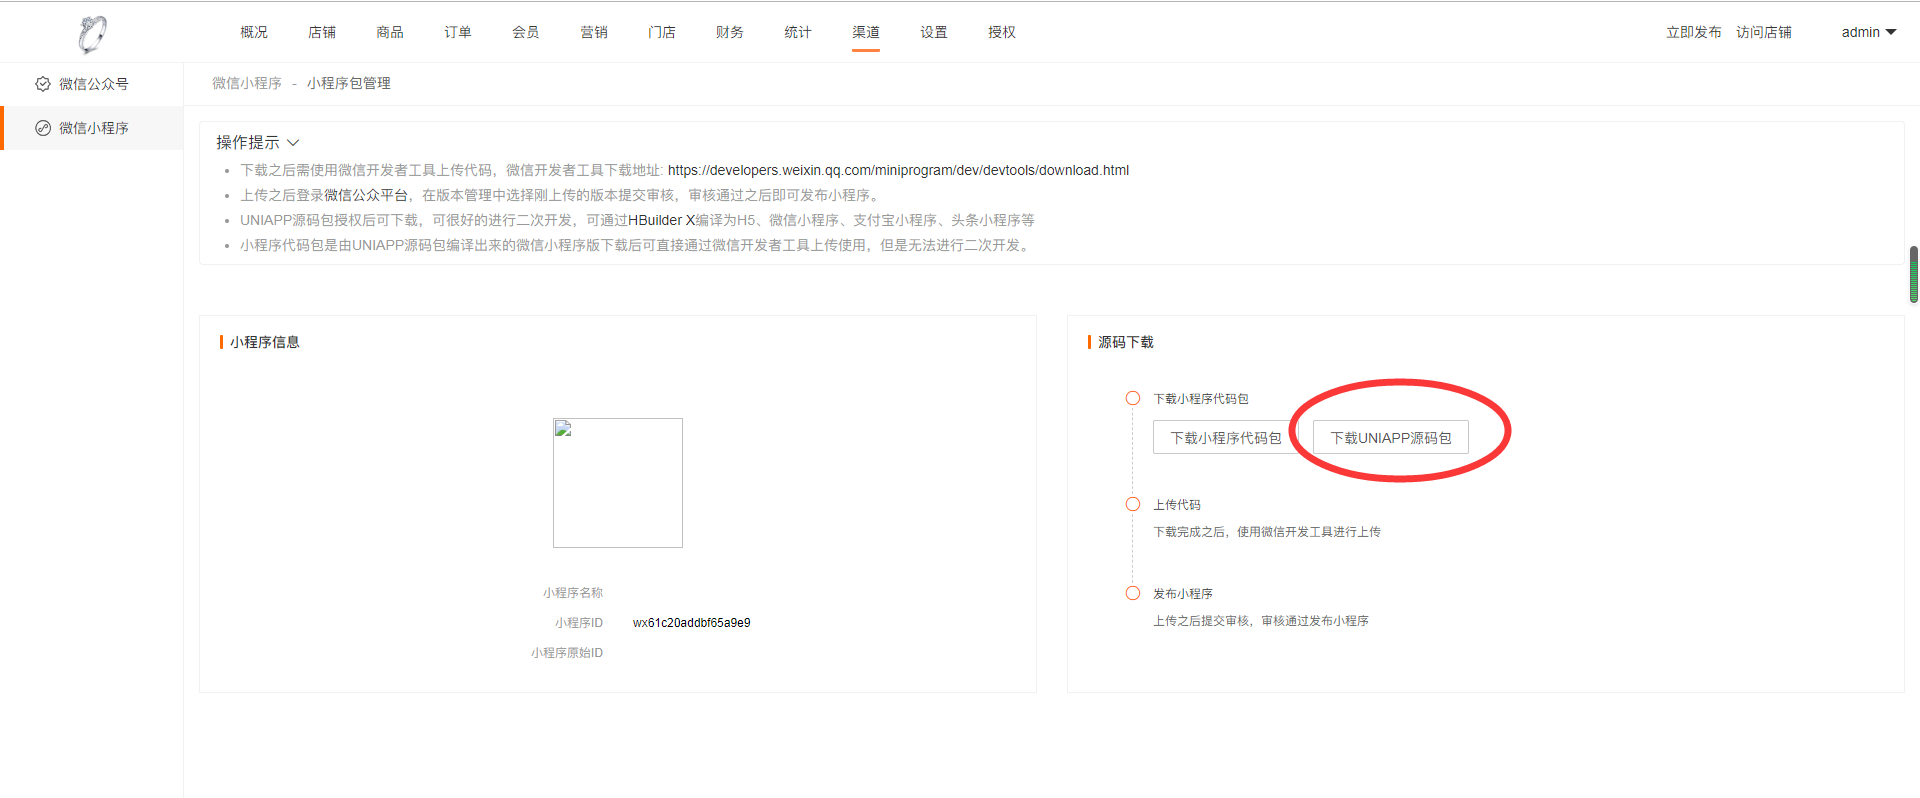
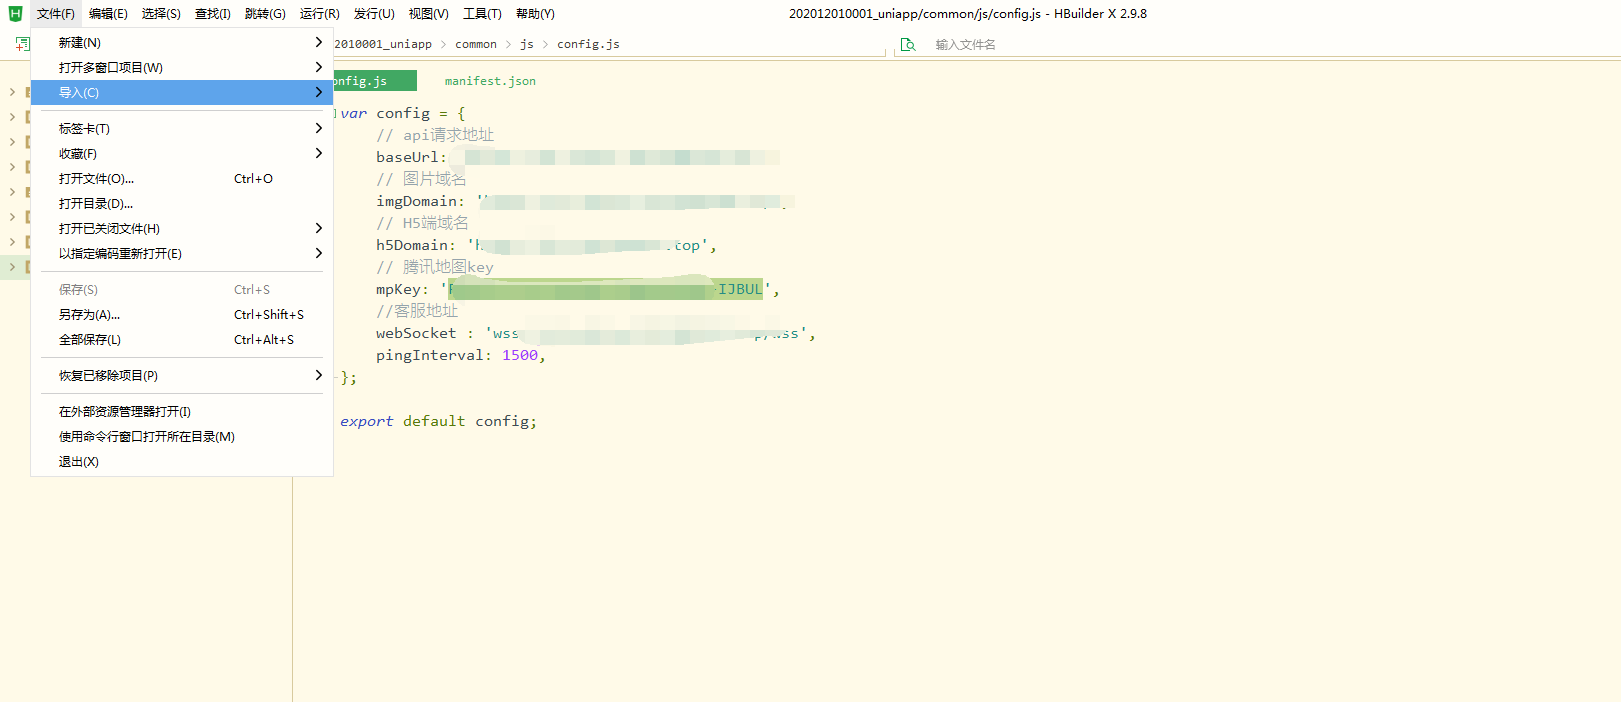
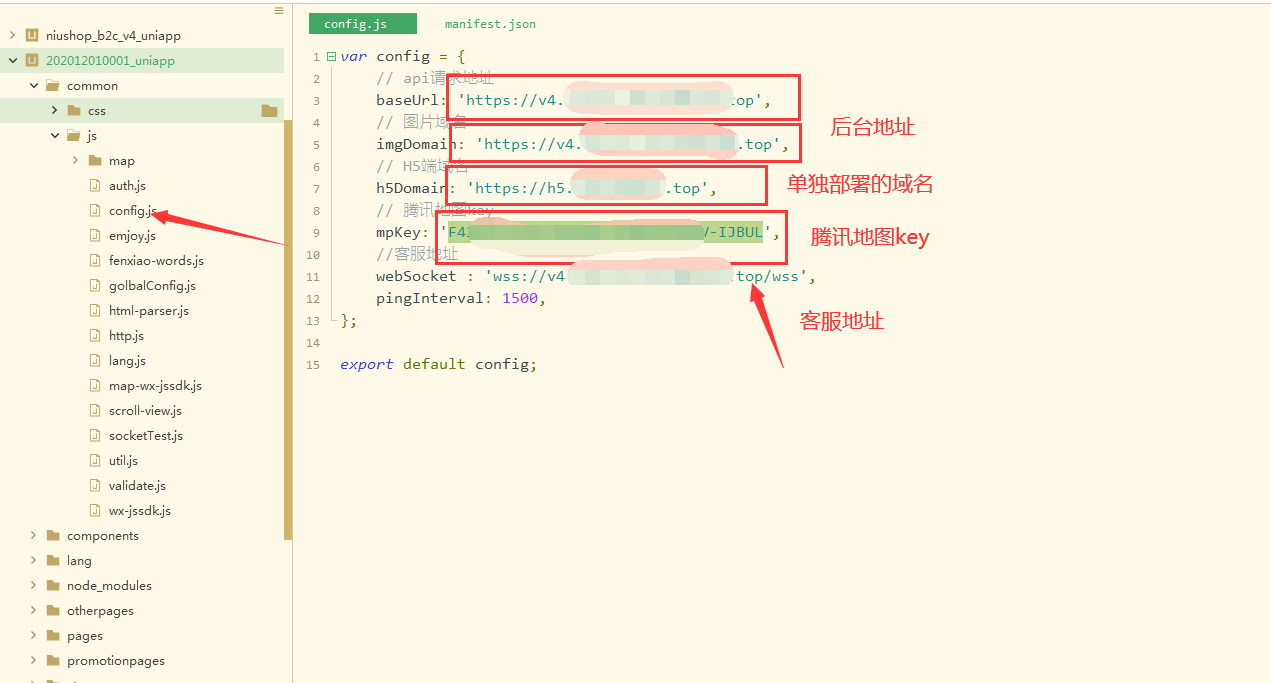
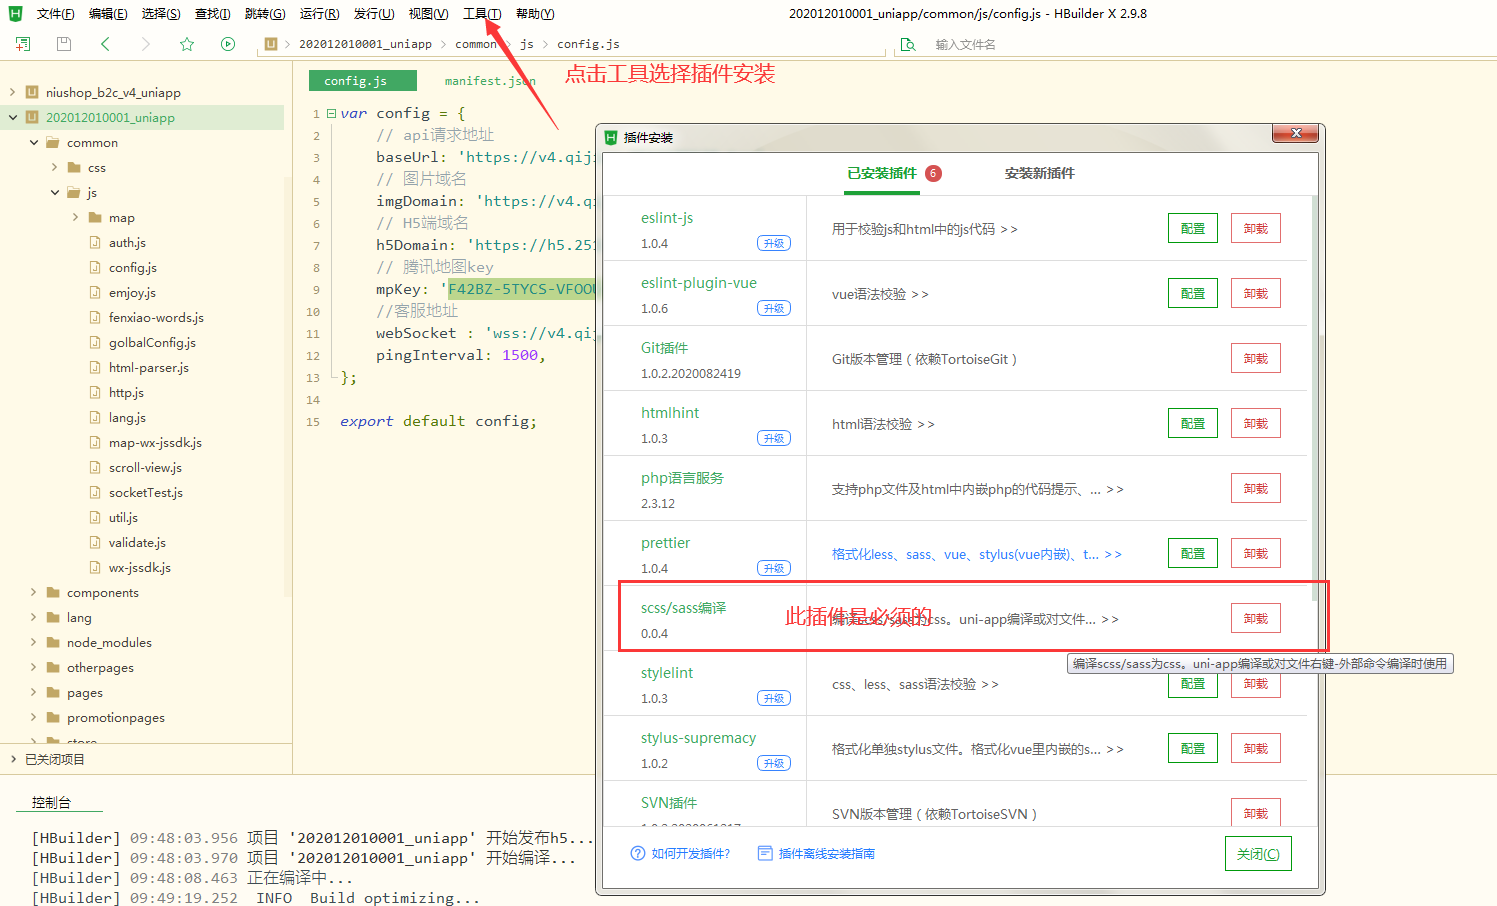
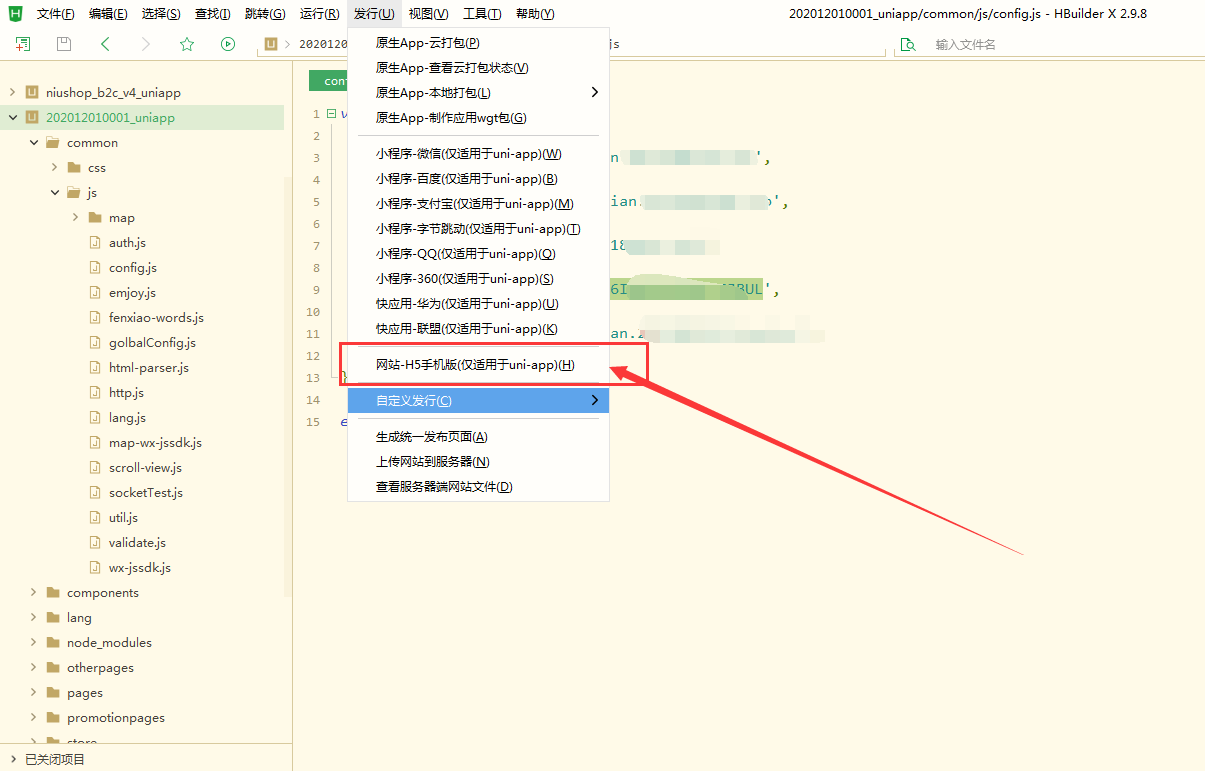
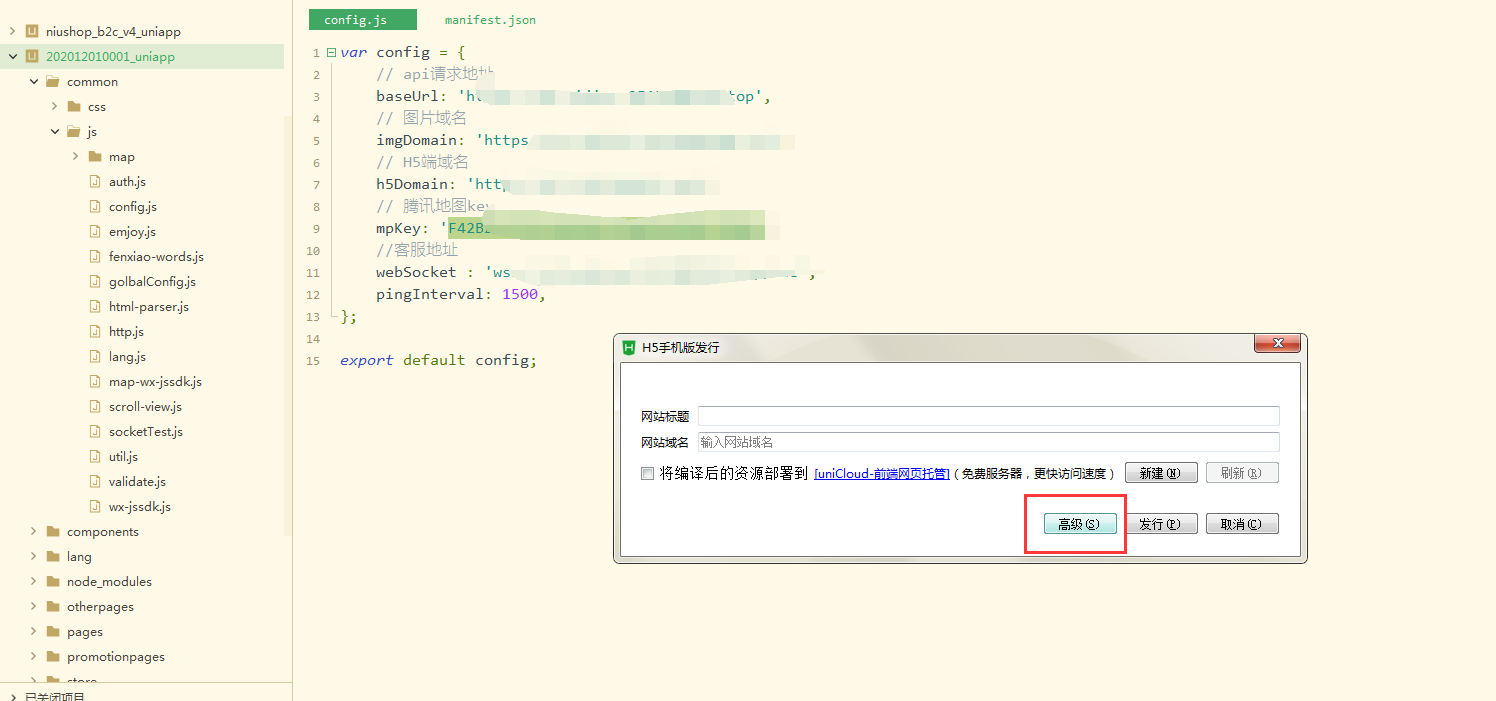
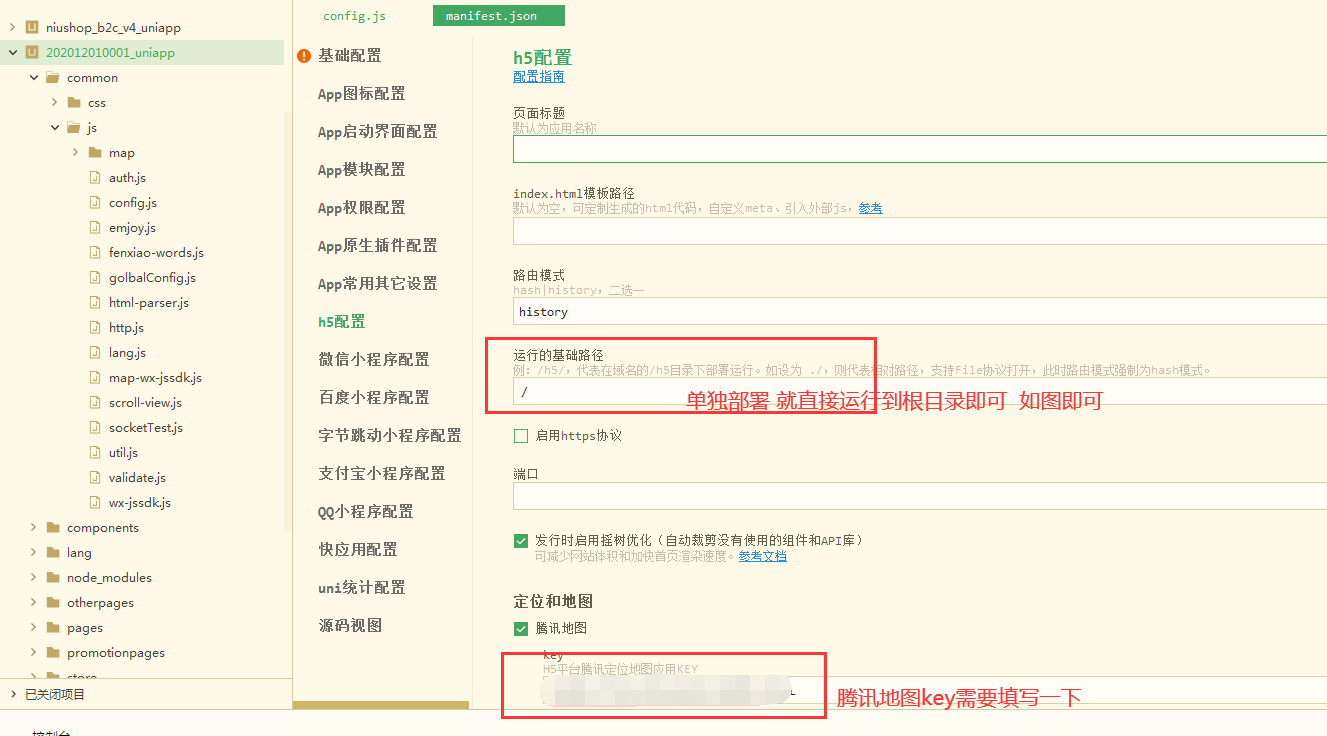
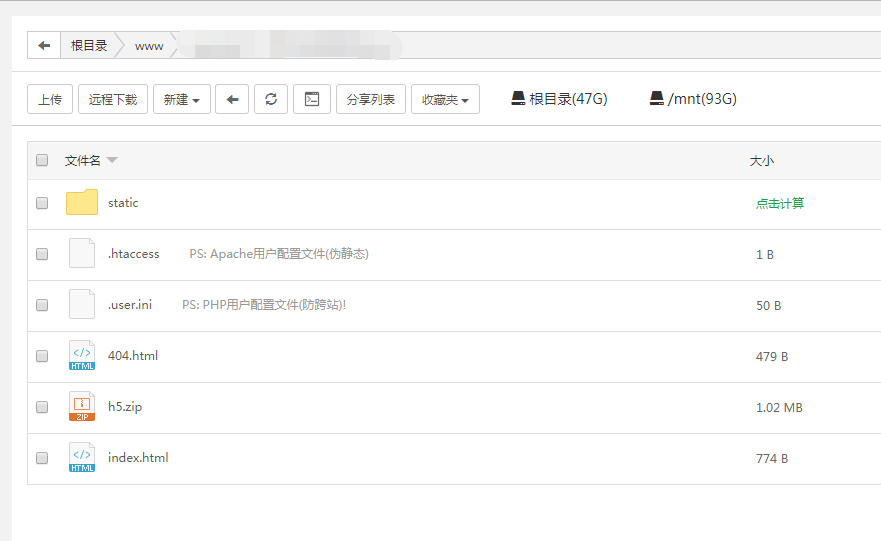
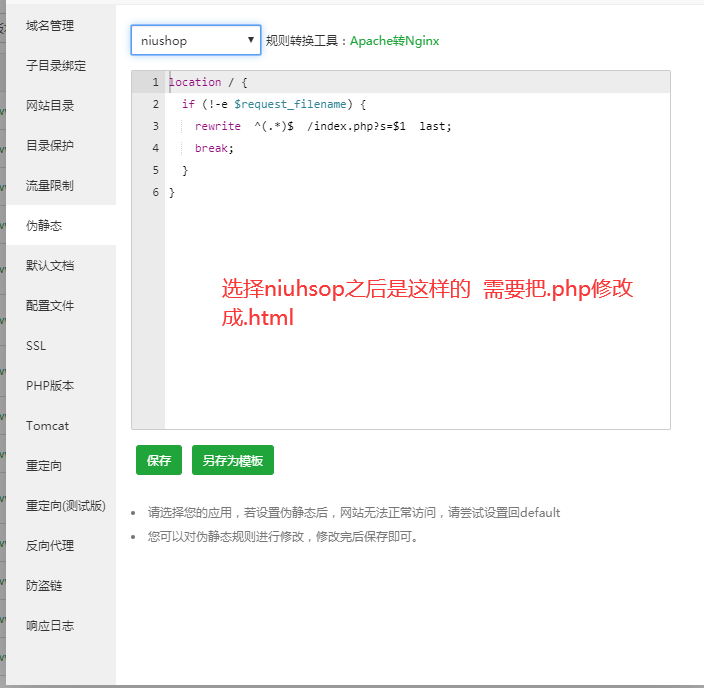
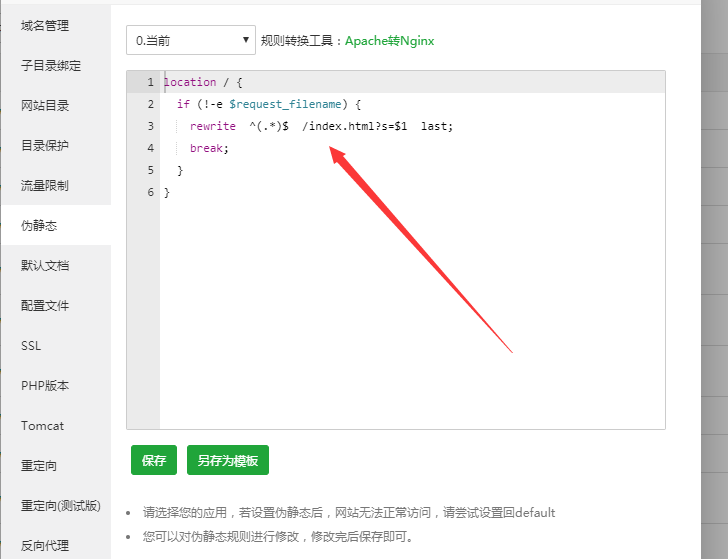
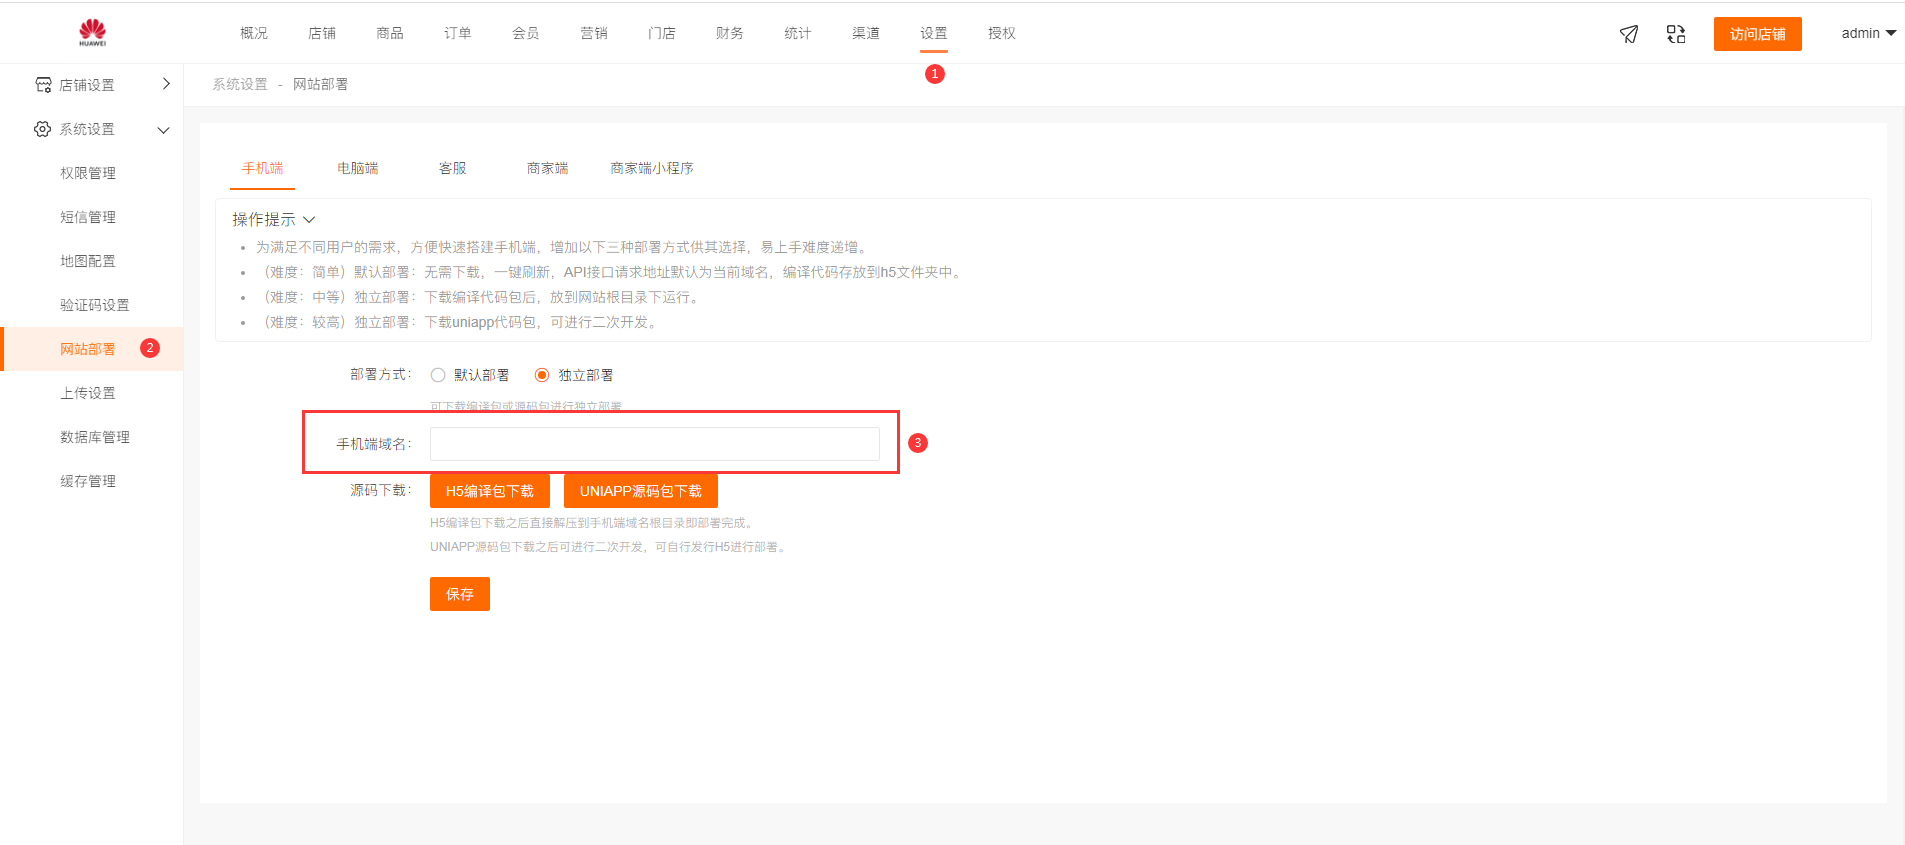
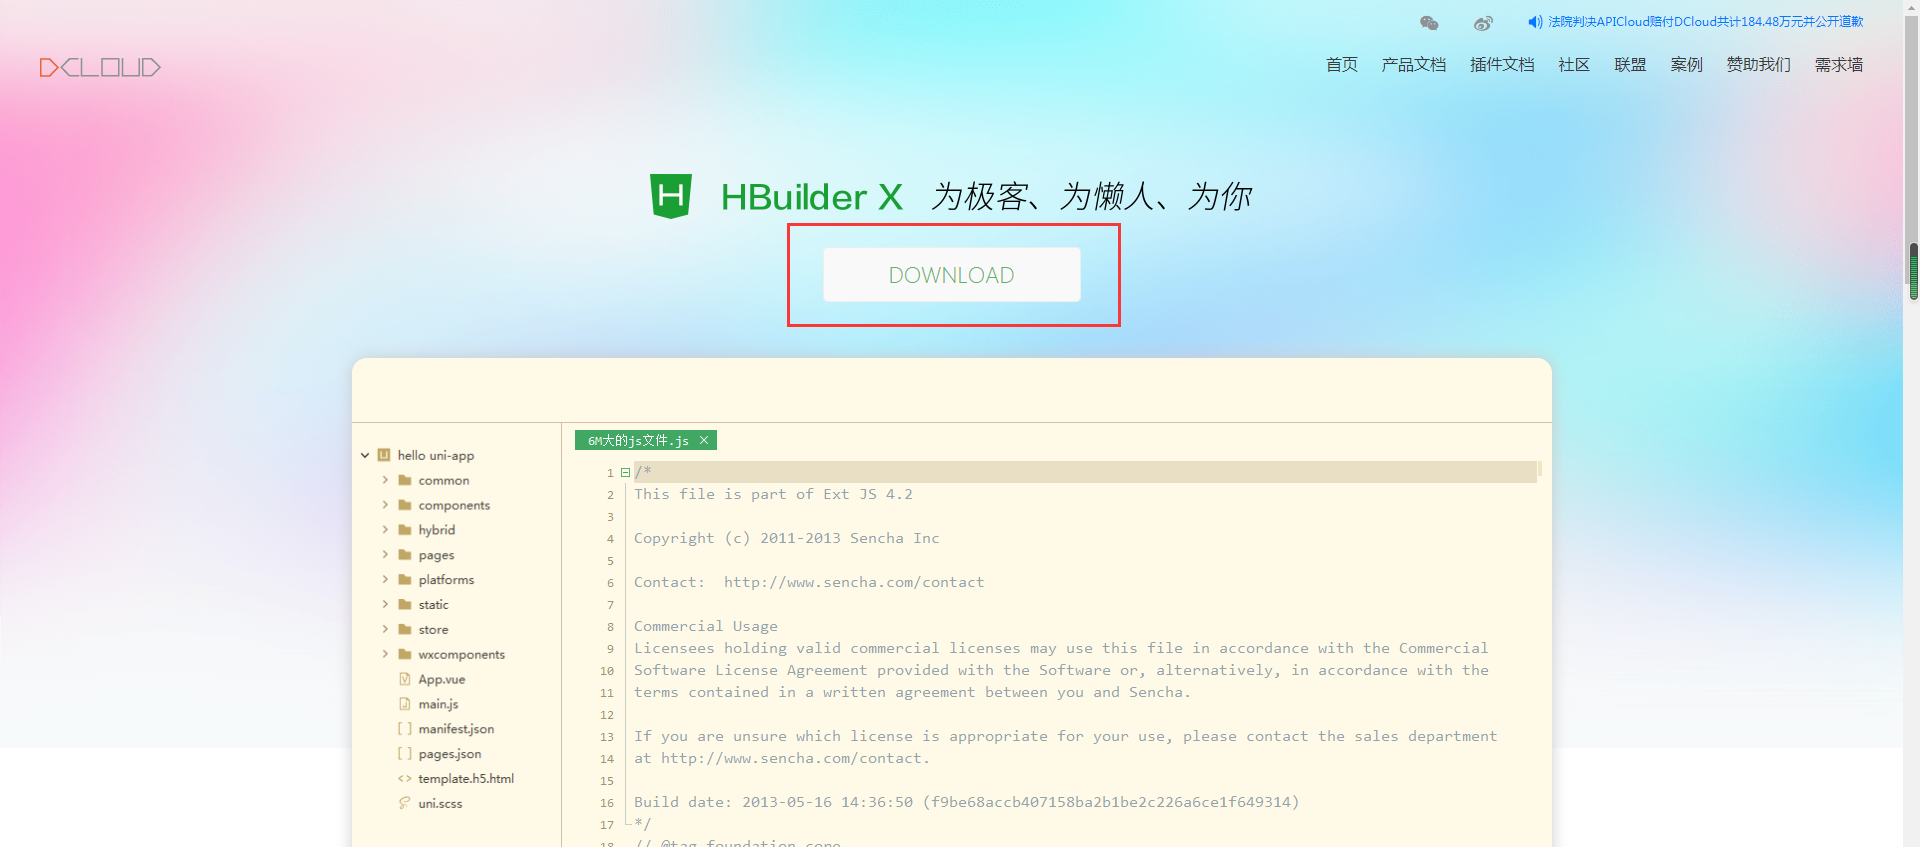
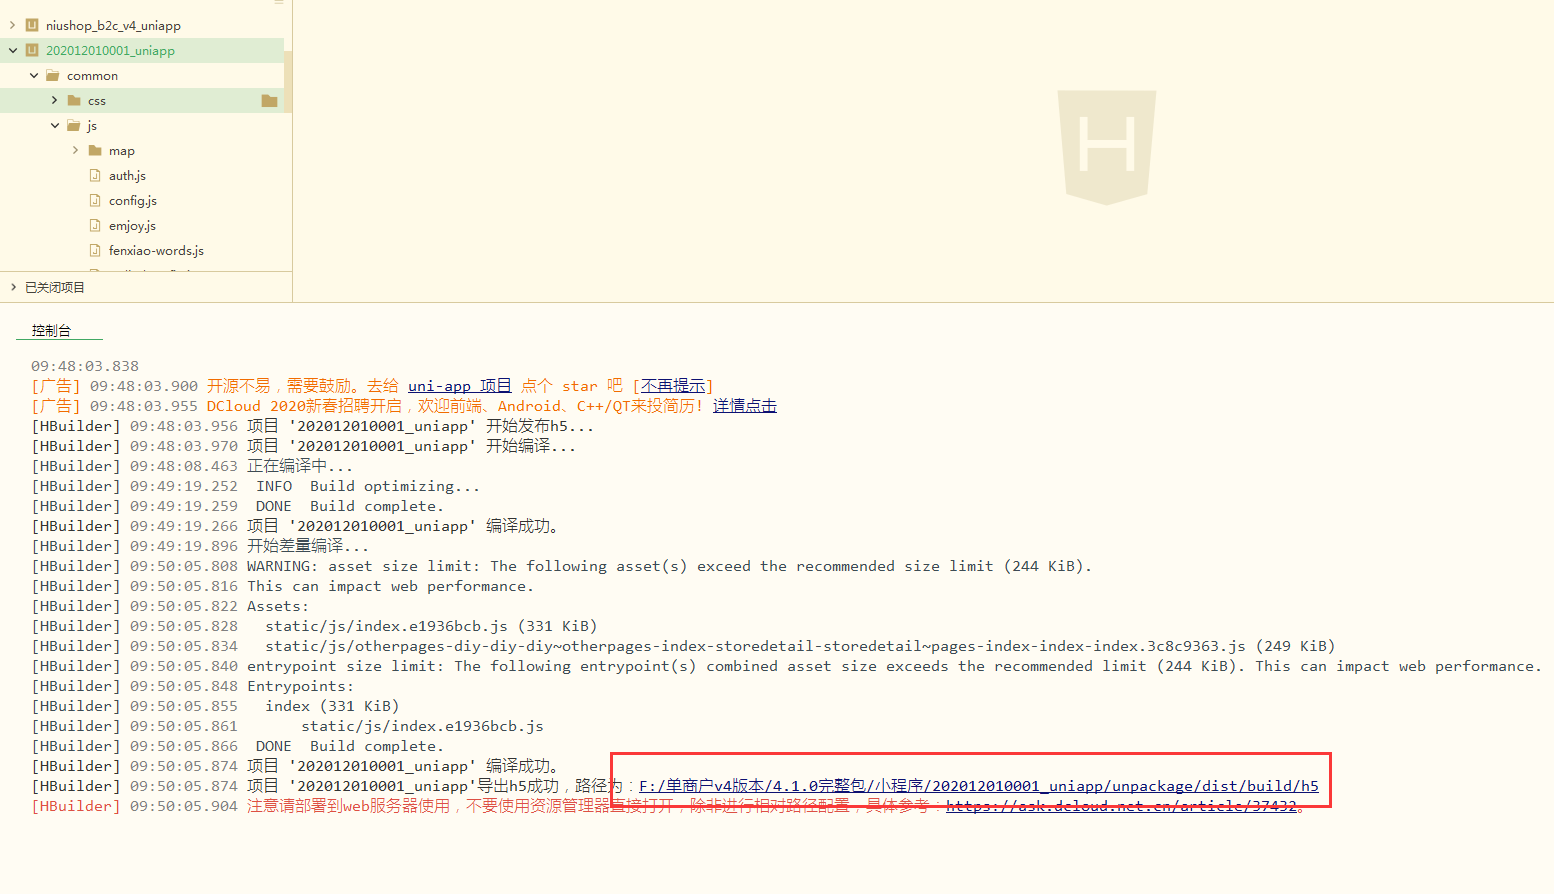
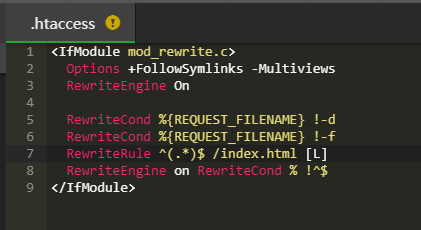
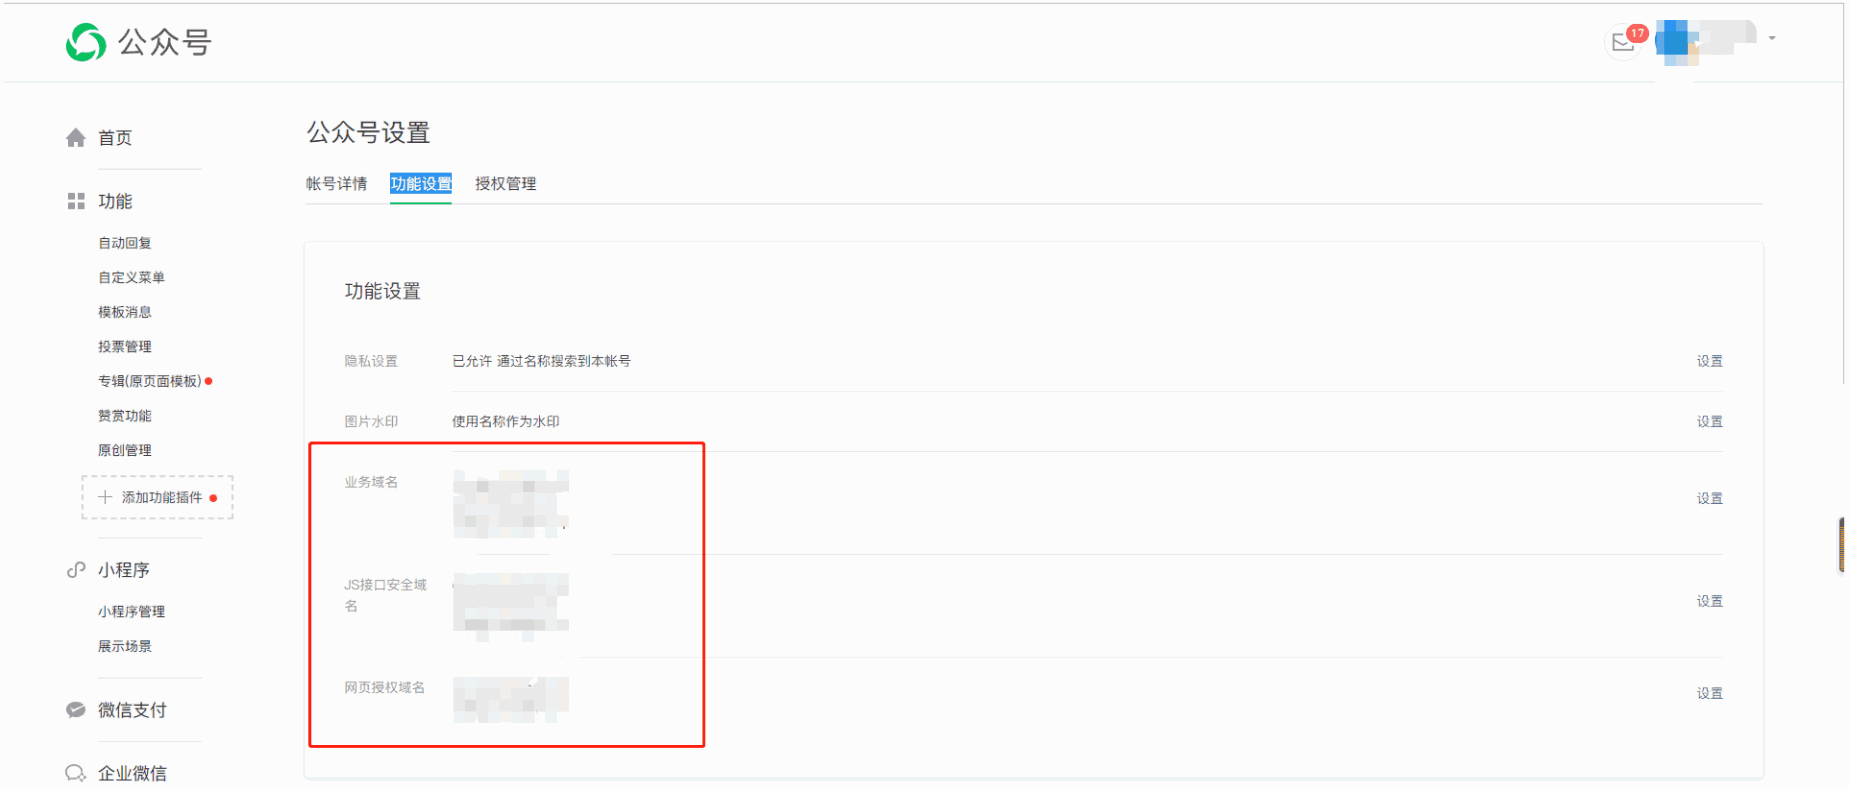
                # h5單獨部署域名 第一步:下載uniapp源碼 ![](https://img.kancloud.cn/25/20/25206827f4a86f7fc64a82cb7d131486_1920x619.png) ![](https://img.kancloud.cn/95/aa/95aa61d44a396696b44e2b90bc5e602c_1920x798.png) 第二步:下載hbuilder(\[[https://www.dcloud.io/hbuilderx.html](https://www.dcloud.io/hbuilderx.html)\]) ![](https://img.kancloud.cn/49/d5/49d5877c632f086a8cf3c6a496c3e550_1920x847.png) ![](https://img.kancloud.cn/9c/9c/9c9c59ce805ba59aef9115de5d0c446e_1920x843.png) 第三步:導入下載下的uniapp源碼 ![](https://img.kancloud.cn/d3/8f/d38f6e8a6a92a2d792a6e6c9180541a3_1621x702.png) 第四步:把配置文件配置好 ![](https://img.kancloud.cn/13/e5/13e543a4807795dc70c4251a7fda3210_1271x683.png) 第五步:需要先安裝一個插件scss/sass插件 ![](https://img.kancloud.cn/6a/6e/6a6e9eac844f5dd8acfbe6cd48e6674d_1497x906.png) 第六步:發行h5 ![](https://img.kancloud.cn/ad/a3/ada3ea48c4e048221805d04c98376f5c_1205x771.png) ![](https://img.kancloud.cn/dd/c1/ddc19b1390a9e95d9db48d192a7b0569_1496x701.png) ![](https://img.kancloud.cn/f1/0b/f10b0fa01a4ac66ab0952668914c446b_1327x736.png) 第七步:發行完之后 找到路徑 把代碼壓縮上傳到新建的站點根目錄并解壓到根目錄 ![](https://img.kancloud.cn/ce/67/ce67b0c24b9111a71f0106c9b5d11555_1554x894.png) ![](https://img.kancloud.cn/42/22/42221568855c4be33bc67e3650b44108_881x541.png) 第八步:給該網站配置偽靜態 nginx環境下偽靜態配置 ![](https://img.kancloud.cn/0e/49/0e49d6990f84f102bc5dd56cb0d082dd_704x688.png) 修改成如下圖 ![](https://img.kancloud.cn/c5/2b/c52b572dca16b0bffe6a499160b1fb25_728x559.png) apache環境下偽靜態配置 根目錄下的.htaccess文件添加偽靜態配置如下圖 <IfModule mod_rewrite.c> Options +FollowSymlinks -Multiviews RewriteEngine On RewriteCond %{REQUEST_FILENAME} !-d RewriteCond %{REQUEST_FILENAME} !-f RewriteRule ^(.*)$ /index.html [L] RewriteEngine on RewriteCond % !^$ </IfModule> ![](https://img.kancloud.cn/c8/28/c828f8dd05fb370a0f4ad87e1ceefaa0_421x230.png) 第九步:后臺訪問手機端域名設置需要修改成你的單獨配置的域名 ![](https://img.kancloud.cn/00/0c/000c42f75cf75b7b4bcc19c6dbbf0c05_1905x845.png) 第十步:如果需要在微信公眾號中拿單獨域名訪問 請把此域名配置到微信公眾號的業務域名、js域名、網頁域名即可 ![](https://img.kancloud.cn/33/22/3322f81440380eaec2c08863ee7e7377_1849x789.png) 這樣就單獨域名配置完成了!
                  <ruby id="bdb3f"></ruby>

                  <p id="bdb3f"><cite id="bdb3f"></cite></p>

                    <p id="bdb3f"><cite id="bdb3f"><th id="bdb3f"></th></cite></p><p id="bdb3f"></p>
                      <p id="bdb3f"><cite id="bdb3f"></cite></p>

                        <pre id="bdb3f"></pre>
                        <pre id="bdb3f"><del id="bdb3f"><thead id="bdb3f"></thead></del></pre>

                        <ruby id="bdb3f"><mark id="bdb3f"></mark></ruby><ruby id="bdb3f"></ruby>
                        <pre id="bdb3f"><pre id="bdb3f"><mark id="bdb3f"></mark></pre></pre><output id="bdb3f"></output><p id="bdb3f"></p><p id="bdb3f"></p>

                        <pre id="bdb3f"><del id="bdb3f"><progress id="bdb3f"></progress></del></pre>

                              <ruby id="bdb3f"></ruby>

                              哎呀哎呀视频在线观看