<ruby id="bdb3f"></ruby>

    <p id="bdb3f"><cite id="bdb3f"></cite></p>

      <p id="bdb3f"><cite id="bdb3f"><th id="bdb3f"></th></cite></p><p id="bdb3f"></p>
        <p id="bdb3f"><cite id="bdb3f"></cite></p>

          <pre id="bdb3f"></pre>
          <pre id="bdb3f"><del id="bdb3f"><thead id="bdb3f"></thead></del></pre>

          <ruby id="bdb3f"><mark id="bdb3f"></mark></ruby><ruby id="bdb3f"></ruby>
          <pre id="bdb3f"><pre id="bdb3f"><mark id="bdb3f"></mark></pre></pre><output id="bdb3f"></output><p id="bdb3f"></p><p id="bdb3f"></p>

          <pre id="bdb3f"><del id="bdb3f"><progress id="bdb3f"></progress></del></pre>

                <ruby id="bdb3f"></ruby>

                ??碼云GVP開源項目 12k star Uniapp+ElementUI 功能強大 支持多語言、二開方便! 廣告
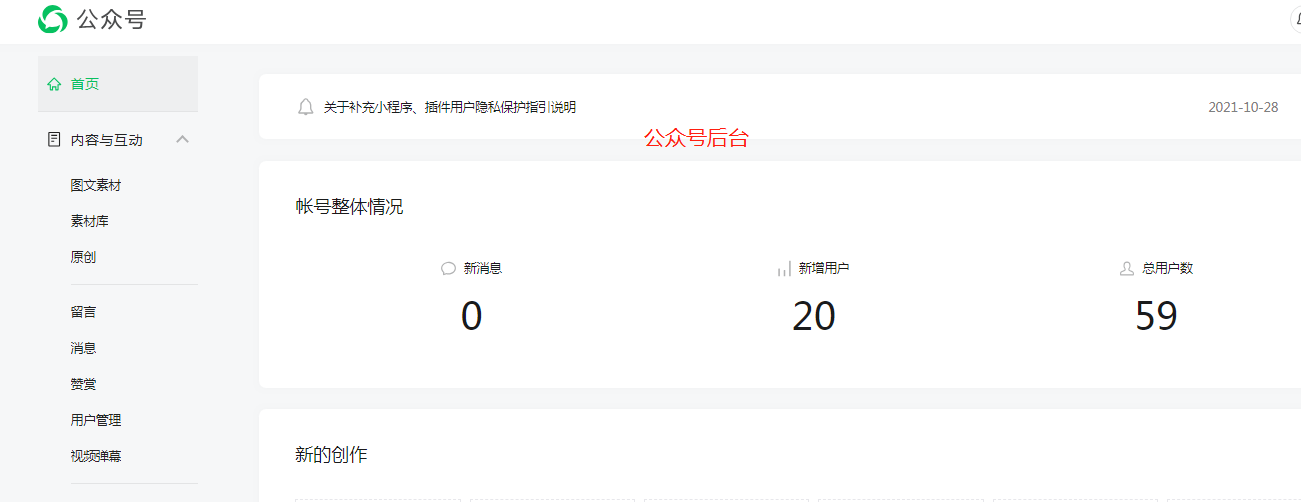
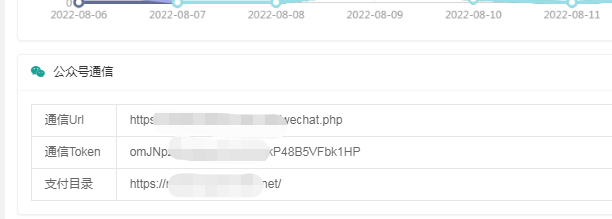
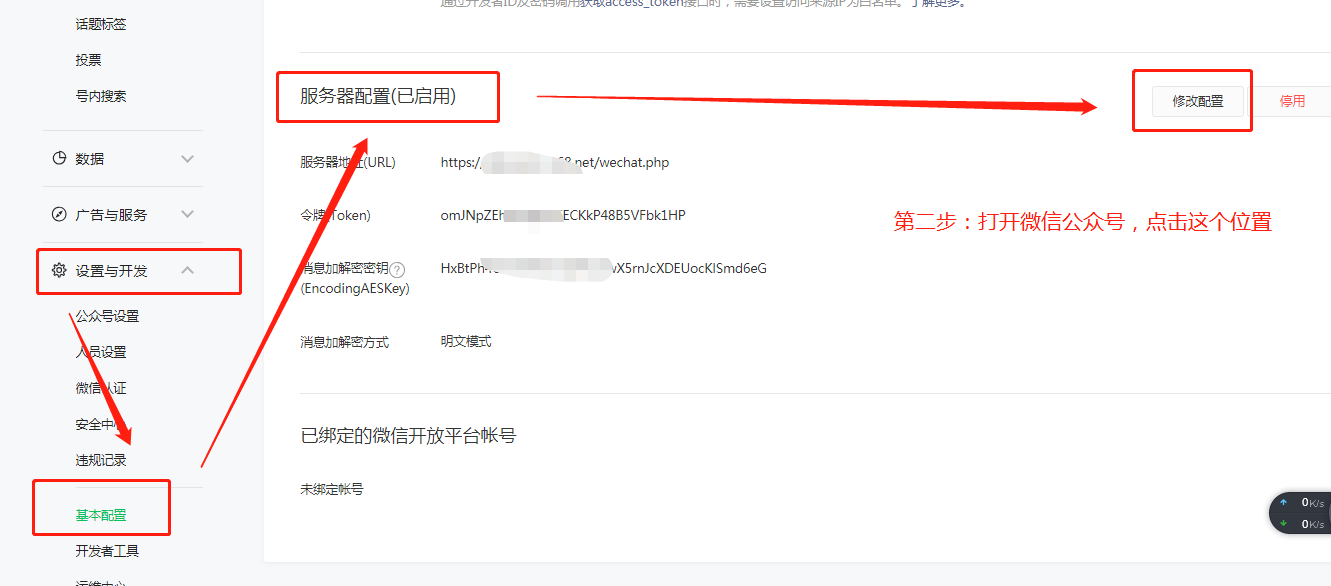
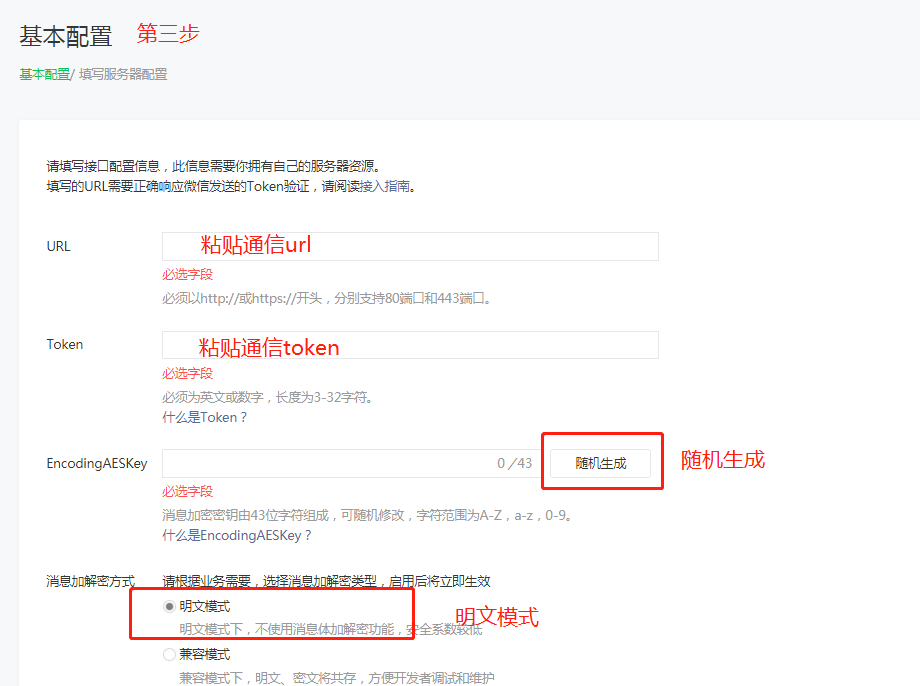
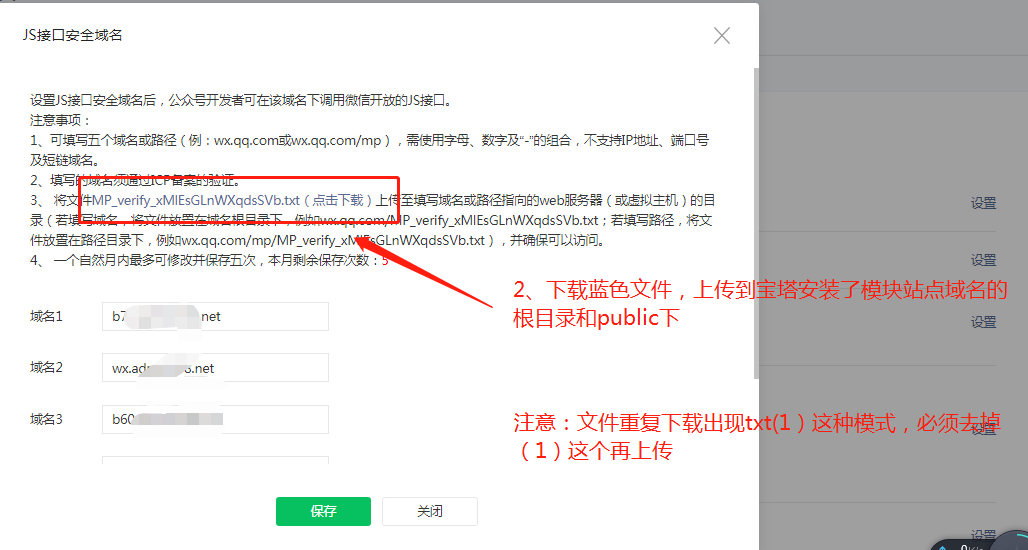
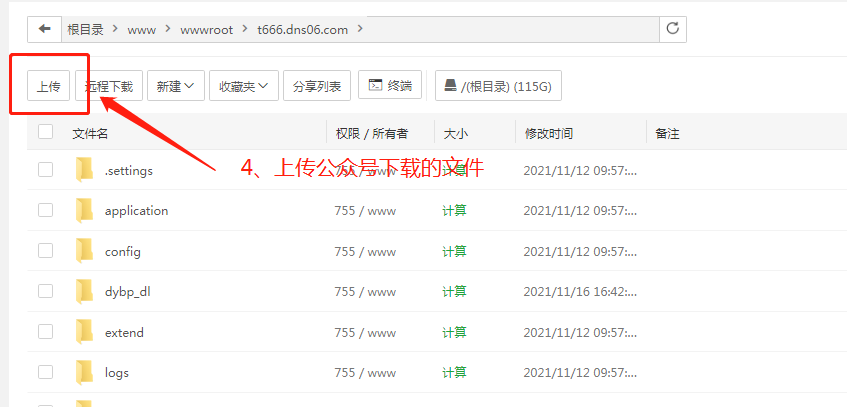
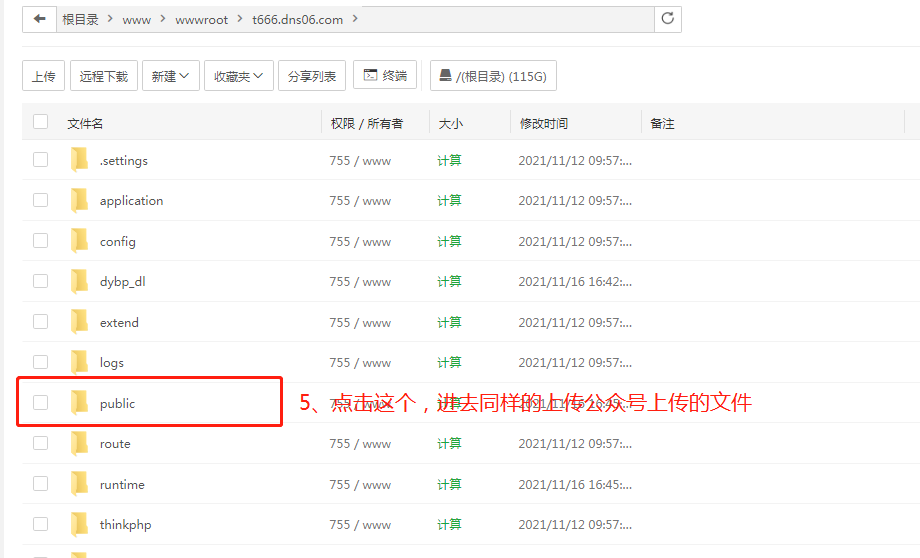
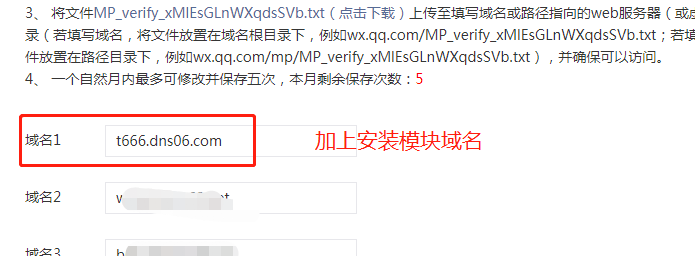
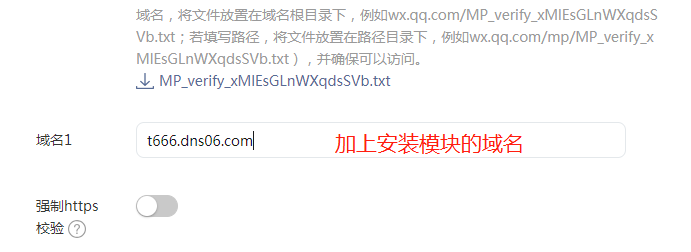
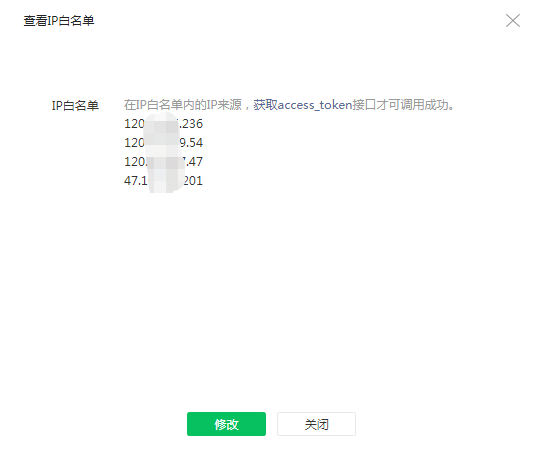
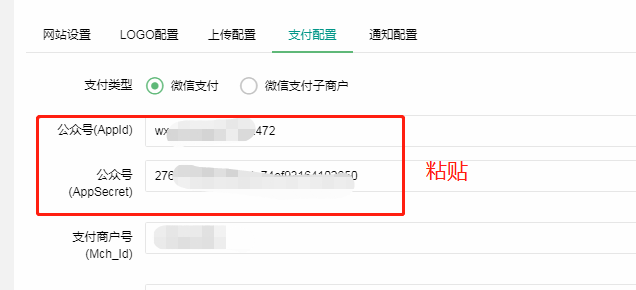
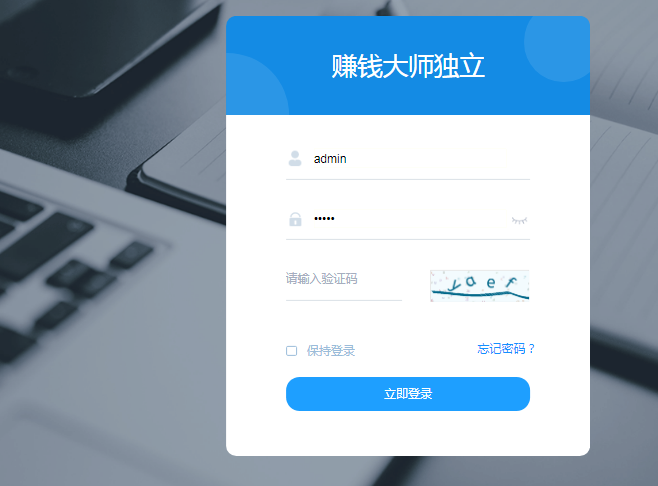
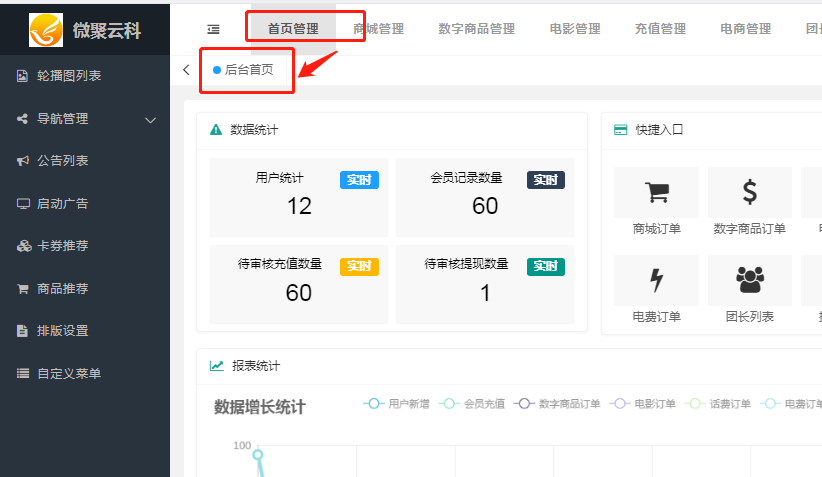
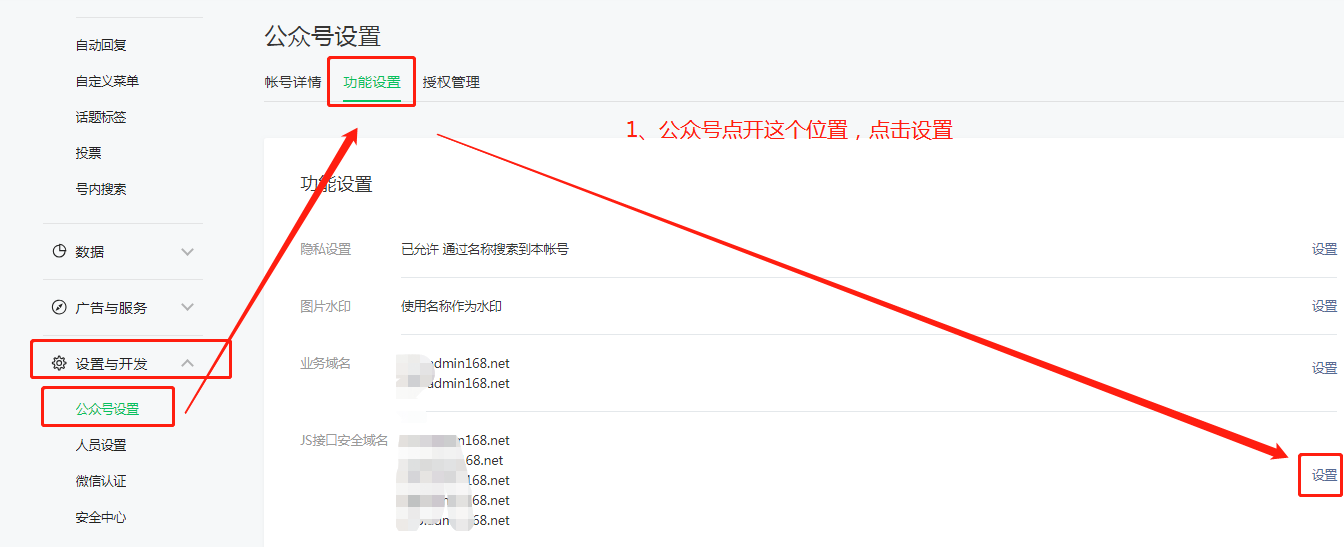
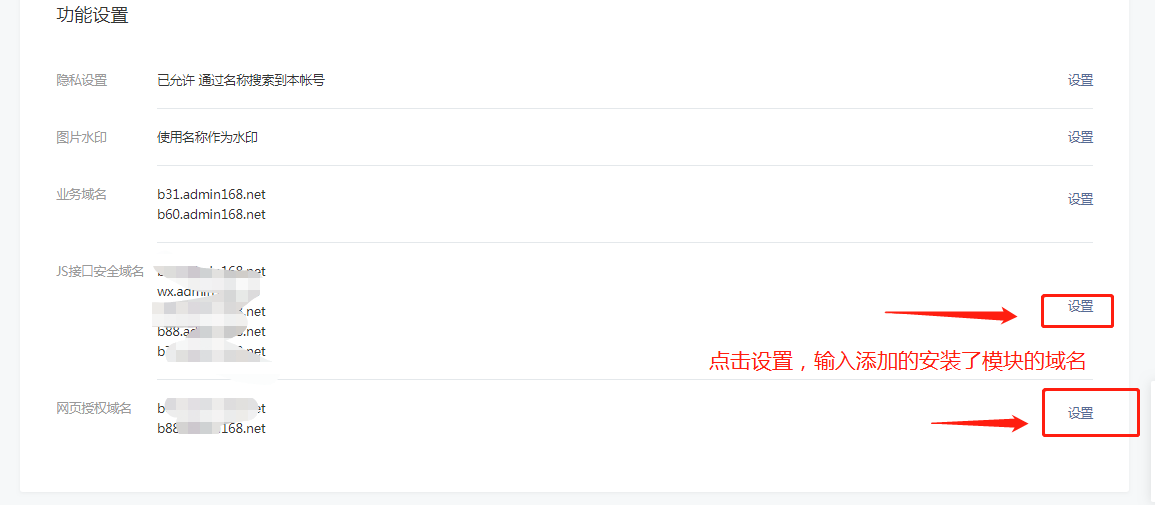
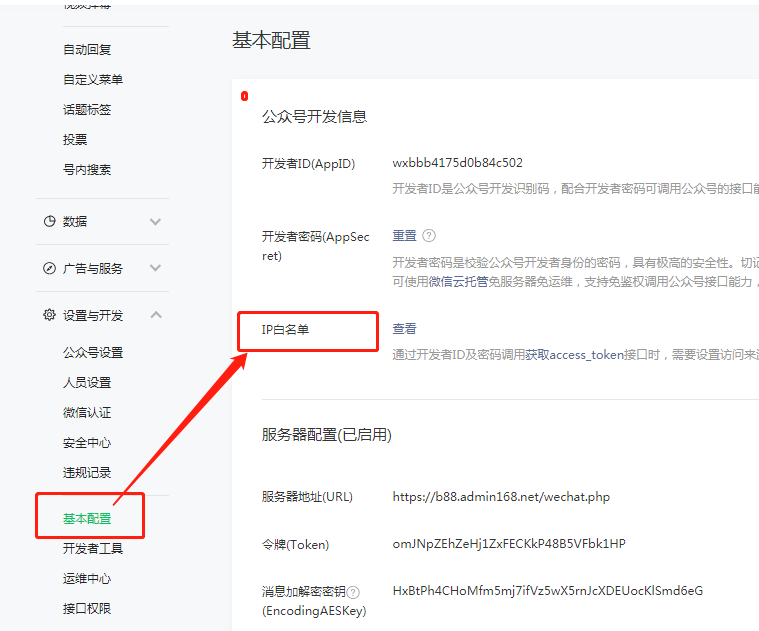
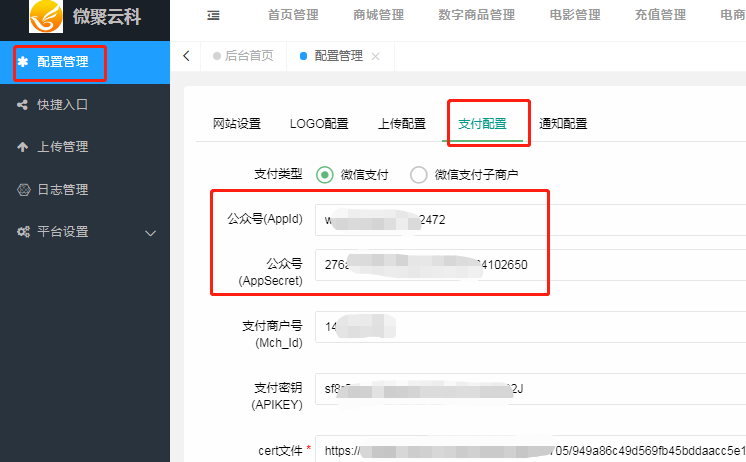
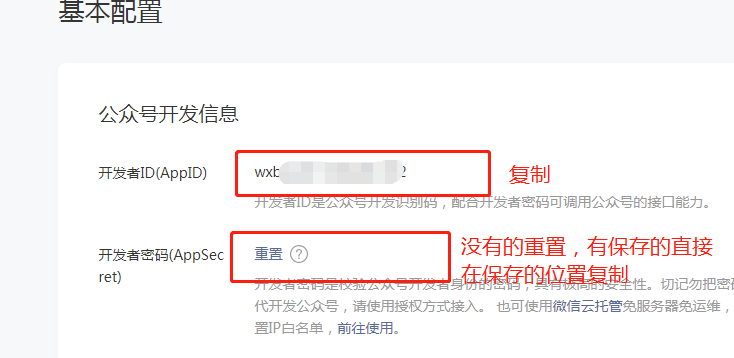
                ### 第一步: 登錄模塊后臺和公眾號后臺 ![](https://img.kancloud.cn/83/22/8322a97307aa1cdcfccbf4e03c8fbde0_658x486.png) ![](https://img.kancloud.cn/d0/48/d0488f940a744974fd96635018a5a9dc_1301x502.png) ### 第二步: 點擊【首頁管理】-【后臺首頁】,滑到最底部,找到【公眾號通信】復制 通信url,和 通信token,粘貼到公眾號【設置與開發】-【服務器配置域名】,再保存,如下圖所示 ![](https://img.kancloud.cn/da/04/da04a5834de2d5706aecd47146b06f50_822x477.png) ![](https://img.kancloud.cn/86/85/8685327ccb7e9079e0f785feb3f33f1a_612x219.png) ![](https://img.kancloud.cn/ef/55/ef552a26f3b7789ee9ab11c6666bfb2d_1331x586.png) ![](https://img.kancloud.cn/56/b9/56b9a8db35286b52666f8e78d72e9944_920x686.png) ### 第三步: 公眾號【設置與開發】-【公眾號設置】-【功能設置】,任意點擊一個功能設置,下載文件,如下圖所示 ![](https://img.kancloud.cn/a6/19/a6193c4fbc38df2f4964c7f317b61ab9_1344x547.png) ![](https://img.kancloud.cn/00/1e/001e20d2f6ca6bbf824ec3504718396b_1028x550.png) ![](https://img.kancloud.cn/13/0a/130a3c0b84704f829328d35405c6b4f6_1403x240.png) ![](https://img.kancloud.cn/91/2b/912bf99a05d66b682c2548ece1a4a561_847x407.png) ![](https://img.kancloud.cn/ff/88/ff881097e2b8aaee19f24f1ef7dcbe9e_920x558.png) ### 第四步: 公眾號【設置與開發】-【公眾號設置】-【功能設置】,【js接口安全域名】和【網頁授權域名】點擊設置,輸入安裝了模塊的域名,保存。如下圖所示 ![](https://img.kancloud.cn/3a/47/3a4716bfb2a1bac251154d7d32c3d194_1155x505.png) ![](https://img.kancloud.cn/50/39/5039b5499da0959101900c2edcda1d3c_695x256.png) ![](https://img.kancloud.cn/1e/b2/1eb293ae4c1457da15b0dd8c732a5c3f_691x252.png) ### 第五步: 點擊公眾號【設置與開發】-【ip白名單】,添加自己的寶塔ip ![](https://img.kancloud.cn/32/be/32beecbe0c60dff4a3227c5f0ea2cdcd_759x631.png) ![](https://img.kancloud.cn/88/de/88dea41a154ac72548ec474d42149e65_544x456.png) ### 第六步: 回到后臺,點擊【系統管理】-【配置管理】-【支付設置】配置下公眾號的支付信息,如果支付沒有注冊的,可以先添加公眾號的appid和秘鑰。 ![](https://img.kancloud.cn/97/a9/97a9cf0d3f8233d3a04ba47eccc1d99a_746x462.png) ### 后續:appid和秘鑰 公眾號點擊【設置與開發】-【基本配置】,找到appid和秘鑰復制過去,如下圖所示 ![](https://img.kancloud.cn/78/ba/78bae67d9d1c89ae957a30934663e5a7_734x358.png) ![](https://img.kancloud.cn/ad/fd/adfd7d2ea8472b1fc840e5384c5170de_636x290.png)
                  <ruby id="bdb3f"></ruby>

                  <p id="bdb3f"><cite id="bdb3f"></cite></p>

                    <p id="bdb3f"><cite id="bdb3f"><th id="bdb3f"></th></cite></p><p id="bdb3f"></p>
                      <p id="bdb3f"><cite id="bdb3f"></cite></p>

                        <pre id="bdb3f"></pre>
                        <pre id="bdb3f"><del id="bdb3f"><thead id="bdb3f"></thead></del></pre>

                        <ruby id="bdb3f"><mark id="bdb3f"></mark></ruby><ruby id="bdb3f"></ruby>
                        <pre id="bdb3f"><pre id="bdb3f"><mark id="bdb3f"></mark></pre></pre><output id="bdb3f"></output><p id="bdb3f"></p><p id="bdb3f"></p>

                        <pre id="bdb3f"><del id="bdb3f"><progress id="bdb3f"></progress></del></pre>

                              <ruby id="bdb3f"></ruby>

                              哎呀哎呀视频在线观看