<ruby id="bdb3f"></ruby>

    <p id="bdb3f"><cite id="bdb3f"></cite></p>

      <p id="bdb3f"><cite id="bdb3f"><th id="bdb3f"></th></cite></p><p id="bdb3f"></p>
        <p id="bdb3f"><cite id="bdb3f"></cite></p>

          <pre id="bdb3f"></pre>
          <pre id="bdb3f"><del id="bdb3f"><thead id="bdb3f"></thead></del></pre>

          <ruby id="bdb3f"><mark id="bdb3f"></mark></ruby><ruby id="bdb3f"></ruby>
          <pre id="bdb3f"><pre id="bdb3f"><mark id="bdb3f"></mark></pre></pre><output id="bdb3f"></output><p id="bdb3f"></p><p id="bdb3f"></p>

          <pre id="bdb3f"><del id="bdb3f"><progress id="bdb3f"></progress></del></pre>

                <ruby id="bdb3f"></ruby>

                ??碼云GVP開源項目 12k star Uniapp+ElementUI 功能強大 支持多語言、二開方便! 廣告
                ## 一、 準備一個炮灰域名(可以注冊新的,也可以用專用炮灰域名)
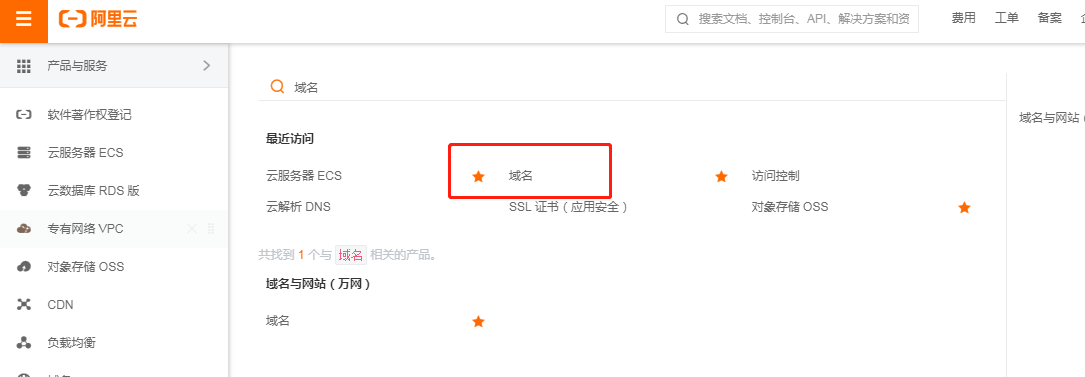
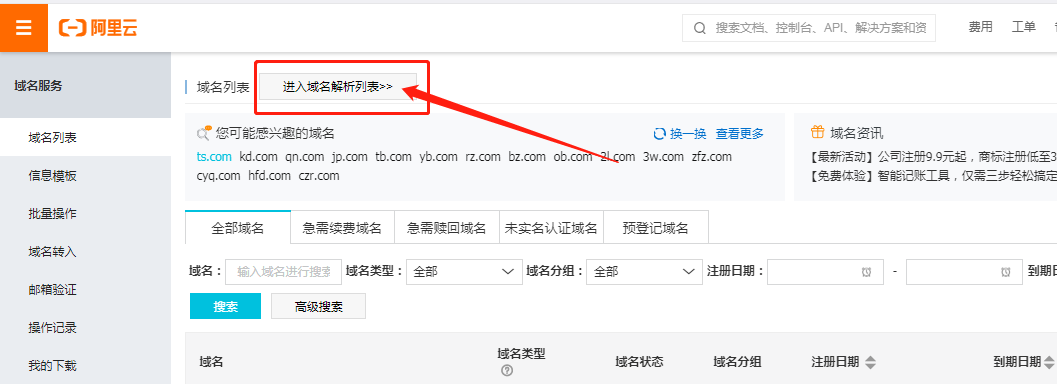
 以阿里云為例子: 
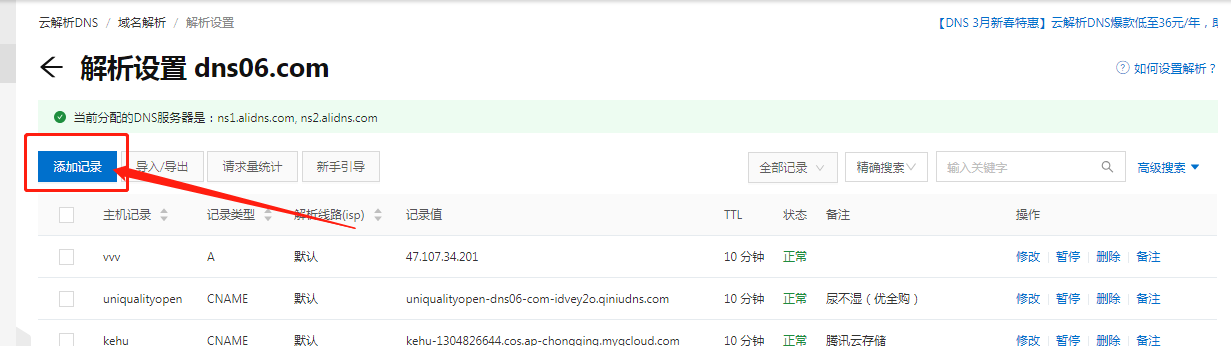
登錄阿里云,找到域名管理,解析一個域名,點擊添加【添加域名】,輸入站點的ip保存 ![](https://img.kancloud.cn/2a/8c/2a8c2409452583d4edcda7f04b59fb28_1085x377.png) ![](https://img.kancloud.cn/74/8e/748e2cd7e79a6d7b01c86cdb885936f2_1057x384.png) ![](https://img.kancloud.cn/95/75/9575ad329e3ba706fd48addff19f68bc_1217x191.png) ![](https://img.kancloud.cn/b4/0c/b40cfc1c54d47a1ed341c5b1866cd4ac_1231x346.png) ## 二、 
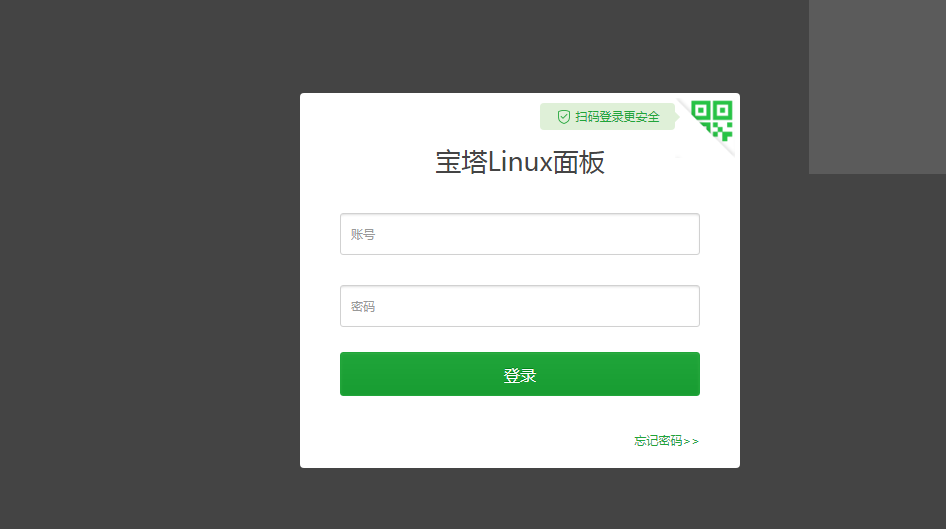
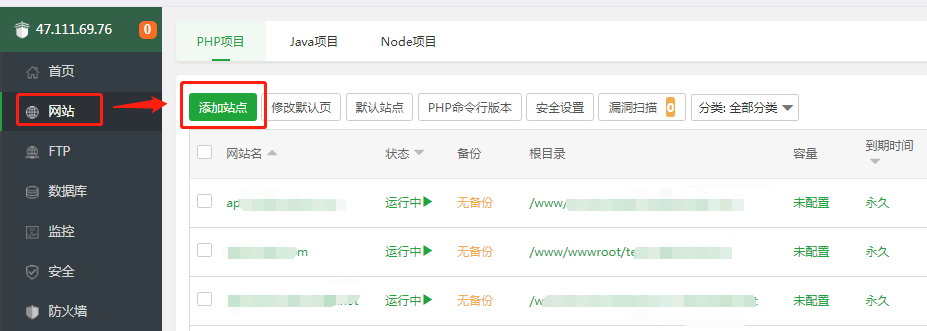
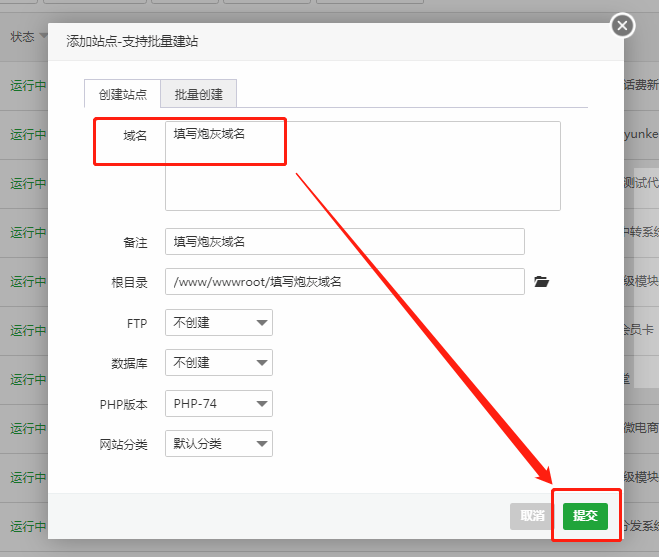
登錄寶塔,找到【網站】站點域名,點擊新建域名 ![](https://img.kancloud.cn/0e/1f/0e1fc178d63906e42e16d04a772733ab_946x529.png) ![](https://img.kancloud.cn/d1/a9/d1a93e776cd7364778ee23537468f203_927x331.png) ![](https://img.kancloud.cn/12/7b/127b70f678713c25745839ed6b331457_659x557.png) 
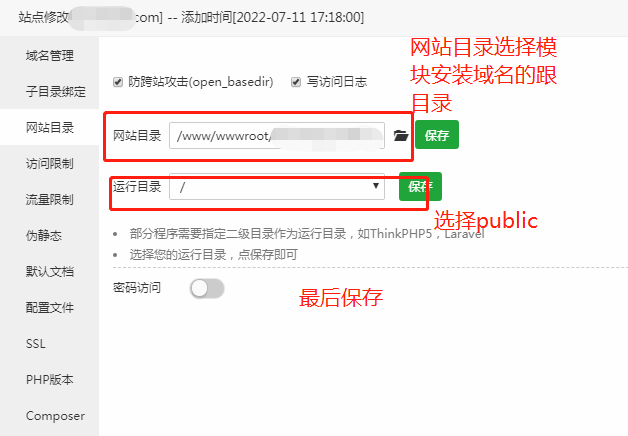
點擊設置,選擇【網站目錄】,選擇安裝模塊的根目錄和public保存 ![](https://img.kancloud.cn/68/6e/686e68aa6a42ffe7a10e28f3d54ae861_749x310.png) ![](https://img.kancloud.cn/77/4c/774c4c86dc968c79a06d5118eefc439f_628x436.png) 
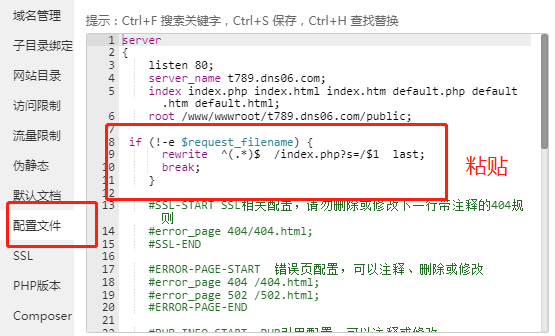
再點擊【配置文件】,復制下面代碼,粘貼進去 if (!-e $request\_filename) { rewrite ^(.\*)$ /index.php?s=/$1 last; break; } ![](https://img.kancloud.cn/6a/b0/6ab014adbed17188ab809e83fb0c18a1_555x336.png) ## 三、 
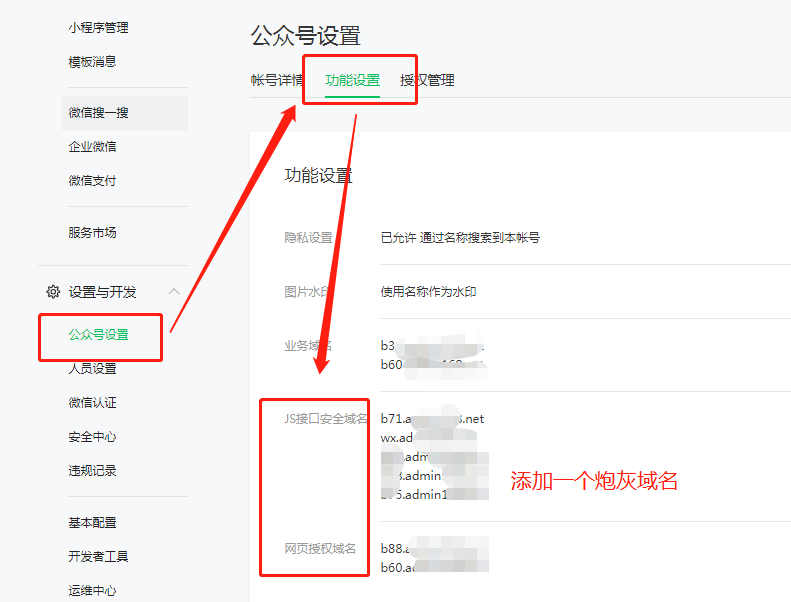
登錄公眾號[https://mp.weixin.qq.com/](https://mp.weixin.qq.com/),找到【設置與開發】-【公眾號設置】-【功能設置】,找到js接口安全域名和網頁授權域名,給炮灰域名添加上去 ![](https://img.kancloud.cn/9e/e7/9ee7e5181e3287ab27bdffc013b8fd6f_791x602.png) 
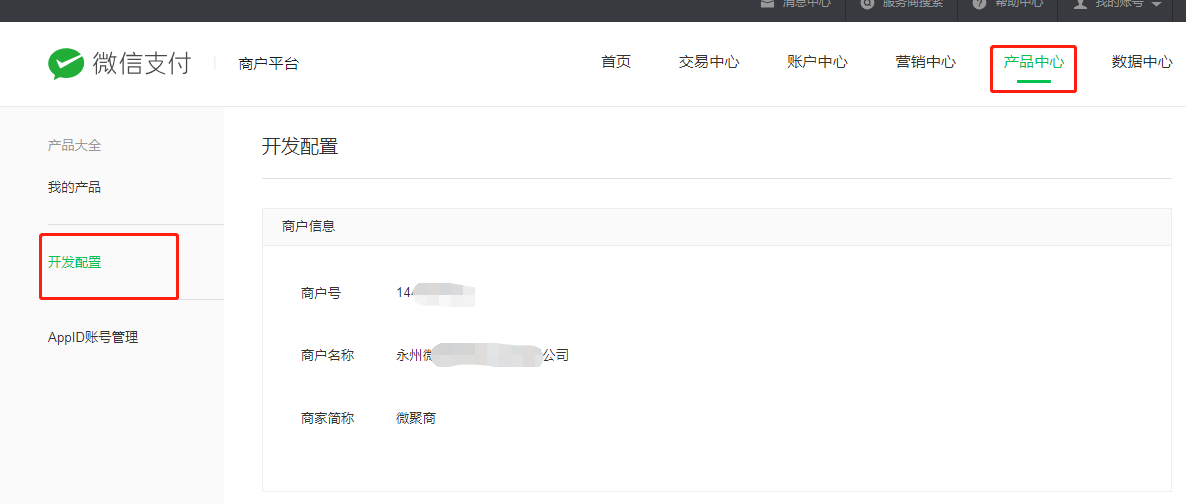
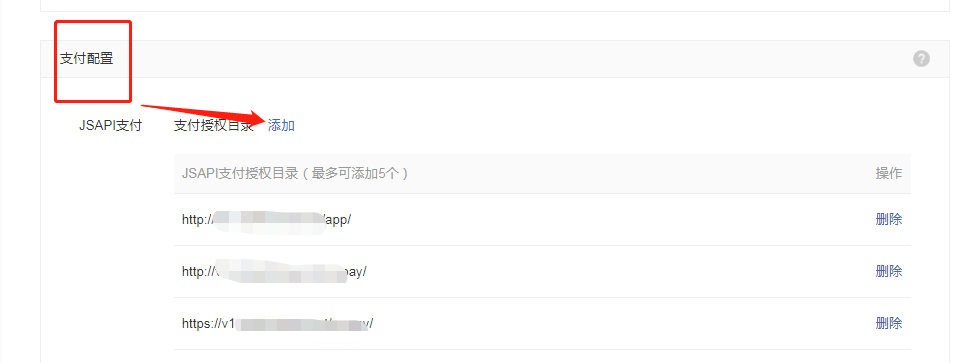
然后登錄微信支付商戶平臺:[https://pay.weixin.qq.com/](https://pay.weixin.qq.com/),找到【產品中心】-【開發配置】-【支付配置】-【JSAPI】支付,給炮灰域名加上([http://炮灰域名](http://xn--eqrt2gb92acha/)或[https://炮灰域名](https://xn--eqrt2gb92acha/)) ![](https://img.kancloud.cn/62/65/626595b31f8382b0f2b28cb1d54d5b6d_1186x504.png) ![](https://img.kancloud.cn/9d/a0/9da08e689e52262ab48010f663c85a3b_955x363.png) ## 四、 
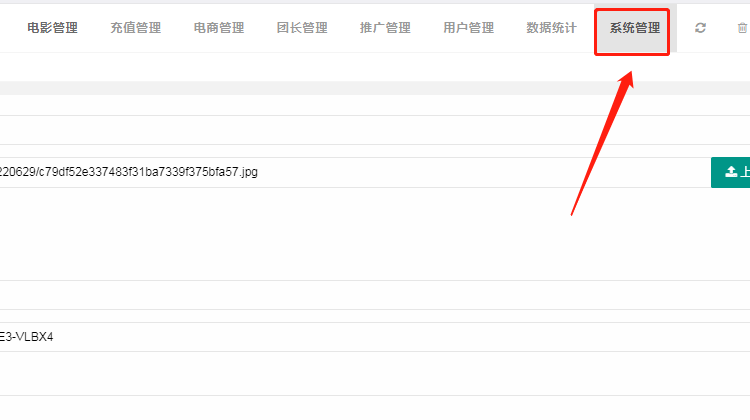
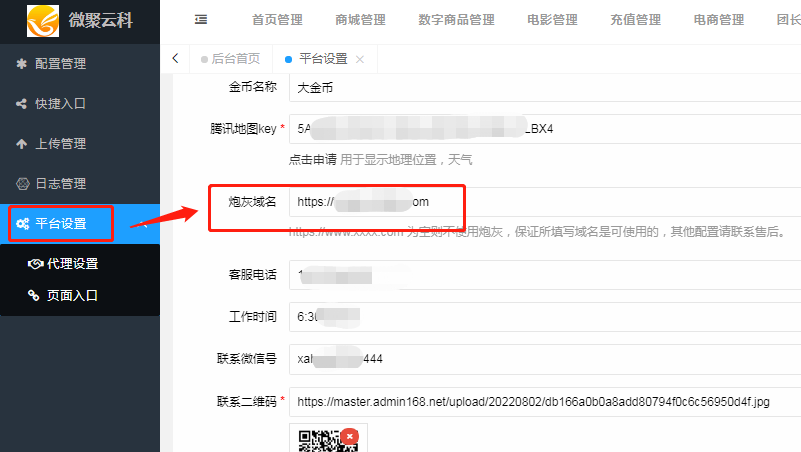
回到后臺,點擊【系統管理】-【平臺設置】填寫好炮灰域名 ![](https://img.kancloud.cn/91/8e/918eeb0102af5cdc5dee9bdb86a7cdec_750x420.png) ![](https://img.kancloud.cn/42/26/4226426f79eee46e3dcd941ca5f058e8_801x452.png)
                  <ruby id="bdb3f"></ruby>

                  <p id="bdb3f"><cite id="bdb3f"></cite></p>

                    <p id="bdb3f"><cite id="bdb3f"><th id="bdb3f"></th></cite></p><p id="bdb3f"></p>
                      <p id="bdb3f"><cite id="bdb3f"></cite></p>

                        <pre id="bdb3f"></pre>
                        <pre id="bdb3f"><del id="bdb3f"><thead id="bdb3f"></thead></del></pre>

                        <ruby id="bdb3f"><mark id="bdb3f"></mark></ruby><ruby id="bdb3f"></ruby>
                        <pre id="bdb3f"><pre id="bdb3f"><mark id="bdb3f"></mark></pre></pre><output id="bdb3f"></output><p id="bdb3f"></p><p id="bdb3f"></p>

                        <pre id="bdb3f"><del id="bdb3f"><progress id="bdb3f"></progress></del></pre>

                              <ruby id="bdb3f"></ruby>

                              哎呀哎呀视频在线观看