查詢出了所有的教師,如何將其轉化為瀏覽器可以識別的html代碼呢?在1.3小節中,或許能找到我們想要的答案。在1.3小節中,我們刪除了`Index.php`中`index()`方法中的以下代碼:
```php
public function index()
{
? return '<style type="text/css">*{ padding: 0; margin: 0; } div{ padding: 4px 48px;} a{color:#2E5CD5;cursor: pointer;text-decoration: none} a:hover{text-decoration:underline; } body{ background: #fff; font-family: "Century Gothic","Microsoft yahei"; color: #333;font-size:18px;} h1{ font-size: 100px; font-weight: normal; margin-bottom: 12px; } p{ line-height: 1.6em; font-size: 42px }</style><div style="padding: 24px 48px;"> <h1>:) </h1><p> ThinkPHP V' . \think\facade\App::version() . '<br/><span style="font-size:30px;">14載初心不改 - 你值得信賴的PHP框架</span></p><span style="font-size:25px;">[ V6.0 版本由 <a href="https://www.yisu.com/" target="yisu">億速云</a> 獨家贊助發布 ]</span></div><script type="text/javascript" src="https://tajs.qq.com/stats?sId=64890268" charset="UTF-8"></script><script type="text/javascript" src="https://e.topthink.com/Public/static/client.js"></script><think id="ee9b1aa918103c4fc"></think>';
}
```
該代碼的作用是顯示一下`Hello ThinkPHP`的歡迎頁:
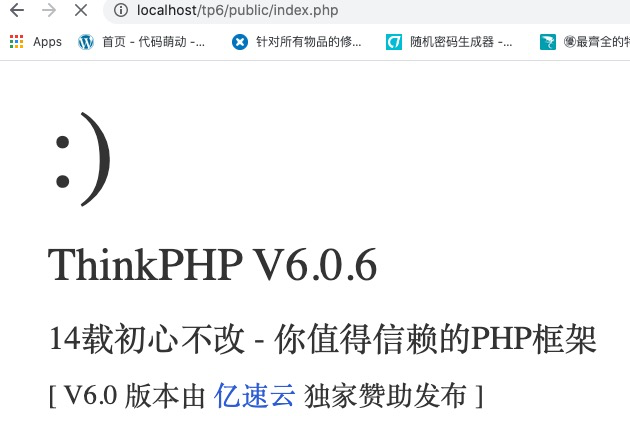
## 發生了什么
下面讓我們在`Index.php`中復原上述代碼,并刷新頁面重新查看ThinkPHP的歡迎頁面,在此頁面的任意位置上點擊右鍵 -> 查看源代碼
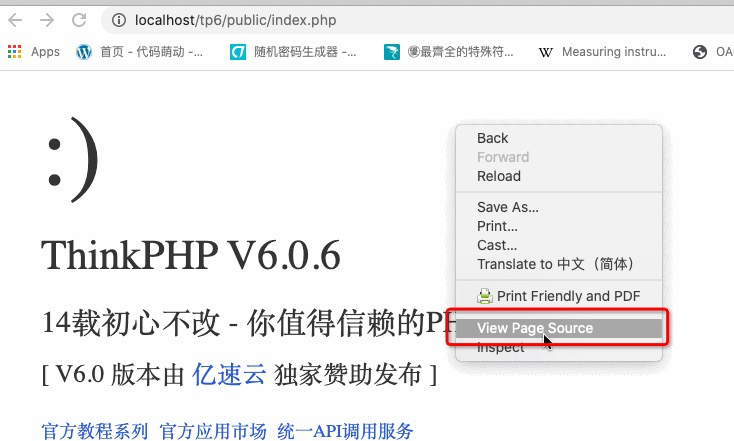
是的,如我們所見,查看到的源代碼即是ThinkPHP中使用return語句返回的字符串。
* ?? ThinkPHP將Html格式的字符串返回給瀏覽器
* ? 瀏覽器接到的Html格式被稱為網頁源代碼,瀏覽器根據接收到的網頁源代碼將代碼變更為更容易被人類識別的界面
所以1.3小節的作業答案也便有了:
```php
public function index()
{
return '<h1 style="color: red">Hello World!</h1>';
}
```
當然也可以這樣:
```php
public function index()
{
return '<style type="text/css">h1 {color: red}</style><h1>Hello World!</h1>';
}
```
當然還會有其它的方案,但相信無論哪種方案,最終返回的都是瀏覽器最終可以顯示為紅色的Hello World!的html代碼。
## 返回table
本節我們的最終目標是顯示一個如下的表格:

該表格是個標準的table,使用html實現大體如下:
```html
<table>
<tr>
<th>序號</th>
<th>姓名</th>
<th>性別</th>
<th>郵箱</th>
<th>用戶名</th>
</tr>
<tr>
<td>1</td>
<td>張三</td>
<td>男</td>
<td>zhangsan@mail.com</td>
<td>zhangsan</td>
</tr>
<tr>
<td>2</td>
<td>李四</td>
<td>男</td>
<td>lisi@yunzhi.club</td>
<td>lisi</td>
</tr>
</table>
```
按照我們剛剛講過的理論,直接把上述html代碼使用return的方法返回給瀏覽器即可實現我們既定的效果:
```php
public function index()
{
return '<table>
<tr>
<th>序號</th>
<th>姓名</th>
<th>性別</th>
<th>郵箱</th>
<th>用戶名</th>
</tr>
<tr>
<td>1</td>
<td>張三</td>
<td>男</td>
<td>zhangsan@mail.com</td>
<td>zhangsan</td>
</tr>
<tr>
<td>2</td>
<td>李四</td>
<td>男</td>
<td>lisi@yunzhi.club</td>
<td>lisi</td>
</tr>
</table>';
}
```
保存后刷新界面:
## 動態實現
成功的顯示了表格以下,我們再加入上個小節中查詢到的teachers數據,以實現顯示數據庫中的教師數據的功能。
```php
public function index()
{
// think鎮facade村的Db提供了一個query方法,調用該方法可以進行數據查詢
// 使用select * from yunzhi_teacher查詢數據庫
$teachers = \think\facade\Db::query('select * from yunzhi_teacher');
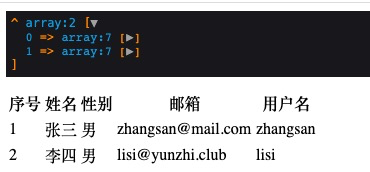
// 調用tp提供的dump方法,友好的輸出查詢結果
dump($teachers);
// 分別獲取張三和李四
$zhangsan = $teachers[0];
$lisi = $teachers[1];
return '<table>
...
```
>[warning] `...`在教程中表達省略了部分代碼,該省略部分在大家跟隨教程練習的過程并**不**可省略。
接下來我們將`return '<table> ....</table>'`修改為`return "<table> ....</table>"`,即將原來的單引號修改為雙引號,然后在適當的位置上加入`teachers`變量中的內容:
```php
public function index()
{
// think鎮facade村的Db提供了一個query方法,調用該方法可以進行數據查詢
// 使用select * from yunzhi_teacher查詢數據庫
$teachers = \think\facade\Db::query('select * from yunzhi_teacher');
// 調用tp提供的dump方法,友好的輸出查詢結果
dump($teachers);
// 分別獲取張三和李四
$zhangsan = $teachers[0];
$lisi = $teachers[1];
return "<table>
<tr>
<th>序號</th>
<th>姓名</th>
<th>性別</th>
<th>郵箱</th>
<th>用戶名</th>
</tr>
<tr>
<td>1</td>
<td>$zhangsan[name]</td>
<td>$zhangsan[sex]</td>
<td>$zhangsan[email]</td>
<td>$zhangsan[username]</td>
</tr>
<tr>
<td>2</td>
<td>$lisi[name]</td>
<td>$lisi[sex]</td>
<td>$lisi[email]</td>
<td>$lisi[username]</td>
</tr>
</table>";
}
```
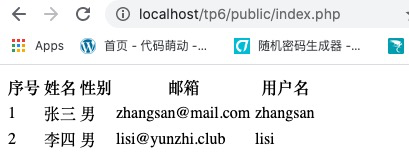
保存后刷新頁面:
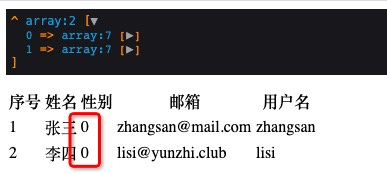
注意此時性別已由`男`變更為`0`,請明成功的顯示了數據庫中的字段。你當然還可以使用navicat打開yunzhi_teacher表,并修改其它中的內容。最后刷新界面來查看界面顯示的內容是否動態的發生了變化。
休息一會,就到這里。
# 本節作業
* 本節中最后將單引號換成了雙引號,不這么改會發生什么?
* 請觀察本節開始恢復的1.3小節的代碼使用的是單引號還是雙引號,把兩個符號換一下看看會發生什么?
* 猜一猜為什么會這樣。
# 相關資源
| 內容 | 地址 |
| ----------- | ----------- |
| Html 表格 | [https://www.runoob.com/html/html-images.html](https://www.runoob.com/html/html-images.html)|
| PHP Sting 字符串| [https://www.php.net/manual/zh/language.types.string.php#language.types.string.syntax.single](https://www.php.net/manual/zh/language.types.string.php#language.types.string.syntax.single)|
| 本節源碼 | [https://github.com/mengyunzhi/tp6/archive/step2.2.5.zip](https://github.com/mengyunzhi/tp6/archive/step2.2.5.zip) |
- 序言
- 第一章 Hello World
- 1.1 運行環境
- 1.1.1 windows
- 1.1.2 macos
- 1.1.3 ubuntu
- 1.2 Hello ThinkPHP
- 1.2.1 windows
- 1.2.2 macos
- 1.2.3 ubuntu
- 2.3 Hello World
- 第二章 教師管理
- 2.1 數據庫初始化
- 2.2 CRUD之 R 讀取數據
- 1 數據流
- 2.2.2 連接數據庫
- 2.2.3 直接讀取數據之DB
- 2.2.4 間接讀取數據之模型
- 2.2.5 顯示數據之原始文案
- 2.2.6 單引號與雙引號
- 2.2.7 顯示數據之視圖
- 2.2.8 模板語法
- 2.2.9 使用bootstrap美化界面
- 2.3 CRUD之 C 增加數據
- 2.3.1 MCA默認路由