
在上一篇文章中,我帶你一起學習了在 Flutter 中如何響應用戶交互事件(手勢)。手勢處理在 Flutter 中分為兩種:原始的指針事件處理和高級的手勢識別。
其中,指針事件以冒泡機制分發,通過 Listener 完成監聽;而手勢識別則通過 Gesture 處理。但需要注意的是,雖然 Flutter 可以同時支持多個手勢(包括一個 Widget 監聽多個手勢,或是多個 Widget 監聽同一個手勢),但最終只會有一個 Widget 的手勢能夠響應用戶行為。為了改變這一點,我們需要自定義手勢,修改手勢競技場對于多手勢優先級判斷的默認行為。
除了需要響應外部的事件之外,UI 框架的另一個重要任務是,處理好各個組件之間的數據同步關系。尤其對于 Flutter 這樣大量依靠組合 Widget 的行為來實現用戶界面的框架來說,如何確保數據的改變能夠映射到最終的視覺效果上就顯得更為重要。所以,在今天這篇文章中,我就與你介紹在 Flutter 中如何進行跨組件數據傳遞。
在之前的分享中,通過組合嵌套的方式,利用數據對基礎 Widget 的樣式進行視覺屬性定制,我們已經實現了多種界面布局。所以,你應該已經體會到了,在 Flutter 中實現跨組件數據傳遞的標準方式是通過屬性傳值。
但是,對于稍微復雜一點的、尤其視圖層級比較深的 UI 樣式,一個屬性可能需要跨越很多層才能傳遞給子組件,這種傳遞方式就會導致中間很多并不需要這個屬性的組件也需要接收其子 Widget 的數據,不僅繁瑣而且冗余。
所以,對于數據的跨層傳遞,Flutter 還提供了三種方案:InheritedWidget、Notification 和 EventBus。接下來,我將依次為你講解這三種方案。
## InheritedWidget
InheritedWidget 是 Flutter 中的一個功能型 Widget,適用于在 Widget 樹中共享數據的場景。通過它,我們可以高效地將數據在 Widget 樹中進行跨層傳遞。
在前面的第 16 篇文章“[從夜間模式說起,如何定制不同風格的 App 主題?](https://time.geekbang.org/column/article/112148)”中,我與你介紹了如何通過 Theme 去訪問當前界面的樣式風格,從而進行樣式復用的例子,比如 Theme.of(context).primaryColor。
**Theme 類是通過 InheritedWidget 實現的典型案例**。在子 Widget 中通過 Theme.of 方法找到上層 Theme 的 Widget,獲取到其屬性的同時,建立子 Widget 和上層父 Widget 的觀察者關系,當上層父 Widget 屬性修改的時候,子 Widget 也會觸發更新。
接下來,我就以 Flutter 工程模板中的計數器為例,與你說明 InheritedWidget 的使用方法。
* 首先,為了使用 InheritedWidget,我們定義了一個繼承自它的新類 CountContainer。
* 然后,我們將計數器狀態 count 屬性放到 CountContainer 中,并提供了一個 of 方法方便其子 Widget 在 Widget 樹中找到它。
* 最后,我們重寫了 updateShouldNotify 方法,這個方法會在 Flutter 判斷 InheritedWidget 是否需要重建,從而通知下層觀察者組件更新數據時被調用到。在這里,我們直接判斷 count 是否相等即可。
~~~
class CountContainer extends InheritedWidget {
// 方便其子 Widget 在 Widget 樹中找到它
static CountContainer of(BuildContext context) => context.inheritFromWidgetOfExactType(CountContainer) as CountContainer;
final int count;
CountContainer({
Key key,
@required this.count,
@required Widget child,
}): super(key: key, child: child);
// 判斷是否需要更新
@override
bool updateShouldNotify(CountContainer oldWidget) => count != oldWidget.count;
}
~~~
然后,我們使用 CountContainer 作為根節點,并用 0 初始化 count。隨后在其子 Widget Counter 中,我們通過 InheritedCountContainer.of 方法找到它,獲取計數狀態 count 并展示:
~~~
class _MyHomePageState extends State<MyHomePage> {
@override
Widget build(BuildContext context) {
// 將 CountContainer 作為根節點,并使用 0 作為初始化 count
return CountContainer(
count: 0,
child: Counter()
);
}
}
class Counter extends StatelessWidget {
@override
Widget build(BuildContext context) {
// 獲取 InheritedWidget 節點
CountContainer state = CountContainer.of(context);
return Scaffold(
appBar: AppBar(title: Text("InheritedWidget demo")),
body: Text(
'You have pushed the button this many times: ${state.count}',
),
);
}
~~~
運行一下,效果如下圖所示:
:-: 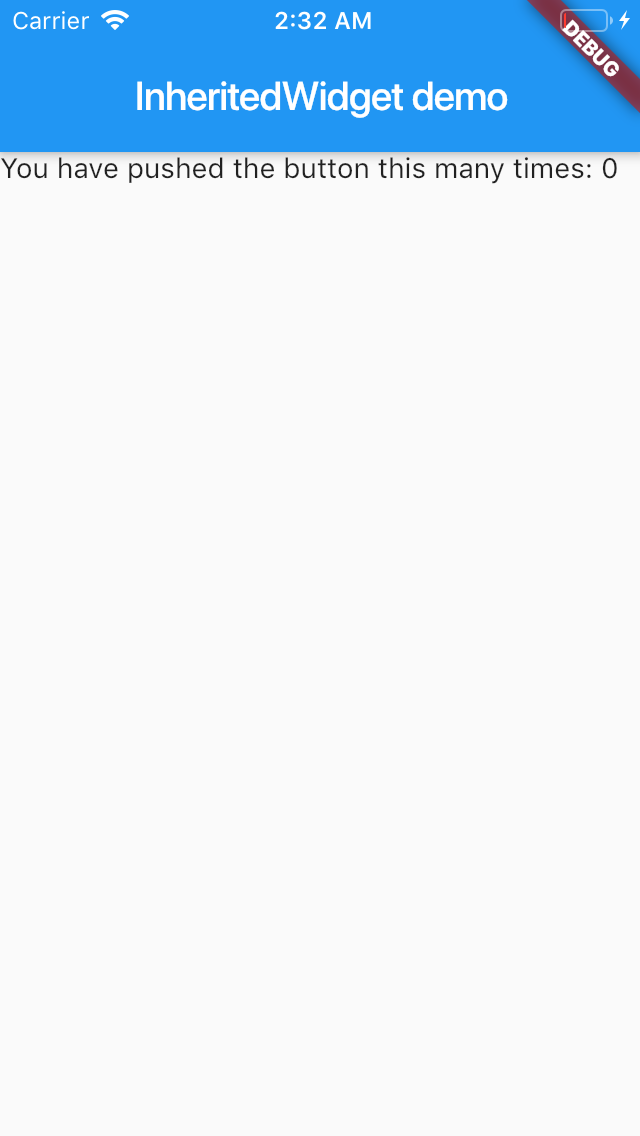
圖 1 InheritedWidget 使用方法
可以看到 InheritedWidget 的使用方法還是比較簡單的,無論 Counter 在 CountContainer 下層什么位置,都能獲取到其父 Widget 的計數屬性 count,再也不用手動傳遞屬性了。
**不過,InheritedWidget 僅提供了數據讀的能力,如果我們想要修改它的數據,則需要把它和 StatefulWidget 中的 State 配套使用**。我們需要把 InheritedWidget 中的數據和相關的數據修改方法,全部移到 StatefulWidget 中的 State 上,而 InheritedWidget 只需要保留對它們的引用。
我們對上面的代碼稍加修改,刪掉 CountContainer 中持有的 count 屬性,增加對數據持有者 State,以及數據修改方法的引用:
~~~
class CountContainer extends InheritedWidget {
...
final _MyHomePageState model;// 直接使用 MyHomePage 中的 State 獲取數據
final Function() increment;
CountContainer({
Key key,
@required this.model,
@required this.increment,
@required Widget child,
}): super(key: key, child: child);
...
}
~~~
然后,我們將 count 數據和其對應的修改方法放在了 State 中,仍然使用 CountContainer 作為根節點,完成了數據和修改方法的初始化。
在其子 Widget Counter 中,我們還是通過 InheritedCountContainer.of 方法找到它,將計數狀態 count 與 UI 展示同步,將按鈕的點擊事件與數據修改同步:
~~~
class _MyHomePageState extends State<MyHomePage> {
int count = 0;
void _incrementCounter() => setState(() {count++;});// 修改計數器
@override
Widget build(BuildContext context) {
return CountContainer(
model: this,// 將自身作為 model 交給 CountContainer
increment: _incrementCounter,// 提供修改數據的方法
child:Counter()
);
}
}
class Counter extends StatelessWidget {
@override
Widget build(BuildContext context) {
// 獲取 InheritedWidget 節點
CountContainer state = CountContainer.of(context);
return Scaffold(
...
body: Text(
'You have pushed the button this many times: ${state.model.count}', // 關聯數據讀方法
),
floatingActionButton: FloatingActionButton(onPressed: state.increment), // 關聯數據修改方法
);
}
}
~~~
運行一下,可以看到,我們已經實現 InheritedWidget 數據的讀寫了。
:-: 
圖 2 InheritedWidget 數據修改示例
## Notification
Notification 是 Flutter 中進行跨層數據共享的另一個重要的機制。如果說 InheritedWidget 的數據流動方式是從父 Widget 到子 Widget 逐層傳遞,那 Notificaiton 則恰恰相反,數據流動方式是從子 Widget 向上傳遞至父 Widget。這樣的數據傳遞機制適用于子 Widget 狀態變更,發送通知上報的場景。
在前面的第 13 篇文章“[經典控件(二):UITableView/ListView 在 Flutter 中是什么?](https://time.geekbang.org/column/article/110859)”中,我與你介紹了 ScrollNotification 的使用方法:ListView 在滾動時會分發通知,我們可以在上層使用 NotificationListener 監聽 ScrollNotification,根據其狀態做出相應的處理。
自定義通知的監聽與 ScrollNotification 并無不同,而如果想要實現自定義通知,我們首先需要繼承 Notification 類。Notification 類提供了 dispatch 方法,可以讓我們沿著 context 對應的 Element 節點樹向上逐層發送通知。
接下來,我們一起看一個具體的案例吧。在下面的代碼中,我們自定義了一個通知和子 Widget。子 Widget 是一個按鈕,在點擊時會發送通知:
~~~
class CustomNotification extends Notification {
CustomNotification(this.msg);
final String msg;
}
// 抽離出一個子 Widget 用來發通知
class CustomChild extends StatelessWidget {
@override
Widget build(BuildContext context) {
return RaisedButton(
// 按鈕點擊時分發通知
onPressed: () => CustomNotification("Hi").dispatch(context),
child: Text("Fire Notification"),
);
}
}
~~~
而在子 Widget 的父 Widget 中,我們監聽了這個通知,一旦收到通知,就會觸發界面刷新,展示收到的通知信息:
~~~
class _MyHomePageState extends State<MyHomePage> {
String _msg = " 通知:";
@override
Widget build(BuildContext context) {
// 監聽通知
return NotificationListener<CustomNotification>(
onNotification: (notification) {
setState(() {_msg += notification.msg+" ";});// 收到子 Widget 通知,更新 msg
},
child:Column(
mainAxisAlignment: MainAxisAlignment.center,
children: <Widget>[Text(_msg),CustomChild()],// 將子 Widget 加入到視圖樹中
)
);
}
}
~~~
運行一下代碼,可以看到,我們每次點擊按鈕之后,界面上都會出現最新的通知信息:
:-: 
圖 3 自定義 Notification
## EventBus
無論是 InheritedWidget 還是 Notificaiton,它們的使用場景都需要依靠 Widget 樹,也就意味著只能在有父子關系的 Widget 之間進行數據共享。但是,組件間數據傳遞還有一種常見場景:這些組件間不存在父子關系。這時,事件總線 EventBus 就登場了。
事件總線是在 Flutter 中實現跨組件通信的機制。它遵循發布 / 訂閱模式,允許訂閱者訂閱事件,當發布者觸發事件時,訂閱者和發布者之間可以通過事件進行交互。發布者和訂閱者之間無需有父子關系,甚至非 Widget 對象也可以發布 / 訂閱。這些特點與其他平臺的事件總線機制是類似的。
接下來,我們通過一個跨頁面通信的例子,來看一下事件總線的具體使用方法。需要注意的是,EventBus 是一個第三方插件,因此我們需要在 pubspec.yaml 文件中聲明它:
~~~
dependencies:
event_bus: 1.1.0
~~~
EventBus 的使用方式靈活,可以支持任意對象的傳遞。所以在這里,我們傳輸數據的載體就選擇了一個有字符串屬性的自定義事件類 CustomEvent:
~~~
class CustomEvent {
String msg;
CustomEvent(this.msg);
}
~~~
然后,我們定義了一個全局的 eventBus 對象,并在第一個頁面監聽了 CustomEvent 事件,一旦收到事件,就會刷新 UI。需要注意的是,千萬別忘了在 State 被銷毀時清理掉事件注冊,否則你會發現 State 永遠被 EventBus 持有著,無法釋放,從而造成內存泄漏:
~~~
// 建立公共的 event bus
EventBus eventBus = new EventBus();
// 第一個頁面
class _FirstScreenState extends State<FirstScreen> {
String msg = " 通知:";
@override
initState() {
// 監聽 CustomEvent 事件,刷新 UI
eventBus.on<CustomEvent>().listen((event) {
setState(() {msg+= event.msg;});// 更新 msg
});
super.initState();
}
dispose() {
subscription.cancel();//State 銷毀時,清理注冊
super.dispose();
}
@override
Widget build(BuildContext context) {
return new Scaffold(
body:Text(msg),
...
);
}
}
~~~
最后,我們在第二個頁面以按鈕點擊回調的方式,觸發了 CustomEvent 事件:
~~~
class SecondScreen extends StatelessWidget {
@override
Widget build(BuildContext context) {
return new Scaffold(
...
body: RaisedButton(
child: Text('Fire Event'),
// 觸發 CustomEvent 事件
onPressed: ()=> eventBus.fire(CustomEvent("hello"))
),
);
}
}
~~~
運行一下,多點擊幾下第二個頁面的按鈕,然后返回查看第一個頁面上的消息:
:-: 
圖 4 EventBus 示例
可以看到,EventBus 的使用方法還是比較簡單的,使用限制也相對最少。
這里我準備了一張表格,把屬性傳值、InheritedWidget、Notification 與 EventBus 這四種數據共享方式的特點和使用場景做了簡單總結,供你參考:
:-: 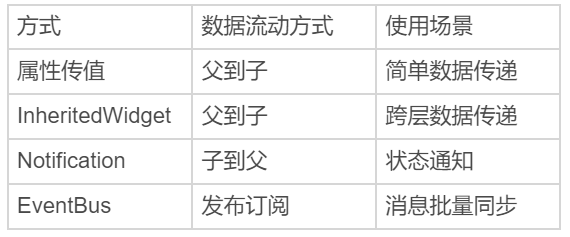
圖 5 屬性傳值、InheritedWidget、Notification 與 EventBus 數據傳遞方式對比
## 總結
好了,今天的分享就到這里。我們來簡單回顧下在 Flutter 中,如何實現跨組件的數據共享。
首先,我們認識了 InheritedWidget。對于視圖層級比較深的 UI 樣式,直接通過屬性傳值的方式會導致很多中間層增加冗余屬性,而使用 InheritedWidget 可以實現子 Widget 跨層共享父 Widget 的屬性。需要注意的是,InheritedWidget 中的屬性在子 Widget 中只能讀,如果有修改的場景,我們需要把它和 StatefulWidget 中的 State 配套使用。
然后,我們學習了 Notification,這種由下到上傳遞數據的跨層共享機制。我們可以使用 NotificationListener,在父 Widget 監聽來自子 Widget 的事件。
最后,我與你介紹了 EventBus,這種無需發布者與訂閱者之間存在父子關系的數據同步機制。
我把今天分享所涉及到的三種跨組件的[數據共享方式 demo](https://github.com/cyndibaby905/20_data_transfer)放到了 GitHub,你可以下載下來自己運行,體會它們之間的共同點和差異。
## 思考題
最后,我來給你留下一個思考題吧。
請你分別概括屬性傳值、InheritedWidget、Notification 與 EventBus 的優缺點。
- 前言
- 開篇詞
- 預習篇
- 01丨預習篇 · 從0開始搭建Flutter工程環境
- 02丨預習篇 · Dart語言概覽
- Flutter開發起步
- 03丨深入理解跨平臺方案的歷史發展邏輯
- 04丨Flutter區別于其他方案的關鍵技術是什么?
- 05丨從標準模板入手,體會Flutter代碼是如何運行在原生系統上的
- Dart語言基礎
- 06丨基礎語法與類型變量:Dart是如何表示信息的?
- 07丨函數、類與運算符:Dart是如何處理信息的?
- 08丨綜合案例:掌握Dart核心特性
- Flutter基礎
- 09丨Widget,構建Flutter界面的基石
- 10丨Widget中的State到底是什么?
- 11丨提到生命周期,我們是在說什么?
- 12丨經典控件(一):文本、圖片和按鈕在Flutter中怎么用?
- 13丨ListView在Flutter中是什么?
- 14 丨 經典布局:如何定義子控件在父容器中排版位置?
- 15 丨 組合與自繪,我該選用何種方式自定義Widget?
- 16 丨 從夜間模式說起,如何定制不同風格的App主題?
- 17丨依賴管理(一):圖片、配置和字體在Flutter中怎么用?
- 18丨依賴管理(二):第三方組件庫在Flutter中要如何管理?
- 19丨用戶交互事件該如何響應?
- 20丨關于跨組件傳遞數據,你只需要記住這三招
- 21丨路由與導航,Flutter是這樣實現頁面切換的
- Flutter進階
- 22丨如何構造炫酷的動畫效果?
- 23丨單線程模型怎么保證UI運行流暢?
- 24丨HTTP網絡編程與JSON解析
- 25丨本地存儲與數據庫的使用和優化
- 26丨如何在Dart層兼容Android-iOS平臺特定實現?(一)
- 27丨如何在Dart層兼容Android-iOS平臺特定實現?(二)
- 28丨如何在原生應用中混編Flutter工程?
- 29丨混合開發,該用何種方案管理導航棧?
- 30丨為什么需要做狀態管理,怎么做?
- 31丨如何實現原生推送能力?
- 32丨適配國際化,除了多語言我們還需要注意什么
- 33丨如何適配不同分辨率的手機屏幕?
- 34丨如何理解Flutter的編譯模式?
- 35丨HotReload是怎么做到的?
- 36丨如何通過工具鏈優化開發調試效率?
- 37丨如何檢測并優化FlutterApp的整體性能表現?
- 38丨如何通過自動化測試提高交付質量?
- Flutter綜合應用
- 39丨線上出現問題,該如何做好異常捕獲與信息采集?
- 40丨衡量FlutterApp線上質量,我們需要關注這三個指標
- 41丨組件化和平臺化,該如何組織合理穩定的Flutter工程結構?
- 42丨如何構建高效的FlutterApp打包發布環境?
- 43丨如何構建自己的Flutter混合開發框架(一)?
- 44丨如何構建自己的Flutter混合開發框架(二)?
- 結束語
- 結束語丨勿畏難,勿輕略