
## 一、概述
GitHub Packages 是一種包管理服務,可讓你輕松地在源代碼旁邊發布公共包或專用包;
## 二、發布jar包到Maven倉庫
包發布到Maven中之后,只需要通過Maven的POM文件即可完成依賴的引入,無需再使用本地庫了,非常方便;
### **安裝和配置Maven**
這里基于獨立安裝,非常簡單,參考[開發工具/Maven/安裝配置](../Maven/%E5%AE%89%E8%A3%85%E9%85%8D%E7%BD%AE.md);
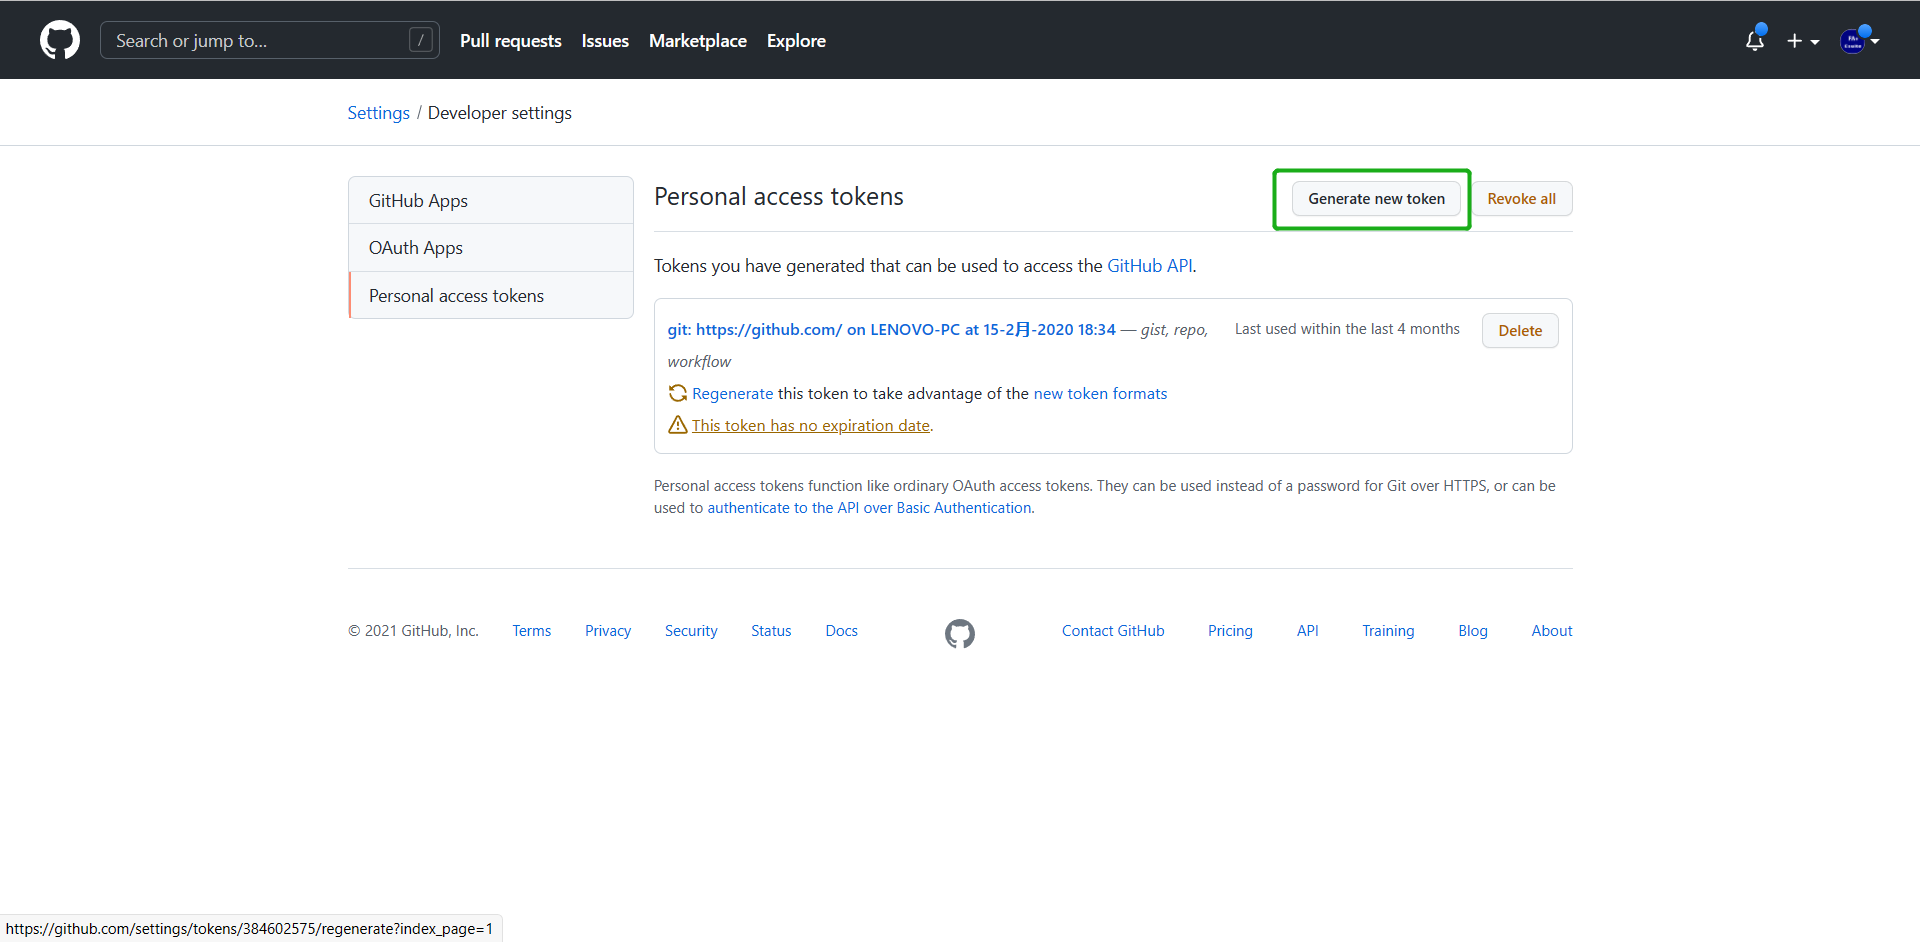
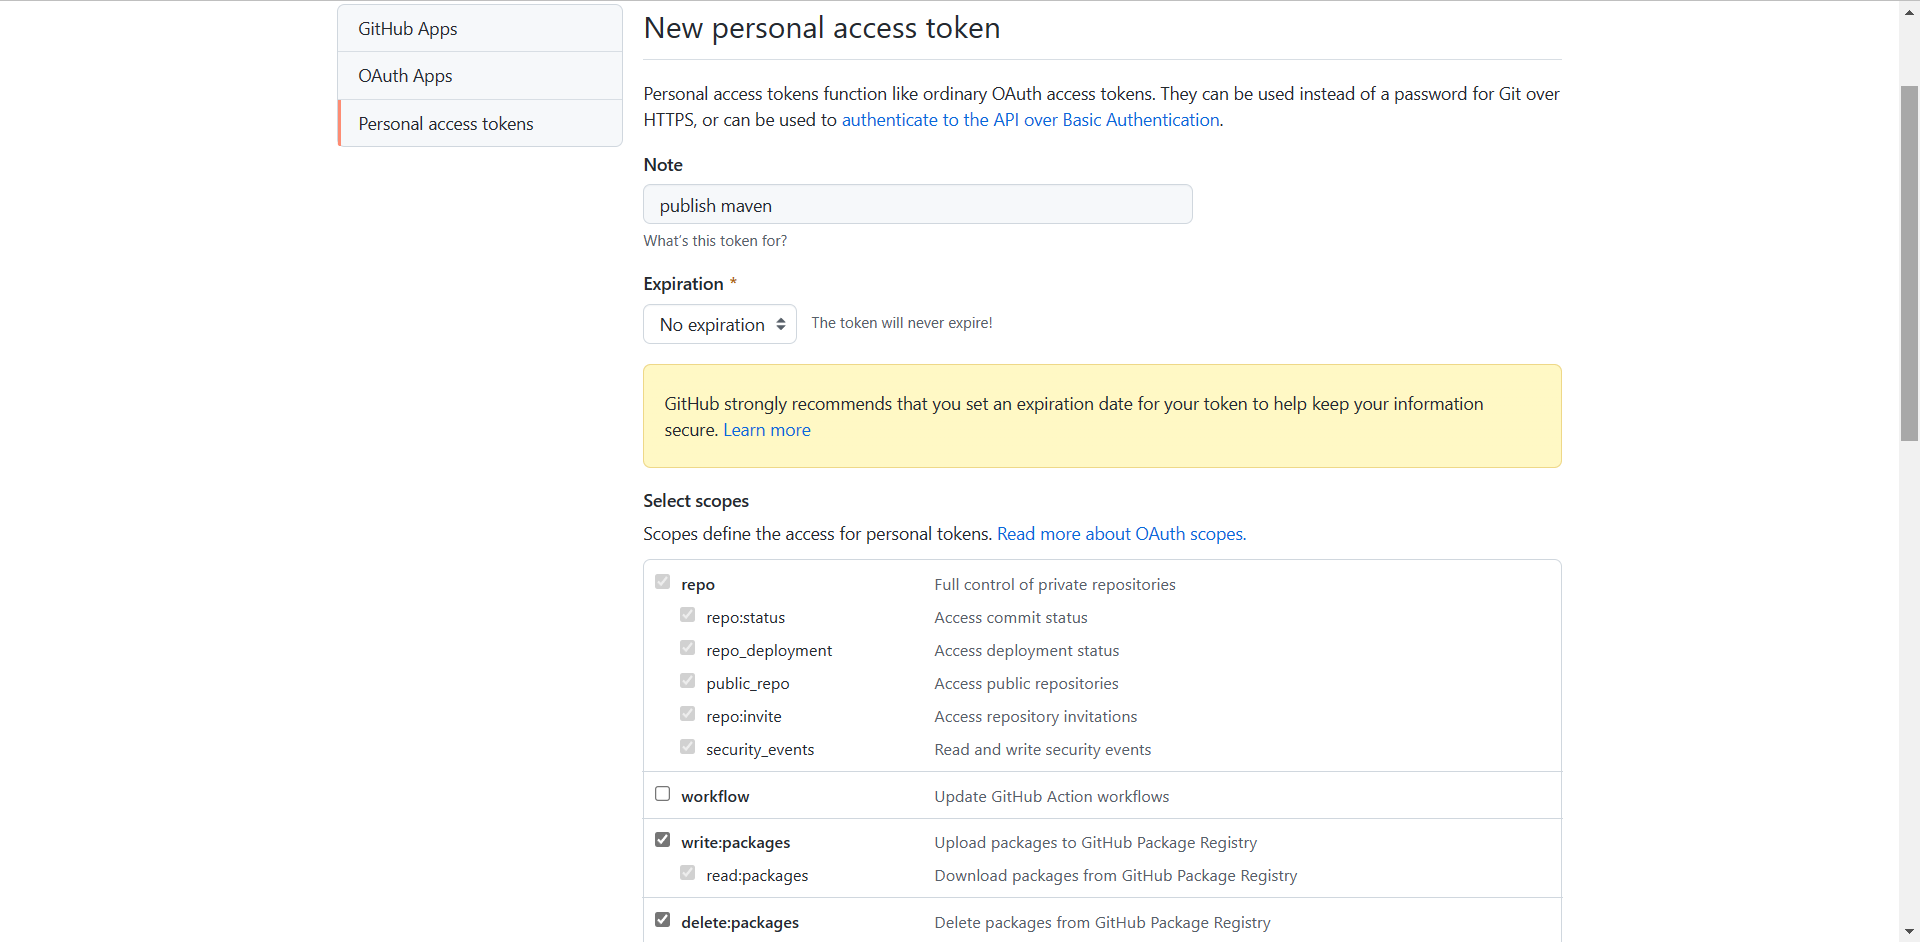
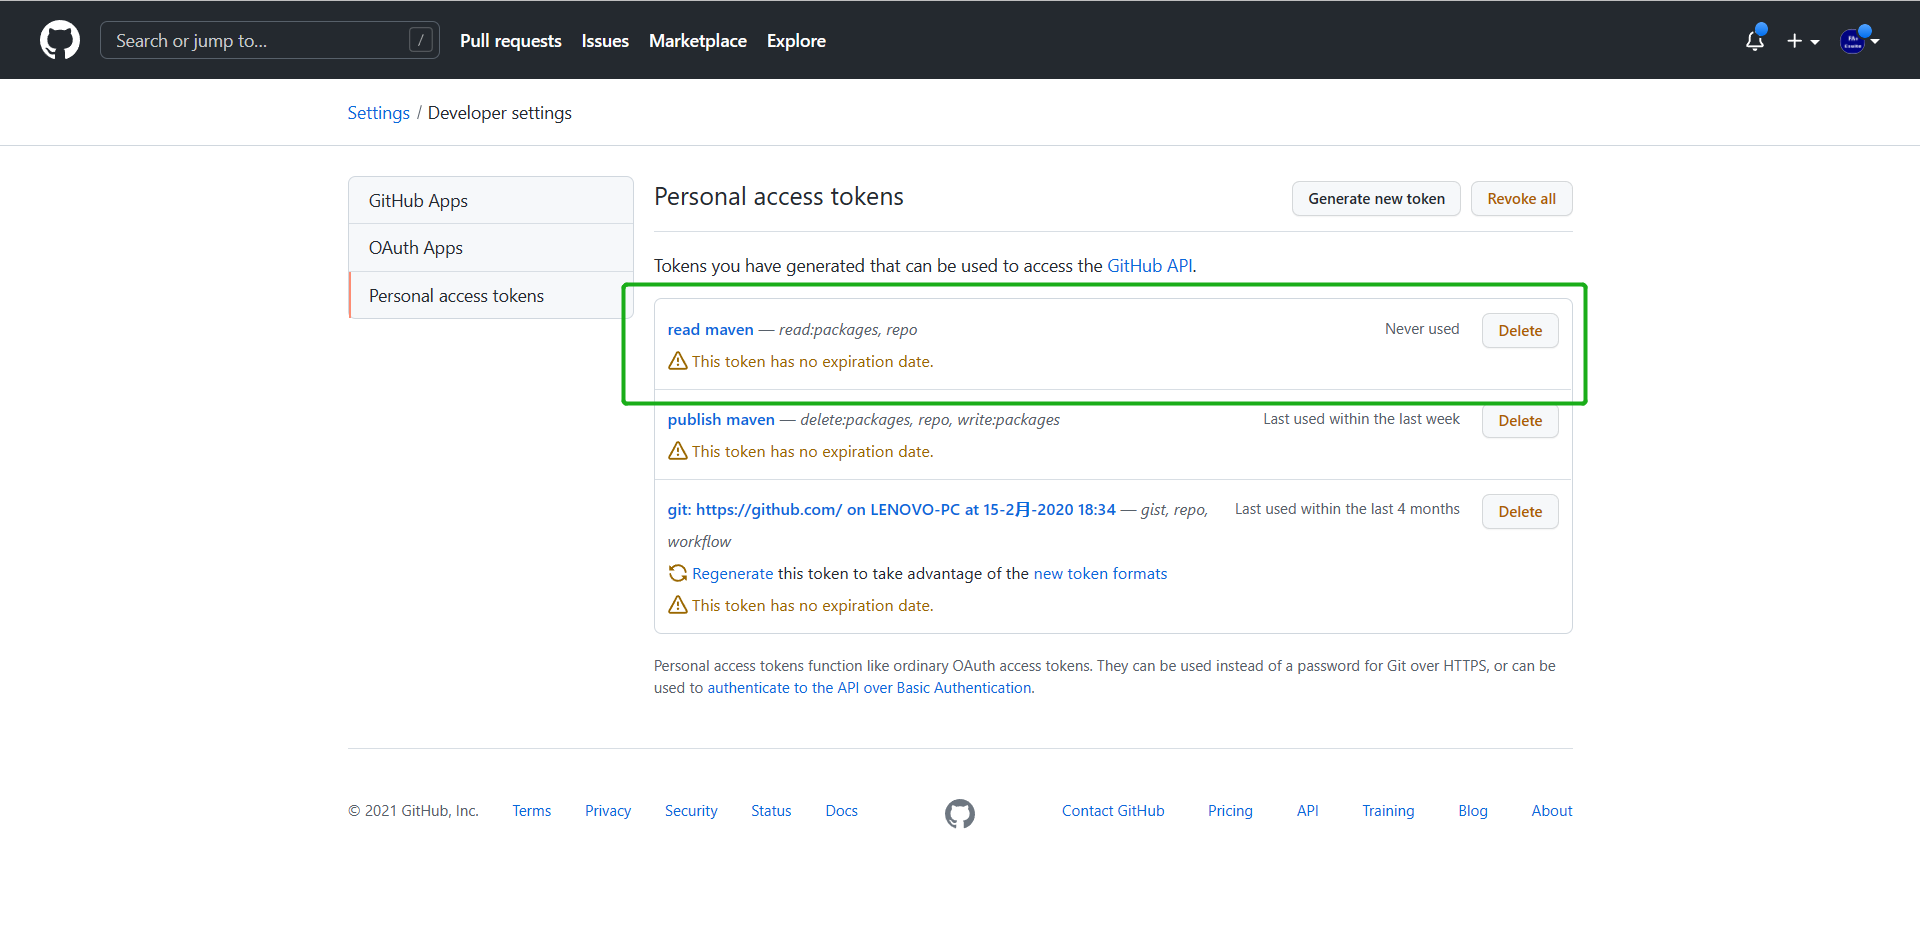
### **創建token**
在Settings>Developer settings>Personal access tokens里創建一個發布包的token,這個tokens應當能夠訪問repo的基本信息、讀寫、刪除packages;
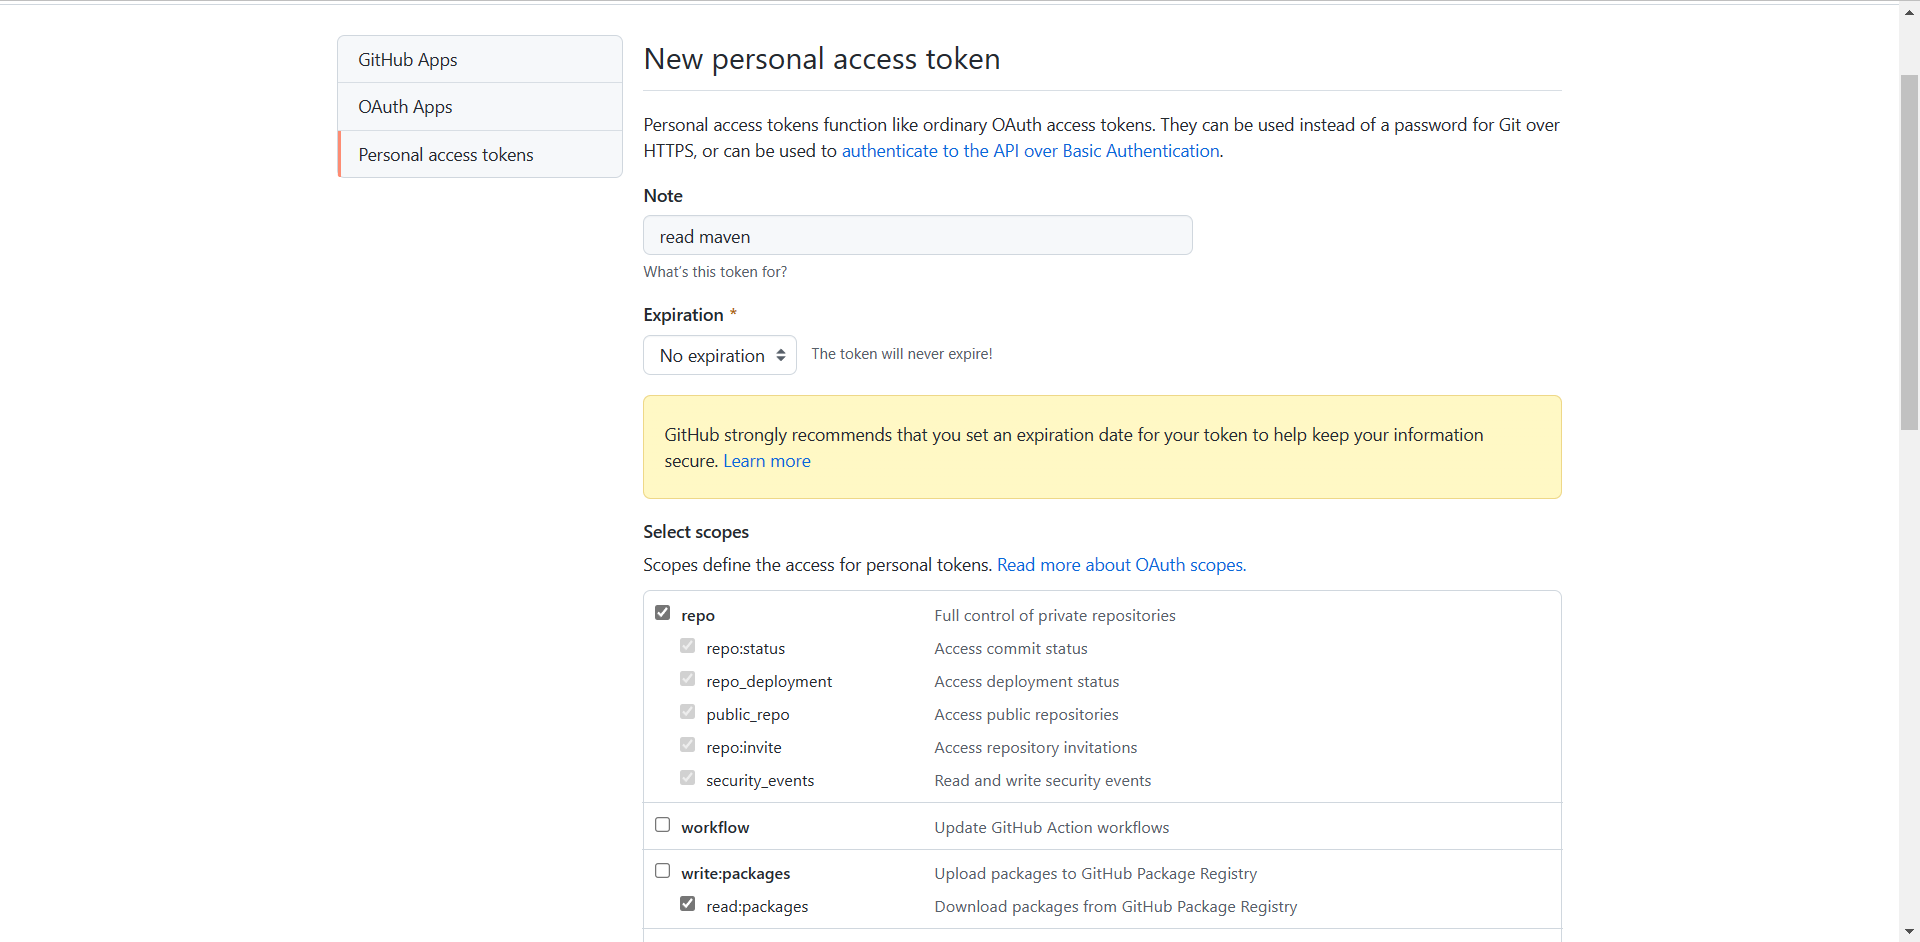
在Settings>Developer settings>Personal access tokens里創建一個安裝包的token,這個tokens應當能夠訪問repo的基本信息、讀;
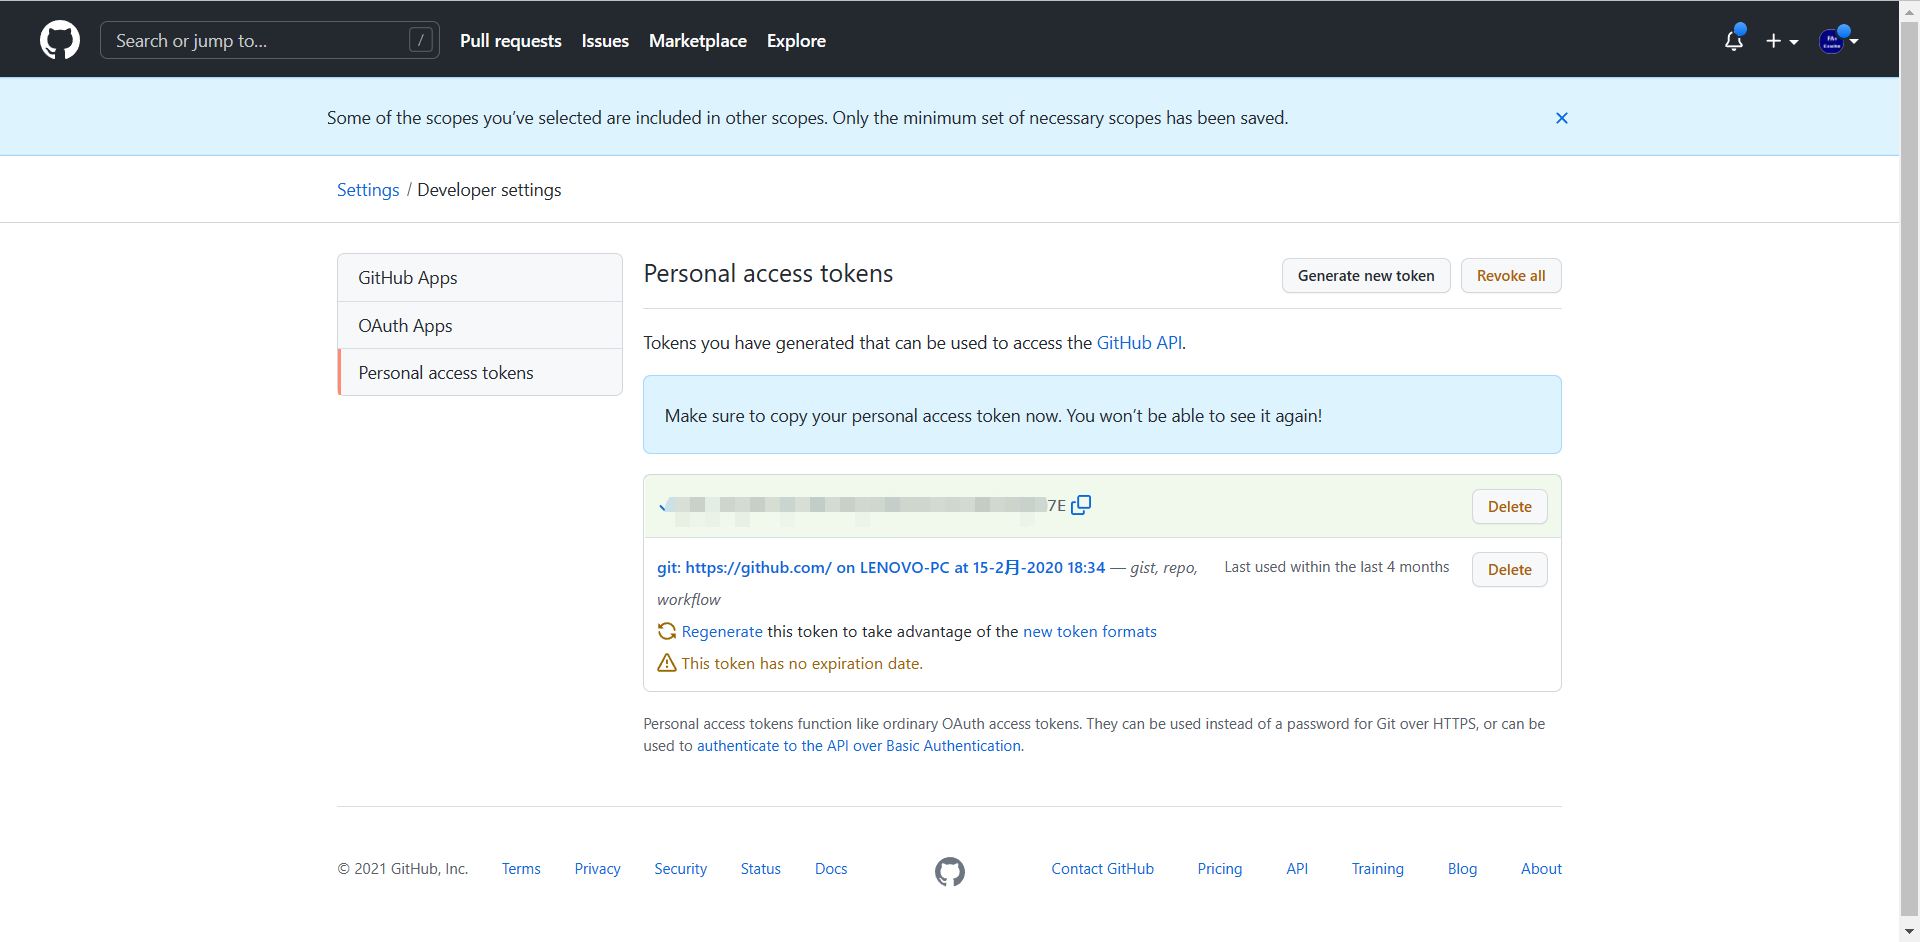
```
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
```
### **配置setting.xml**
可以直接用下面的配置內容覆蓋掉setting.xml:
```
<settings xmlns="http://maven.apache.org/SETTINGS/1.0.0"
xmlns:xsi="http://www.w3.org/2001/XMLSchema-instance"
xsi:schemaLocation="http://maven.apache.org/SETTINGS/1.0.0
http://maven.apache.org/xsd/settings-1.0.0.xsd">
<activeProfiles>
<activeProfile>github</activeProfile>
</activeProfiles>
<profiles>
<profile>
<id>github</id>
<repositories>
<repository>
<id>central</id>
<url>https://repo1.maven.org/maven2</url>
</repository>
<repository>
<id>github</id>
<url>https://maven.pkg.github.com/4170804/raymaven</url>
<snapshots>
<enabled>true</enabled>
</snapshots>
</repository>
</repositories>
</profile>
</profiles>
<servers>
<server>
<id>github</id>
<username>4170804</username>
<password>${token}</password>
</server>
</servers>
</settings>
```
>[danger]
> 需要替代:
${token}: 上面創建token環節產生的token字符串,如果當前是發布環境,則需要配置發布環境讀寫token,如果只是使用,則只需要配置只讀的token;
### **配置工程POM**
需要發布包的工程POM文件中,加入
```
<distributionManagement>?
<repository>???
<id>github</id>???
<name>raymaven</name>
<url>https://maven.pkg.github.com/4170804/raymaven</url>
</repository>
</distributionManagement>
```
### **執行命令發布**
進入工程根目錄,執行命令:
```
cd D:\eclipseray\workspace\rayframework
mvn clean
mvn deploy -f pom.release.xml -e
```
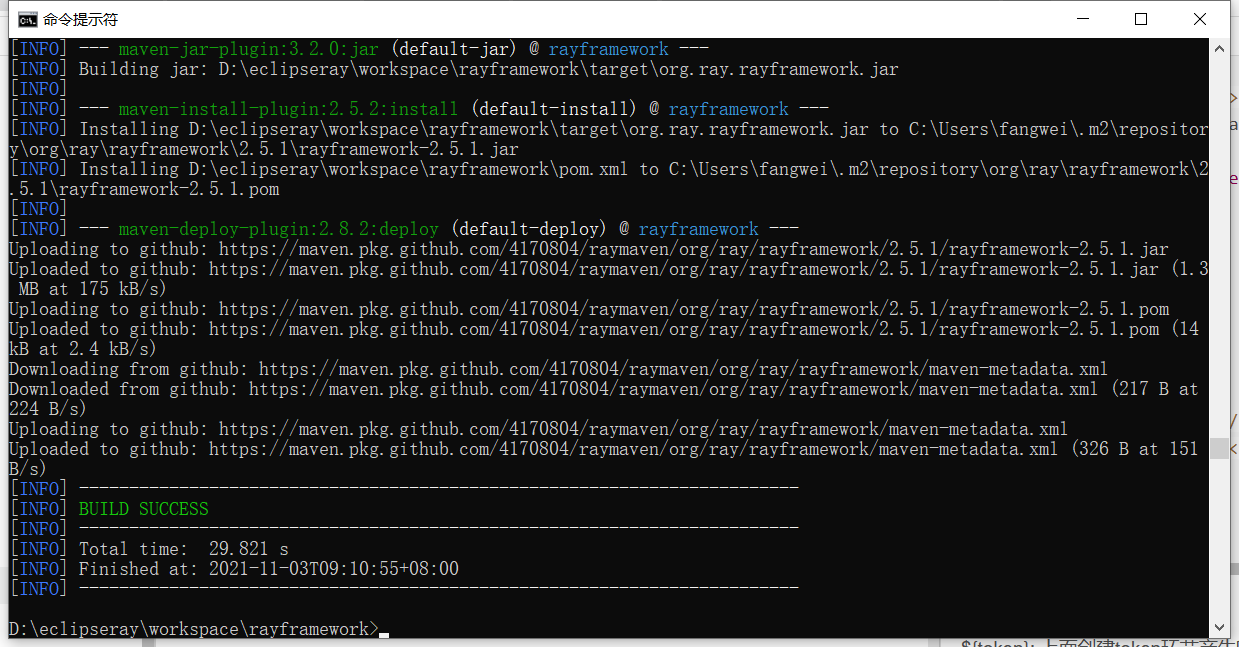
效果:
>[danger]
> 1、打包的時候,用命令行,關掉eclipse,建議打包的過程,全程不要開eclipse;
> 2、如果發布的時候,報證書錯誤,加入命令行看看:`-Dmaven.wagon.http.ssl.insecure=true -Dmaven.wagon.http.ssl.allowall=true`
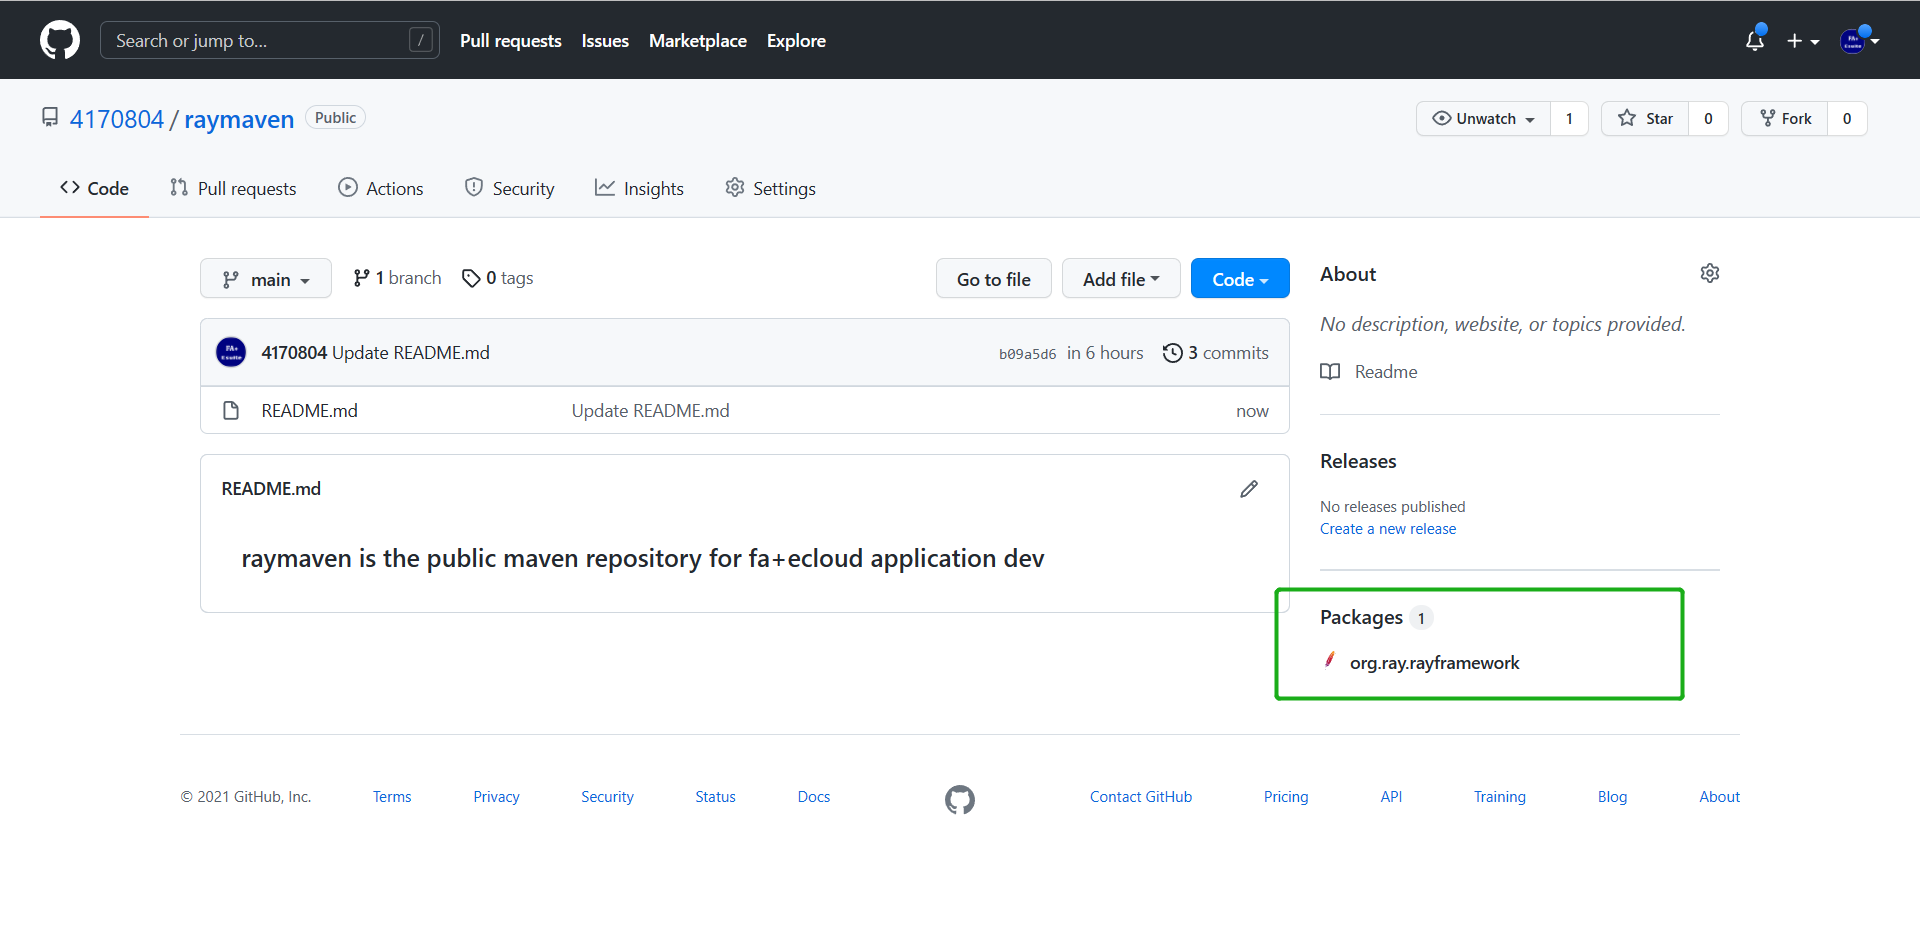
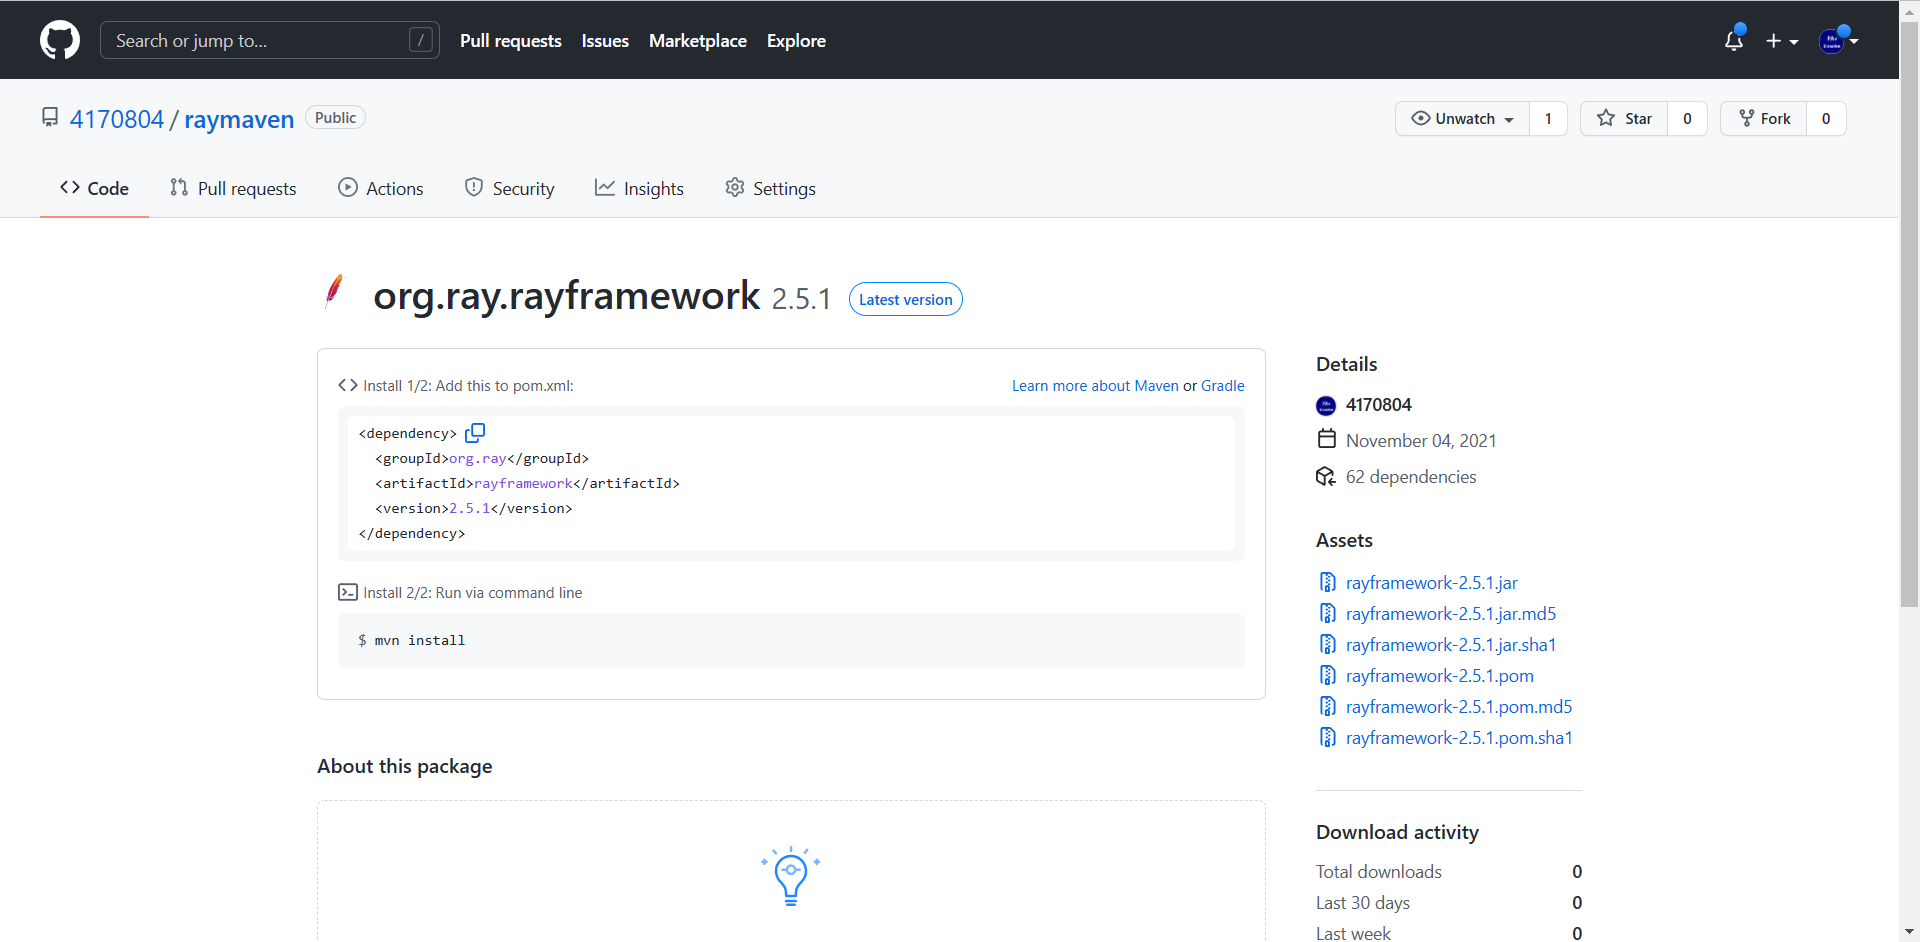
### **包設置為公共**
首次發布包時,默認可見性是私有的,只有您才能看到包。 您可以通過更改訪問設置來修改私有或公共容器映像的訪問權限;
公共包可以匿名訪問,無需身份驗證。 包一旦被設為公共,便無法再次將其設為私有。
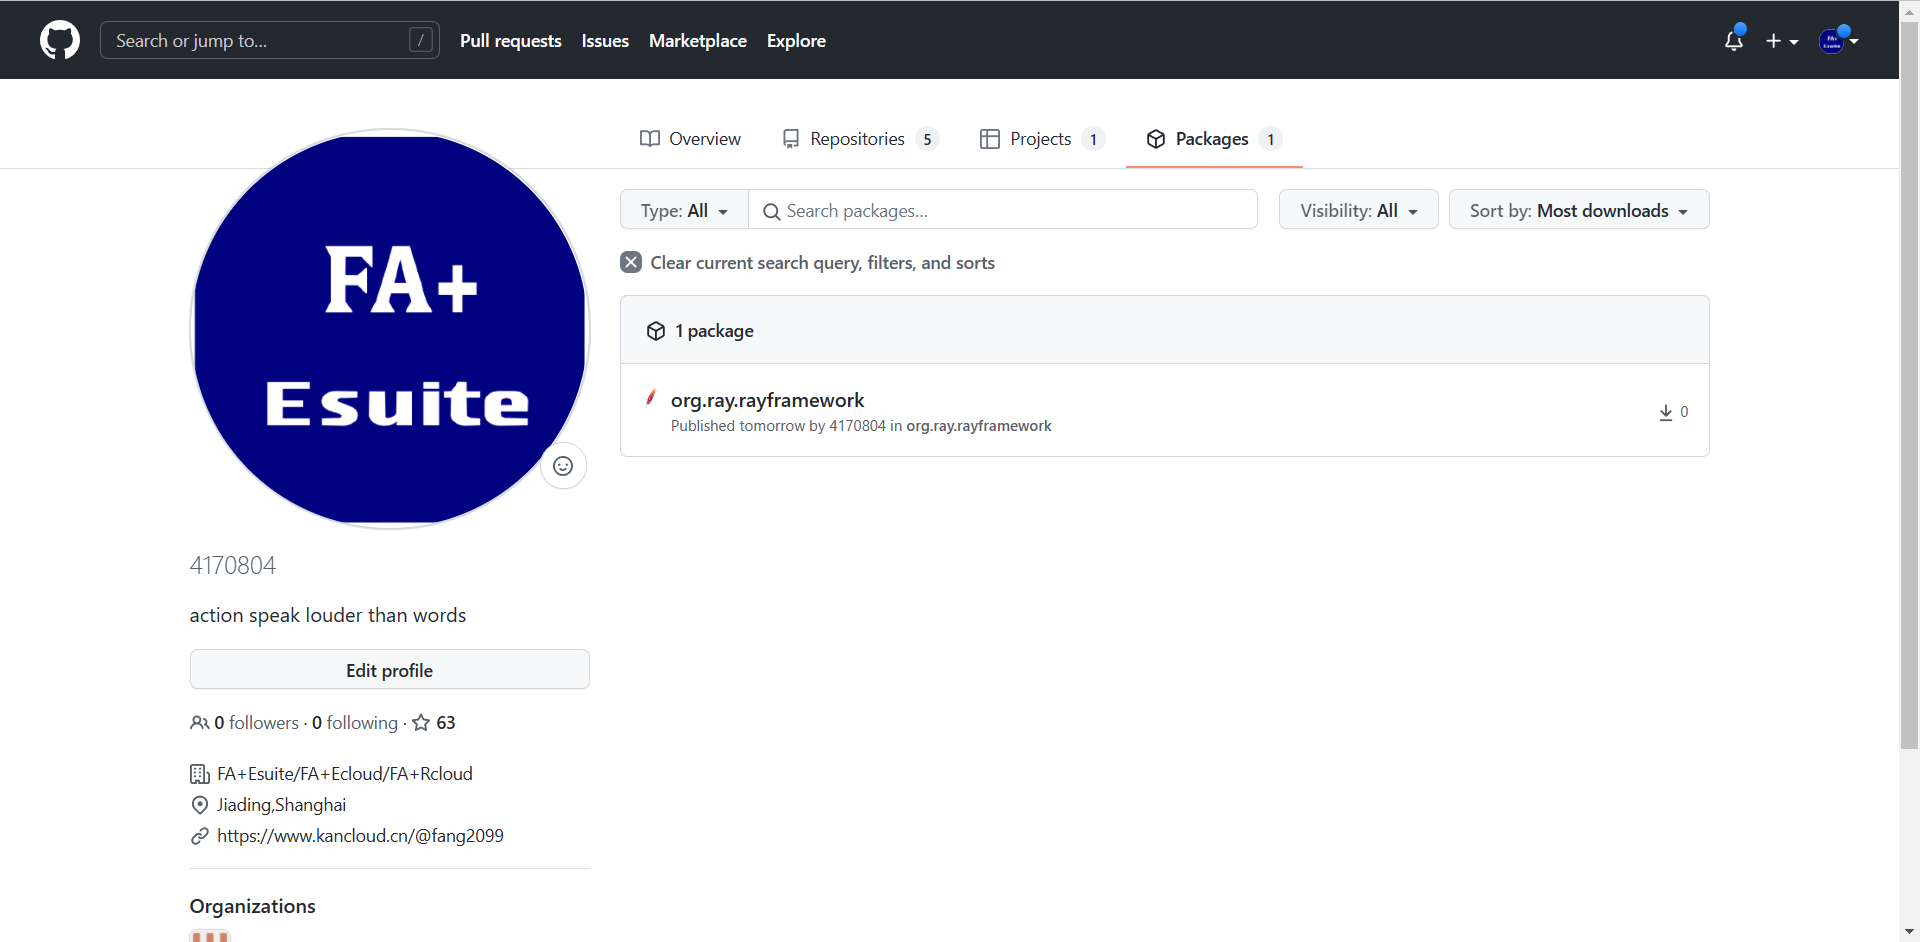
在 GitHub 上,導航到用戶帳戶的主頁面Your Profile;
在個人資料頁面的右上角,單擊Packages,選擇指定的包;
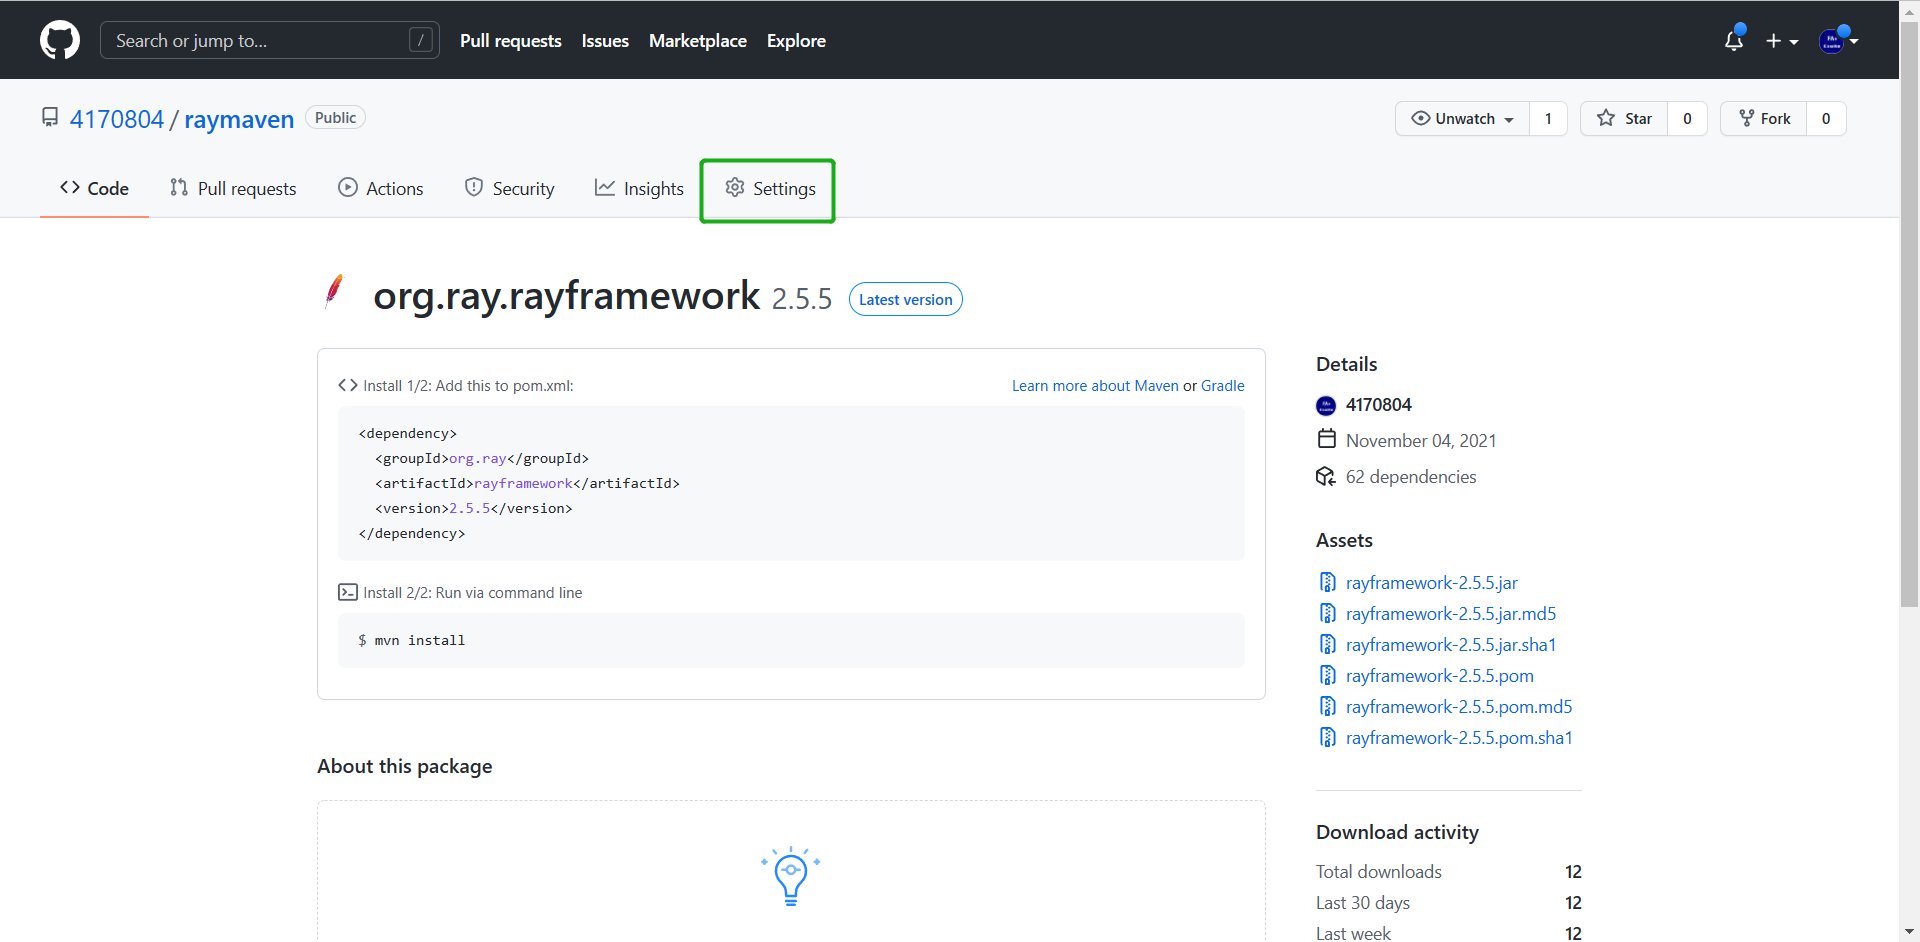
進入設置頁面的Danger Zone,更改包的可見性;
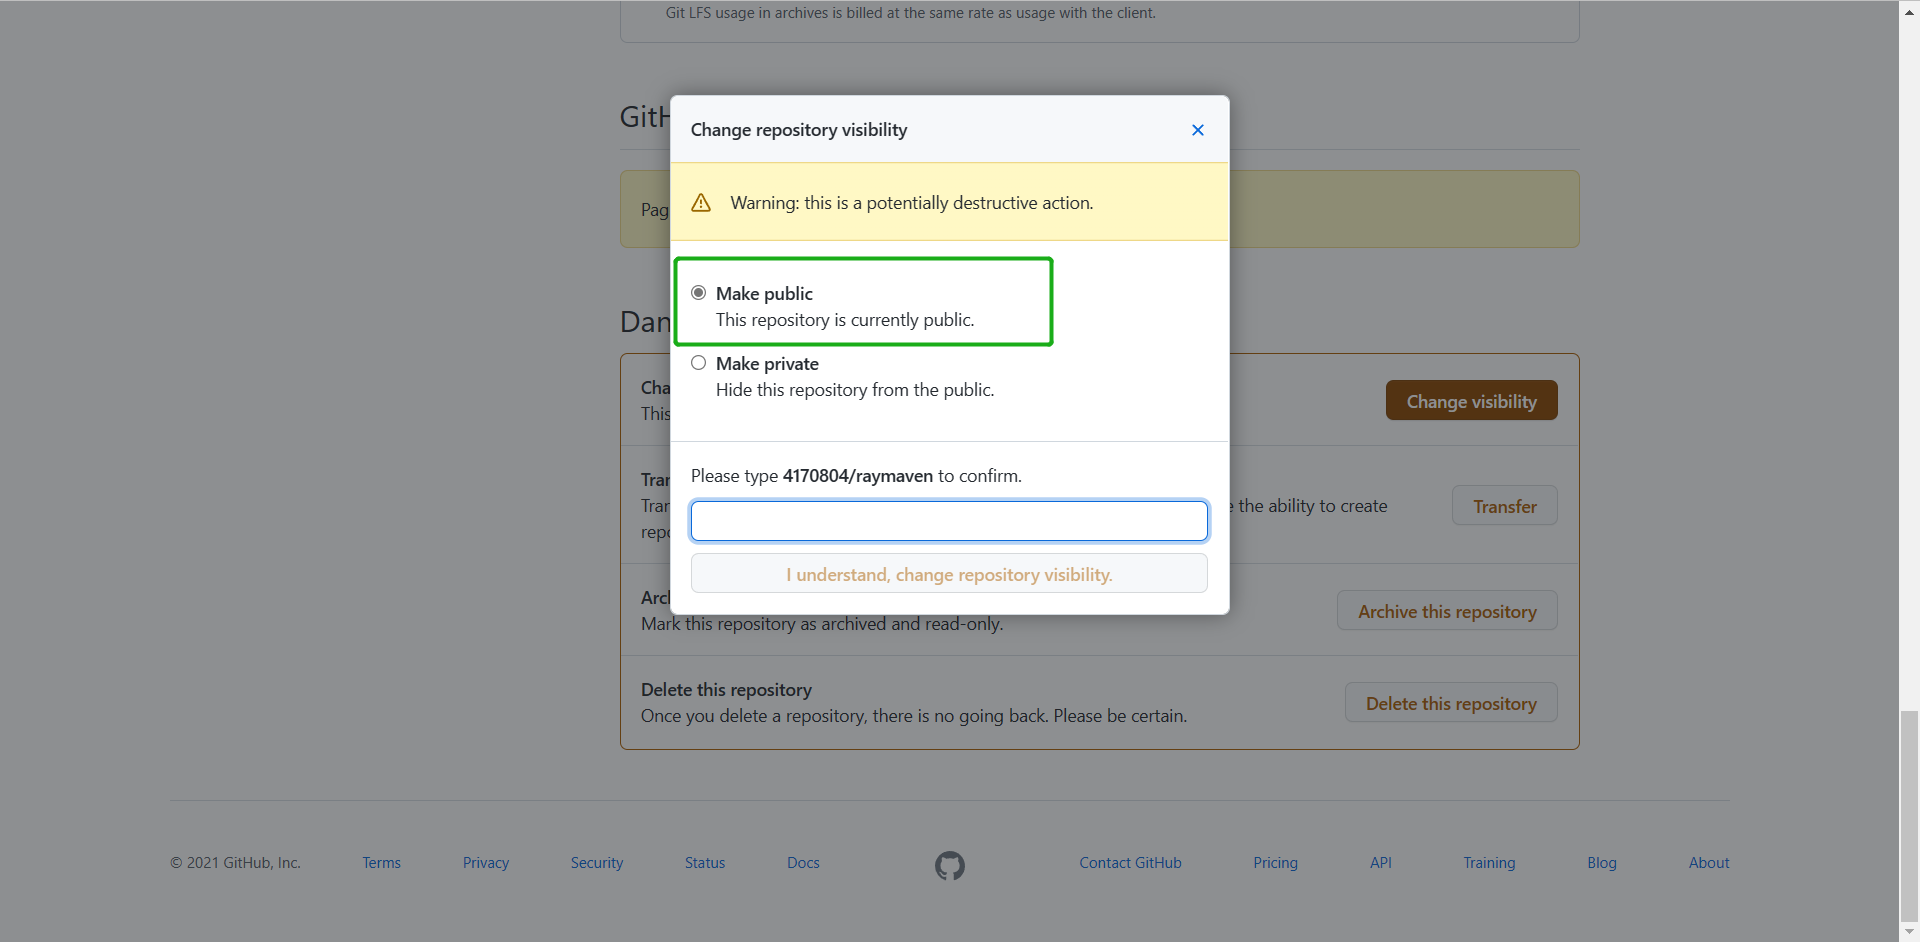
即可;
### **工程中引用**
**配置文件:**
需要在eclipse中,配置Maven的全局設置,設定一個設置文件;
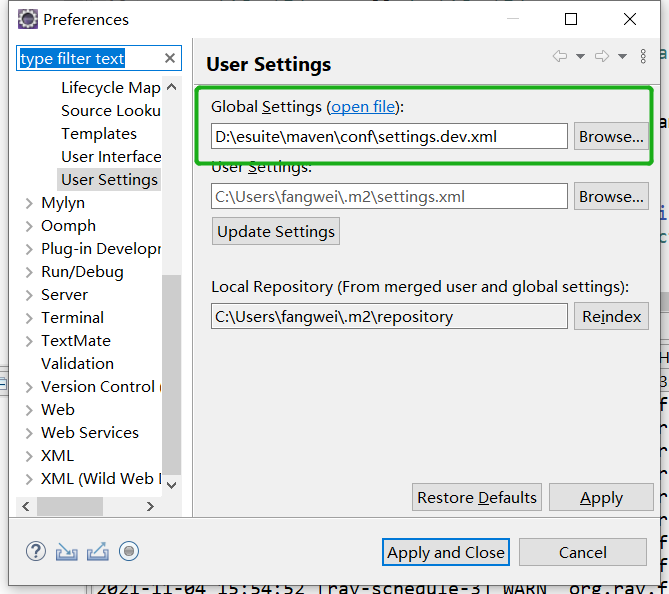
配置文件中的內容,可以直接復制下面的文本,完全覆蓋即可;
```
<settings xmlns="http://maven.apache.org/SETTINGS/1.0.0"
xmlns:xsi="http://www.w3.org/2001/XMLSchema-instance"
xsi:schemaLocation="http://maven.apache.org/SETTINGS/1.0.0
http://maven.apache.org/xsd/settings-1.0.0.xsd">
<activeProfiles>
<activeProfile>github</activeProfile>
</activeProfiles>
<profiles>
<profile>
<id>github</id>
<repositories>
<repository>
<id>central</id>
<url>https://repo1.maven.org/maven2</url>
</repository>
<repository>
<id>github</id>
<url>https://maven.pkg.github.com/4170804/raymaven</url>
<snapshots>
<enabled>true</enabled>
</snapshots>
</repository>
</repositories>
</profile>
</profiles>
<servers>
<server>
<id>github</id>
<username>4170804</username>
<password>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</password>
</server>
</servers>
</settings>
```
>[danger] token使用只讀的`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`
>
**工程的POM**
就可以如同公有倉庫里面的介質一樣,引入依賴即可;
```
<dependencies>
<dependency>
<groupId>org.ray</groupId>
<artifactId>rayframework</artifactId>
<version>3.0.1</version>
</dependency>
</dependencies>
```
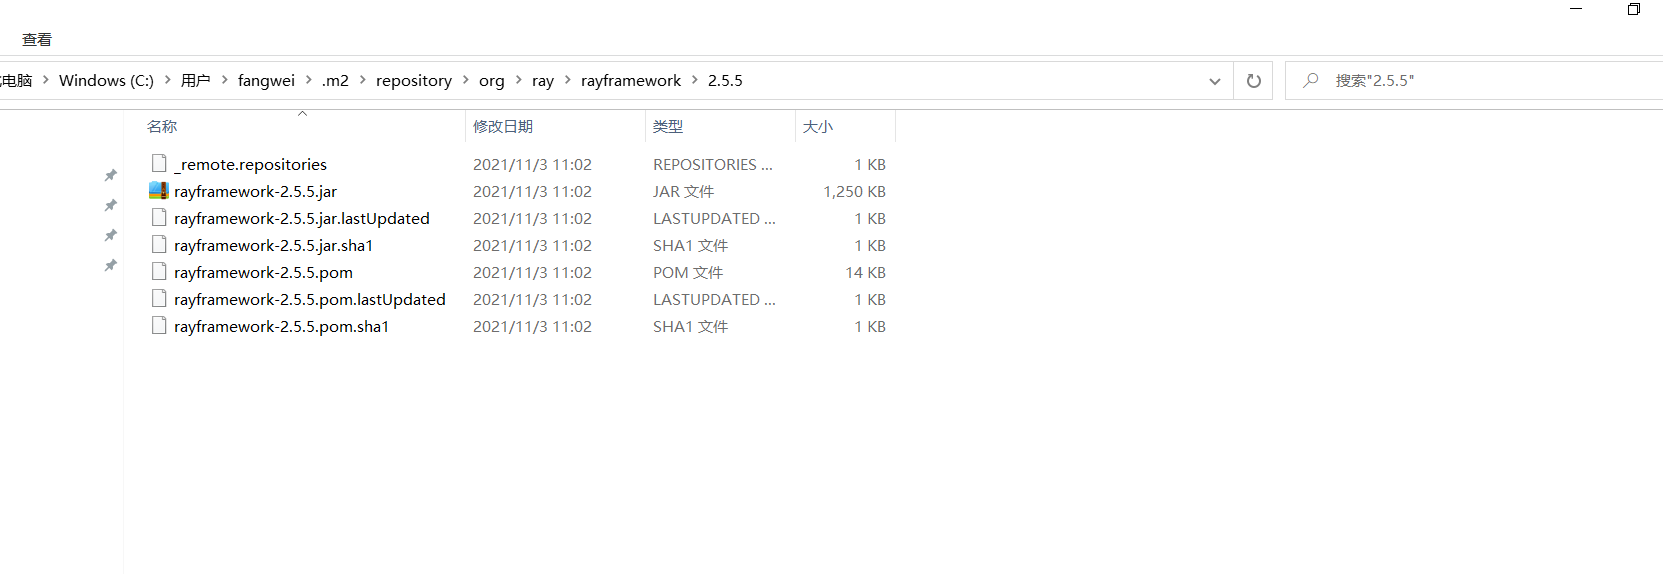
下載到本地庫效果:
## 三、前置條件
為了簡化發布庫包,把待發布的庫包的所有本地依賴包都打入了庫包,方便開發者只需要引入一個包即可;
因此,發布庫包前,需要把各依賴庫全部安裝到本地,方可,后續更新,只需更新本地包文件,即可自動更新本地依賴包了;
安裝本地包的方法參考:[本地包安裝](../Maven/%E6%9C%AC%E5%9C%B0%E5%8C%85%E5%AE%89%E8%A3%85.md)
需要安裝的包包括:
```
<!-- uniframework core libs start -->
<dependency>
<groupId>org.wbase</groupId>
<artifactId>org.wbase.framework.core</artifactId>
<version>${uniframework.version}</version>
</dependency>
<dependency>
<groupId>org.wbase</groupId>
<artifactId>org.wbase.framework.engine</artifactId>
<version>${uniframework.version}</version>
</dependency>
<dependency>
<groupId>org.wbase</groupId>
<artifactId>org.wbase.framework.integrate</artifactId>
<version>${uniframework.version}</version>
</dependency>
<dependency>
<groupId>org.wbase</groupId>
<artifactId>org.wbase.framework.internet</artifactId>
<version>${uniframework.version}</version>
</dependency>
<dependency>
<groupId>org.wbase</groupId>
<artifactId>org.wbase.framework.iot</artifactId>
<version>${uniframework.version}</version>
</dependency>
<dependency>
<groupId>org.wbase</groupId>
<artifactId>org.wbase.framework.open.core</artifactId>
<version>${uniframework.version}</version>
</dependency>
<dependency>
<groupId>org.wbase</groupId>
<artifactId>org.wbase.framework.ray.core</artifactId>
<version>${uniframework.version}</version>
</dependency>
<dependency>
<groupId>org.wbase</groupId>
<artifactId>org.wbase.framework.sysadmin</artifactId>
<version>${uniframework.version}</version>
</dependency>
<dependency>
<groupId>org.wbase</groupId>
<artifactId>org.wbase.framework.taglib</artifactId>
<version>${uniframework.version}</version>
</dependency>
<dependency>
<groupId>org.wbase</groupId>
<artifactId>org.wbase.framework.oauth</artifactId>
<version>${uniframework.version}</version>
</dependency>
<!-- uniframework core libs end -->
```
- 引言
- 01、開發工具
- Maven
- 術語
- 倉庫
- Archetype
- 安裝配置
- 典型配置
- 內置變量
- eclipse插件
- 本地包安裝
- 依賴庫更新
- 依賴庫排錯
- 常見問題
- Gradle
- build.gradle
- gradle插件
- eclipse插件
- Eclipse
- json生成bean
- 常見問題
- IDEA Community
- 工程管理
- maven操作
- 格式化
- 常見問題
- Git
- GitHub
- 快速開始
- 既有工程
- 新建工程
- 日常提交
- PR操作
- 多人協作
- 常用命令
- 常見問題
- 同步代碼
- 發布庫包
- CodeGenerator
- VSCode
- 安裝
- 配置
- 快速開始
- 與GitHub整合
- 斷點調試
- 便捷開發
- 擴展
- prettier+
- Vetur
- 前端調試
- F12調試工具
- Vue前端調試
- 測試工具
- 壓力測試
- 接口測試
- 抓包工具
- 導入證書
- SecureCRT
- 02、前端技術
- 前端設計
- javascript
- 基本語法
- 數據類型
- 類型轉換
- 錯誤處理
- console對象
- 標準庫
- 異步操作
- ES6及后續增強
- 模塊化
- 擴展運算符
- 解構變量
- 箭頭函數
- 混入模式
- web標準
- css
- html
- HistoryApi
- dom
- 如何理解
- 虛擬dom
- JSON
- svg
- WebAssembly
- web components
- HtmlComponents
- Custom Elements
- 標準擴展
- javascript
- Babel
- TypeScript
- JavaScript
- ECMAScript
- 模塊化
- CommonJS
- require
- exports與module.exports
- ES6模塊
- export
- import
- AMD
- define
- require
- CMD
- define
- require
- Web Storage
- JSX
- ES6語法
- 語法糖
- ==和===
- let與const
- call&apply
- 內置對象
- Object
- Class
- Promise對象
- then
- catch
- finally
- resolve
- reject
- Module
- Generator函數
- arguments
- 函數擴展
- 數組
- 對象
- Set和Map
- Proxy對象
- css
- sass
- less
- postcss
- CSS Modules
- Node.js
- 安裝
- npm
- ls
- init
- install
- run
- uninstall
- update
- version
- npm生態
- yarn
- package.json
- node_modules
- 常用技術
- 應用實例
- Web框架
- Express
- Egg.js
- Mock
- Mock.js
- 語法規范
- 非核心api
- 核心api
- easymock
- 開發測試
- ESLint
- jest
- Travis
- Prettier
- stylelint
- 構建工具
- gulp
- Browserify
- webpack
- 安裝配置
- 入口起點entry
- 輸出output
- 裝載器loader
- 插件plugins
- webpack-cli
- public目錄
- 技術概念
- CSR與SSR
- polyfill
- axios
- 請求對象
- 響應對象
- 自定義實例
- 攔截器
- 跨域訪問
- 03、前端框架
- mvvm
- vue.js
- 簡明指南
- vue文件結構
- 組件指南
- 組件命名
- 應用流程
- 單文件組件
- 組件導入導出
- 生命周期
- Prop
- 復用方法
- 懶加載
- 全局環境
- 全局配置
- 全局API
- 選項對象
- 混入選項
- vue實例$
- vue指令
- v-bind(:)
- v-on(@)
- v-model
- 特殊屬性
- 內置組件
- 自定義機制
- 組件
- 指令
- 過濾器
- 混入
- slot插槽
- 渲染函數
- 注意事項
- 總結
- vueCli
- 安裝
- 組成部分
- vue.config.js
- vue核心文件
- 狀態管理
- 簡單狀態
- Vuex
- 構造器選項
- 實例屬性
- 實例方法
- 綁定輔助函數
- 模塊化
- 總結
- 路由管理
- 簡單路由
- Vue Router
- 路由模式
- route
- router
- <router-link>與編程式
- <router-view>
- 嵌套路由
- 導航守衛
- 總結
- vue插件
- Vue Loader
- 實戰舉例
- vue快速入門
- vue與后臺聯動
- vue完整實例
- vue組件庫
- vue-ls
- Enquire.js
- lodash
- md5.js
- moment
- nprogress
- viser-vue
- vue-clipboard2
- vue-cropper
- vue-quill-editor
- wangeditor
- vue-svg-icon-loader
- 實戰參考
- Vue Antd Admin
- ant-design-vue
- 快速開始
- 要點解析
- vuepress
- vant
- 04、后端框架
- SprigBoot
- 快速入門
- 完整示例
- 完整進階
- 核心技術
- 核心標記
- 頁面技術
- Thymeleaf
- 數據訪問
- 基本用法
- 事務控制
- 事務規則
- 注意事項
- 實體狀態
- 數據查詢
- 普通查詢
- 分頁查詢
- 統計查詢
- 命名訪問
- 公用共享
- 緩存機制
- 服務層
- 控制器
- AOP
- 定時任務
- 異步任務
- 靜態注入
- WebClient
- 啟動機制
- 應用監控
- 線程安全
- 調試測試
- 打包部署
- 打jar包
- 常見問題
- 配置問題
- 開發問題
- 文檔生成
- 相關技術
- springfox
- knife4j
- actuator
- kaptcha
- YAML
- API Blueprint
- 啟用https
- SpringSecurity
- 快速入門
- 核心元素
- jwt
- 與springsecurity集成
- 05、運行容器
- artemis
- 協議支持
- mqtt
- 安裝運行
- 管理配置
- 日志配置
- 業務配置
- 安全配置
- 數據存儲
- SSL支持
- 運行維護
- mosquitto
- 安裝運行
- 管理配置
- SSL支持
- rocketmq
- 安裝運行
- 控制臺
- 代碼實例
- kafka
- ZooKeeper
- 安裝運行
- 代碼實例
- zookeeper
- 安裝運行
- 應用實例
- dubbo
- 代碼實例
- hadoop
- 安裝配置
- 快速運行
- netty
- 06、相關技術
- Serverless
- Protobuf
- SSL
- 證書
- 認證類型
- 硬件技術
- 基礎知識
- 開發技術
- 消息協議
- 07、項目實戰
- 前端開發
- 從零開始開發
- 開發環境搭建
- 原生技術開發
- 路由守衛
- 動態路由菜單
- 全局API
- 登錄認證
- 與后端交互
- 代碼開發調試
- 快速打包發布
- 常見問題收集
- 后端開發
- 從零開始開發
- 開發環境搭建
- 常用注解說明
- 常用基礎設施
- 核心業務約定
- 平臺配置文件
- 業務配置清單
- 關鍵配置參數
- 項目必配參數
- 項目調優參數
- 返回結果處理
- 字段翻譯機制
- 列表字段翻譯
- 實體字段翻譯
- 組合字段翻譯
- 列表數據增強
- 列表數據簡化
- 返回字段過濾
- 返回字段改名
- 定制返回結果
- 原生技術開發
- 動態級聯字典
- 簡單數據查詢
- 短信驗證業務
- 測試數據模擬
- 開放平臺登陸
- 微信開放平臺
- 抖音開放平臺
- 文件處理方案
- 文件字段存儲
- 文件字段解析
- 圖像數據存取
- 文件資源方案
- 服務集成開發
- redis服務集成
- mqtt服務集成
- kafka集成
- rocketmq集成
- websocket集成
- elasticsearch集成
- netty集成
- 外部工具開發
- 發送短信服務
- 發送郵件服務
- 動態pdf生成
- 數據處理開發
- 同步導出數據
- 異步導出數據
- 同步導入數據
- 異步導入數據
- 多線程與并發
- 線程并發安全
- 操作間隔控制
- 異步待辦機制
- 平臺定時任務
- 平臺異步任務
- 常見注意事項
- 安全相關開發
- 接口安全策略
- 接口限流策略
- 接口授權策略
- 權限相關開發
- 路由權限方案
- 組織權限方案
- 數據權限方案
- 字段權限方案
- 按鈕權限方案
- 支付相關開發
- 微信原生支付
- 微信H5支付
- 微信JSAPI支付
- 微信批量轉賬
- 微信動態支付
- 支付寶移動網站支付
- 支付寶PC網站支付
- 平臺緩存機制
- 內置進程內緩存
- 內置分布式緩存
- 平臺自定義緩存
- 平臺插件機制
- 賬號的邀請碼
- 賬號的二維碼
- 定制事件機制
- 約定實現機制
- 請求回調機制
- 啟動自動加載
- 平臺基礎設施
- 動態參數加載
- 定制待定常量
- 定制單位組織
- 平臺緩存機制
- 平臺外訪機制
- 靜態資源獲取
- 調試打印機制
- 數據源隨時用
- 上下文隨處拿
- 平臺診斷機制
- 平臺內置資源
- 強制間隔時間
- 賬號擴展開發
- 賬號變更事件
- 業務開發指南
- 字典數據獲取
- 數據層持久化
- 基礎服務調用
- 查詢時間范圍
- 代碼開發調試
- 常見問題收集
- 從零開始
- PCV1運行
- PCV2運行
- H5端運行
- 開發進階
- 最佳實踐
- 開發方案
- 前后分離
- 跨域訪問
- 庫表設計
- 模型設計
- 容器部署
- 集群部署
- 日志收集
- 動態配置
- 開發管理
- 開發環境
- 代碼控制
- 問題跟蹤
- 進度跟蹤
- 測試環境
- 調試輔助
- DevOps
- 代碼風格
- 運行維護
- 基本監控知識
- 線程堆棧分析
- 內存堆棧分析
- 應用診斷工具
- 工程示范
- 后端開發
- 前端開發
- PC端
- 移動端
- 08、內置容器
- 調度服務
- 調度容器
- 快速開發
- 線程并發
- 多點部署
- 本地調試
- 常見問題
- 開放服務
- 快速接入
- 接口開發
- 09、開放平臺
- 微信公號
- 環境準備
- 環境配置
- 技術方案
- 獲取OpenId
- 常見問題
- 10、平臺功能
- 系統管理
- 單位組織
- 角色管理
- 賬號管理
- 子賬號
- 財務賬戶
- 開放數據
- 綁定數據
- 套餐權益
- 會員定義
- 變更審核
- 注冊審核
- 系統配置
- 路由配置
- 參數配置
- 屬性配置
- 樹形設置
- 服務接口
- 訪問設置
- 系統監控
- 在線用戶
- 內存數據
- 系統變量
- 外訪數據
- 到訪數據
- 操作記錄
- 靜態字典
- 日志管理
- 元數據
- 接入管理
- 微信公號
- 微信支付
- 開放服務
- 客戶端
- 服務列表
- 請求歷史
- 請求服務
- 調度服務
- 調度監控
- 11、補充語言
- php
- 生產環境
- 安裝
- 初始配置
- nginx集成
- 配置文件
- 語法
- 變量和常量
- 數據類型
- 條件控制
- 運算符
- 數組
- 指針
- 循環控制
- 函數
- 語法糖
- 預定義變量
- session和cookie
- 命名空間
- 面向對象
- 數據庫操作
- 表單
- 錯誤
- 異常
- 過濾器
- JSON
- XML
- AJAX
- Composer
- 開發環境
- 本地調試
- 遠程調試
- .net
- 開發環境
- C#快速入門
- 12、依賴容器
- elasticsearch
- 運行配置
- 命令操作
- 中文分詞
- Kibana
- Logstash
- 開發技術
- 搜索類型
- 代碼示例
- 應用場景
- 常見問題
- nginx
- 下載安裝
- 基本配置
- 服務啟停
- 安全防護
- 常見問題
- linux
- 常用操作
- 常用命令
- 用戶管理
- ftp服務
- 防火墻
- 運維
- 網絡安全
- 內核參數
- 安裝
- yum源問題
- mysql
- 安裝配置
- 快速安裝
- 正式安裝
- 參數配置
- 性能優化
- 語句優化
- 配置優化
- 設計優化
- 運維常識
- 系統監控
- 連接數
- 超時
- cpu利用率
- 數據備份
- 導入復制
- 經驗舉例
- 故障處理
- 用戶管理
- 系統日志
- 日志清理
- 安全經驗
- 集群方案
- MySQL Replication
- MySQL Cluster
- 常見問題
- redis
- 安裝配置
- 安裝運行
- 參數配置
- 運維常識
- 技術要點
- pubSub
- 操作命令
- 持久化
- 常見問題
- docker
- 安裝運行
- 鏡像操作
- 容器操作
- 倉庫操作
- 實戰案例
- kubernetes
- 后記