# iview-admin簡介
iview-admin是iview生態圈的成員之一。是一套基于 Vue.js,搭配ivew UI([https://www.iviewui.com/](https://www.iviewui.com/))?組件庫形成的后臺集成解決方案。
# 環境
Windows+Node.js +git
# 項目啟動
## 下載代碼
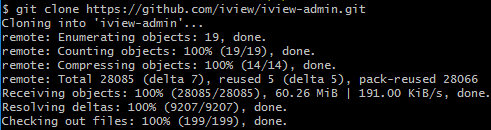
在GitHub上下載iview-admin代碼
git clone https://github.com/iview/iview-admin.git -b 2.0
## 安裝依賴
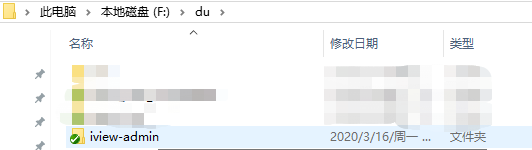
找到文件所在位置
進入項目根目錄 cd iview-admin
安裝依賴 npm install
## 運行項目
運行項目 npm run dev
項目運行完成瀏覽器會自動打開網頁,進入登錄頁面。如圖

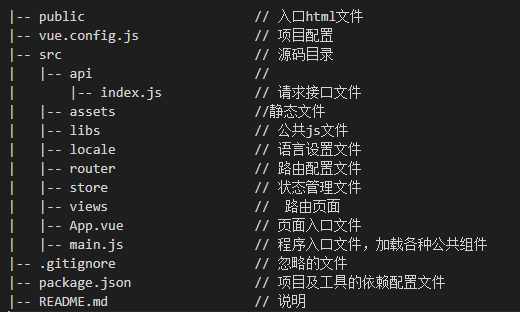
# 目錄結構
項目運行成功,我們可以添加自己的模塊,下面我們進行如下操作,新建頁面、配置路由。
# 新建頁面(以行李查詢為例)
## 說明:
在index.html處有個id="app"的div,在App.vue中也有一個id="app" 的div。頁面渲染的就是這個組件。
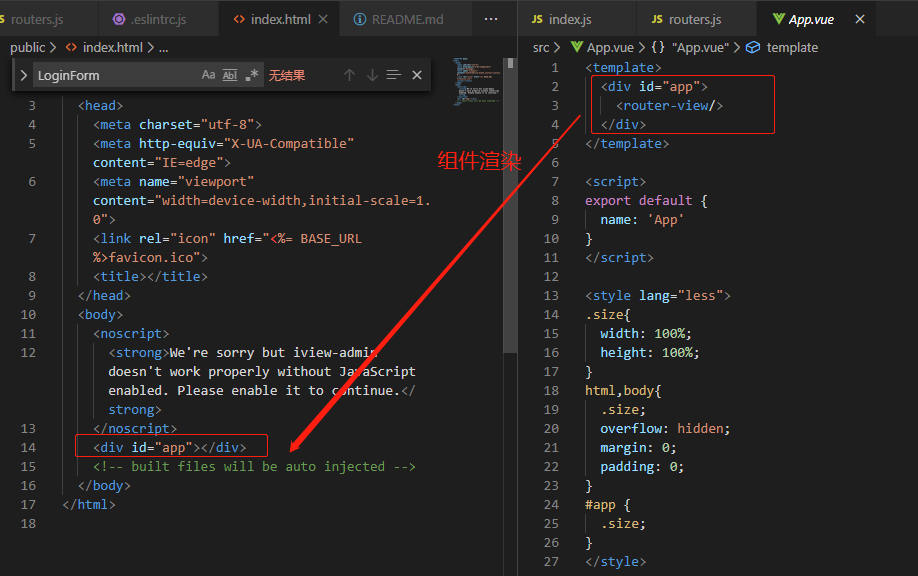
在App.vue中有個router-view標簽,默認在這渲染當路由為"/"指向的組件,所以要設置路由。

## 步驟
### 在src/views下面新建文件夾luggage
### 在luggage文件夾下新建luggage.vue luggage.js 和 luggage.css 文件
這里我們就創建好了一個組件即新的頁面。它的頁面路徑為 src/views/luggage。這個路徑將在后面的路由配置中用到。要想在瀏覽器上展示,接下來我們就要進行路由的配置
# 路由配置
說明:首先我們要看vue-router插件是否下載(一般項目npm install的時候會自動下載vue-router插件)
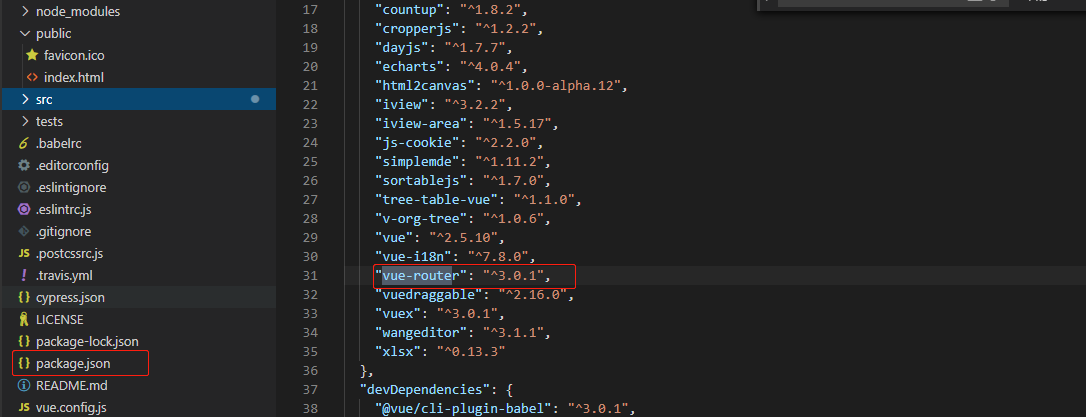
如果沒有下載,用下面的命令進行下載
npm install --save vue-router
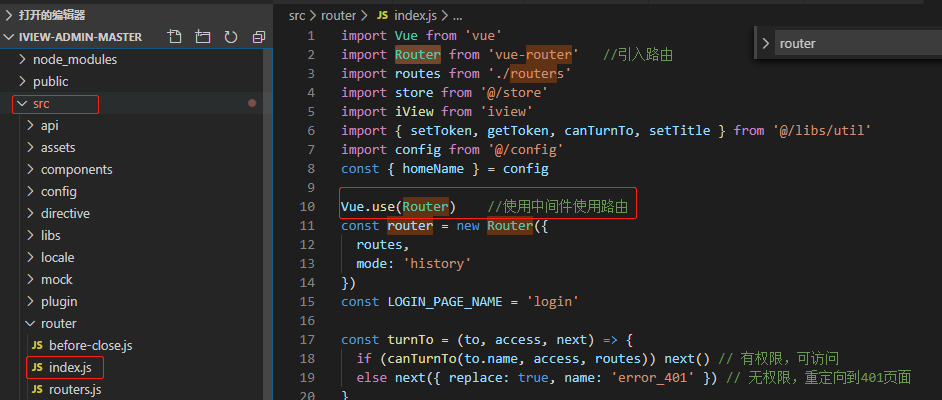
之后在src/router/index下看有沒有引入路由
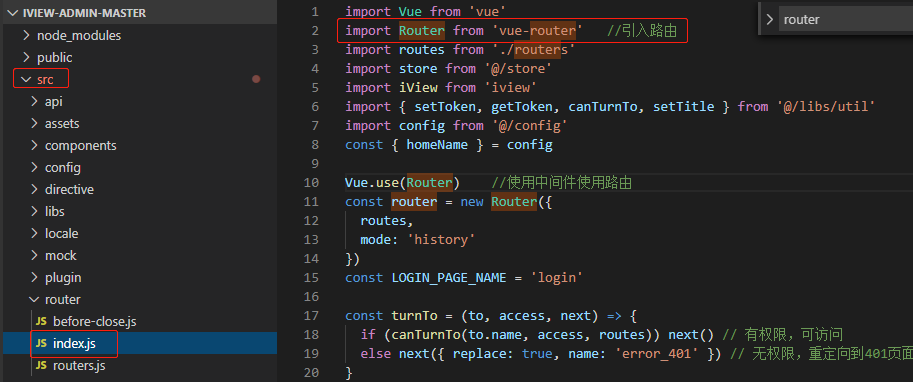
## 引入成功,開始使用插件
## 生成router實例
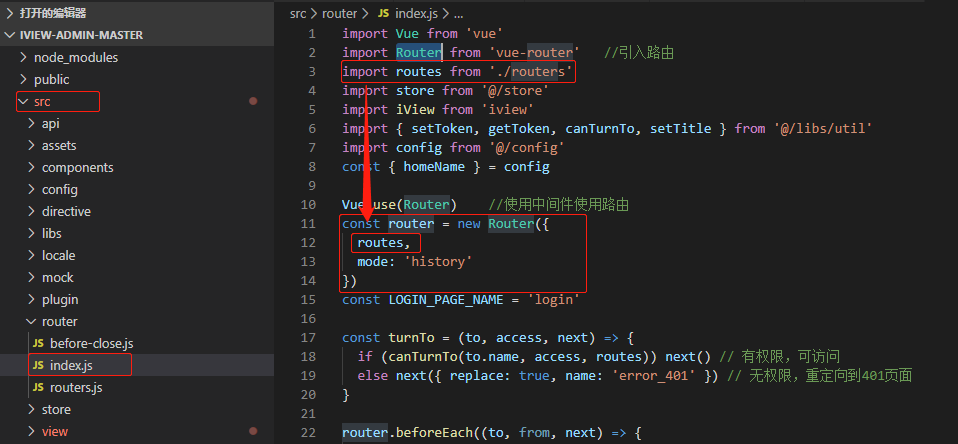
這里的routers是從同級目錄下的routers.js引入的。routers.js這個文件是定義路由的文件。下面以行李查詢為例進行定義路由
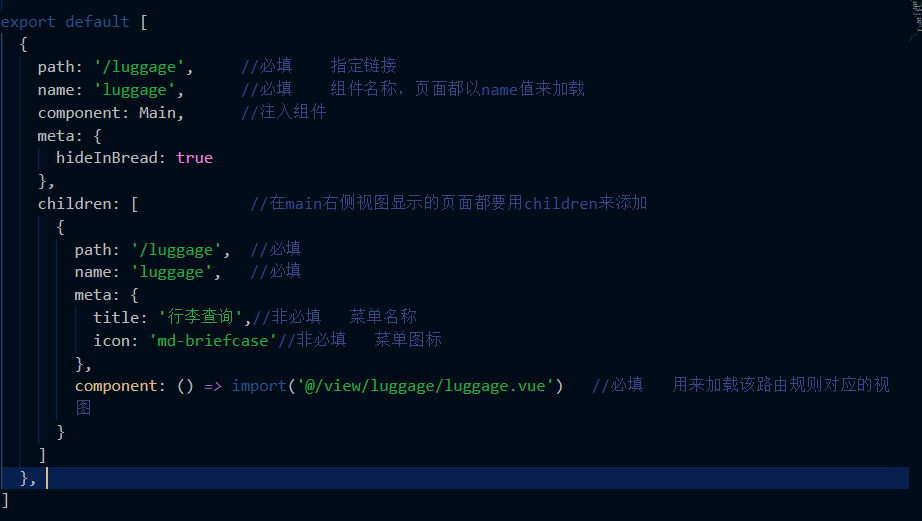
這是上面新建的頁面路徑我們已經配置到了路由里面,vue會自動匹配改視圖在頁面做出響應。
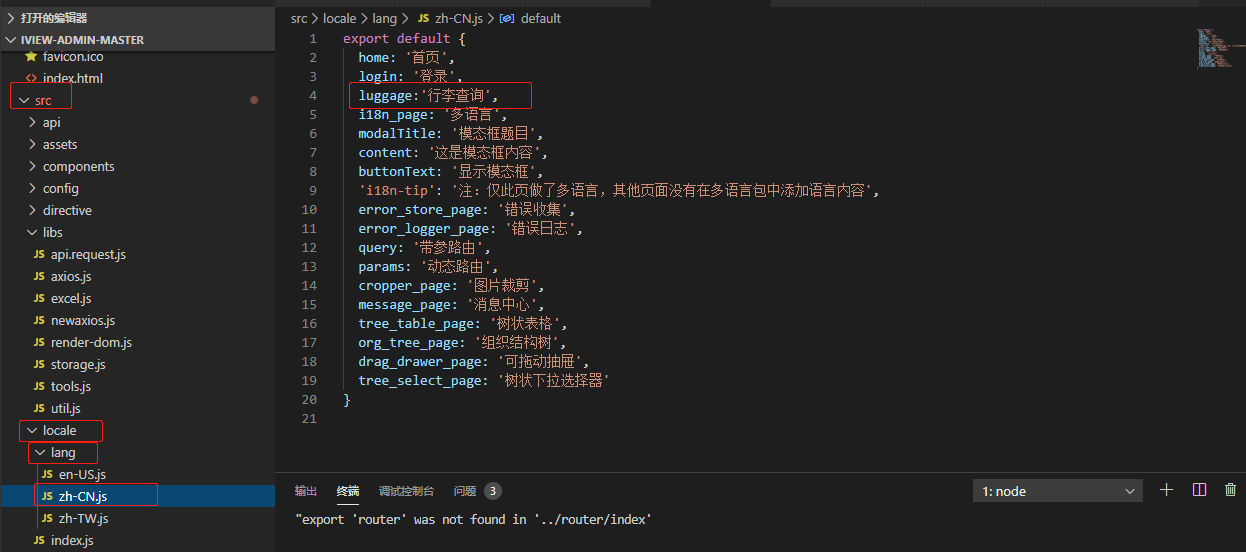
這里定義了路由,同時要在zh-CN.js下面配置菜單的中文title
## 在src/main.js中把路由實例傳給vue根組件

這樣應用就啟動了。在左側菜單就形成了我們配置的路由
# 配置頁面詳解
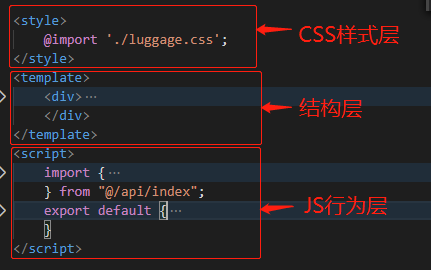
在結構層進行頁面布局,在行為層進行數據渲染
## 頁面布局使用iview插件
同路由一樣。我們要先看是否下載iview插件
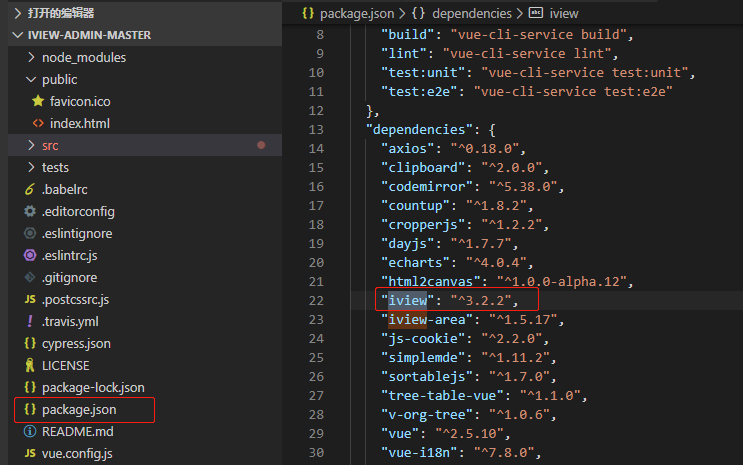
要是沒有下載,用如下命令進行下載
npm install iview@1.0.1 --save
下載之后,在src/main.js引入iview插件
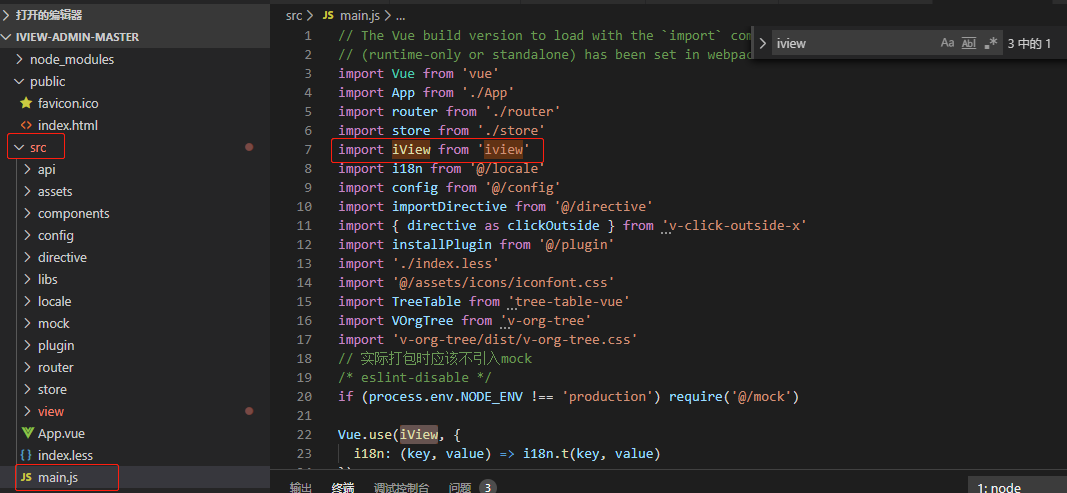
引入成功之后,我們就可在任意頁面使用iview插件組件。組件的引用具體看文檔
[http://v1.iviewui.com/](http://v1.iviewui.com/)
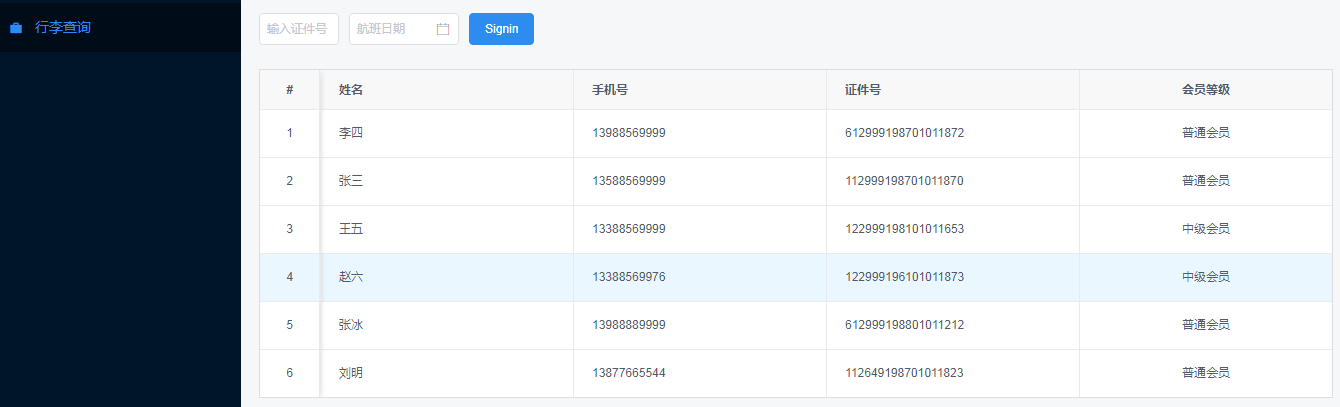
下面我們做一個行李查詢項目,包括旅客列表,旅客關聯的行程、行李信息
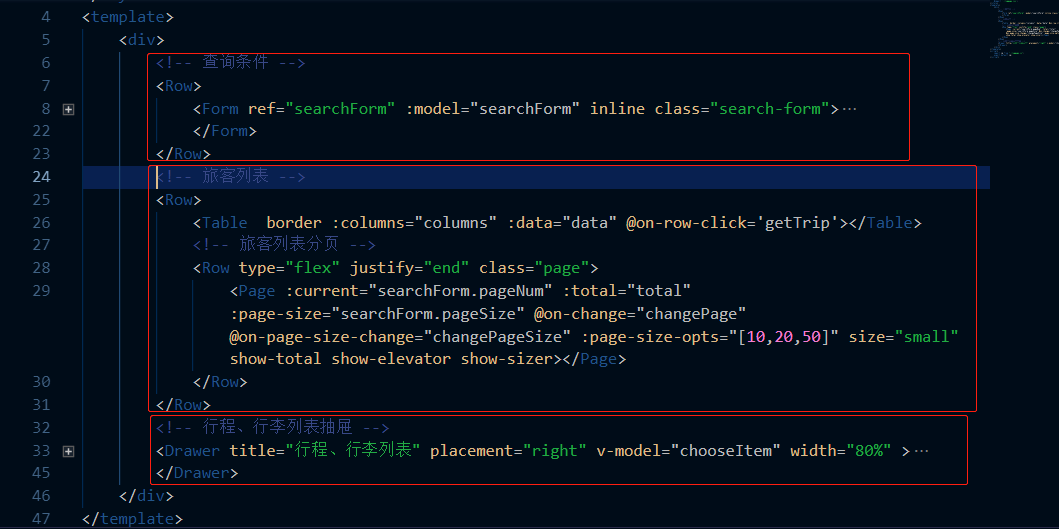
這些頁面展示都放在結構層,<template></template>標簽里面。注:此標簽下面緊接著是一個div標簽,如圖
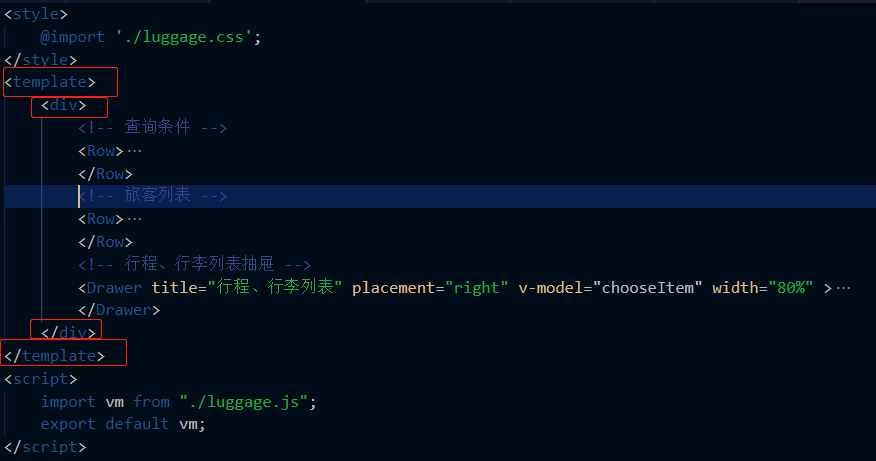
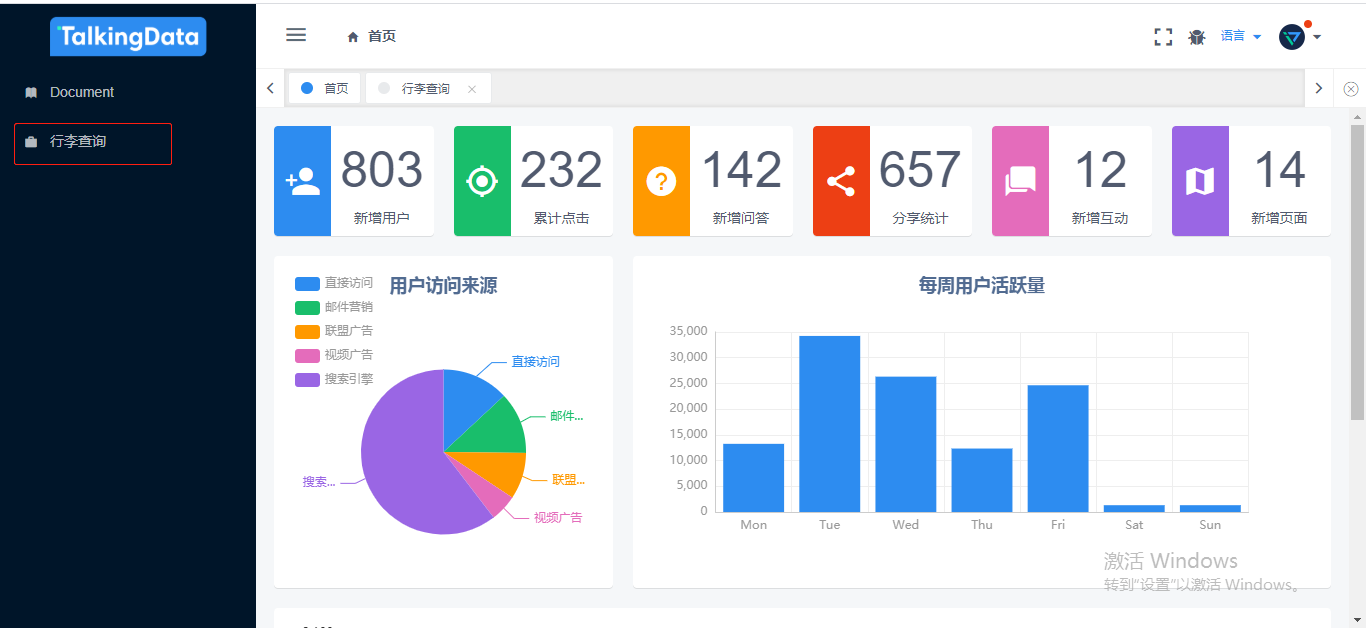
這個功能,頁面整體有三部分。條件查詢表單、旅客列表表格、旅客關聯抽屜。用到的iview組件有form表單、table表格、drawer抽屜。具體參數配置看iview文檔
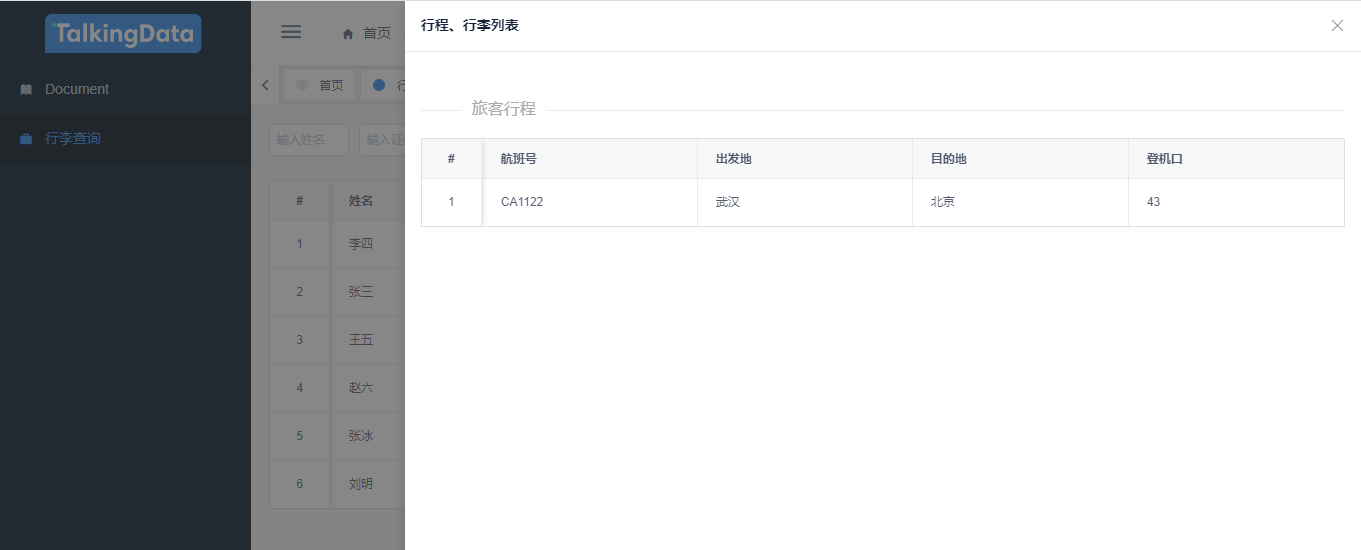
頁面效果如圖
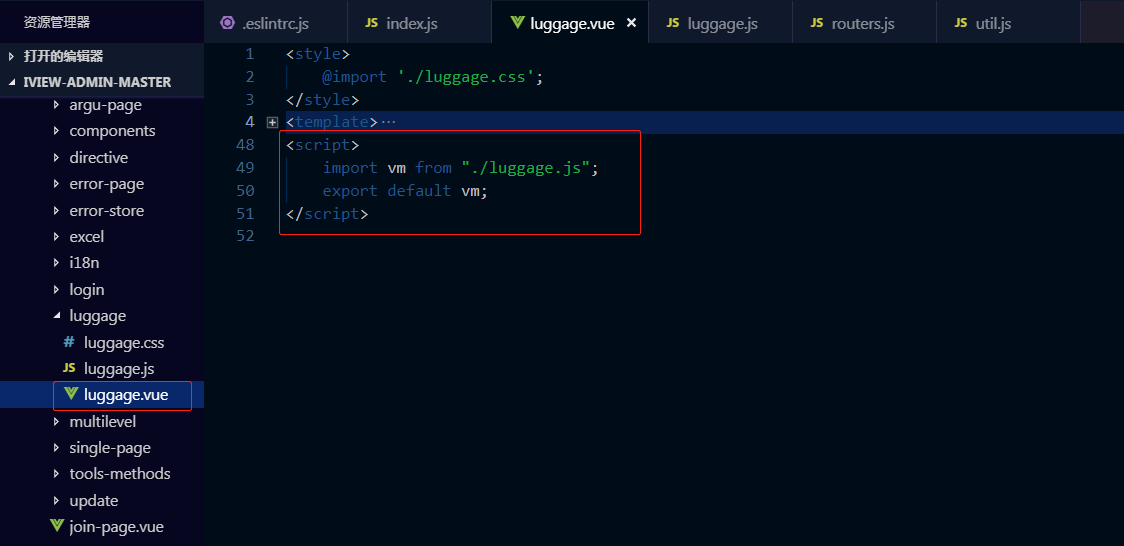
下面以table表格為例。展示頁面與后臺交互,首先我們要在vue文件中引入js文件
## 頁面布局
直接引用iview的table組件
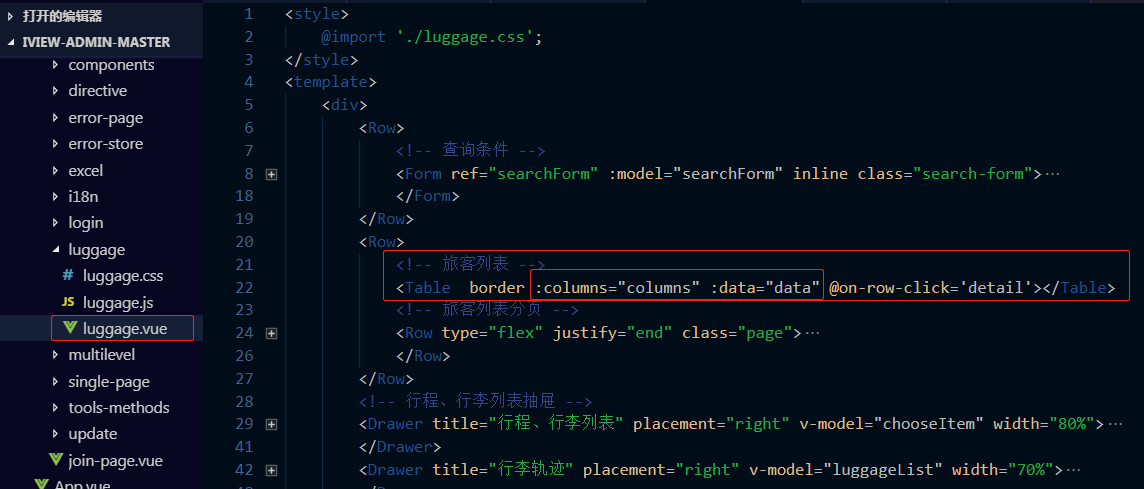
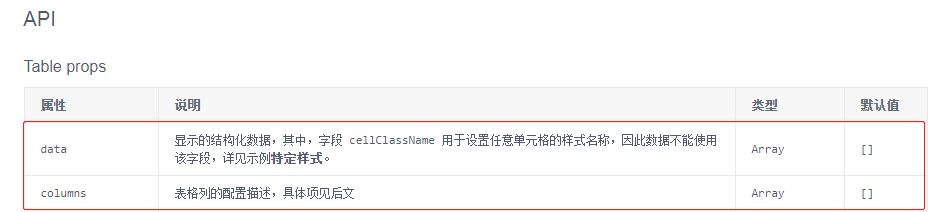
我們看一下iview的table組件的參數配置
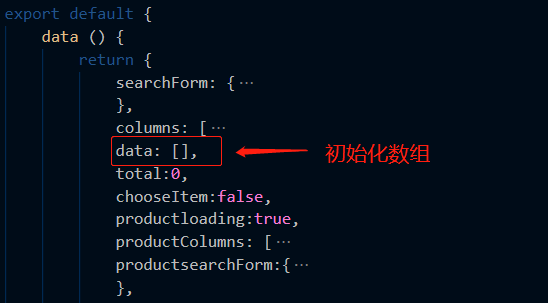
## 初始化數據

## 行為層數據獲取
### 配置請求鏈接
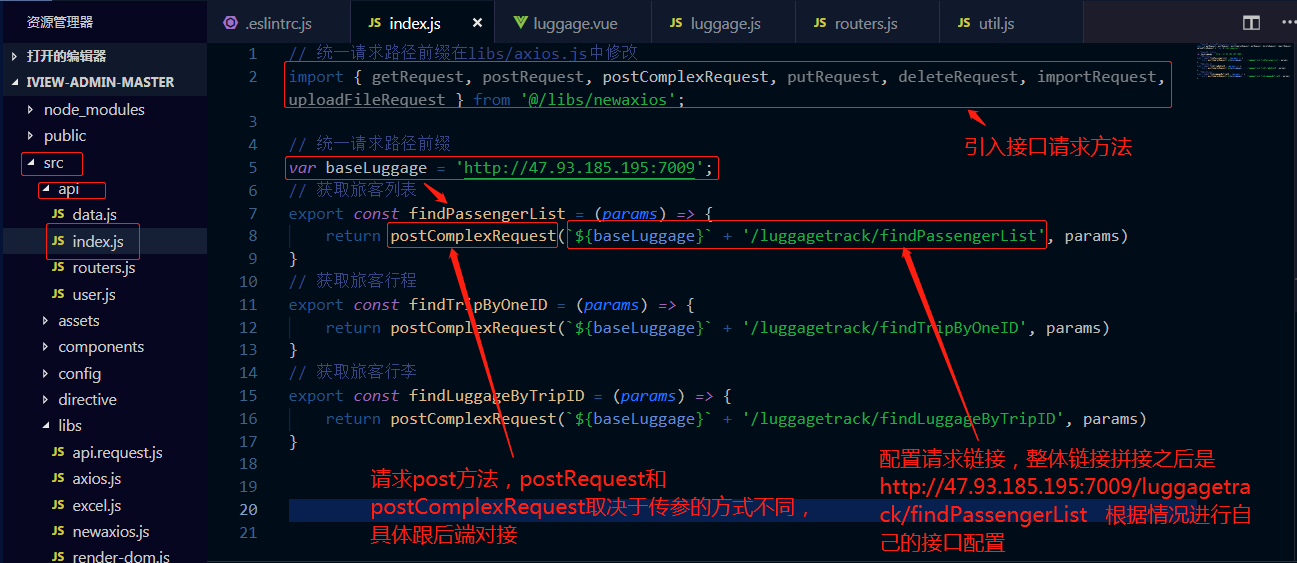
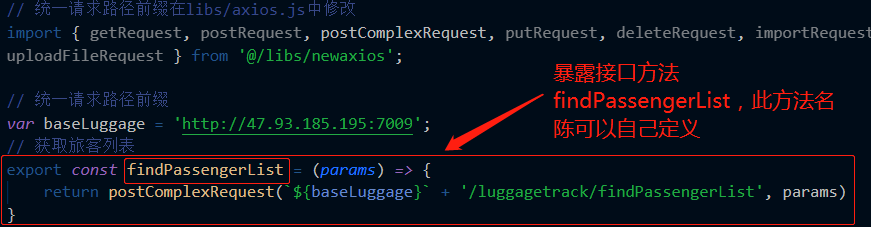
配置完成之后。我們將方法暴露出來。方便給組件引用
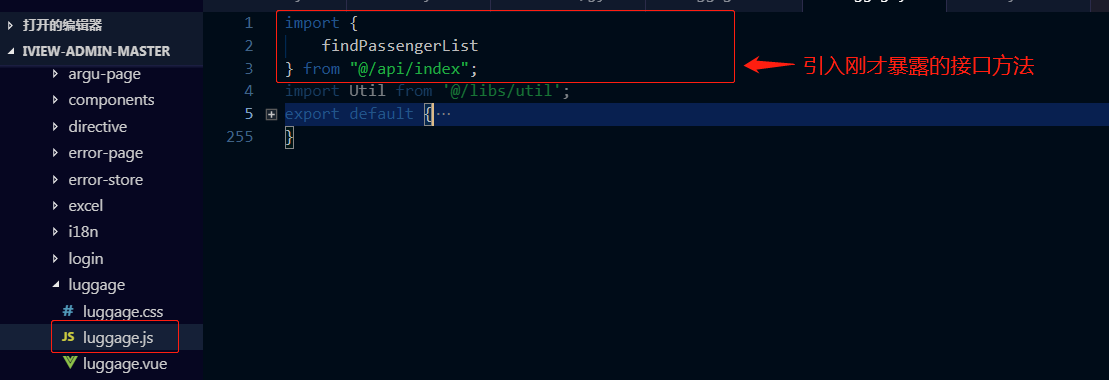
### 在頁面js文件中引入接口方法
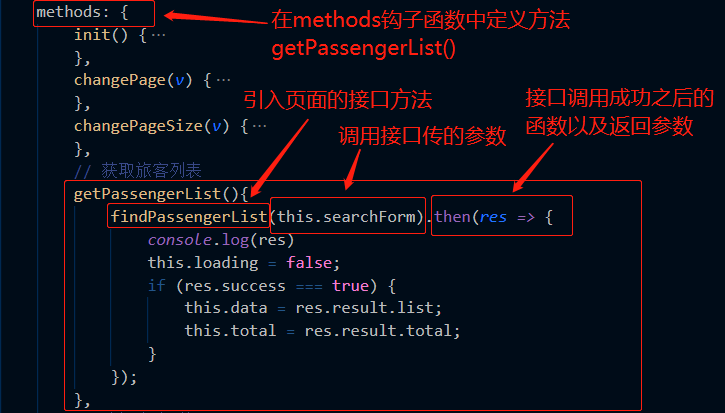
### 方法中調用接口
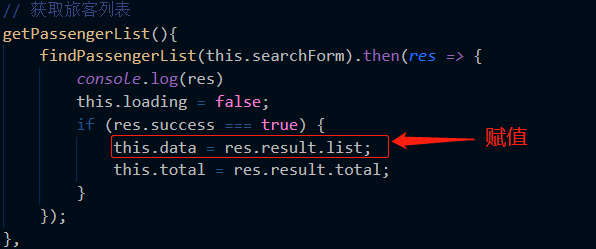
### 數據賦值
此時將調用后端返回的數組數據賦值給了table表格的data數組
頁面剛開始加載就要將數據渲染出來,所以要在mounted鉤子函數中調用獲取旅客列表函數
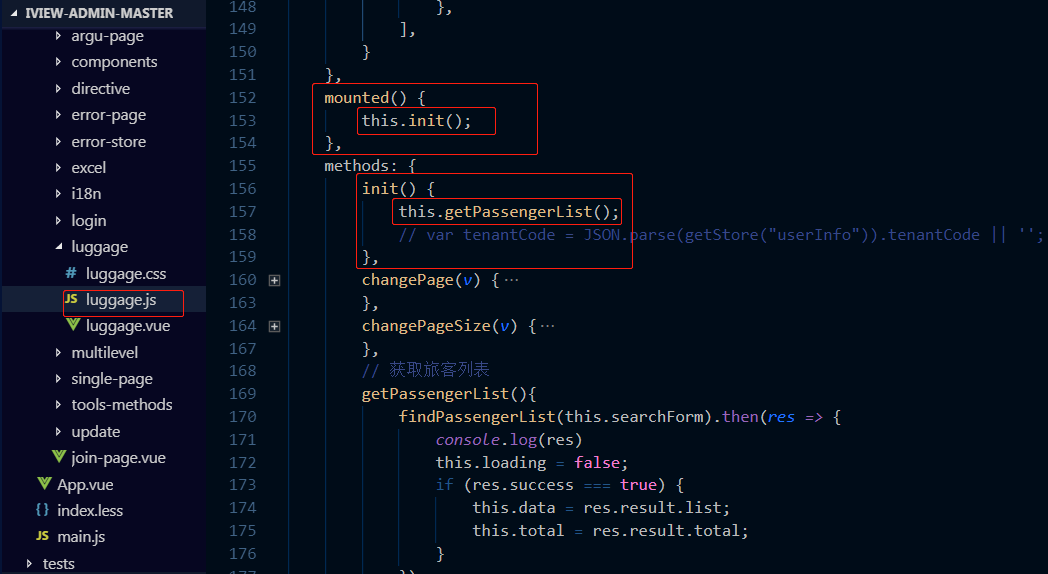
這時頁面里面的表格就渲染出來了