
[TOC]
>[success] # nodejs如何debugger
**nodejs** 有 **2種** 代碼調試方式,第一種是用在 **vscode** 中打斷點調試,第二種是在瀏覽器上打斷點調試。
>[success] ## 在vscode中調試nodejs
首先創建一個 **debugger-test** 文件夾,執行 **npm init -y** 初始化一下項目,初始化完成后文件夾中會多出來一個 **package.json** 文件,內容如下
**package.json**
~~~
{
"name": "debugger-test",
"version": "1.0.0",
"description": "",
"main": "index.js", // 主文件入口
"scripts": {
"test": "echo \"Error: no test specified\" && exit 1"
},
"keywords": [],
"author": "",
"license": "ISC"
}
~~~
可以看到 **package.json** 有個 **main** 等于 **index.js** ,這時候需要在 **debugger-test** 文件夾中創建一個 **index.js** 文件,這個是 **入口主文件** ,你也可以改成其他的名字,例如: **app.js** ,但是 **文件名與package.json中的main的值要保持一致** ,**vscode** 在 **debug** 時候,會從 **package.json** 里的 **main** 這找到這個 **入口文件** 進行 **debug**。
下面正式演示如何 **debug** :
>[success] ### 簡單案例
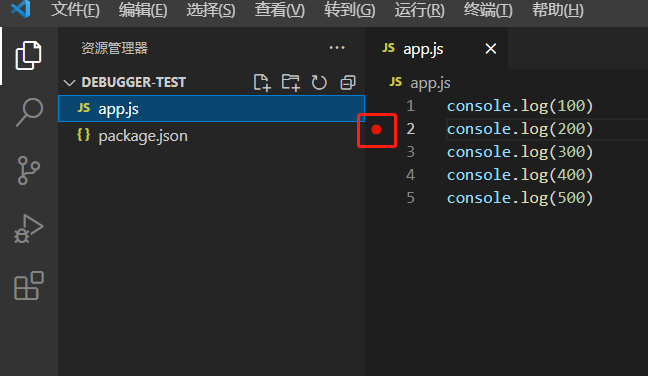
1. 首先在 **app.js入口文件** 中寫幾行代碼,然后在需要 **debug** 的代碼處,點擊前面的紅點,點出來就代表打斷點成功
2. 然后 **點擊左側的昆蟲圖標** ,安裝圖片的順序點擊
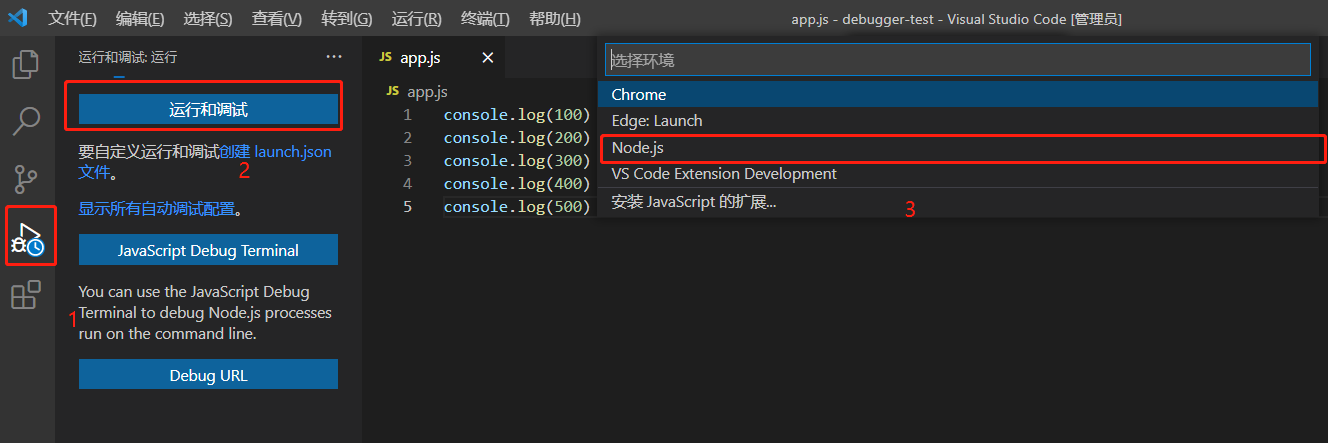
這樣就進入了 **debug模式** ,此時鼠標放入到代碼上還會出現打斷點時代碼的信息
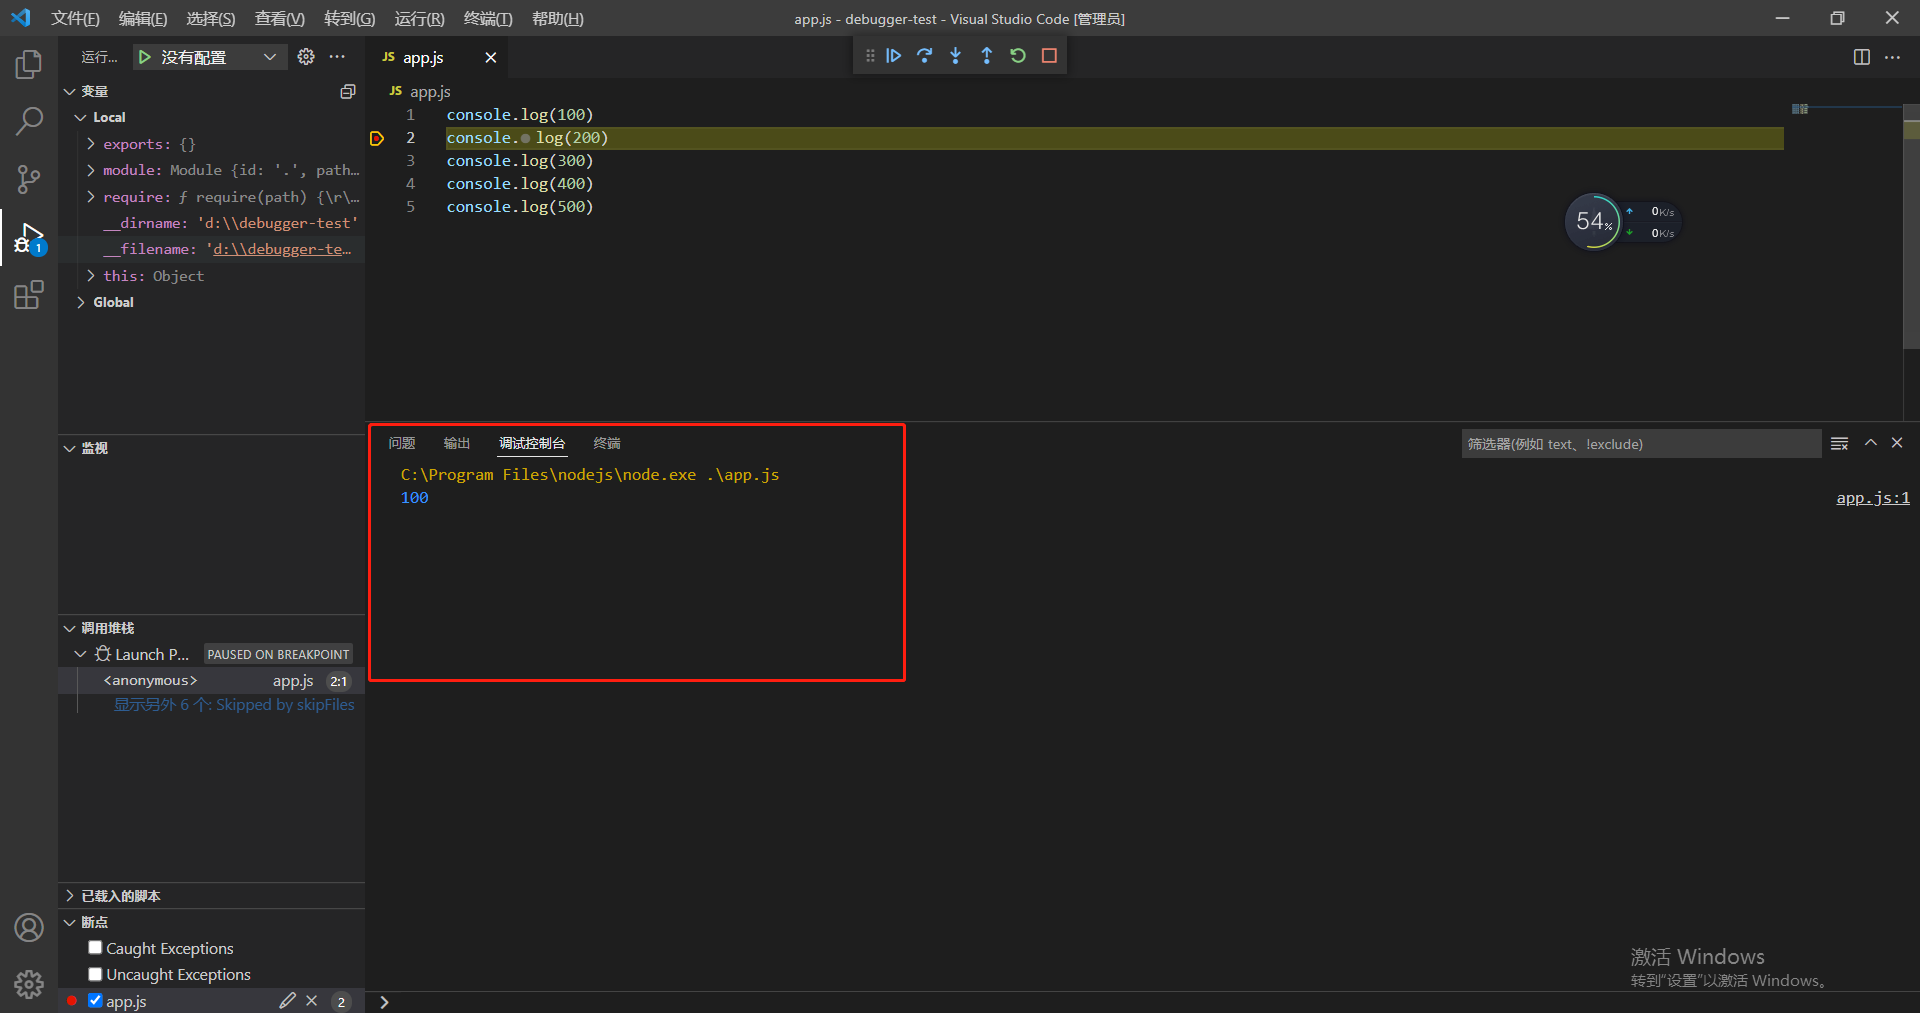
3. **debug** 的按鈕都代表什么意思?
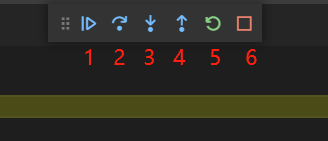
我們可以看到當我們 **debug** 時,電腦的上方會出現上圖這些按鈕,都代表什么意思呢?
1:**一口氣走完所有代碼**
2:**下一行代碼**
3:**進入函數執行**
4:**跳出**
5:**重啟(重新執行)**
6:**停止**
>[success] ### 稍復雜案例
1. 創建一個 **http** 服務
**app.js**
~~~
// 1. 引入node自帶的http模塊
const http = require('http')
// 2. 通過http創建服務
const server = http.createServer((req, res) => {
// 返回200,信息格式為html格式
res.writeHead(200, {'content-type': 'text/html'})
// 返回內容h1標簽等
res.end('<h1>hellow world</h1>')
})
// 3. 監聽3000端口
server.listen(3000, ()=> {
console.log('Listening on 3000 prot')
})
~~~
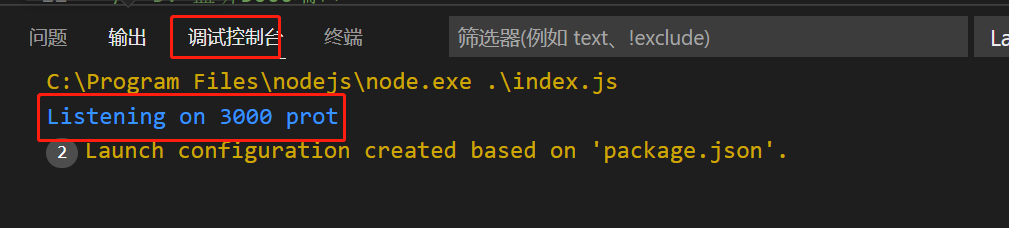
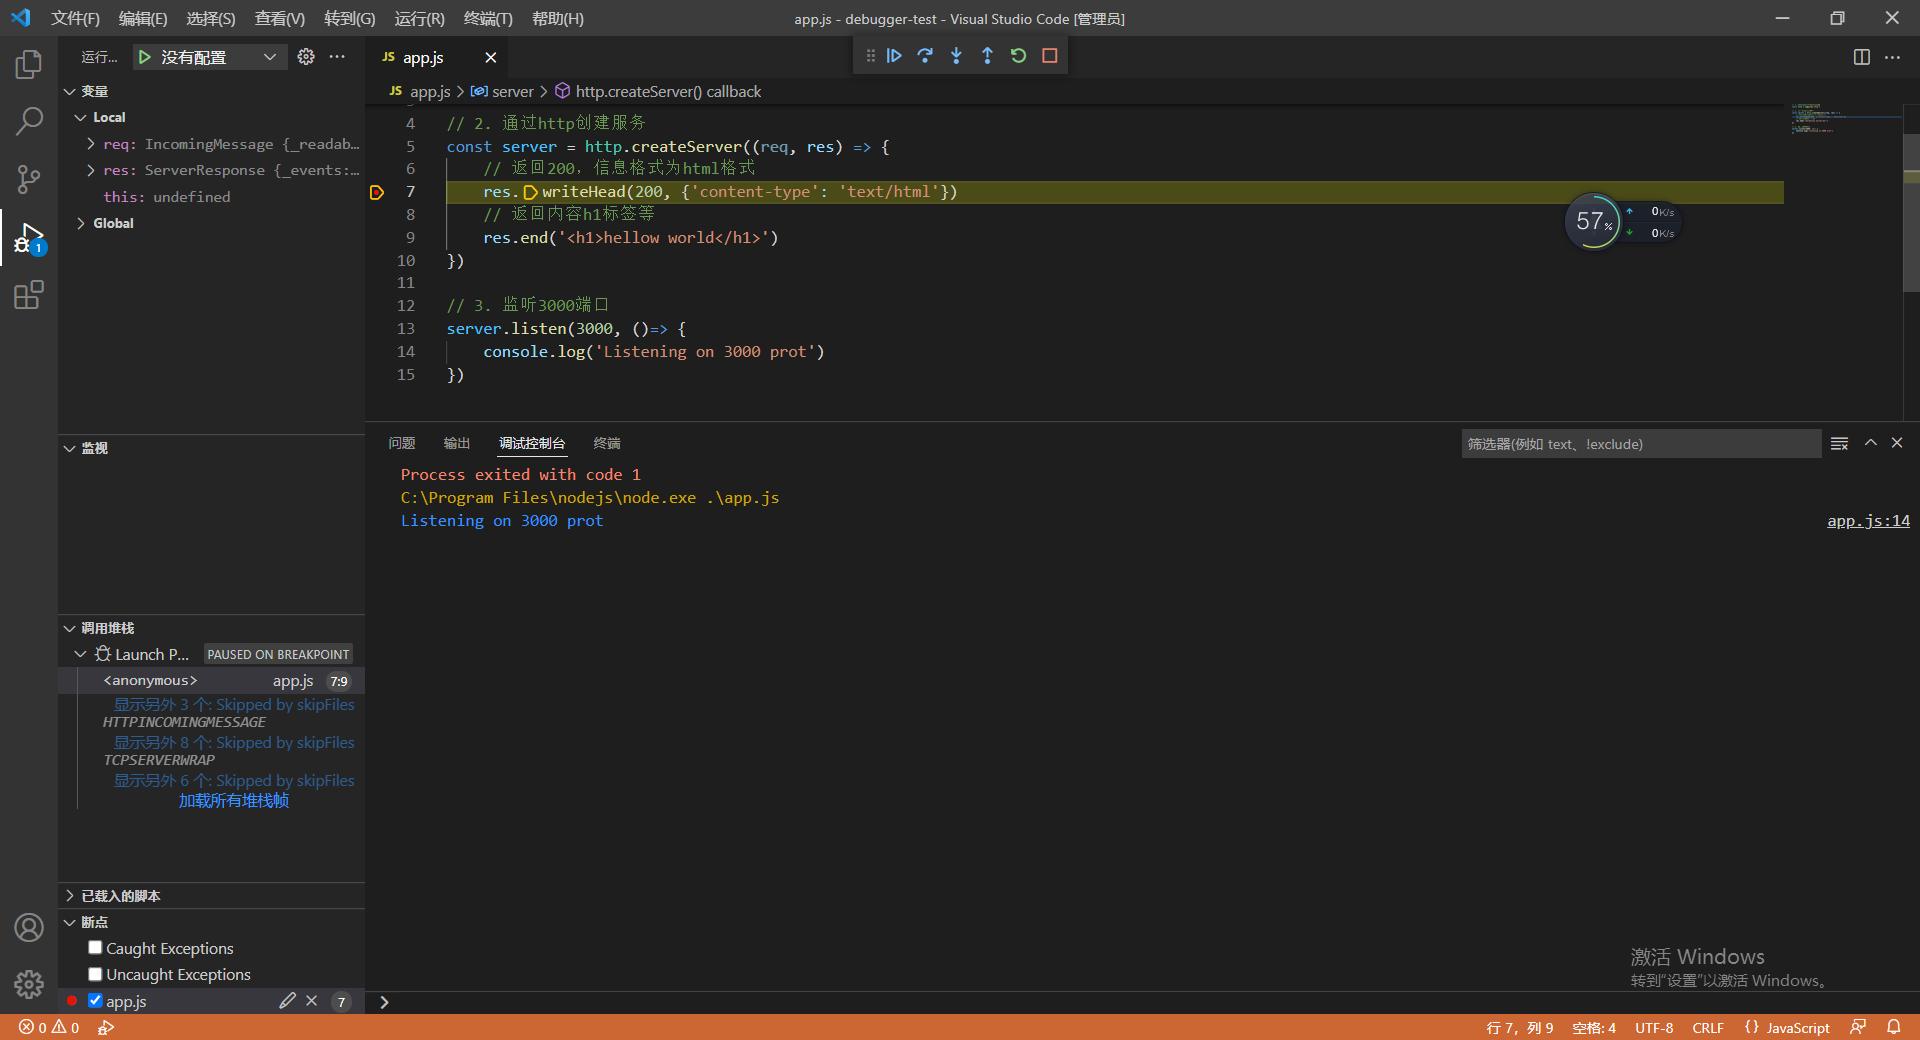
2. 在想 **debug** 的位置打上斷點
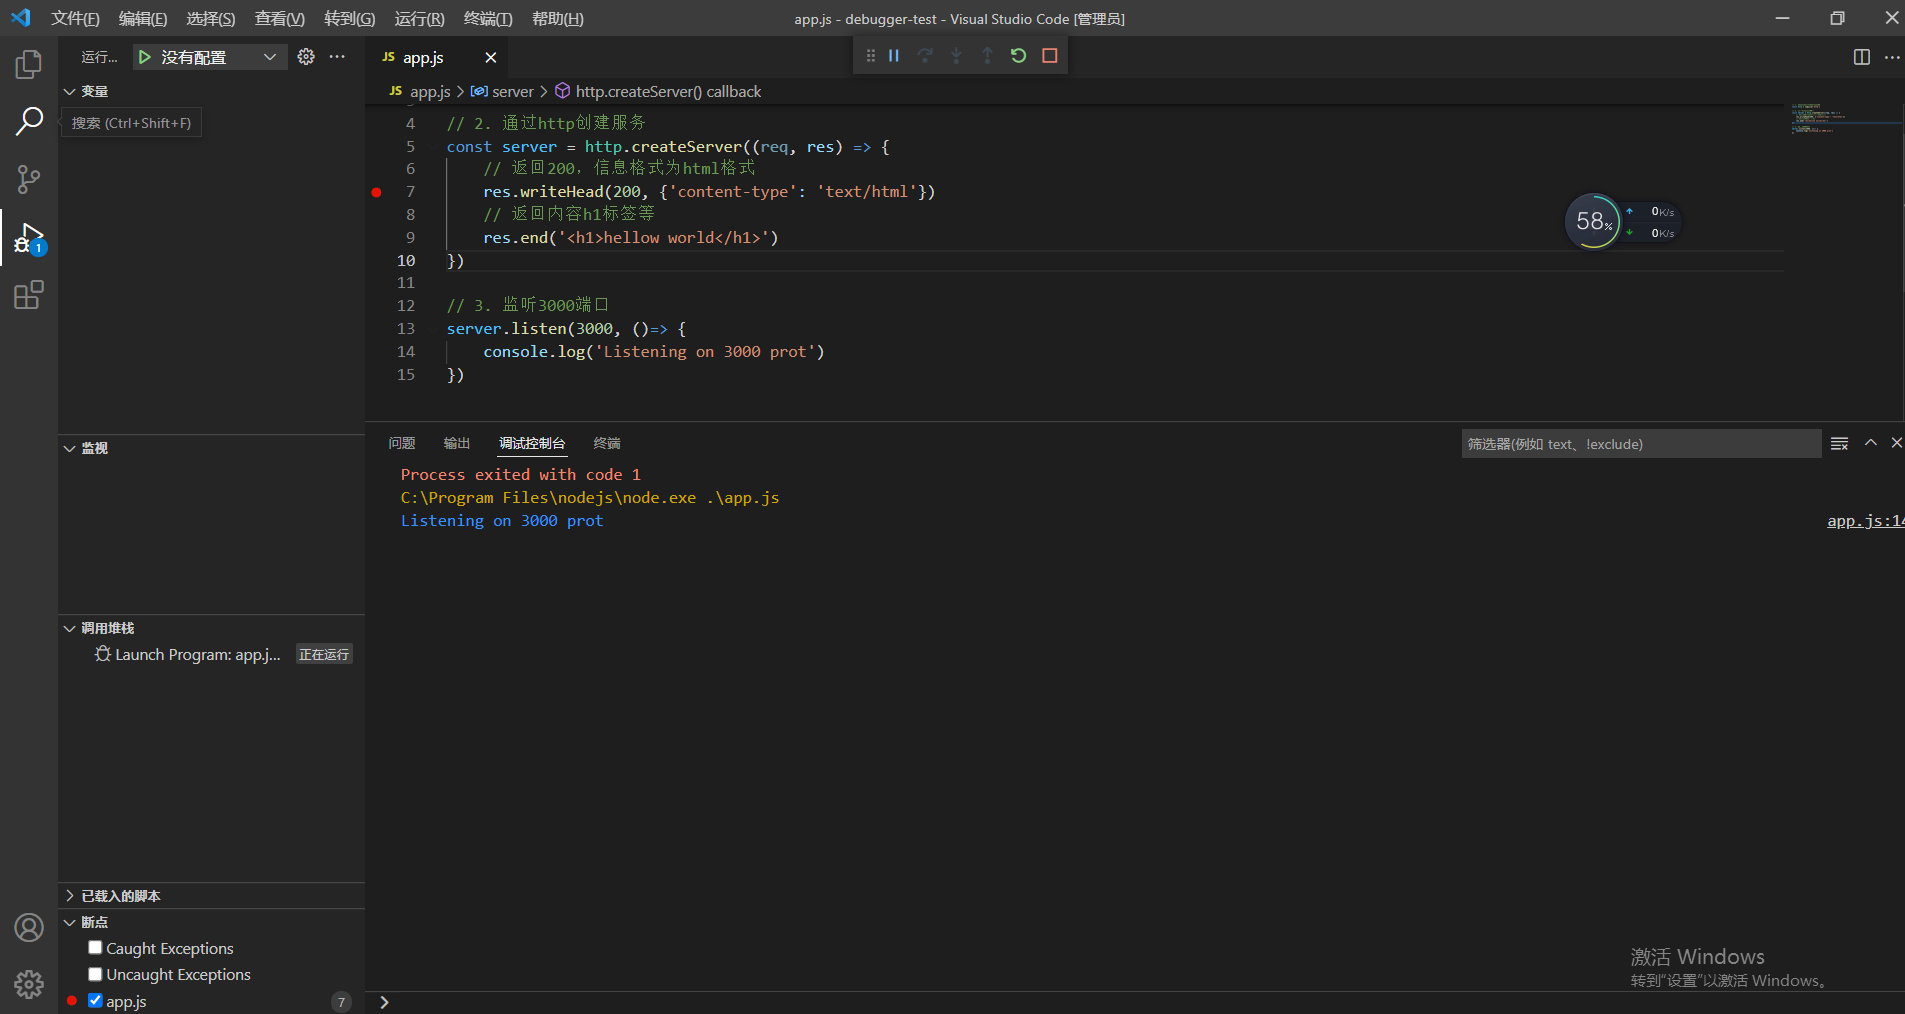
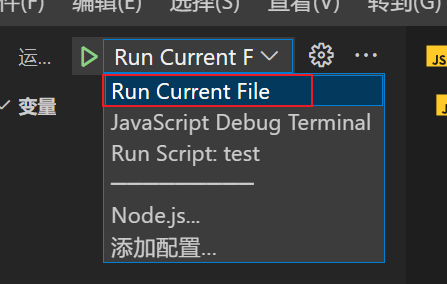
然后點擊左上角的綠色三角啟動按鈕 **啟動**,啟動后在 **vscode** 的控制臺就能看到下方的 **監聽3000端口 **的提示,如下圖:
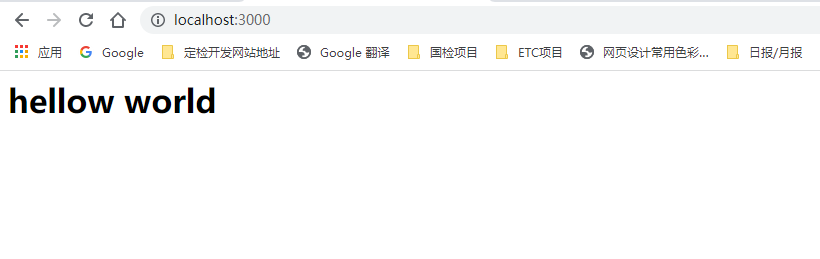
3. 訪問 **[localhost:3000](localhost:3000)** ,這里啟動的是node的 **3000** 端口,所以訪問 **3000** 端口就能進入到后臺的服務斷點,訪問服務端時,它會向服務端發送 **2** 個 **http** 請求,一個是返回 **hellow world** ,一個是瀏覽器 **title** 旁邊的 **icon** 圖標

這樣就進入斷點了
>[success] ## 在瀏覽器中調試nodejs(nodejs 基于 inspect 協議的調試方法)
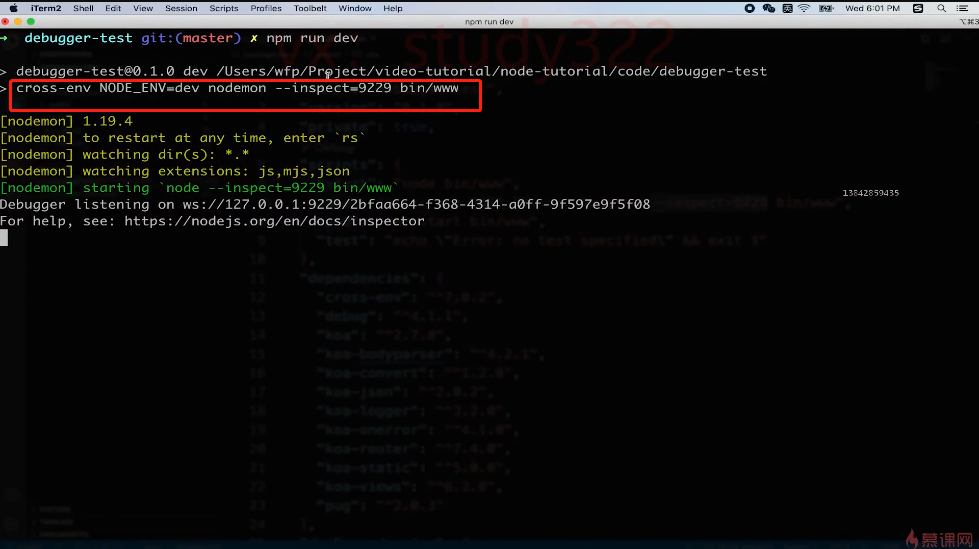
注意:本章內容中的指令在后續章節有講到,所以看這里會有些懵,**dev 指令** 后續項目中會講到,這里就是大概熟悉一下怎么 **調試 nodejs**
1. 在 **package.json** 中,會有 **npm run dev** 的運行指令,到時候需要在 **dev** 的 **指令** 中添加 **--inspect=9229** ,**9229** 是一個 **默認的端口號** ,這個可以自己改
~~~
{
"name": "debugger-test",
"version": "1.0.0",
"description": "",
"main": "app.js",
"scripts": {
"dev": "cross-env NODE_ENV=dev nodemon --inspect=9229 bin/www", // 這里添加 --inspect=9229 才可以瀏覽器調試
"test": "echo \"Error: no test specified\" && exit 1"
},
"keywords": [],
"author": "",
"license": "ISC"
}
~~~
2. 然后啟動項目,要保證這里有 **--inspect=9229** 這段代碼
3. 然后在要調試的代碼處寫上一行 **debugger** ,寫完后 **程序會自動重啟,如果沒有重啟,自己手動重啟一下** ,然后到瀏覽器窗口輸入:[chrome://inspect/](chrome://inspect/) 就會跳轉到這個頁面,就會看到下面有一個可以點擊的 **inspect**
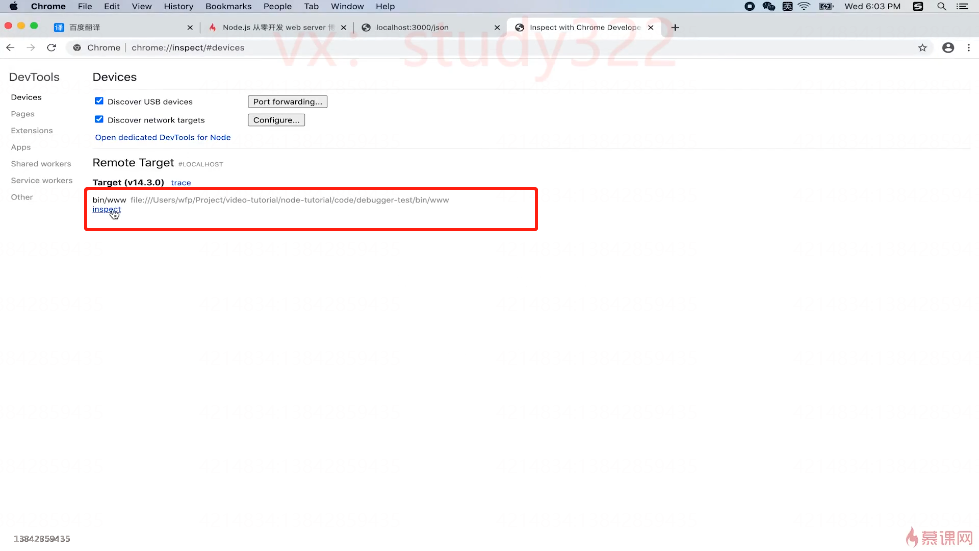
點進去后就可以發現 **console** 是我們打印的日志,**sources** 是我們的后端代碼,**注意:一旦代碼改了后,要把之前打開的inspect的窗口關掉,重新再打開,這樣后端的代碼才是最新的**
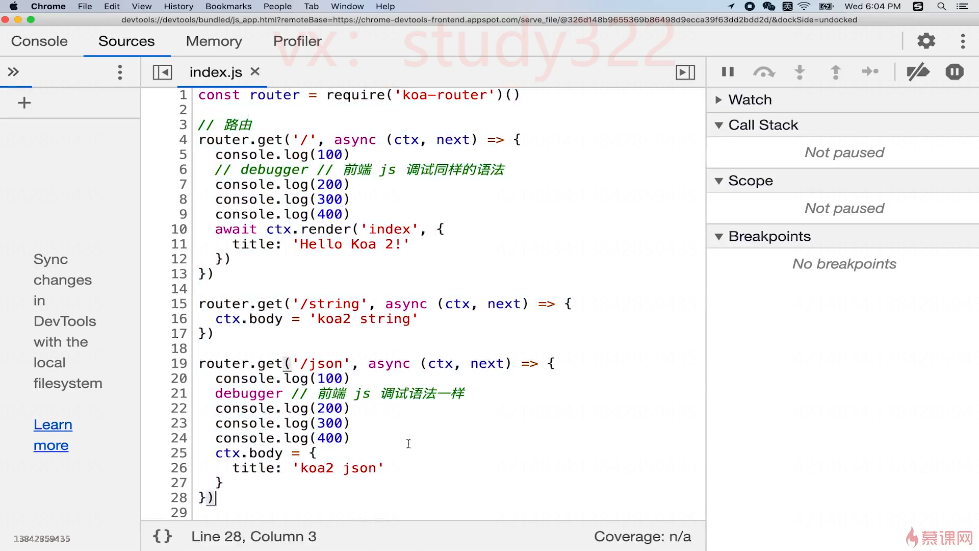
這個時候訪問后端接口,瀏覽器會跳入后端寫 **debugger** 這個地方
4. 然后這里就基本上就跟之前一樣了,**第1個按鈕是一口氣執行完成代碼** ,**第2個是下一步** ,通常用的就只有這2個

- NodeJS基礎
- 什么是NodeJS
- npm
- Node.js+Express+Koa2+開發Web Server博客
- 下載和安裝node
- nodejs和js的區別
- commonjs-演示
- nodejs如何debugger
- server端與前端的區別
- 項目需求分析
- 開發接口(不使用任何框架)
- http-概述
- 處理get請求
- 處理post請求
- 處理http請求的綜合示例
- 搭建開發環境
- 初始化并且開發路由
- 開發博客項目之數據存儲
- MySql介紹
- 數據庫操作(創建和增、刪、查)
- Nodejs 操作 Mysql
- Nodejs 鏈接 mysql 做成工具
- API 對接 MySQL
- 開發博客項目之登陸
- cookie-介紹
- cookie用于登錄驗證
- cookie做限制