
## Swagger
[OpenAPI](https://swagger.io/specification/)(Swagger)規范是一種用于描述 `RESTful API` 的強大定義格式。 `Nest` 提供了一個專用[模塊](https://github.com/nestjs/swagger)來使用它。
### 安裝
首先,您必須安裝所需的包:
```bash
$ npm install --save @nestjs/swagger swagger-ui-express
```
如果你正在使用 `fastify` ,你必須安裝 `fastify-swagger` 而不是 `swagger-ui-express` :
```bash
$ npm install --save @nestjs/swagger fastify-swagger
```
### 引導(Bootstrap)
安裝過程完成后,打開引導文件(主要是 `main.ts` )并使用 `SwaggerModule` 類初始化 Swagger:
```typescript
import { NestFactory } from '@nestjs/core';
import { SwaggerModule, DocumentBuilder } from '@nestjs/swagger';
import { ApplicationModule } from './app.module';
async function bootstrap() {
const app = await NestFactory.create(ApplicationModule);
const options = new DocumentBuilder()
.setTitle('Cats example')
.setDescription('The cats API description')
.setVersion('1.0')
.addTag('cats')
.build();
const document = SwaggerModule.createDocument(app, options);
SwaggerModule.setup('api', app, document);
await app.listen(3000);
}
bootstrap();
```
`DocumentBuilder` 有助于構建符合 OpenAPI 規范的基礎文檔。它提供了幾種允許設置諸如標題,描述,版本等屬性的方法。為了創建一個完整的文檔(使用已定義的 HTTP 路由),我們使用 `SwaggerModule` 類的 `createDocument()` 方法。 此方法接收兩個參數,即應用程序實例和 Swagger 選項對象。
一旦創建完文檔,我們就可以調用 `setup()` 方法。 它接收:
1. Swagger UI 的掛載路徑
2. 應用程序實例
3. 上面已經實例化的文檔對象
現在,您可以運行以下命令來啟動 `HTTP` 服務器:
```bash
$ npm run start
```
應用程序運行時,打開瀏覽器并導航到 `http://localhost:3000/api` 。 你應該可以看到 Swagger UI
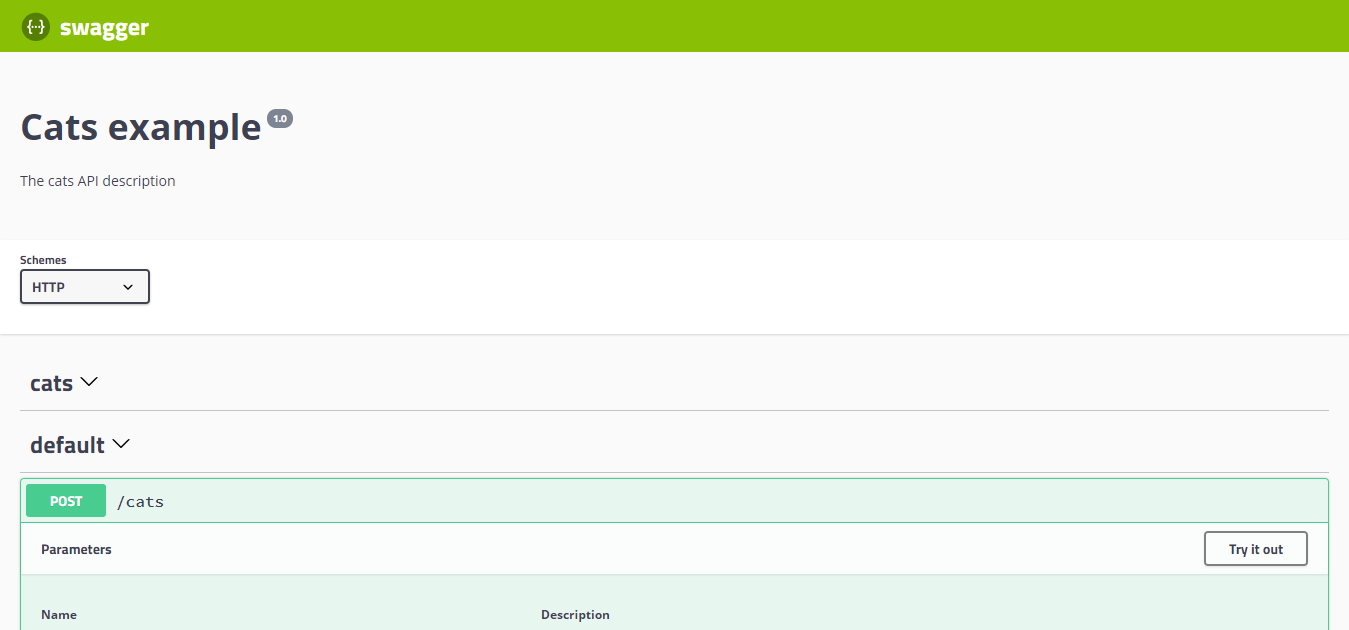
`SwaggerModule` 自動反映所有端點。同時,為了展現 Swagger UI,`@nestjs/swagger`依據平臺使用 `swagger-ui-express` 或 `fastify-swagger`。
> 生成并下載 Swagger JSON 文件,只需在瀏覽器中導航到 `http://localhost:3000/api-json` (如果您的 Swagger 文檔是在 `http://localhost:3000/api` 下)。
### 路由參數
`SwaggerModule` 在路由處理程序中查找所有使用的 `@Body()` , `@Query()` 和 `@Param()` 裝飾器來生成 API 文檔。該模塊利用反射創建相應的模型定義。 看看下面的代碼:
```typescript
@Post()
async create(@Body() createCatDto: CreateCatDto) {
this.catsService.create(createCatDto);
}
```
> 要顯式地設置主體定義,可以使用 `@ApiBody()` 裝飾器( `@nestjs/swagger` 包)。
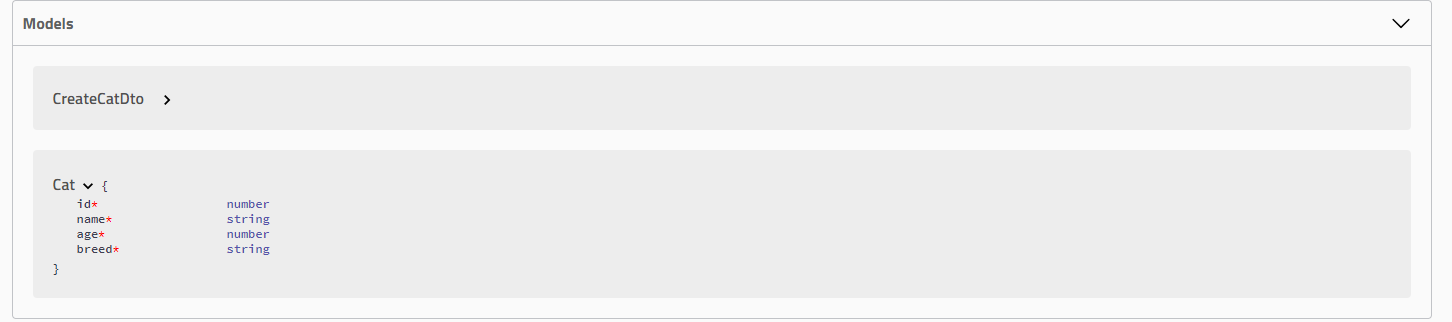
基于 `CreateCatDto` ,將創建模塊定義:

如您所見,雖然該類具有一些聲明的屬性,但定義為空。 為了使類屬性對 `SwaggerModule` 可見,我們必須用 `@ApiProperty()` 裝飾器對其進行注釋或者使用 CLI 插件自動完成(更多請閱讀**插件**小節):
```typescript
import { ApiProperty } from '@nestjs/swagger';
export class CreateCatDto {
@ApiProperty()
name: string;
@ApiProperty()
age: number;
@ApiProperty()
breed: string;
}
```
> 考慮使用 Swagger 插件(請閱讀**插件**小節),它會自動幫你完成。
讓我們打開瀏覽器并驗證生成的 `CreateCatDto` 模型:

另外,`@ApiProperty()` 裝飾器允許設計不同[模式對象](https://swagger.io/specification/#schemaObject) 屬性:
```typescript
@ApiProperty({
description: 'The age of a cat',
min: 1,
default: 1,
})
age: number;
```
> 避免顯式地輸入 `{{"@ApiProperty({ required: false })"}}`,你可以使用 `@ApiPropertyOptional()` 短手裝飾器。
為了顯式地設置屬性的類型,使用`type`鍵
```typescript
@ApiProperty({
type: Number,
})
age: number;
```
### 數組
當屬性實際上是一個數組時,我們必須手動指定一個類型:
```typescript
@ApiProperty({ type: [String] })
names: string[];
```
> 考慮使用 Swagger 插件(請閱讀**插件**小節),它會自動發現數組。
只需將您的類型作為數組的第一個元素(如上所示)或將 `isArray` 屬性設置為 `true` 。
### 循環依賴
當類之間具有循環依賴關系時,請使用惰性函數為 `SwaggerModule` 提供類型信息:
```typescript
@ApiProperty({ type: () => Node })
node: Node;
```
> 考慮使用 Swagger 插件(請閱讀**插件**小節),它會自動發現循環依賴。
### 泛型和接口
由于 TypeScript 不會存儲有關泛型或接口的元數據,因此當您在 DTO 中使用它們時,`SwaggerModule` 可能無法在運行時正確生成模型定義。例如,以下代碼將不會被 Swagger 模塊正確檢查:
```typescript
createBulk(@Body() usersDto: CreateUserDto[])
```
為了克服此限制,可以顯式設置類型:
```typescript
@ApiBody({ type: [CreateUserDto] })
createBulk(@Body() usersDto: CreateUserDto[])
```
### 類型映射
在你建立例如CRUD(創建/讀取/更新/刪除)的功能時,基于一個基礎的實體類型通常會比較有用。Nest提供了幾個有用的函數以實現類型轉換,讓這個任務更方便一些。
當建立一個輸入驗證類型(也叫DTO)時,通常會采用同一個類型來建立**crete**和**update**。例如,**create**變量可能需要所有的字段,而**update**則可能需要讓所有字段都是可選的。
Nest提供了`PartialType()`函數來保證簡化任務并最小化模版。
`PartialType()`函數返回一個類型(類),并將所有輸入類型設置為可選的。例如,我們由如下類型開始:
```typescript
import { ApiProperty } from '@nestjs/swagger';
export class CreateCatDto {
@ApiProperty()
name: string;
@ApiProperty()
age: number;
@ApiProperty()
breed: string;
}
```
默認地,所有字段都需要。要使用同一字段創建類型,但每個都是可選的,使用`PartialType()`,并傳遞類型引用(`CreateCatDto`)作為其參數:
```typescript
export class UpdateCatDto extends PartialType(CreateCatDto) {}
```
> `PartialType()`從`@nestjs/swagger`中導入。
`PickTYpe()`功能從一個輸入類型中選擇一部分屬性來創建一個新類型(類)。例如,我們由如下類型開始:
```typescript
import { ApiProperty } from '@nestjs/swagger';
export class CreateCatDto {
@ApiProperty()
name: string;
@ApiProperty()
age: number;
@ApiProperty()
breed: string;
}
```
我們可以使用PickTYpe()函數從這個類中選取一部分屬性:
```typescript
export class UpdateCatAgeDto extends PickType(CreateCatDto, ['age'] as const) {}
```
> `PartialType()`從`@nestjs/swagger`中導入。
`OmitType()`函數從一個輸入類型中取出所有屬性然后移除一些鍵。例如,我們由如下類型開始:
```typescript
import { ApiProperty } from '@nestjs/swagger';
export class CreateCatDto {
@ApiProperty()
name: string;
@ApiProperty()
age: number;
@ApiProperty()
breed: string;
}
```
我們可以生成并獲取一個如下所示的`name`屬性,在這個結構中,`OmitType`的第二個參數是屬性名稱的數組:
```typescript
export class UpdateCatDto extends OmitType(CreateCatDto, ['name'] as const) {}
```
> `OmitType()`從`@nestjs/swagger`中導入。
`IntersectionType()`函數將兩種類型組合成一個新類型(類)。例如,我們由如下類型開始:
```typescript
import { ApiProperty } from '@nestjs/swagger';
export class CreateCatDto {
@ApiProperty()
name: string;
@ApiProperty()
breed: string;
}
export class AdditionalCatInfo {
@ApiProperty()
color: string;
}
```
我們可以生成一個新類型,將兩個類型中所有屬性組合在一起。
```typescript
export class UpdateCatDto extends IntersectionType(CreateCatDto, AdditionalCatInfo) {}
```
> `IntersectionType()`從`@nestjs/swagger`中導入。
類型映射函數是可以組合的。例如,下列示例將產生一個類(類型),其擁有`name`除外的`CreateCatDto`類型的所有屬性,這些屬性都被設置為可選的:
```typescript
export class UpdateCatDto extends PartialType(
OmitType(CreateCatDto, ['name'] as const),
) {}
```
### 枚舉
為了定義一個 `enum`,我們必須手動在 `@ApiProperty` 上設置 `enum` 屬性為數值數組。
```typescript
@ApiProperty({ enum: ['Admin', 'Moderator', 'User']})
role: UserRole;
```
或者,如下定義實際的 TypeScript 枚舉:
```typescript
export enum UserRole {
Admin = 'Admin',
Moderator = 'Moderator',
User = 'User'
}
```
你可以直接將枚舉在 `@Query()` 參數裝飾器里使用,并結合 `@ApiQuery()` 裝飾器。
```typescript
@ApiQuery({ name: 'role', enum: UserRole })
async filterByRole(@Query('role') role: UserRole = UserRole.User) {}
```

將 `isArray` 設置為 **true** ,`enum` 可以**多選**:

### 枚舉 schema
默認地,`enum`屬性將在參數中添加一個`[Enum](https://swagger.io/docs/specification/data-models/enums/)`的原生定義。
```typescript
- breed:
type: 'string'
enum:
- Persian
- Tabby
- Siamese
```
上述情況在大部分情況下都能正常工作。然而,如果你使用工具將該定義作為輸入來生成客戶端代碼,你可能在生成代碼時會遇到包含兩層枚舉的問題。考慮如下代碼:
```typescript
// generated client-side code
export class CatDetail {
breed: CatDetailEnum;
}
export class CatInformation {
breed: CatInformationEnum;
}
export enum CatDetailEnum {
Persian = 'Persian',
Tabby = 'Tabby',
Siamese = 'Siamese',
}
export enum CatInformationEnum {
Persian = 'Persian',
Tabby = 'Tabby',
Siamese = 'Siamese',
}
```
> 上述代碼使用一個叫做[NSwag](https://github.com/RicoSuter/NSwag)的工具生成。
你可以看到你現在有兩個同樣的枚舉。要強調這個問題,你可以在你的裝飾器中`enum`屬性旁傳遞一個`enumName`。
```typescript
export class CatDetail {
@ApiProperty({ enum: CatBreed, enumName: 'CatBreed' })
breed: CatBreed;
}
```
`enumName`屬性使能`@nestjs/swagger`來將`CatBreed`轉換成它自身的`schema`從而使`CatBreed`枚舉可重用,如下:
```typescript
CatDetail:
type: 'object'
properties:
...
- breed:
schema:
$ref: '#/components/schemas/CatBreed'
CatBreed:
type: string
enum:
- Persian
- Tabby
- Siamese
```
> 任何使用`enum`作為屬性的裝飾器也會使用`enumName`。
### 原生定義
在某些特定情況下(例如,深度嵌套的數組,矩陣),您可能需要手動描述類型。
```typescript
@ApiProperty({
type: 'array',
items: {
type: 'array',
items: {
type: 'number',
},
},
})
coords: number[][];
```
同樣,為了在控制器類中手動定義輸入/輸出內容,請使用 `schema` 屬性:
```typescript
@ApiBody({
schema: {
type: 'array',
items: {
type: 'array',
items: {
type: 'number',
},
},
},
})
async create(@Body() coords: number[][]) {}
```
### 額外模型
為了定義其他應由 Swagger 模塊檢查的模型,請使用 `@ApiExtraModels()` 裝飾器:
```typescript
@ApiExtraModels(ExtraModel)
export class CreateCatDto {}
```
然后,您可以使用 `getSchemaPath(ExtraModel)` 獲取對模型的引用(`$ref`):
```typescript
'application/vnd.api+json': {
schema: { $ref: getSchemaPath(ExtraModel) },
},
```
#### oneOf, anyOf, allOf
為了合并模式(schemas),您可以使用 `oneOf`,`anyOf` 或 `allOf` 關鍵字 ([閱讀更多](https://swagger.io/docs/specification/data-models/oneof-anyof-allof-not/)).
```typescript
@ApiProperty({
oneOf: [
{ $ref: getSchemaPath(Cat) },
{ $ref: getSchemaPath(Dog) },
],
})
pet: Cat | Dog;
```
如果你想定義一個多態數組(例如,數組成員包含多個schema),你可以使用原生定義(如上)來手動定義你的類型。
```typescript
type Pet = Cat | Dog;
@ApiProperty({
type: 'array',
items: {
oneOf: [
{ $ref: getSchemaPath(Cat) },
{ $ref: getSchemaPath(Dog) },
],
},
})
pets: Pet[];
```
> `getSchemaPath()` 函數是從 `@nestjs/swagger`進行導入的
必須使用 `@ApiExtraModels()` 裝飾器(在類級別)將 `Cat` 和 `Dog` 都定義為額外模型。
### 多種規格
`SwaggerModuler`還提供了一種支持多種規格的方法。 換句話說,您可以在不同的端點上使用不同的 UI 提供不同的文檔。
為了支持多規格,您的應用程序必須使用模塊化方法編寫。 `createDocument()` 方法接受的第三個參數:`extraOptions` ,它是一個包含 `include` 屬性的對象。`include` 屬性的值是一個模塊數組。
您可以設置多個規格支持,如下所示:
```typescript
import { NestFactory } from '@nestjs/core';
import { SwaggerModule, DocumentBuilder } from '@nestjs/swagger';
import { ApplicationModule } from './app.module';
async function bootstrap() {
const app = await NestFactory.create(ApplicationModule);
/**
* createDocument(application, configurationOptions, extraOptions);
*
* createDocument method takes in an optional 3rd argument "extraOptions"
* which is an object with "include" property where you can pass an Array
* of Modules that you want to include in that Swagger Specification
* E.g: CatsModule and DogsModule will have two separate Swagger Specifications which
* will be exposed on two different SwaggerUI with two different endpoints.
*/
const options = new DocumentBuilder()
.setTitle('Cats example')
.setDescription('The cats API description')
.setVersion('1.0')
.addTag('cats')
.build();
const catDocument = SwaggerModule.createDocument(app, options, {
include: [CatsModule]
});
SwaggerModule.setup('api/cats', app, catDocument);
const secondOptions = new DocumentBuilder()
.setTitle('Dogs example')
.setDescription('The dogs API description')
.setVersion('1.0')
.addTag('dogs')
.build();
const dogDocument = SwaggerModule.createDocument(app, secondOptions, {
include: [DogsModule]
});
SwaggerModule.setup('api/dogs', app, dogDocument);
await app.listen(3000);
}
bootstrap();
```
現在,您可以使用以下命令啟動服務器:
```bash
$ npm run start
```
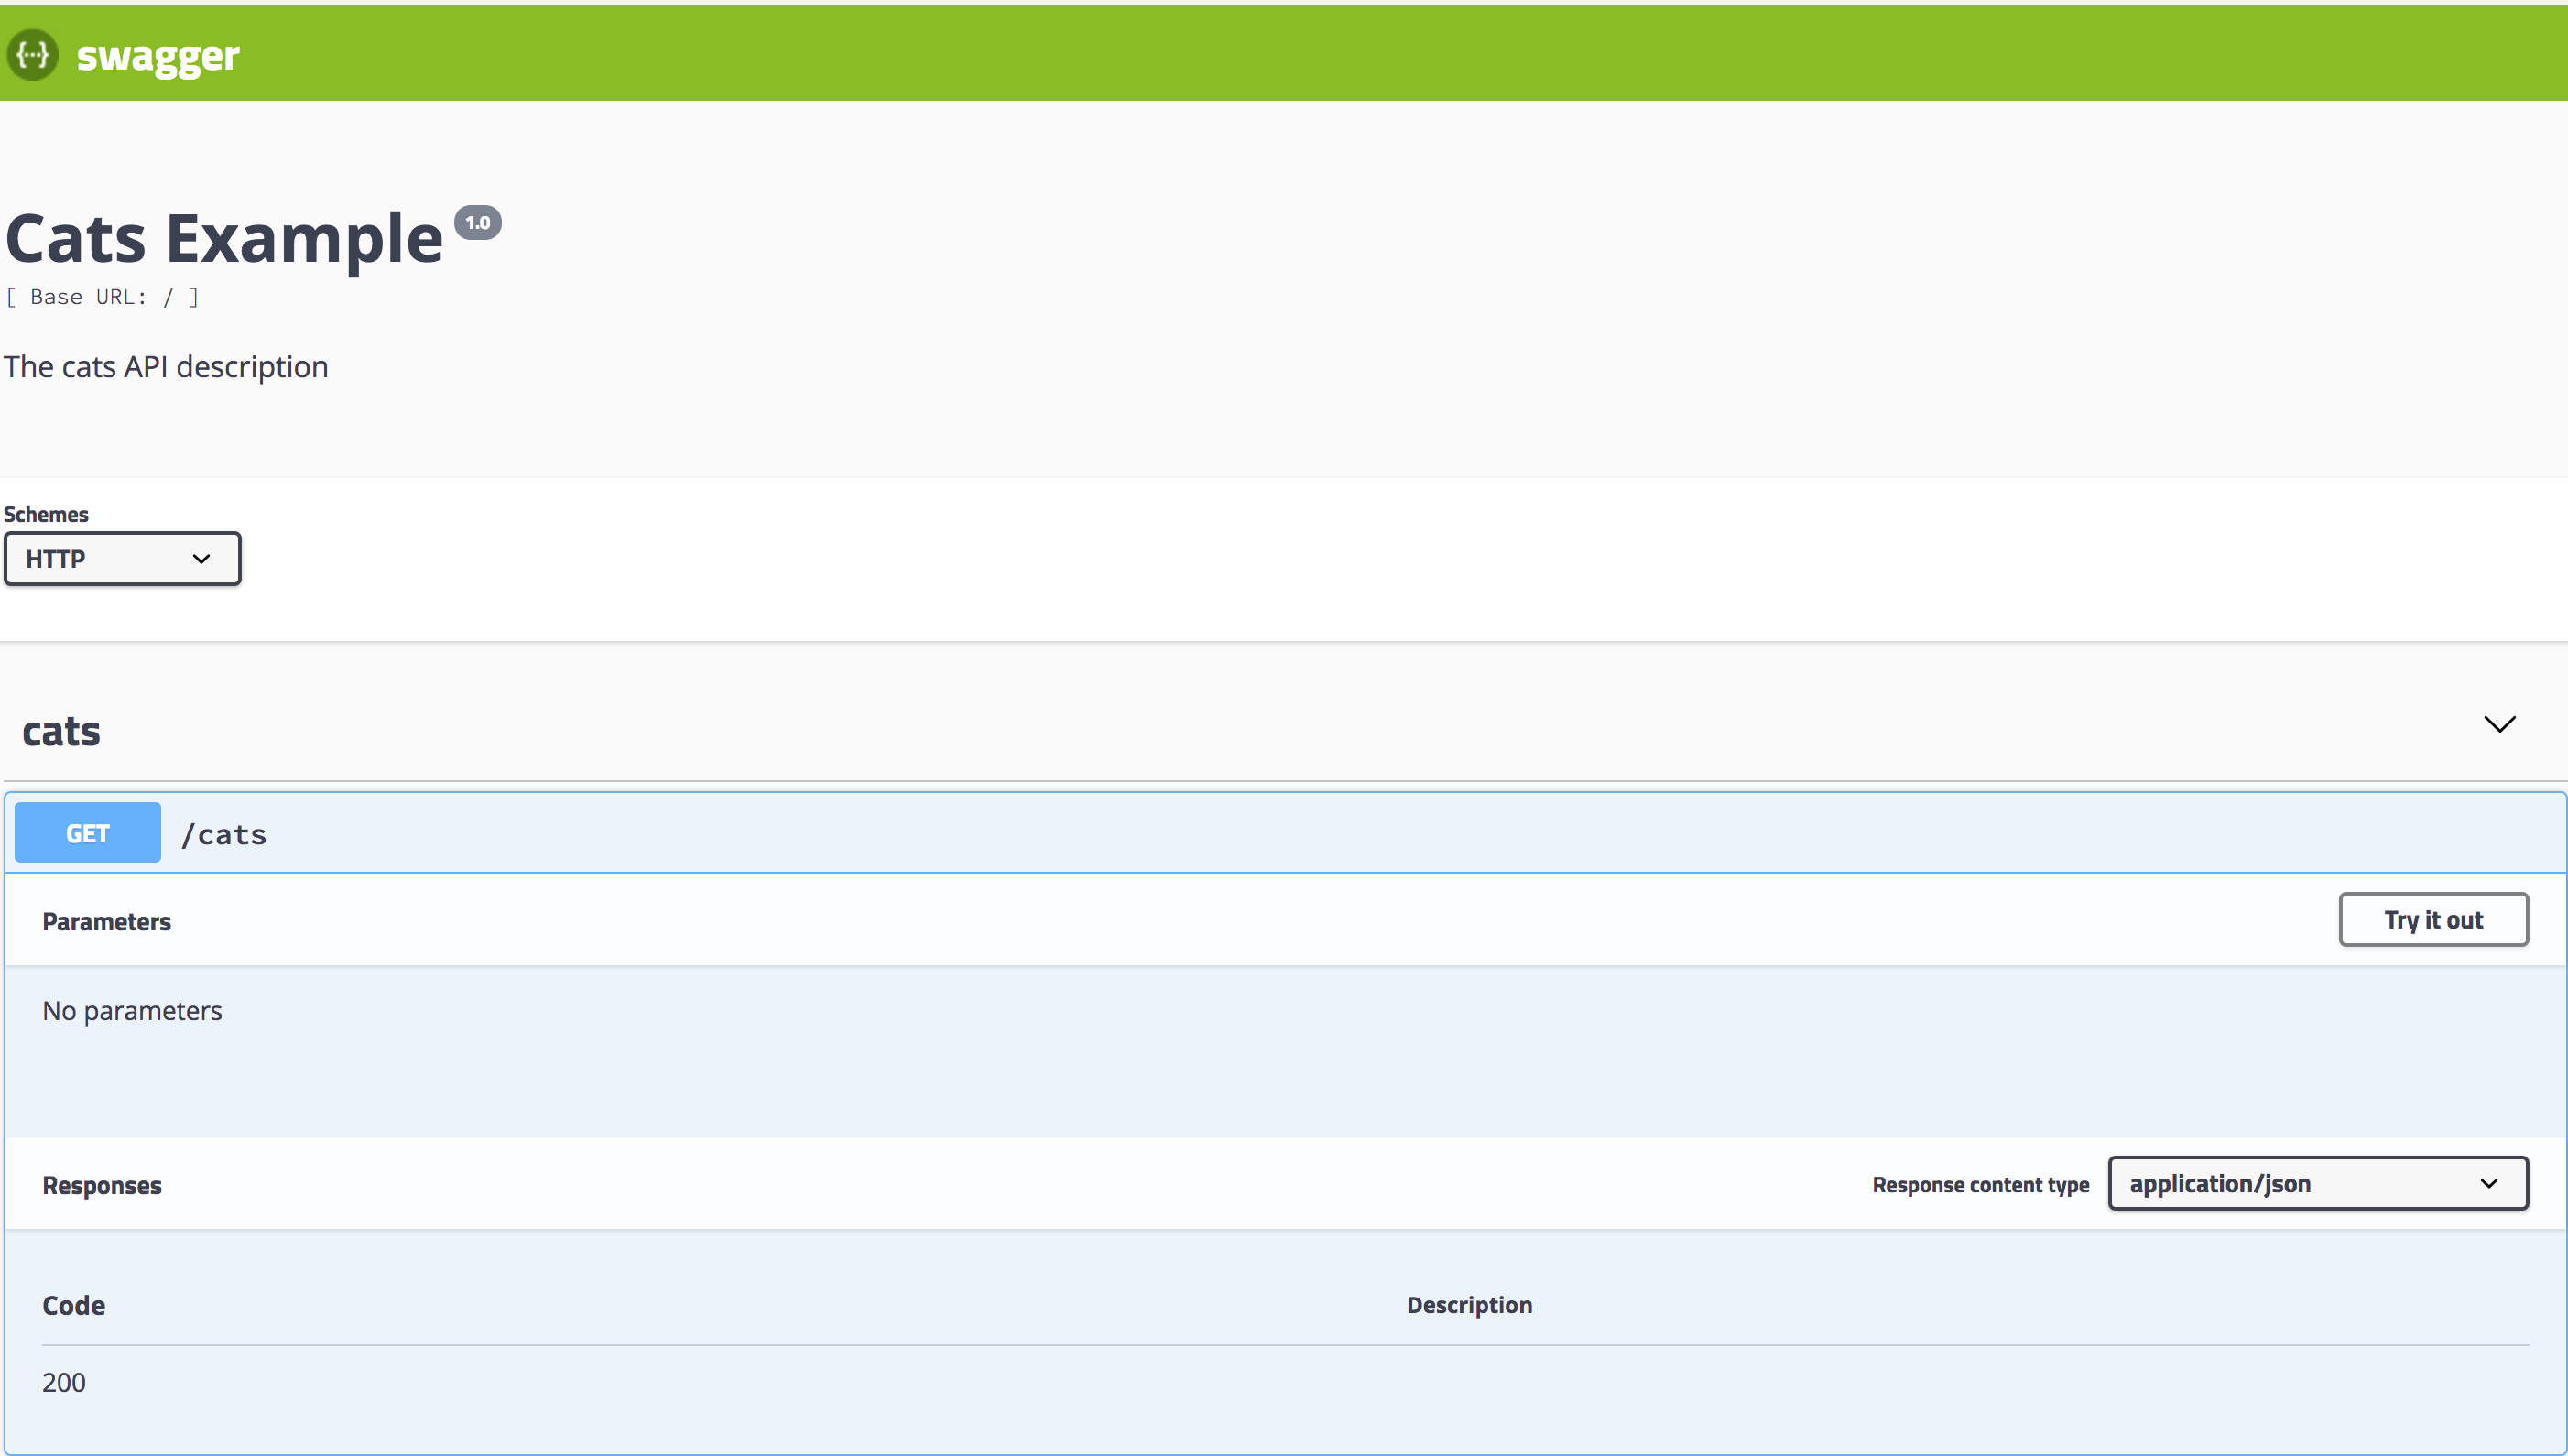
導航到 `http://localhost:3000/api/cats` 查看 Swagger UI 里的 cats:
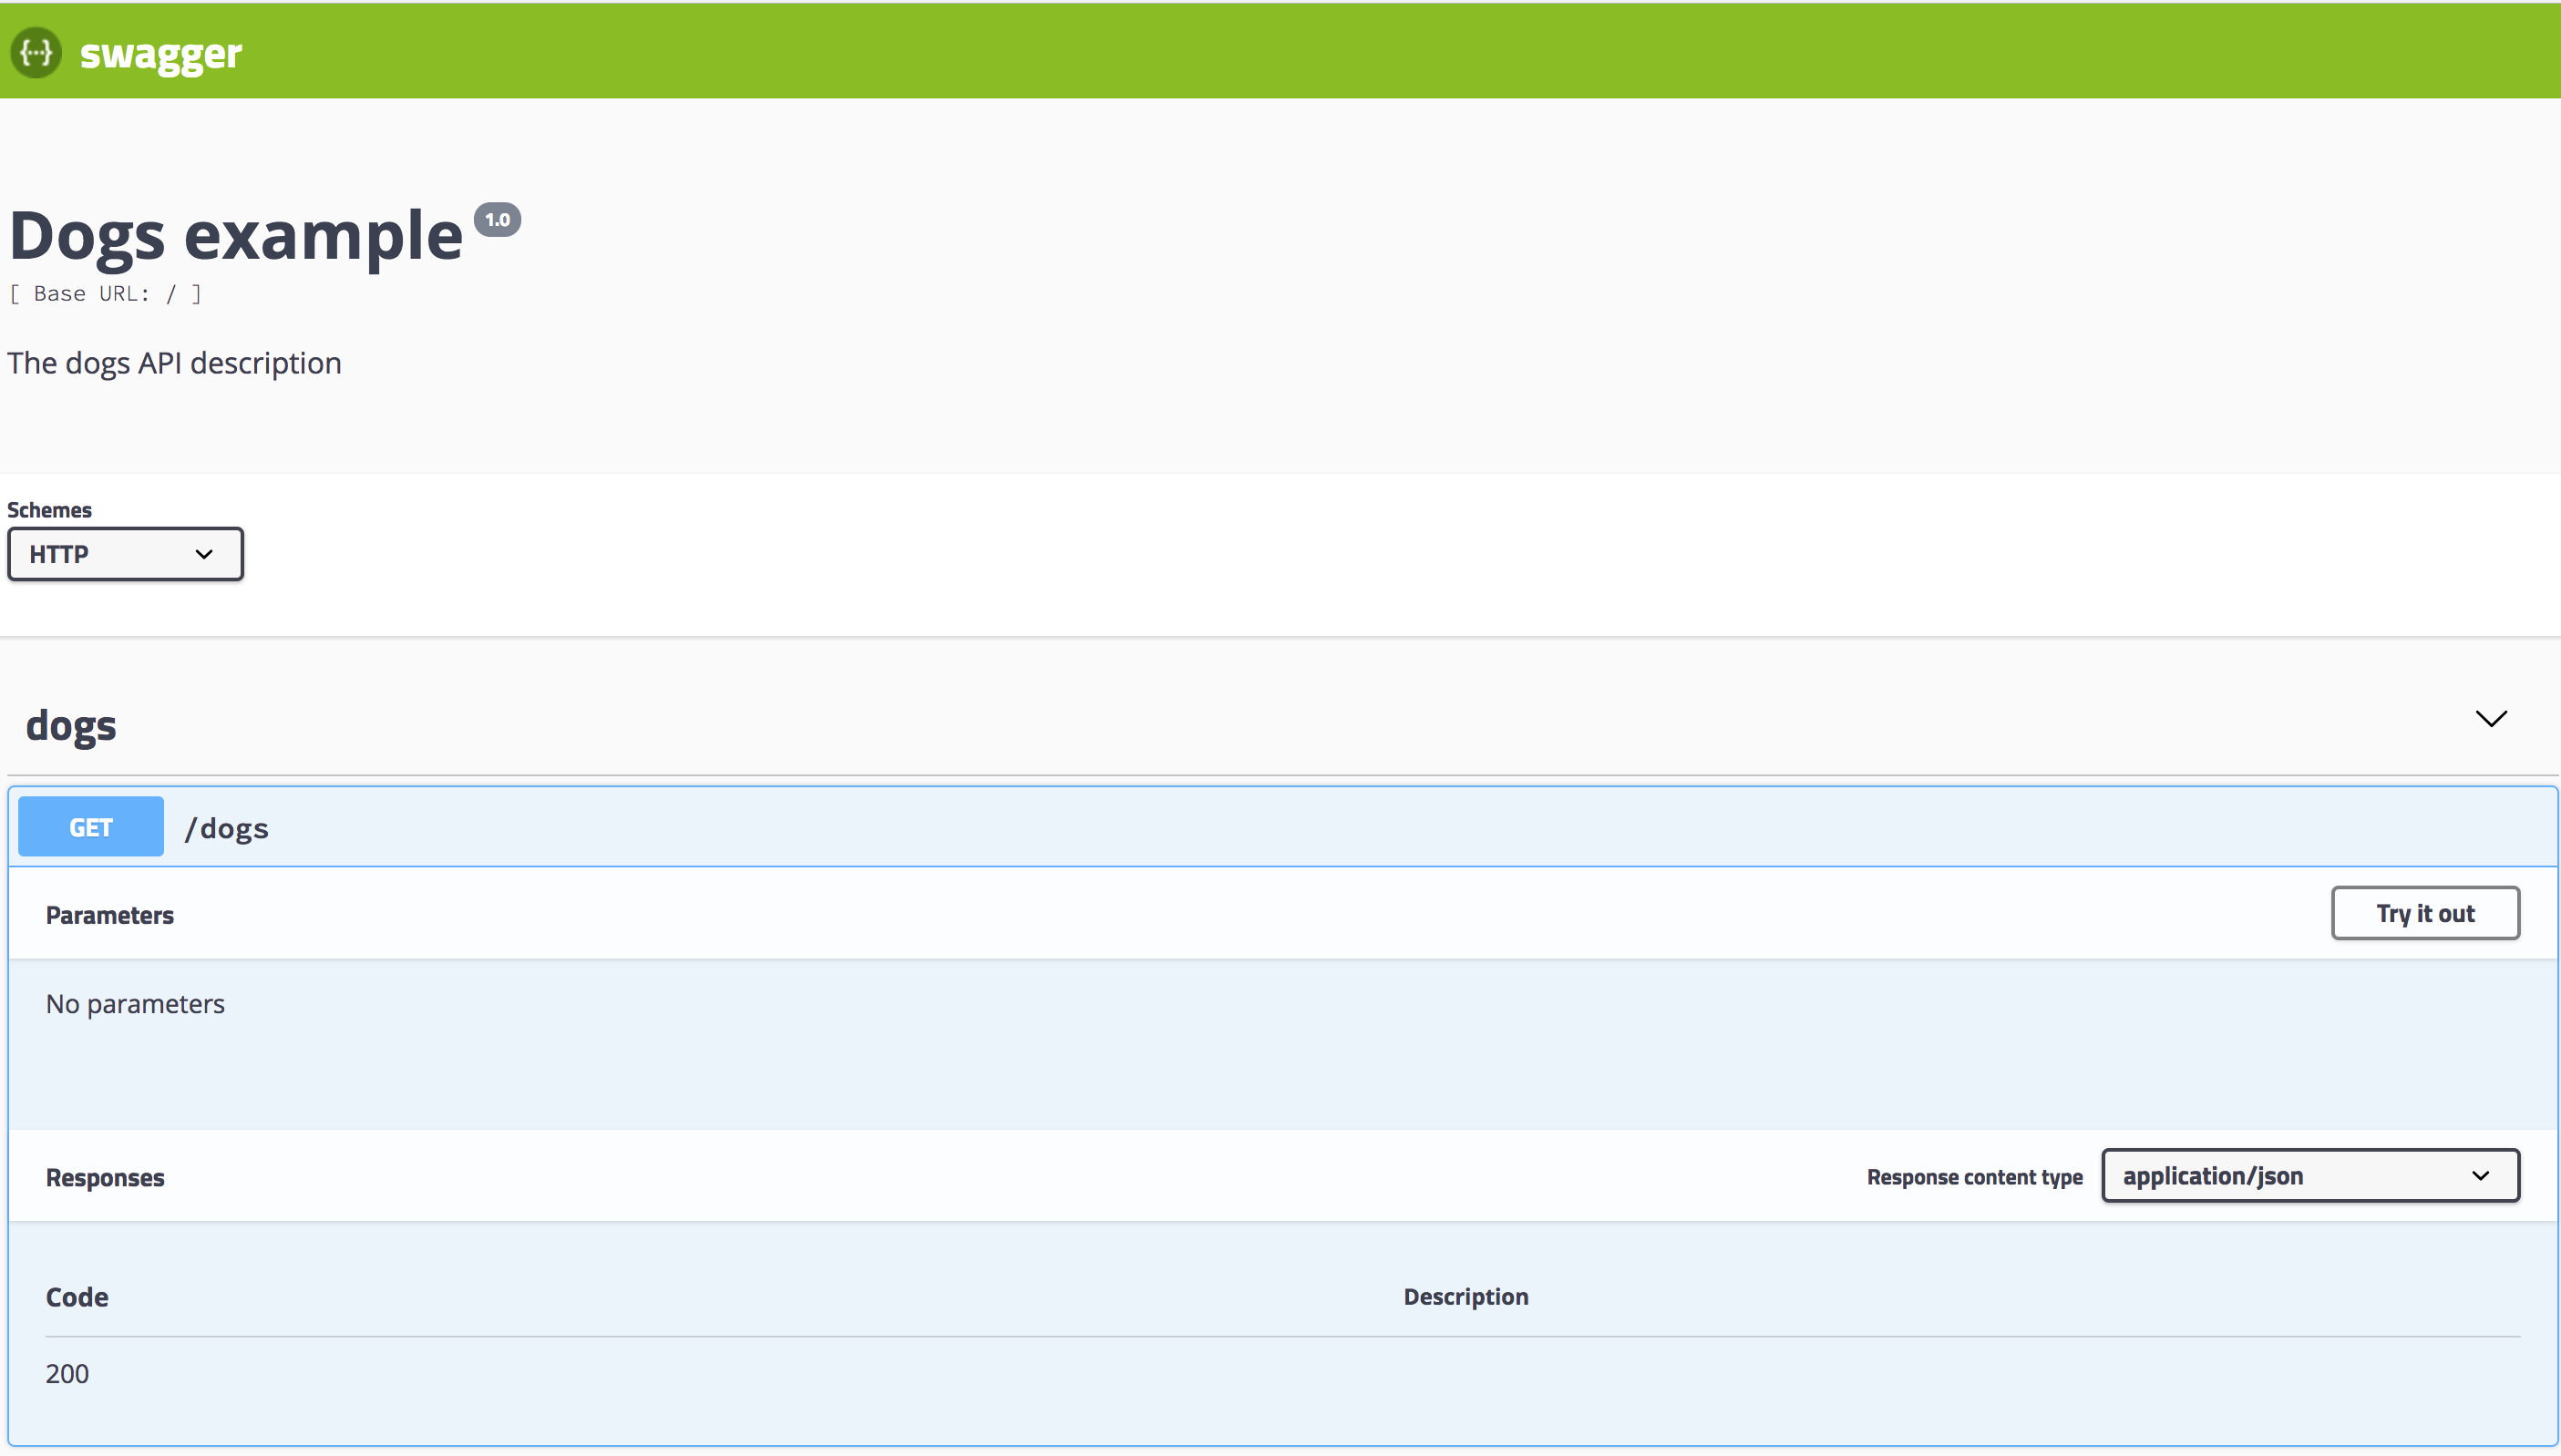
`http://localhost:3000/api/dogs` 查看 Swagger UI 里的 dogs:
### 標簽(Tags)
要將控制器附加到特定標簽,請使用 `@ApiTags(...tags)` 裝飾器。
```typescript
@ApiUseTags('cats')
@Controller('cats')
export class CatsController {}
```
### HTTP 頭字段
要定義自定義 HTTP 標頭作為請求一部分,請使用 `@ApiHeader()` 。
```typescript
@ApiHeader({
name: 'Authorization',
description: 'Auth token'
})
@Controller('cats')
export class CatsController {}
```
### 響應
要定義自定義 `HTTP` 響應,我們使用 `@ApiResponse()` 裝飾器。
```typescript
@Post()
@ApiResponse({ status: 201, description: 'The record has been successfully created.'})
@ApiResponse({ status: 403, description: 'Forbidden.'})
async create(@Body() createCatDto: CreateCatDto) {
this.catsService.create(createCatDto);
}
```
與異常過濾器部分中定義的常見 `HTTP` 異常相同,Nest 還提供了一組可重用的 **API 響應** ,這些響應繼承自核心 `@ApiResponse` 裝飾器:
- `@ApiOkResponse()`
- `@ApiCreatedResponse()`
- `@ApiBadRequestResponse()`
- `@ApiUnauthorizedResponse()`
- `@ApiNotFoundResponse()`
- `@ApiForbiddenResponse()`
- `@ApiMethodNotAllowedResponse()`
- `@ApiNotAcceptableResponse()`
- `@ApiRequestTimeoutResponse()`
- `@ApiConflictResponse()`
- `@ApiGoneResponse()`
- `@ApiPayloadTooLargeResponse()`
- `@ApiUnsupportedMediaTypeResponse()`
- `@ApiUnprocessableEntityResponse()`
- `@ApiInternalServerErrorResponse()`
- `@ApiNotImplementedResponse()`
- `@ApiBadGatewayResponse()`
- `@ApiServiceUnavailableResponse()`
- `@ApiGatewayTimeoutResponse()`
- `@ApiDefaultResponse()`
```typescript
@Post()
@ApiCreatedResponse({ description: 'The record has been successfully created.'})
@ApiForbiddenResponse({ description: 'Forbidden.'})
async create(@Body() createCatDto: CreateCatDto) {
this.catsService.create(createCatDto);
}
```
要為請求指定返回模型,必須創建一個類并使用 `@ApiProperty()` 裝飾器注釋所有屬性。
```typescript
export class Cat {
@ApiProperty()
id: number;
@ApiProperty()
name: string;
@ApiProperty()
age: number;
@ApiProperty()
breed: string;
}
```
之后,必須將 `Cat` 模型與響應裝飾器的 `type` 屬性結合使用。
```typescript
@ApiTags('cats')
@Controller('cats')
export class CatsController {
@Post()
@ApiCreatedResponse({
description: 'The record has been successfully created.',
type: Cat
})
async create(@Body() createCatDto: CreateCatDto): Promise<Cat> {
return this.catsService.create(createCatDto);
}
}
```
打開瀏覽器,驗證生成的 `Cat` 模型:
### 全局前綴
要忽略通過 `setGlobalPrefix()` 設置的路由的全局前綴,請使用 `ignoreGlobalPrefix`:
```typescript
const document = SwaggerModule.createDocument(app, options, {
ignoreGlobalPrefix: true
});
```
### 安全
要定義針對特定操作應使用的安全性機制,請使用 `@ApiSecurity()` 裝飾器。
```typescript
@ApiSecurity('basic')
@Controller('cats')
export class CatsController {}
```
在運行應用程序之前,請記住使用 `DocumentBuilder` 將安全性定義添加到您的基本文檔中:
```typescript
const options = new DocumentBuilder().addSecurity('basic', {
type: 'http',
scheme: 'basic'
});
```
一些最流行的身份驗證技術是預定義的(例如 `basic` 和 `bearer`),因此,您不必如上所述手動定義安全性機制。
### 基礎認證
為了使用基礎認證,使用 `@ApiBasicAuth()`。
```typescript
@ApiBasicAuth()
@Controller('cats')
export class CatsController {}
```
在運行應用程序之前,請記住使用 `DocumentBuilder` 將安全性定義添加到基本文檔中:
```typescript
const options = new DocumentBuilder().addBasicAuth();
```
### Bearer 認證
為了使用 bearer 認證, 使用 `@ApiBearerAuth()`。
```typescript
@ApiBearerAuth()
@Controller('cats')
export class CatsController {}
```
在運行應用程序之前,請記住使用 `DocumentBuilder` 將安全性定義添加到基本文檔中:
```typescript
const options = new DocumentBuilder().addBearerAuth();
```
### OAuth2 認證
為了使用 OAuth2 認證,使用 `@ApiOAuth2()`。
```typescript
@ApiOAuth2(['pets:write'])
@Controller('cats')
export class CatsController {}
```
在運行應用程序之前,請記住使用 `DocumentBuilder` 將安全性定義添加到基本文檔中:
```typescript
const options = new DocumentBuilder().addOAuth2();
```
### Cookie 認證
使用`@ApiCookieAuth()`來使能cookie認證。
```typescript
@ApiCookieAuth()
@Controller('cats')
export class CatsController {}
```
在你運行應用前,記得使用`DocumentBuilder`來向你的基礎文檔添加安全定義。
```typescript
const options = new DocumentBuilder().addCookieAuth('optional-session-id');
```
### 文件上傳
您可以使用 `@ApiBody` 裝飾器和 `@ApiConsumes()` 為特定方法啟用文件上載。 這里是使用[文件上傳](https://docs.nestjs.com/techniques/file-upload)技術的完整示例:
```typescript
@UseInterceptors(FileInterceptor('file'))
@ApiConsumes('multipart/form-data')
@ApiBody({
description: 'List of cats',
type: FileUploadDto,
})
uploadFile(@UploadedFile() file) {}
```
`FileUploadDto` 如下所定義:
```typescript
class FileUploadDto {
@ApiProperty({ type: 'string', format: 'binary' })
file: any;
}
```
### 擴展
要使用`@ApiExtension()`裝飾器添加一個擴展,擴展名稱必須以`x-`作為前綴。
```typescript
@ApiExtension('x-foo', { hello: 'world' })
```
### 裝飾器
所有可用的 OpenAPI 裝飾器都有一個 `Api` 前綴,可以清楚地區分核心裝飾器。 以下是導出的裝飾器的完整列表,以及可以應用裝飾器的級別的名稱。
| | |
| :----------------------: | :-----------------: |
| `@ApiOperation()` | Method |
| `@ApiResponse()` | Method / Controller |
| `@ApiProduces()` | Method / Controller |
| `@ApiConsumes()` | Method / Controller |
| `@ApiBearerAuth()` | Method / Controller |
| `@ApiOAuth2()` | Method / Controller |
| `@ApiBasicAuth()` | Method / Controller |
| `@ApiSecurity()` | Method / Controller |
| `@ApiExtraModels()` | Method / Controller |
| `@ApiBody()` | Method |
| `@ApiParam()` | Method |
| `@ApiQuery()` | Method |
| `@ApiHeader()` | Method / Controller |
| `@ApiExcludeEndpoint()` | Method |
| `@ApiTags()` | Method / Controller |
| `@ApiProperty()` | Model |
| `@ApiPropertyOptional()` | Model |
| `@ApiHideProperty()` | Model |
| `@ApiExtension()` | Model |
### 插件
TypeScript 的元數據反射系統具有幾個限制,這些限制使得例如無法確定類包含哪些屬性或無法識別給定屬性是可選屬性還是必需屬性。但是,其中一些限制可以在編譯時解決。 Nest 提供了一個插件,可以增強 TypeScript 編譯過程,以減少所需的樣板代碼量。
> 該插件是**選擇性**的。可以手動聲明所有裝飾器,也可以只聲明需要的特定裝飾器。
Swagger 插件會自動:
- 除非使用 `@ApiHideProperty`,否則用 `@ApiProperty` 注釋所有 DTO 屬性
- 根據問號標記設置 `required` 屬性(例如,`name?: string` 將設置 `required: false`)
- 根據類型設置 `type` 或 `enum` 屬性(也支持數組)
- 根據分配的默認值設置 `default` 屬性
- 根據 `class-validator` 裝飾器設置多個驗證規則(如果 `classValidatorShim` 設置為 `true`)
- 向具有正確狀態和 `type`(響應模型)的每個端點添加響應裝飾器
請注意,你的文件名必須包含如下前綴之一:['.dto.ts', '.entity.ts'] (例如, create-user.dto.ts) 從而能讓插件對其進行分析。
以前,如果您想通過 Swagger UI 提供交互式體驗,您必須重復很多代碼,以使程序包知道應如何在規范中聲明您的模型/組件。例如,您可以定義一個簡單的 `CreateUserDto` 類,如下所示:
```typescript
export class CreateUserDto {
@ApiProperty()
email: string;
@ApiProperty()
password: string;
@ApiProperty({ enum: RoleEnum, default: [], isArray: true })
roles: RoleEnum[] = [];
@ApiProperty({ required: false, default: true })
isEnabled?: boolean = true;
}
```
盡管對于中型項目而言這并不是什么大問題,但是一旦您擁有大量的類,它就會變得冗長而笨拙。
現在,在啟用 Swagger 插件的情況下,可以簡單地聲明上述類定義:
```typescript
export class CreateUserDto {
email: string;
password: string;
roles: RoleEnum[] = [];
isEnabled?: boolean = true;
}
```
該插件會基于**抽象語法樹**動態添加適當的裝飾器。因此,您不必再為分散在整個項目中的 `@ApiProperty` 裝飾器而苦惱。
?> 該插件將自動生成所有缺少的 swagger 屬性,但是如果您需要覆蓋它們,則只需通過 `@ApiProperty()` 顯式設置它們即可。
為了啟用該插件,只需打開 `nest-cli.json`(如果使用[Nest CLI](/cli/overview)) 并添加以下`plugins`配置:
```javascript
{
"collection": "@nestjs/schematics",
"sourceRoot": "src",
"compilerOptions": {
"plugins": ["@nestjs/swagger/plugin"]
}
}
```
您可以使用 `options` 屬性來自定義插件的行為。
```javascript
"plugins": [
{
"name": "@nestjs/swagger/plugin",
"options": {
"classValidatorShim": false
}
}
]
```
`options` 屬性必須滿足以下接口:
```typescript
export interface PluginOptions {
dtoFileNameSuffix?: string[];
controllerFileNameSuffix?: string[];
classValidatorShim?: boolean;
}
```
<table>
<tr>
<th>選項(Option)</th>
<th>默認(Default)</th>
<th>描述(Description)</th>
</tr>
<tr>
<td><code>dtoFileNameSuffix</code></td>
<td><code>['.dto.ts', '.entity.ts']</code></td>
<td>DTO(數據傳輸對象)文件后綴</td>
</tr>
<tr>
<td><code>controllerFileNameSuffix</code></td>
<td><code>.controller.ts</code></td>
<td>控制器文件后綴</td>
</tr>
<tr>
<td><code>classValidatorShim</code></td>
<td><code>true</code></td>
<td>如果設置為true,則模塊將重用 <code>class-validator</code> 驗證裝飾器 (例如 <code>@Max(10)</code> 會將 <code>max: 10</code> 添加到 schema 定義中) </td>
</tr>
</table>
如果您不使用 CLI,而是使用自定義的 `webpack` 配置,則可以將此插件與 `ts-loader` 結合使用:
```javascript
getCustomTransformers: (program: any) => ({
before: [require('@nestjs/swagger/plugin').before({}, program)]
}),
```
### 移植到 4.0
如果你現在正在使用 `@nestjs/swagger@3.*`,請注意版本 4.0 中的以下重大更改/ API 更改。
以下裝飾器已經被更改/重命名:
- `@ApiModelProperty` 現在是 `@ApiProperty`
- `@ApiModelPropertyOptional` 現在是 `@ApiPropertyOptional`
- `@ApiResponseModelProperty` 現在是 `@ApiResponseProperty`
- `@ApiImplicitQuery` 現在是 `@ApiQuery`
- `@ApiImplicitParam` 現在是 `@ApiParam`
- `@ApiImplicitBody` 現在是 `@ApiBody`
- `@ApiImplicitHeader` 現在是 `@ApiHeader`
- `@ApiOperation({{ '{' }} title: 'test' {{ '}' }})` 現在是 `@ApiOperation({{ '{' }} summary: 'test' {{ '}' }})`
- `@ApiUseTags` 現在是 `@ApiTags`
`DocumentBuilder` 重大更改(更新的方法簽名):
- `addTag`
- `addBearerAuth`
- `addOAuth2`
- `setContactEmail` 現在是 `setContact`
- `setHost` 已經被移除
- `setSchemes` 已經被移除
如下方法被添加:
- `addServer`
- `addApiKey`
- `addBasicAuth`
- `addSecurity`
- `addSecurityRequirements`
### 示例
請參考這里的[示例](https://github.com/nestjs/nest/tree/master/sample/11-swagger)。
- 介紹
- 概述
- 第一步
- 控制器
- 提供者
- 模塊
- 中間件
- 異常過濾器
- 管道
- 守衛
- 攔截器
- 自定義裝飾器
- 基礎知識
- 自定義提供者
- 異步提供者
- 動態模塊
- 注入作用域
- 循環依賴
- 模塊參考
- 懶加載模塊
- 應用上下文
- 生命周期事件
- 跨平臺
- 測試
- 技術
- 數據庫
- Mongo
- 配置
- 驗證
- 緩存
- 序列化
- 版本控制
- 定時任務
- 隊列
- 日志
- Cookies
- 事件
- 壓縮
- 文件上傳
- 流式處理文件
- HTTP模塊
- Session(會話)
- MVC
- 性能(Fastify)
- 服務器端事件發送
- 安全
- 認證(Authentication)
- 授權(Authorization)
- 加密和散列
- Helmet
- CORS(跨域請求)
- CSRF保護
- 限速
- GraphQL
- 快速開始
- 解析器(resolvers)
- 變更(Mutations)
- 訂閱(Subscriptions)
- 標量(Scalars)
- 指令(directives)
- 接口(Interfaces)
- 聯合類型
- 枚舉(Enums)
- 字段中間件
- 映射類型
- 插件
- 復雜性
- 擴展
- CLI插件
- 生成SDL
- 其他功能
- 聯合服務
- 遷移指南
- Websocket
- 網關
- 異常過濾器
- 管道
- 守衛
- 攔截器
- 適配器
- 微服務
- 概述
- Redis
- MQTT
- NATS
- RabbitMQ
- Kafka
- gRPC
- 自定義傳輸器
- 異常過濾器
- 管道
- 守衛
- 攔截器
- 獨立應用
- Cli
- 概述
- 工作空間
- 庫
- 用法
- 腳本
- Openapi
- 介紹
- 類型和參數
- 操作
- 安全
- 映射類型
- 裝飾器
- CLI插件
- 其他特性
- 遷移指南
- 秘籍
- CRUD 生成器
- 熱重載
- MikroORM
- TypeORM
- Mongoose
- 序列化
- 路由模塊
- Swagger
- 健康檢查
- CQRS
- 文檔
- Prisma
- 靜態服務
- Nest Commander
- 問答
- Serverless
- HTTP 適配器
- 全局路由前綴
- 混合應用
- HTTPS 和多服務器
- 請求生命周期
- 常見錯誤
- 實例
- 遷移指南
- 發現
- 誰在使用Nest?