
原文出處——>[解開Android應用程序組件Activity的"singleTask"之謎](http://blog.csdn.net/luoshengyang/article/details/6714543)
在Android應用程序中,可以配置Activity以四種方式來啟動,其中最令人迷惑的就是"singleTask"這種方式了,官方文檔稱以這種方式啟動的Activity總是屬于一個任務的根Activity。果真如此嗎?本文將為你解開Activity的"singleTask"之謎。
在解開這個謎之前,我們先來簡單了解一下在Android應用程序中,任務(Task)是個什么樣的概念。我們知道,Activity是Android應用程序的基礎組件之一,在應用程序運行時,每一個Activity代表一個用戶操作。用戶為了完成某個功能而執行的一系列操作就形成了一個Activity序列,這個序列在Android應用程序中就稱之為任務,它是從用戶體驗的角度出發,把一組相關的Activity組織在一起而抽象出來的概念。
對初學者來說,在開發Android應用程序時,對任務的概念可能不是那么的直觀,一般我們只關注如何實現應用程序中的每一個Activity。事實上,Android系統中的任務更多的是體現是應用程序運行的時候,因此,它相對于Activity來說是動態存在的,這就是為什么我們在開發時對任務這個概念不是那么直觀的原因。不過,我們在開發Android應用程序時,還是可以配置Activity的任務屬性的,即告訴系統,它是要在新的任務中啟動呢,還是在已有的任務中啟動,亦或是其它的Activity能不能與它共享同一個任務,具體配置請參考官方文檔:http://developer.android.com/guide/topics/fundamentals/tasks-and-back-stack.html
它是這樣介紹以"singleTask"方式啟動的Activity的:
The system creates a new task and instantiates the activity at the root of the new task. However, if an instance of the activity already exists in a separate task, the system routes the intent to the existing instance through a call to its onNewIntent() method, rather than creating a new instance. Only one instance of the activity can exist at a time.
它明確說明,以"singleTask"方式啟動的Activity,全局只有唯一個實例存在,因此,當我們第一次啟動這個Activity時,系統便會創建一個新的任務,并且初始化一個這樣的Activity的實例,放在新任務的底部,如果下次再啟動這個Activity時,系統發現已經存在這樣的Activity實例,就會調用這個Activity實例的onNewIntent成員函數,從而把它激活起來。從這句話就可以推斷出,以"singleTask"方式啟動的Activity總是屬于一個任務的根Activity。
但是文檔接著舉例子說明,當用戶按下鍵盤上的Back鍵時,如果此時在前臺中運行的任務堆棧頂端是一個"singleTask"的Activity,系統會回到當前任務的下一個Activity中去,而不是回到前一個Activity中去,如下圖所示:

真是坑爹啊!有木有!前面剛說"singleTask"會在新的任務中運行,并且位于任務堆棧的底部,這里在Task B中,一個赤裸裸的帶著"singleTask"標簽的箭頭無情地指向Task B堆棧頂端的Activity Y,剛轉身就翻臉不認人了呢!
事實勝于雄辯,我們來做一個實驗吧,看看到底在啟動這個"singleTask"的Activity的時候,它是位于新任務堆棧的底部呢,還是在已有任務的頂部。
首先在Android源代碼工程中創建一個Android應用程序工程,名字就稱為Task吧。關于如何獲得Android源代碼工程,請參考在Ubuntu上下載、編譯和安裝Android最新源代碼一文;關于如何在Android源代碼工程中創建應用程序工程,請參考在Ubuntu上為Android系統內置Java應用程序測試Application Frameworks層的硬件服務一文。這個應用程序工程定義了一個名為shy.luo.task的package,這個例子的源代碼主要就是實現在這里了。下面,將會逐一介紹這個package里面的文件。
應用程序的默認Activity定義在src/shy/luo/task/MainActivity.java文件中:
~~~
package shy.luo.task;
import android.app.Activity;
import android.content.Intent;
import android.os.Bundle;
import android.util.Log;
import android.view.View;
import android.view.View.OnClickListener;
import android.widget.Button;
public class MainActivity extends Activity implements OnClickListener {
private final static String LOG_TAG = "shy.luo.task.MainActivity";
private Button startButton = null;
@Override
public void onCreate(Bundle savedInstanceState) {
super.onCreate(savedInstanceState);
setContentView(R.layout.main);
startButton = (Button)findViewById(R.id.button_start);
startButton.setOnClickListener(this);
Log.i(LOG_TAG, "Main Activity Created.");
}
@Override
public void onClick(View v) {
if(v.equals(startButton)) {
Intent intent = new Intent("shy.luo.task.subactivity");
startActivity(intent);
}
}
}
~~~
它的實現很簡單,當點擊它上面的一個按鈕的時候,就會啟動另外一個名字為“shy.luo.task.subactivity”的Actvity。
名字為“shy.luo.task.subactivity”的Actvity實現在src/shy/luo/task/SubActivity.java文件中:
~~~
package shy.luo.task;
import android.app.Activity;
import android.os.Bundle;
import android.util.Log;
import android.view.View;
import android.view.View.OnClickListener;
import android.widget.Button;
public class SubActivity extends Activity implements OnClickListener {
private final static String LOG_TAG = "shy.luo.task.SubActivity";
private Button finishButton = null;
@Override
public void onCreate(Bundle savedInstanceState) {
super.onCreate(savedInstanceState);
setContentView(R.layout.sub);
finishButton = (Button)findViewById(R.id.button_finish);
finishButton.setOnClickListener(this);
Log.i(LOG_TAG, "Sub Activity Created.");
}
@Override
public void onClick(View v) {
if(v.equals(finishButton)) {
finish();
}
}
}
~~~
它的實現也很簡單,當點擊上面的一個銨鈕的時候,就結束自己,回到前面一個Activity中去。
再來看一下應用程序的配置文件AndroidManifest.xml:
~~~
<?xml version="1.0" encoding="utf-8"?>
<manifest xmlns:android="http://schemas.android.com/apk/res/android"
package="shy.luo.task"
android:versionCode="1"
android:versionName="1.0">
<application android:icon="@drawable/icon" android:label="@string/app_name">
<activity android:name=".MainActivity"
android:label="@string/app_name">
<intent-filter>
<action android:name="android.intent.action.MAIN" />
<category android:name="android.intent.category.LAUNCHER" />
</intent-filter>
</activity>
<activity android:name=".SubActivity"
android:label="@string/sub_activity"
android:launchMode="singleTask">
<intent-filter>
<action android:name="shy.luo.task.subactivity"/>
<category android:name="android.intent.category.DEFAULT"/>
</intent-filter>
</activity>
</application>
</manifest>
~~~
注意,這里的SubActivity的launchMode屬性配置為"singleTask"。
再來看界面配置文件,它們定義在res/layout目錄中,main.xml文件對應MainActivity的界面:
~~~
<?xml version="1.0" encoding="utf-8"?>
<LinearLayout xmlns:android="http://schemas.android.com/apk/res/android"
android:orientation="vertical"
android:layout_width="fill_parent"
android:layout_height="fill_parent"
android:gravity="center">
<Button
android:id="@+id/button_start"
android:layout_width="wrap_content"
android:layout_height="wrap_content"
android:gravity="center"
android:text="@string/start" >
</Button>
</LinearLayout>
~~~
而sub.xml對應SubActivity的界面:
~~~
<?xml version="1.0" encoding="utf-8"?>
<LinearLayout xmlns:android="http://schemas.android.com/apk/res/android"
android:orientation="vertical"
android:layout_width="fill_parent"
android:layout_height="fill_parent"
android:gravity="center">
<Button
android:id="@+id/button_finish"
android:layout_width="wrap_content"
android:layout_height="wrap_content"
android:gravity="center"
android:text="@string/finish" >
</Button>
</LinearLayout>
~~~
字符串文件位于res/values/strings.xml文件中:
~~~
<?xml version="1.0" encoding="utf-8"?>
<resources>
<string name="app_name">Task</string>
<string name="sub_activity">Sub Activity</string>
<string name="start">Start singleTask activity</string>
<string name="finish">Finish activity</string>
</resources>
~~~
最后,我們還要在工程目錄下放置一個編譯腳本文件Android.mk:
~~~
LOCAL_PATH:= $(call my-dir)
include $(CLEAR_VARS)
LOCAL_MODULE_TAGS := optional
LOCAL_SRC_FILES := $(call all-subdir-java-files)
LOCAL_PACKAGE_NAME := Task
include $(BUILD_PACKAGE)
~~~
這樣,原材料就準備好了,接下來就要編譯了。有關如何單獨編譯Android源代碼工程的模塊,以及如何打包system.img,請參考如何單獨編譯Android源代碼中的模塊一文。
執行以下命令進行編譯和打包:
~~~
USER-NAME@MACHINE-NAME:~/Android$ mmm packages/experimental/Task
USER-NAME@MACHINE-NAME:~/Android$ make snod
~~~
這樣,打包好的Android系統鏡像文件system.img就包含我們前面創建的Task應用程序了。
再接下來,就是運行模擬器來運行我們的例子了。關于如何在Android源代碼工程中運行模擬器,請參考在Ubuntu上下載、編譯和安裝Android最新源代碼一文。
執行以下命令啟動模擬器:
~~~
USER-NAME@MACHINE-NAME:~/Android$ emulator
~~~
模擬器啟動起,就可以App Launcher中找到Task應用程序圖標,接著把它啟動起來:
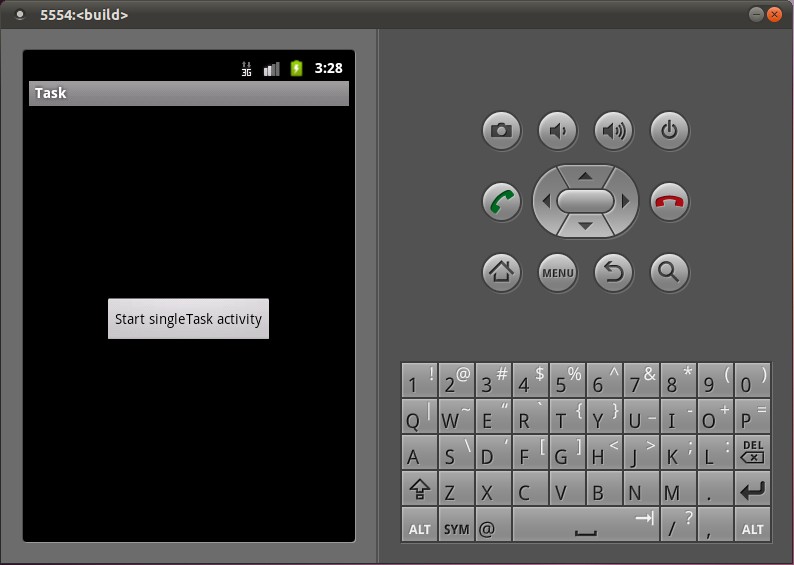
點擊中間的按鈕,就會以"singleTask"的方式來啟動SubActivity:
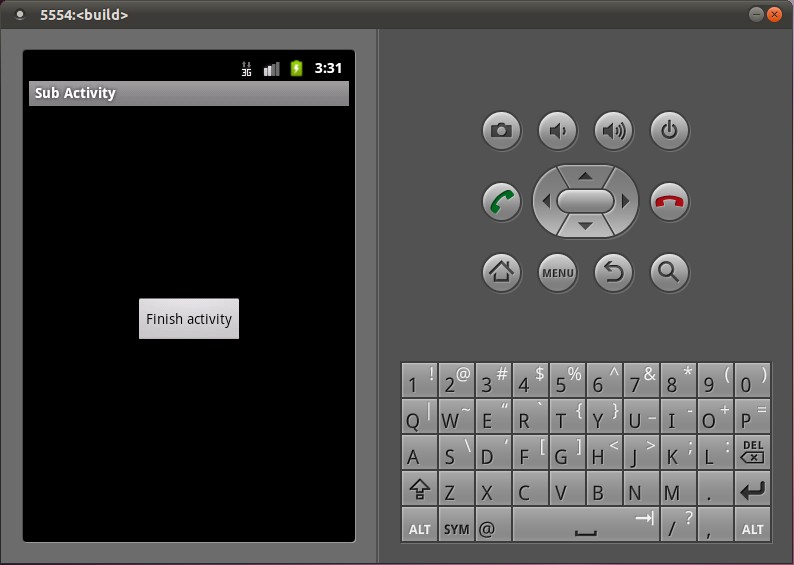
現在,我們如何來確認SubActivity是不是在新的任務中啟動并且位于這個新任務的堆棧底部呢?Android源代碼工程為我們準備了adb工具,可以查看模擬器上系統運行的狀況,執行下面的命令查看;
~~~
USER-NAME@MACHINE-NAME:~/Android$ adb shell dumpsys activity
~~~
這個命令輸出的內容比較多,這里我們只關心TaskRecord部分:
~~~
Running activities (most recent first):
TaskRecord{4070d8f8 #3 A shy.luo.task}
Run #2: HistoryRecord{406a13f8 shy.luo.task/.SubActivity}
Run #1: HistoryRecord{406a0e00 shy.luo.task/.MainActivity}
TaskRecord{4067a510 #2 A com.android.launcher}
Run #0: HistoryRecord{40677518 com.android.launcher/com.android.launcher2.Launcher}
~~~
果然,SubActivity和MainActivity都是運行在TaskRecord#3中,并且SubActivity在MainActivity的上面。這是怎么回事呢?碰到這種情況,Linus Torvalds告誡我們:Read the fucking source code;去年張麻子又說:槍在手,跟我走;我們沒有槍,但是有source code,因此,我要說:跟著代碼走。
前面我們在兩篇文章Android應用程序啟動過程源代碼分析和Android應用程序內部啟動Activity過程(startActivity)的源代碼分析時,分別在Step 9和Step 8中分析了Activity在啟動過程中與任務相關的函數ActivityStack.startActivityUncheckedLocked函數中,它定義在frameworks/base/services/java/com/android/server/am/ActivityStack.java文件中:
~~~
public class ActivityStack {
......
final int startActivityUncheckedLocked(ActivityRecord r,
ActivityRecord sourceRecord, Uri[] grantedUriPermissions,
int grantedMode, boolean onlyIfNeeded, boolean doResume) {
final Intent intent = r.intent;
final int callingUid = r.launchedFromUid;
int launchFlags = intent.getFlags();
......
ActivityRecord notTop = (launchFlags&Intent.FLAG_ACTIVITY_PREVIOUS_IS_TOP)
!= 0 ? r : null;
......
if (sourceRecord == null) {
......
} else if (sourceRecord.launchMode == ActivityInfo.LAUNCH_SINGLE_INSTANCE) {
......
} else if (r.launchMode == ActivityInfo.LAUNCH_SINGLE_INSTANCE
|| r.launchMode == ActivityInfo.LAUNCH_SINGLE_TASK) {
// The activity being started is a single instance... it always
// gets launched into its own task.
launchFlags |= Intent.FLAG_ACTIVITY_NEW_TASK;
}
......
boolean addingToTask = false;
if (((launchFlags&Intent.FLAG_ACTIVITY_NEW_TASK) != 0 &&
(launchFlags&Intent.FLAG_ACTIVITY_MULTIPLE_TASK) == 0)
|| r.launchMode == ActivityInfo.LAUNCH_SINGLE_TASK
|| r.launchMode == ActivityInfo.LAUNCH_SINGLE_INSTANCE) {
// If bring to front is requested, and no result is requested, and
// we can find a task that was started with this same
// component, then instead of launching bring that one to the front.
if (r.resultTo == null) {
// See if there is a task to bring to the front. If this is
// a SINGLE_INSTANCE activity, there can be one and only one
// instance of it in the history, and it is always in its own
// unique task, so we do a special search.
ActivityRecord taskTop = r.launchMode != ActivityInfo.LAUNCH_SINGLE_INSTANCE
? findTaskLocked(intent, r.info)
: findActivityLocked(intent, r.info);
if (taskTop != null) {
......
if ((launchFlags&Intent.FLAG_ACTIVITY_CLEAR_TOP) != 0
|| r.launchMode == ActivityInfo.LAUNCH_SINGLE_TASK
|| r.launchMode == ActivityInfo.LAUNCH_SINGLE_INSTANCE) {
// In this situation we want to remove all activities
// from the task up to the one being started. In most
// cases this means we are resetting the task to its
// initial state.
ActivityRecord top = performClearTaskLocked(
taskTop.task.taskId, r, launchFlags, true);
if (top != null) {
......
} else {
// A special case: we need to
// start the activity because it is not currently
// running, and the caller has asked to clear the
// current task to have this activity at the top.
addingToTask = true;
// Now pretend like this activity is being started
// by the top of its task, so it is put in the
// right place.
sourceRecord = taskTop;
}
} else if (r.realActivity.equals(taskTop.task.realActivity)) {
......
} else if ((launchFlags&Intent.FLAG_ACTIVITY_RESET_TASK_IF_NEEDED) == 0) {
......
} else if (!taskTop.task.rootWasReset) {
......
}
......
}
}
}
......
if (r.packageName != null) {
// If the activity being launched is the same as the one currently
// at the top, then we need to check if it should only be launched
// once.
ActivityRecord top = topRunningNonDelayedActivityLocked(notTop);
if (top != null && r.resultTo == null) {
if (top.realActivity.equals(r.realActivity)) {
if (top.app != null && top.app.thread != null) {
......
}
}
}
} else {
......
}
boolean newTask = false;
// Should this be considered a new task?
if (r.resultTo == null && !addingToTask
&& (launchFlags&Intent.FLAG_ACTIVITY_NEW_TASK) != 0) {
// todo: should do better management of integers.
mService.mCurTask++;
if (mService.mCurTask <= 0) {
mService.mCurTask = 1;
}
r.task = new TaskRecord(mService.mCurTask, r.info, intent,
(r.info.flags&ActivityInfo.FLAG_CLEAR_TASK_ON_LAUNCH) != 0);
if (DEBUG_TASKS) Slog.v(TAG, "Starting new activity " + r
+ " in new task " + r.task);
newTask = true;
if (mMainStack) {
mService.addRecentTaskLocked(r.task);
}
} else if (sourceRecord != null) {
if (!addingToTask &&
(launchFlags&Intent.FLAG_ACTIVITY_CLEAR_TOP) != 0) {
......
} else if (!addingToTask &&
(launchFlags&Intent.FLAG_ACTIVITY_REORDER_TO_FRONT) != 0) {
......
}
// An existing activity is starting this new activity, so we want
// to keep the new one in the same task as the one that is starting
// it.
r.task = sourceRecord.task;
......
} else {
......
}
......
startActivityLocked(r, newTask, doResume);
return START_SUCCESS;
}
......
}
~~~
首先是獲得用來啟動Activity的Intent的Flags,并且保存在launchFlags變量中,這里,launcFlags的Intent.FLAG_ACTIVITY_PREVIOUS_IS_TOP位沒有置位,因此,notTop為null。
接下來的這個if語句:
~~~
if (sourceRecord == null) {
......
} else if (sourceRecord.launchMode == ActivityInfo.LAUNCH_SINGLE_INSTANCE) {
......
} else if (r.launchMode == ActivityInfo.LAUNCH_SINGLE_INSTANCE
|| r.launchMode == ActivityInfo.LAUNCH_SINGLE_TASK) {
// The activity being started is a single instance... it always
// gets launched into its own task.
launchFlags |= Intent.FLAG_ACTIVITY_NEW_TASK;
}
~~~
這里變量r的類型為ActivityRecord,它表示即將在啟動的Activity,在這個例子中,即為SubActivity,因此,這里的r.launchMode等于ActivityInfo.LAUNCH_SINGLE_TASK,于是,無條件將launchFlags的Intent.FLAG_ACTIVITY_PREVIOUS_IS_TOP位置為1,表示這個SubActivity要在新的任務中啟動,但是別急,還要看看其它條件是否滿足,如果條件都滿足,才可以在新的任務中啟動這個SubActivity。
接下將addingToTask變量初始化為false,這個變量也將決定是否要將SubActivity在新的任務中啟動,從名字我們就可以看出,默認不增加到原有的任務中啟動,即要在新的任務中啟動。這里的r.launchMode == ActivityInfo.LAUNCH_SINGLE_TASK條成立,條件r.resultTo == null也成立,它表這個Activity不需要將結果返回給啟動它的Activity。于是會進入接下來的if語句中,執行:
~~~
ActivityRecord taskTop = r.launchMode != ActivityInfo.LAUNCH_SINGLE_INSTANCE
? findTaskLocked(intent, r.info)
: findActivityLocked(intent, r.info)
~~~
這里的條件r.launchMode != ActivityInfo.LAUNCH_SINGLE_INSTANCE成立,于是執行findTaskLocked函數,這個函數也是定義在frameworks/base/services/java/com/android/server/am/ActivityStack.java文件中:
~~~
public class ActivityStack {
......
/**
* Returns the top activity in any existing task matching the given
* Intent. Returns null if no such task is found.
*/
private ActivityRecord findTaskLocked(Intent intent, ActivityInfo info) {
ComponentName cls = intent.getComponent();
if (info.targetActivity != null) {
cls = new ComponentName(info.packageName, info.targetActivity);
}
TaskRecord cp = null;
final int N = mHistory.size();
for (int i=(N-1); i>=0; i--) {
ActivityRecord r = (ActivityRecord)mHistory.get(i);
if (!r.finishing && r.task != cp
&& r.launchMode != ActivityInfo.LAUNCH_SINGLE_INSTANCE) {
cp = r.task;
//Slog.i(TAG, "Comparing existing cls=" + r.task.intent.getComponent().flattenToShortString()
// + "/aff=" + r.task.affinity + " to new cls="
// + intent.getComponent().flattenToShortString() + "/aff=" + taskAffinity);
if (r.task.affinity != null) {
if (r.task.affinity.equals(info.taskAffinity)) {
//Slog.i(TAG, "Found matching affinity!");
return r;
}
} else if (r.task.intent != null
&& r.task.intent.getComponent().equals(cls)) {
//Slog.i(TAG, "Found matching class!");
//dump();
//Slog.i(TAG, "For Intent " + intent + " bringing to top: " + r.intent);
return r;
} else if (r.task.affinityIntent != null
&& r.task.affinityIntent.getComponent().equals(cls)) {
//Slog.i(TAG, "Found matching class!");
//dump();
//Slog.i(TAG, "For Intent " + intent + " bringing to top: " + r.intent);
return r;
}
}
}
return null;
}
......
}
~~~
這個函數無非就是根據即將要啟動的SubActivity的taskAffinity屬性值在系統中查找這樣的一個Task:Task的affinity屬性值與即將要啟動的Activity的taskAffinity屬性值一致。如果存在,就返回這個Task堆棧頂端的Activity回去。在上面的AndroidManifest.xml文件中,沒有配置MainActivity和SubActivity的taskAffinity屬性,于是它們的taskAffinity屬性值就默認為父標簽application的taskAffinity屬性值,這里,標簽application的taskAffinity也沒有配置,于是它們就默認為包名,即"shy.luo.task"。由于在啟動SubActivity之前,MainActivity已經啟動,MainActivity啟動的時候,會在一個新的任務里面啟動,而這個新的任務的affinity屬性就等于它的第一個Activity的taskAffinity屬性值。于是,這個函數會動回表示MainActivity的ActivityRecord回去.
回到前面的startActivityUncheckedLocked函數中,這里的taskTop就表示MainActivity,它不為null,于是繼續往前執行。由于條件r.launchMode == ActivityInfo.LAUNCH_SINGLE_TASK成立,于是執行下面語句:
~~~
ActivityRecord top = performClearTaskLocked(
kTop.task.taskId, r, launchFlags, true);
~~~
函數performClearTaskLocked也是定義在frameworks/base/services/java/com/android/server/am/ActivityStack.java文件中:
~~~
public class ActivityStack {
......
/**
* Perform clear operation as requested by
* {@link Intent#FLAG_ACTIVITY_CLEAR_TOP}: search from the top of the
* stack to the given task, then look for
* an instance of that activity in the stack and, if found, finish all
* activities on top of it and return the instance.
*
* @param newR Description of the new activity being started.
* @return Returns the old activity that should be continue to be used,
* or null if none was found.
*/
private final ActivityRecord performClearTaskLocked(int taskId,
ActivityRecord newR, int launchFlags, boolean doClear) {
int i = mHistory.size();
// First find the requested task.
while (i > 0) {
i--;
ActivityRecord r = (ActivityRecord)mHistory.get(i);
if (r.task.taskId == taskId) {
i++;
break;
}
}
// Now clear it.
while (i > 0) {
i--;
ActivityRecord r = (ActivityRecord)mHistory.get(i);
if (r.finishing) {
continue;
}
if (r.task.taskId != taskId) {
return null;
}
if (r.realActivity.equals(newR.realActivity)) {
// Here it is! Now finish everything in front...
ActivityRecord ret = r;
if (doClear) {
while (i < (mHistory.size()-1)) {
i++;
r = (ActivityRecord)mHistory.get(i);
if (r.finishing) {
continue;
}
if (finishActivityLocked(r, i, Activity.RESULT_CANCELED,
null, "clear")) {
i--;
}
}
}
// Finally, if this is a normal launch mode (that is, not
// expecting onNewIntent()), then we will finish the current
// instance of the activity so a new fresh one can be started.
if (ret.launchMode == ActivityInfo.LAUNCH_MULTIPLE
&& (launchFlags&Intent.FLAG_ACTIVITY_SINGLE_TOP) == 0) {
if (!ret.finishing) {
int index = indexOfTokenLocked(ret);
if (index >= 0) {
finishActivityLocked(ret, index, Activity.RESULT_CANCELED,
null, "clear");
}
return null;
}
}
return ret;
}
}
return null;
}
......
}
~~~
這個函數中作用無非就是找到ID等于參數taskId的任務,然后在這個任務中查找是否已經存在即將要啟動的Activity的實例,如果存在,就會把這個Actvity實例上面直到任務堆棧頂端的Activity通過調用finishActivityLocked函數將它們結束掉。在這個例子中,就是要在屬性值affinity等于"shy.luo.task"的任務中看看是否存在SubActivity類型的實例,如果有,就把它上面的Activity都結束掉。這里,屬性值affinity等于"shy.luo.task"的任務只有一個MainActivity,而且它不是SubActivity的實例,所以這個函數就返回null了。
回到前面的startActivityUncheckedLocked函數中,這里的變量top就為null了,于是執行下面的else語句:
~~~
if (top != null) {
......
} else {
// A special case: we need to
// start the activity because it is not currently
// running, and the caller has asked to clear the
// current task to have this activity at the top.
addingToTask = true;
// Now pretend like this activity is being started
// by the top of its task, so it is put in the
// right place.
sourceRecord = taskTop;
}
~~~
于是,變量addingToTask值就為true了,同時將變量sourceRecord的值設置為taskTop,即前面調用findTaskLocked函數的返回值,這里,它就是表示MainActivity了。
繼續往下看,下面這個if語句:
~~~
if (r.packageName != null) {
// If the activity being launched is the same as the one currently
// at the top, then we need to check if it should only be launched
// once.
ActivityRecord top = topRunningNonDelayedActivityLocked(notTop);
if (top != null && r.resultTo == null) {
if (top.realActivity.equals(r.realActivity)) {
if (top.app != null && top.app.thread != null) {
......
}
}
}
} else {
......
}
~~~
它是例行性地檢查當前任務頂端的Activity,是否是即將啟動的Activity的實例,如果是否的話,在某些情況下,它什么也不做,就結束這個函數調用了。這里,當前任務頂端的Activity為MainActivity,它不是SubActivity實例,于是繼續往下執行:
~~~
boolean newTask = false;
// Should this be considered a new task?
if (r.resultTo == null && !addingToTask
&& (launchFlags&Intent.FLAG_ACTIVITY_NEW_TASK) != 0) {
......
} else if (sourceRecord != null) {
if (!addingToTask &&
(launchFlags&Intent.FLAG_ACTIVITY_CLEAR_TOP) != 0) {
......
} else if (!addingToTask &&
(launchFlags&Intent.FLAG_ACTIVITY_REORDER_TO_FRONT) != 0) {
......
}
// An existing activity is starting this new activity, so we want
// to keep the new one in the same task as the one that is starting
// it.
r.task = sourceRecord.task;
......
} else {
......
}
~~~
這里首先將newTask變量初始化為false,表示不要在新的任務中啟動這個SubActivity。由于前面的已經把addingToTask設置為true,因此,這里會執行中間的else if語句,即這里會把r.task設置為sourceRecord.task,即把SubActivity放在MainActivity所在的任務中啟動。
最后,就是調用startActivityLocked函數繼續進行啟動Activity的操作了。后面的操作這里就不跟下去了,有興趣的讀者可以參考兩篇文章Android應用程序啟動過程源代碼分析和Android應用程序內部啟動Activity過程(startActivity)的源代碼分析。
到這里,思路就理清了,雖然SubActivity的launchMode被設置為"singleTask"模式,但是它并不像官方文檔描述的一樣:The system creates a new task and instantiates the activity at the root of the new task,而是在跟它有相同taskAffinity的任務中啟動,并且位于這個任務的堆棧頂端,于是,前面那個圖中,就會出現一個帶著"singleTask"標簽的箭頭指向一個任務堆棧頂端的Activity Y了。
那么,我們有沒有辦法讓一個"singleTask"的Activity在新的任務中啟動呢?答案是肯定的。從上面的代碼分析中,只要我們能夠進入函數startActivityUncheckedLocked的這個if語句中:
~~~
if (r.resultTo == null && !addingToTask
&& (launchFlags&Intent.FLAG_ACTIVITY_NEW_TASK) != 0) {
// todo: should do better management of integers.
mService.mCurTask++;
if (mService.mCurTask <= 0) {
mService.mCurTask = 1;
}
r.task = new TaskRecord(mService.mCurTask, r.info, intent,
(r.info.flags&ActivityInfo.FLAG_CLEAR_TASK_ON_LAUNCH) != 0);
if (DEBUG_TASKS) Slog.v(TAG, "Starting new activity " + r
+ " in new task " + r.task);
newTask = true;
if (mMainStack) {
mService.addRecentTaskLocked(r.task);
}
}
~~~
那么,這個即將要啟動的Activity就會在新的任務中啟動了。進入這個if語句需要滿足三個條件,r.resultTo為null,launchFlags的Intent.FLAG_ACTIVITY_NEW_TASK位為1,并且addingToTask值為false。從上面的分析中可以看到,當即將要啟動的Activity的launchMode為"singleTask",并且調用startActivity時不要求返回要啟動的Activity的執行結果時,前面兩個條件可以滿足,要滿足第三個條件,只要當前系統不存在affinity屬性值等于即將要啟動的Activity的taskAffinity屬性值的任務就可以了。
我們可以稍微修改一下上面的AndroidManifest.xml配置文件來做一下這個實驗:
~~~
<?xml version="1.0" encoding="utf-8"?>
<manifest xmlns:android="http://schemas.android.com/apk/res/android"
package="shy.luo.task"
android:versionCode="1"
android:versionName="1.0">
<application android:icon="@drawable/icon" android:label="@string/app_name">
<activity android:name=".MainActivity"
android:label="@string/app_name"
android:taskAffinity="shy.luo.task.main.activity">
<intent-filter>
<action android:name="android.intent.action.MAIN" />
<category android:name="android.intent.category.LAUNCHER" />
</intent-filter>
</activity>
<activity android:name=".SubActivity"
android:label="@string/sub_activity"
android:launchMode="singleTask"
android:taskAffinity="shy.luo.task.sub.activity">
<intent-filter>
<action android:name="shy.luo.task.subactivity"/>
<category android:name="android.intent.category.DEFAULT"/>
</intent-filter>
</activity>
</application>
</manifest>
~~~
注意,這里我們設置MainActivity的taskAffinity屬性值為"shy.luo.task.main.activity",設置SubActivity的taskAffinity屬性值為"shy.luo.task.sub.activity"。重新編譯一下程序,在模擬器上把這個應用程序再次跑起來,用“adb shell dumpsys activity”命令再來查看一下系統運行的的任務,就會看到:
~~~
Running activities (most recent first):
TaskRecord{4069c020 #4 A shy.luo.task.sub.activity}
Run #2: HistoryRecord{40725040 shy.luo.task/.SubActivity}
TaskRecord{40695220 #3 A shy.luo.task.main.activity}
Run #1: HistoryRecord{406b26b8 shy.luo.task/.MainActivity}
TaskRecord{40599c90 #2 A com.android.launcher}
Run #0: HistoryRecord{40646628 com.android.launcher/com.android.launcher2.Launcher}
~~~
這里就可以看到,SubActivity和MainActivity就分別運行在不同的任務中了。
至此,我們總結一下,設置了"singleTask"啟動模式的Activity的特點:
1. 設置了"singleTask"啟動模式的Activity,它在啟動的時候,會先在系統中查找屬性值affinity等于它的屬性值taskAffinity的任務存在;如果存在這樣的任務,它就會在這個任務中啟動,否則就會在新任務中啟動。因此,如果我們想要設置了"singleTask"啟動模式的Activity在新的任務中啟動,就要為它設置一個獨立的taskAffinity屬性值。
2. 如果設置了"singleTask"啟動模式的Activity不是在新的任務中啟動時,它會在已有的任務中查看是否已經存在相應的Activity實例,如果存在,就會把位于這個Activity實例上面的Activity全部結束掉,即最終這個Activity實例會位于任務的堆棧頂端中。
看來,要解開Activity的"singleTask"之謎,還是要自力更生啊,不過,如果我們仔細閱讀官方文檔,在http://developer.android.com/guide/topics/manifest/activity-element.html 中,有這樣的描述:
As shown in the table above, standard is the default mode and is appropriate for most types of activities. SingleTop is also a common and useful launch mode for many types of activities. The other modes — singleTask and singleInstance —are not appropriate for most applications, since they result in an interaction model that is likely to be unfamiliar to users and is very different from most other applications.
Regardless of the launch mode that you choose, make sure to test the usability of the activity during launch and when navigating back to it from other activities and tasks using the BACK key.
這樣看,官方文檔也沒有坑我們呢,它告誡我們:make sure to test the usability of the activity during launch。
- 前言
- Android組件設計思想
- Android源代碼開發和調試環境搭建
- Android源代碼下載和編譯
- Android源代碼情景分析法
- Android源代碼調試分析法
- 手把手教你為手機編譯ROM
- 在Ubuntu上下載、編譯和安裝Android最新源代碼
- 在Ubuntu上下載、編譯和安裝Android最新內核源代碼(Linux Kernel)
- 如何單獨編譯Android源代碼中的模塊
- 在Ubuntu上為Android系統編寫Linux內核驅動程序
- 在Ubuntu上為Android系統內置C可執行程序測試Linux內核驅動程序
- 在Ubuntu上為Android增加硬件抽象層(HAL)模塊訪問Linux內核驅動程序
- 在Ubuntu為Android硬件抽象層(HAL)模塊編寫JNI方法提供Java訪問硬件服務接口
- 在Ubuntu上為Android系統的Application Frameworks層增加硬件訪問服務
- 在Ubuntu上為Android系統內置Java應用程序測試Application Frameworks層的硬件服務
- Android源代碼倉庫及其管理工具Repo分析
- Android編譯系統簡要介紹和學習計劃
- Android編譯系統環境初始化過程分析
- Android源代碼編譯命令m/mm/mmm/make分析
- Android系統鏡像文件的打包過程分析
- 從CM刷機過程和原理分析Android系統結構
- Android系統架構概述
- Android系統整體架構
- android專用驅動
- Android硬件抽象層HAL
- Android應用程序組件
- Android應用程序框架
- Android用戶界面架構
- Android虛擬機之Dalvik虛擬機
- Android硬件抽象層
- Android硬件抽象層(HAL)概要介紹和學習計劃
- Android專用驅動
- Android Logger驅動系統
- Android日志系統驅動程序Logger源代碼分析
- Android應用程序框架層和系統運行庫層日志系統源代碼分析
- Android日志系統Logcat源代碼簡要分析
- Android Binder驅動系統
- Android進程間通信(IPC)機制Binder簡要介紹和學習計劃
- 淺談Service Manager成為Android進程間通信(IPC)機制Binder守護進程之路
- 淺談Android系統進程間通信(IPC)機制Binder中的Server和Client獲得Service Manager接口之路
- Android系統進程間通信(IPC)機制Binder中的Server啟動過程源代碼分析
- Android系統進程間通信(IPC)機制Binder中的Client獲得Server遠程接口過程源代碼分析
- Android系統進程間通信Binder機制在應用程序框架層的Java接口源代碼分析
- Android Ashmem驅動系統
- Android系統匿名共享內存Ashmem(Anonymous Shared Memory)簡要介紹和學習計劃
- Android系統匿名共享內存Ashmem(Anonymous Shared Memory)驅動程序源代碼分析
- Android系統匿名共享內存Ashmem(Anonymous Shared Memory)在進程間共享的原理分析
- Android系統匿名共享內存(Anonymous Shared Memory)C++調用接口分析
- Android應用程序進程管理
- Android應用程序進程啟動過程的源代碼分析
- Android系統進程Zygote啟動過程的源代碼分析
- Android系統默認Home應用程序(Launcher)的啟動過程源代碼分析
- Android應用程序消息機制
- Android應用程序消息處理機制(Looper、Handler)分析
- Android應用程序線程消息循環模型分析
- Android應用程序輸入事件分發和處理機制
- Android應用程序鍵盤(Keyboard)消息處理機制分析
- Android應用程序UI架構
- Android系統的開機畫面顯示過程分析
- Android幀緩沖區(Frame Buffer)硬件抽象層(HAL)模塊Gralloc的實現原理分析
- SurfaceFlinger
- Android系統Surface機制的SurfaceFlinger服務
- SurfaceFlinger服務簡要介紹和學習計劃
- 啟動過程分析
- 對幀緩沖區(Frame Buffer)的管理分析
- 線程模型分析
- 渲染應用程序UI的過程分析
- Android應用程序與SurfaceFlinger服務的關系
- 概述和學習計劃
- 連接過程分析
- 共享UI元數據(SharedClient)的創建過程分析
- 創建Surface的過程分析
- 渲染Surface的過程分析
- Android應用程序窗口(Activity)
- 實現框架簡要介紹和學習計劃
- 運行上下文環境(Context)的創建過程分析
- 窗口對象(Window)的創建過程分析
- 視圖對象(View)的創建過程分析
- 與WindowManagerService服務的連接過程分析
- 繪圖表面(Surface)的創建過程分析
- 測量(Measure)、布局(Layout)和繪制(Draw)過程分析
- WindowManagerService
- WindowManagerService的簡要介紹和學習計劃
- 計算Activity窗口大小的過程分析
- 對窗口的組織方式分析
- 對輸入法窗口(Input Method Window)的管理分析
- 對壁紙窗口(Wallpaper Window)的管理分析
- 計算窗口Z軸位置的過程分析
- 顯示Activity組件的啟動窗口(Starting Window)的過程分析
- 切換Activity窗口(App Transition)的過程分析
- 顯示窗口動畫的原理分析
- Android控件TextView的實現原理分析
- Android視圖SurfaceView的實現原理分析
- Android應用程序UI硬件加速渲染
- 簡要介紹和學習計劃
- 環境初始化過程分析
- 預加載資源地圖集服務(Asset Atlas Service)分析
- Display List構建過程分析
- Display List渲染過程分析
- 動畫執行過程分析
- Android應用程序資源管理框架
- Android資源管理框架(Asset Manager)
- Asset Manager 簡要介紹和學習計劃
- 編譯和打包過程分析
- Asset Manager的創建過程分析
- 查找過程分析
- Dalvik虛擬機和ART虛擬機
- Dalvik虛擬機
- Dalvik虛擬機簡要介紹和學習計劃
- Dalvik虛擬機的啟動過程分析
- Dalvik虛擬機的運行過程分析
- Dalvik虛擬機JNI方法的注冊過程分析
- Dalvik虛擬機進程和線程的創建過程分析
- Dalvik虛擬機垃圾收集機制簡要介紹和學習計劃
- Dalvik虛擬機Java堆創建過程分析
- Dalvik虛擬機為新創建對象分配內存的過程分析
- Dalvik虛擬機垃圾收集(GC)過程分析
- ART虛擬機
- Android ART運行時無縫替換Dalvik虛擬機的過程分析
- Android運行時ART簡要介紹和學習計劃
- Android運行時ART加載OAT文件的過程分析
- Android運行時ART加載類和方法的過程分析
- Android運行時ART執行類方法的過程分析
- ART運行時垃圾收集機制簡要介紹和學習計劃
- ART運行時Java堆創建過程分析
- ART運行時為新創建對象分配內存的過程分析
- ART運行時垃圾收集(GC)過程分析
- ART運行時Compacting GC簡要介紹和學習計劃
- ART運行時Compacting GC堆創建過程分析
- ART運行時Compacting GC為新創建對象分配內存的過程分析
- ART運行時Semi-Space(SS)和Generational Semi-Space(GSS)GC執行過程分析
- ART運行時Mark-Compact( MC)GC執行過程分析
- ART運行時Foreground GC和Background GC切換過程分析
- Android安全機制
- SEAndroid安全機制簡要介紹和學習計劃
- SEAndroid安全機制框架分析
- SEAndroid安全機制中的文件安全上下文關聯分析
- SEAndroid安全機制中的進程安全上下文關聯分析
- SEAndroid安全機制對Android屬性訪問的保護分析
- SEAndroid安全機制對Binder IPC的保護分析
- 從NDK在非Root手機上的調試原理探討Android的安全機制
- APK防反編譯
- Android視頻硬解穩定性問題探討和處理
- Android系統的智能指針(輕量級指針、強指針和弱指針)的實現原理分析
- Android應用程序安裝過程源代碼分析
- Android應用程序啟動過程源代碼分析
- 四大組件源代碼分析
- Activity
- Android應用程序的Activity啟動過程簡要介紹和學習計劃
- Android應用程序內部啟動Activity過程(startActivity)的源代碼分析
- 解開Android應用程序組件Activity的"singleTask"之謎
- Android應用程序在新的進程中啟動新的Activity的方法和過程分析
- Service
- Android應用程序綁定服務(bindService)的過程源代碼分析
- ContentProvider
- Android應用程序組件Content Provider簡要介紹和學習計劃
- Android應用程序組件Content Provider應用實例
- Android應用程序組件Content Provider的啟動過程源代碼分析
- Android應用程序組件Content Provider在應用程序之間共享數據的原理分析
- Android應用程序組件Content Provider的共享數據更新通知機制分析
- BroadcastReceiver
- Android系統中的廣播(Broadcast)機制簡要介紹和學習計劃
- Android應用程序注冊廣播接收器(registerReceiver)的過程分析
- Android應用程序發送廣播(sendBroadcast)的過程分析