[TOC]
成為一名優秀的Android開發,需要一份完備的[知識體系](https://github.com/JsonChao/Awesome-Android-Exercise),在這里,讓我們一起成長為自己所想的那樣。
[更好的閱讀體驗請跳轉至個人博客](https://jsonchao.github.io/2018/12/01/Android%E4%B8%BB%E6%B5%81%E4%B8%89%E6%96%B9%E5%BA%93%E6%BA%90%E7%A0%81%E5%88%86%E6%9E%90%EF%BC%88%E4%B8%80%E3%80%81%E6%B7%B1%E5%85%A5%E7%90%86%E8%A7%A3OKHttp%E6%BA%90%E7%A0%81%EF%BC%89/)
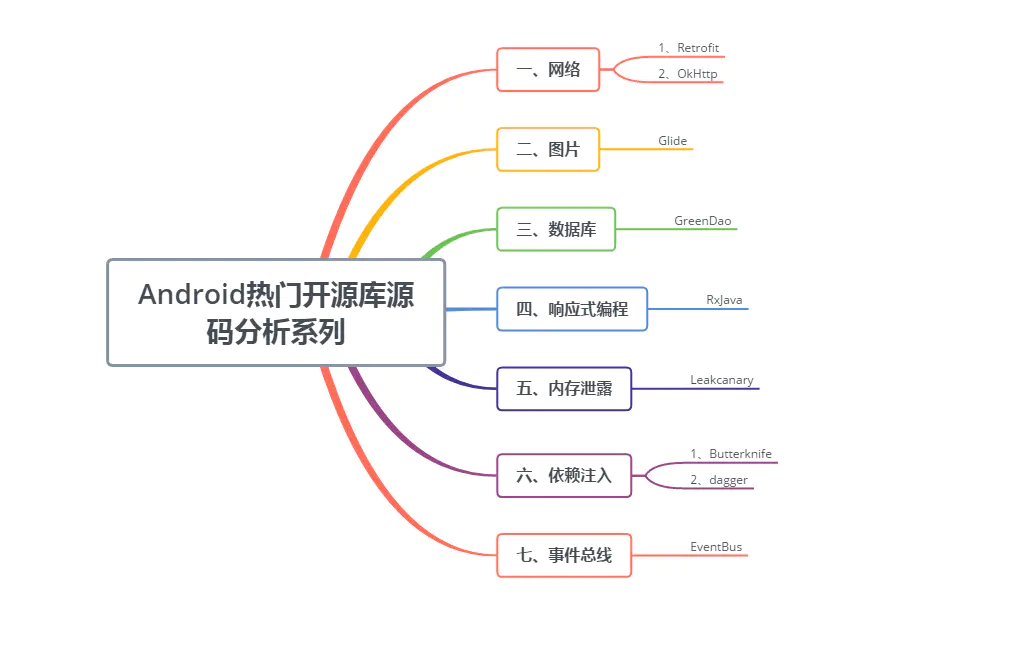
前兩篇我們詳細分析了View的核心源碼—[Android的觸摸事件傳遞機制](https://jsonchao.github.io/2018/10/17/Android%E8%A7%A6%E6%91%B8%E4%BA%8B%E4%BB%B6%E4%BC%A0%E9%80%92%E6%9C%BA%E5%88%B6/)和[Android View的繪制流程](https://jsonchao.github.io/2018/10/28/Android%20View%E7%9A%84%E7%BB%98%E5%88%B6%E6%B5%81%E7%A8%8B/),從這篇開始,筆者接下來將會陪大家深入分析目前Android中大部分的主流開源框架源碼,從而能夠讓我們真正地去理解這些優秀開源框架背后的思想,真真切切地提升自己的內功。目前,這一系列的分析順序如下:
~~~
主流三方庫:
網絡:1、OKHttp 2、Retrofit
圖片:3、Glide
數據庫:4、GreenDao
響應式編程:5、RxJava
內存泄露:6、LeakCanary
依賴注入:7、ButterKnife 8、Dagger2
事件總線:9、EventBus
~~~
總結成思維導圖,就是這樣的:
這一篇將會對Android的三方網絡庫OKHttp源碼進行深入的分析,在閱讀過OKHttp源碼和大量其它優秀的OKHttp源碼分析文章后,我發現只要搞懂以下這三塊,就能**證明你對OKHttp有了一個深入的了解**。
* OKHttp請求流程
* 網絡請求緩存處理
* 連接池
首先,補充一點網絡知識:
一些常用的狀態碼
* 100~199:指示信息,表示請求已接收,繼續處理
* 200~299:請求成功,表示請求已被成功接收、理解
* 300~399:重定向,要完成請求必須進行更進一步的操作
* 400~499:客戶端錯誤,請求有語法錯誤或請求無法實現
* 500~599:服務器端錯誤,服務器未能實現合法的請求
### 一、OKHttp請求流程
OKHttp內部的大致請求流程圖如下所示:

如下為使用OKHttp進行Get請求的步驟:
~~~
//1.新建OKHttpClient客戶端
OkHttpClient client = new OkHttpClient();
//新建一個Request對象
Request request = new Request.Builder()
.url(url)
.build();
//2.Response為OKHttp中的響應
Response response = client.newCall(request).execute();
~~~
#### 1.新建OKHttpClient客戶端
~~~
OkHttpClient client = new OkHttpClient();
public OkHttpClient() {
this(new Builder());
}
OkHttpClient(Builder builder) {
....
}
~~~
可以看到,OkHttpClient使用了建造者模式,Builder里面的可配置參數如下:
~~~
public static final class Builder {
Dispatcher dispatcher;// 分發器
@Nullable Proxy proxy;
List<Protocol> protocols;
List<ConnectionSpec> connectionSpecs;// 傳輸層版本和連接協議
final List<Interceptor> interceptors = new ArrayList<>();// 攔截器
final List<Interceptor> networkInterceptors = new ArrayList<>();
EventListener.Factory eventListenerFactory;
ProxySelector proxySelector;
CookieJar cookieJar;
@Nullable Cache cache;
@Nullable InternalCache internalCache;// 內部緩存
SocketFactory socketFactory;
@Nullable SSLSocketFactory sslSocketFactory;// 安全套接層socket 工廠,用于HTTPS
@Nullable CertificateChainCleaner certificateChainCleaner;// 驗證確認響應證書 適用 HTTPS 請求連接的主機名。
HostnameVerifier hostnameVerifier;// 驗證確認響應證書 適用 HTTPS 請求連接的主機名。
CertificatePinner certificatePinner;// 證書鎖定,使用CertificatePinner來約束哪些認證機構被信任。
Authenticator proxyAuthenticator;// 代理身份驗證
Authenticator authenticator;// 身份驗證
ConnectionPool connectionPool;// 連接池
Dns dns;
boolean followSslRedirects; // 安全套接層重定向
boolean followRedirects;// 本地重定向
boolean retryOnConnectionFailure;// 重試連接失敗
int callTimeout;
int connectTimeout;
int readTimeout;
int writeTimeout;
int pingInterval;
// 這里是默認配置的構建參數
public Builder() {
dispatcher = new Dispatcher();
protocols = DEFAULT_PROTOCOLS;
connectionSpecs = DEFAULT_CONNECTION_SPECS;
...
}
// 這里傳入自己配置的構建參數
Builder(OkHttpClient okHttpClient) {
this.dispatcher = okHttpClient.dispatcher;
this.proxy = okHttpClient.proxy;
this.protocols = okHttpClient.protocols;
this.connectionSpecs = okHttpClient.connectionSpecs;
this.interceptors.addAll(okHttpClient.interceptors);
this.networkInterceptors.addAll(okHttpClient.networkInterceptors);
...
}
~~~
#### 2.同步請求流程
~~~
Response response = client.newCall(request).execute();
/**
* Prepares the {@code request} to be executed at some point in the future.
*/
@Override public Call newCall(Request request) {
return RealCall.newRealCall(this, request, false /* for web socket */);
}
// RealCall為真正的請求執行者
static RealCall newRealCall(OkHttpClient client, Request originalRequest, boolean forWebSocket) {
// Safely publish the Call instance to the EventListener.
RealCall call = new RealCall(client, originalRequest, forWebSocket);
call.eventListener = client.eventListenerFactory().create(call);
return call;
}
@Override public Response execute() throws IOException {
synchronized (this) {
// 每個Call只能執行一次
if (executed) throw new IllegalStateException("Already Executed");
executed = true;
}
captureCallStackTrace();
timeout.enter();
eventListener.callStart(this);
try {
// 通知dispatcher已經進入執行狀態
client.dispatcher().executed(this);
// 通過一系列的攔截器請求處理和響應處理得到最終的返回結果
Response result = getResponseWithInterceptorChain();
if (result == null) throw new IOException("Canceled");
return result;
} catch (IOException e) {
e = timeoutExit(e);
eventListener.callFailed(this, e);
throw e;
} finally {
// 通知 dispatcher 自己已經執行完畢
client.dispatcher().finished(this);
}
}
Response getResponseWithInterceptorChain() throws IOException {
// Build a full stack of interceptors.
List<Interceptor> interceptors = new ArrayList<>();
// 在配置 OkHttpClient 時設置的 interceptors;
interceptors.addAll(client.interceptors());
// 負責失敗重試以及重定向
interceptors.add(retryAndFollowUpInterceptor);
// 請求時,對必要的Header進行一些添加,接收響應時,移除必要的Header
interceptors.add(new BridgeInterceptor(client.cookieJar()));
// 負責讀取緩存直接返回、更新緩存
interceptors.add(new CacheInterceptor(client.internalCache()));
// 負責和服務器建立連接
interceptors.add(new ConnectInterceptor(client));
if (!forWebSocket) {
// 配置 OkHttpClient 時設置的 networkInterceptors
interceptors.addAll(client.networkInterceptors());
}
// 負責向服務器發送請求數據、從服務器讀取響應數據
interceptors.add(new CallServerInterceptor(forWebSocket));
Interceptor.Chain chain = new RealInterceptorChain(interceptors, null, null, null, 0,
originalRequest, this, eventListener, client.connectTimeoutMillis(),
client.readTimeoutMillis(), client.writeTimeoutMillis());
// 使用責任鏈模式開啟鏈式調用
return chain.proceed(originalRequest);
}
// StreamAllocation 對象,它相當于一個管理類,維護了服務器連接、并發流
// 和請求之間的關系,該類還會初始化一個 Socket 連接對象,獲取輸入/輸出流對象。
public Response proceed(Request request, StreamAllocation streamAllocation, HttpCodec httpCodec,
RealConnection connection) throws IOException {
...
// Call the next interceptor in the chain.
// 實例化下一個攔截器對應的RealIterceptorChain對象
RealInterceptorChain next = new RealInterceptorChain(interceptors, streamAllocation, httpCodec,
connection, index + 1, request, call, eventListener, connectTimeout, readTimeout,
writeTimeout);
// 得到當前的攔截器
Interceptor interceptor = interceptors.get(index);
// 調用當前攔截器的intercept()方法,并將下一個攔截器的RealIterceptorChain對象傳遞下去,最后得到響應
Response response = interceptor.intercept(next);
...
return response;
}
~~~
#### 3.異步請求的流程
~~~
Request request = new Request.Builder()
.url("http://publicobject.com/helloworld.txt")
.build();
client.newCall(request).enqueue(new Callback() {
@Override
public void onFailure(Call call, IOException e) {
e.printStackTrace();
}
@Override
public void onResponse(Call call, Response response) throws IOException {
...
}
void enqueue(AsyncCall call) {
synchronized (this) {
readyAsyncCalls.add(call);
}
promoteAndExecute();
}
// 正在準備中的異步請求隊列
private final Deque<AsyncCall> readyAsyncCalls = new ArrayDeque<>();
// 運行中的異步請求
private final Deque<AsyncCall> runningAsyncCalls = new ArrayDeque<>();
// 同步請求
private final Deque<RealCall> runningSyncCalls = new ArrayDeque<>();
// Promotes eligible calls from {@link #readyAsyncCalls} to {@link #runningAsyncCalls} and runs
// them on the executor service. Must not be called with synchronization because executing calls
// can call into user code.
private boolean promoteAndExecute() {
assert (!Thread.holdsLock(this));
List<AsyncCall> executableCalls = new ArrayList<>();
boolean isRunning;
synchronized (this) {
for (Iterator<AsyncCall> i = readyAsyncCalls.iterator(); i.hasNext(); ) {
AsyncCall asyncCall = i.next();
// 如果其中的runningAsynCalls不滿,且call占用的host小于最大數量,則將call加入到runningAsyncCalls中執行,
// 同時利用線程池執行call;否者將call加入到readyAsyncCalls中。
if (runningAsyncCalls.size() >= maxRequests) break; // Max capacity.
if (runningCallsForHost(asyncCall) >= maxRequestsPerHost) continue; // Host max capacity.
i.remove();
executableCalls.add(asyncCall);
runningAsyncCalls.add(asyncCall);
}
isRunning = runningCallsCount() > 0;
}
for (int i = 0, size = executableCalls.size(); i < size; i++) {
AsyncCall asyncCall = executableCalls.get(i);
asyncCall.executeOn(executorService());
}
return isRunning;
}
~~~
最后,我們在看看AsynCall的代碼。
~~~
final class AsyncCall extends NamedRunnable {
private final Callback responseCallback;
AsyncCall(Callback responseCallback) {
super("OkHttp %s", redactedUrl());
this.responseCallback = responseCallback;
}
String host() {
return originalRequest.url().host();
}
Request request() {
return originalRequest;
}
RealCall get() {
return RealCall.this;
}
/**
* Attempt to enqueue this async call on {@code executorService}. This will attempt to clean up
* if the executor has been shut down by reporting the call as failed.
*/
void executeOn(ExecutorService executorService) {
assert (!Thread.holdsLock(client.dispatcher()));
boolean success = false;
try {
executorService.execute(this);
success = true;
} catch (RejectedExecutionException e) {
InterruptedIOException ioException = new InterruptedIOException("executor rejected");
ioException.initCause(e);
eventListener.callFailed(RealCall.this, ioException);
responseCallback.onFailure(RealCall.this, ioException);
} finally {
if (!success) {
client.dispatcher().finished(this); // This call is no longer running!
}
}
}
@Override protected void execute() {
boolean signalledCallback = false;
timeout.enter();
try {
// 跟同步執行一樣,最后都會調用到這里
Response response = getResponseWithInterceptorChain();
if (retryAndFollowUpInterceptor.isCanceled()) {
signalledCallback = true;
responseCallback.onFailure(RealCall.this, new IOException("Canceled"));
} else {
signalledCallback = true;
responseCallback.onResponse(RealCall.this, response);
}
} catch (IOException e) {
e = timeoutExit(e);
if (signalledCallback) {
// Do not signal the callback twice!
Platform.get().log(INFO, "Callback failure for " + toLoggableString(), e);
} else {
eventListener.callFailed(RealCall.this, e);
responseCallback.onFailure(RealCall.this, e);
}
} finally {
client.dispatcher().finished(this);
}
}
}
~~~
從上面的源碼可以知道,攔截鏈的處理OKHttp幫我們默認做了五步攔截處理,其中RetryAndFollowUpInterceptor、BridgeInterceptor、CallServerInterceptor內部的源碼很簡潔易懂,此處不再多說,下面將對OKHttp最為核心的兩部分:緩存處理和連接處理(連接池)進行講解。
### 二、網絡請求緩存處理之CacheInterceptor
~~~
@Override public Response intercept(Chain chain) throws IOException {
// 根據request得到cache中緩存的response
Response cacheCandidate = cache != null
? cache.get(chain.request())
: null;
long now = System.currentTimeMillis();
// request判斷緩存的策略,是否要使用了網絡,緩存或兩者都使用
CacheStrategy strategy = new CacheStrategy.Factory(now, chain.request(), cacheCandidate).get();
Request networkRequest = strategy.networkRequest;
Response cacheResponse = strategy.cacheResponse;
if (cache != null) {
cache.trackResponse(strategy);
}
if (cacheCandidate != null && cacheResponse == null) {
closeQuietly(cacheCandidate.body()); // The cache candidate wasn't applicable. Close it.
}
// If we're forbidden from using the network and the cache is insufficient, fail.
if (networkRequest == null && cacheResponse == null) {
return new Response.Builder()
.request(chain.request())
.protocol(Protocol.HTTP_1_1)
.code(504)
.message("Unsatisfiable Request (only-if-cached)")
.body(Util.EMPTY_RESPONSE)
.sentRequestAtMillis(-1L)
.receivedResponseAtMillis(System.currentTimeMillis())
.build();
}
// If we don't need the network, we're done.
if (networkRequest == null) {
return cacheResponse.newBuilder()
.cacheResponse(stripBody(cacheResponse))
.build();
}
Response networkResponse = null;
try {
// 調用下一個攔截器,決定從網絡上來得到response
networkResponse = chain.proceed(networkRequest);
} finally {
// If we're crashing on I/O or otherwise, don't leak the cache body.
if (networkResponse == null && cacheCandidate != null) {
closeQuietly(cacheCandidate.body());
}
}
// If we have a cache response too, then we're doing a conditional get.
// 如果本地已經存在cacheResponse,那么讓它和網絡得到的networkResponse做比較,決定是否來更新緩存的cacheResponse
if (cacheResponse != null) {
if (networkResponse.code() == HTTP_NOT_MODIFIED) {
Response response = cacheResponse.newBuilder()
.headers(combine(cacheResponse.headers(), networkResponse.headers()))
.sentRequestAtMillis(networkResponse.sentRequestAtMillis())
.receivedResponseAtMillis(networkResponse.receivedResponseAtMillis())
.cacheResponse(stripBody(cacheResponse))
.networkResponse(stripBody(networkResponse))
.build();
networkResponse.body().close();
// Update the cache after combining headers but before stripping the
// Content-Encoding header (as performed by initContentStream()).
cache.trackConditionalCacheHit();
cache.update(cacheResponse, response);
return response;
} else {
closeQuietly(cacheResponse.body());
}
}
Response response = networkResponse.newBuilder()
.cacheResponse(stripBody(cacheResponse))
.networkResponse(stripBody(networkResponse))
.build();
if (cache != null) {
if (HttpHeaders.hasBody(response) && CacheStrategy.isCacheable(response, networkRequest)) {
// Offer this request to the cache.
// 緩存未經緩存過的response
CacheRequest cacheRequest = cache.put(response);
return cacheWritingResponse(cacheRequest, response);
}
if (HttpMethod.invalidatesCache(networkRequest.method())) {
try {
cache.remove(networkRequest);
} catch (IOException ignored) {
// The cache cannot be written.
}
}
}
return response;
}
~~~
緩存攔截器會根據請求的信息和緩存的響應的信息來判斷是否存在緩存可用,如果有可以使用的緩存,那么就返回該緩存給用戶,否則就繼續使用責任鏈模式來從服務器中獲取響應。當獲取到響應的時候,又會把響應緩存到磁盤上面。
### 三、ConnectInterceptor之連接池
~~~
@Override public Response intercept(Chain chain) throws IOException {
RealInterceptorChain realChain = (RealInterceptorChain) chain;
Request request = realChain.request();
StreamAllocation streamAllocation = realChain.streamAllocation();
// We need the network to satisfy this request. Possibly for validating a conditional GET.
boolean doExtensiveHealthChecks = !request.method().equals("GET");
// HttpCodec是對 HTTP 協議操作的抽象,有兩個實現:Http1Codec和Http2Codec,顧名思義,它們分別對應 HTTP/1.1 和 HTTP/2 版本的實現。在這個方法的內部實現連接池的復用處理
HttpCodec httpCodec = streamAllocation.newStream(client, chain, doExtensiveHealthChecks);
RealConnection connection = streamAllocation.connection();
return realChain.proceed(request, streamAllocation, httpCodec, connection);
}
// Returns a connection to host a new stream. This // prefers the existing connection if it exists,
// then the pool, finally building a new connection.
// 調用 streamAllocation 的 newStream() 方法的時候,最終會經過一系列
// 的判斷到達 StreamAllocation 中的 findConnection() 方法
private RealConnection findConnection(int connectTimeout, int readTimeout, int writeTimeout,
int pingIntervalMillis, boolean connectionRetryEnabled) throws IOException {
...
// Attempt to use an already-allocated connection. We need to be careful here because our
// already-allocated connection may have been restricted from creating new streams.
// 嘗試使用已分配的連接,已經分配的連接可能已經被限制創建新的流
releasedConnection = this.connection;
// 釋放當前連接的資源,如果該連接已經被限制創建新的流,就返回一個Socket以關閉連接
toClose = releaseIfNoNewStreams();
if (this.connection != null) {
// We had an already-allocated connection and it's good.
result = this.connection;
releasedConnection = null;
}
if (!reportedAcquired) {
// If the connection was never reported acquired, don't report it as released!
// 如果該連接從未被標記為獲得,不要標記為發布狀態,reportedAcquired 通過 acquire() 方法修改
releasedConnection = null;
}
if (result == null) {
// Attempt to get a connection from the pool.
// 嘗試供連接池中獲取一個連接
Internal.instance.get(connectionPool, address, this, null);
if (connection != null) {
foundPooledConnection = true;
result = connection;
} else {
selectedRoute = route;
}
}
}
// 關閉連接
closeQuietly(toClose);
if (releasedConnection != null) {
eventListener.connectionReleased(call, releasedConnection);
}
if (foundPooledConnection) {
eventListener.connectionAcquired(call, result);
}
if (result != null) {
// If we found an already-allocated or pooled connection, we're done.
// 如果已經從連接池中獲取到了一個連接,就將其返回
return result;
}
// If we need a route selection, make one. This is a blocking operation.
boolean newRouteSelection = false;
if (selectedRoute == null && (routeSelection == null || !routeSelection.hasNext())) {
newRouteSelection = true;
routeSelection = routeSelector.next();
}
synchronized (connectionPool) {
if (canceled) throw new IOException("Canceled");
if (newRouteSelection) {
// Now that we have a set of IP addresses, make another attempt at getting a connection from
// the pool. This could match due to connection coalescing.
// 根據一系列的 IP地址從連接池中獲取一個鏈接
List<Route> routes = routeSelection.getAll();
for (int i = 0, size = routes.size(); i < size;i++) {
Route route = routes.get(i);
// 從連接池中獲取一個連接
Internal.instance.get(connectionPool, address, this, route);
if (connection != null) {
foundPooledConnection = true;
result = connection;
this.route = route;
break;
}
}
}
if (!foundPooledConnection) {
if (selectedRoute == null) {
selectedRoute = routeSelection.next();
}
// Create a connection and assign it to this allocation immediately. This makes it possible
// for an asynchronous cancel() to interrupt the handshake we're about to do.
// 在連接池中如果沒有該連接,則創建一個新的連接,并將其分配,這樣我們就可以在握手之前進行終端
route = selectedRoute;
refusedStreamCount = 0;
result = new RealConnection(connectionPool, selectedRoute);
acquire(result, false);
}
}
// If we found a pooled connection on the 2nd time around, we're done.
if (foundPooledConnection) {
// 如果我們在第二次的時候發現了一個池連接,那么我們就將其返回
eventListener.connectionAcquired(call, result);
return result;
}
// Do TCP + TLS handshakes. This is a blocking operation.
// 進行 TCP 和 TLS 握手
result.connect(connectTimeout, readTimeout, writeTimeout, pingIntervalMillis,
connectionRetryEnabled, call, eventListener);
routeDatabase().connected(result.route());
Socket socket = null;
synchronized (connectionPool) {
reportedAcquired = true;
// Pool the connection.
// 將該連接放進連接池中
Internal.instance.put(connectionPool, result);
// If another multiplexed connection to the same address was created concurrently, then
// release this connection and acquire that one.
// 如果同時創建了另一個到同一地址的多路復用連接,釋放這個連接并獲取那個連接
if (result.isMultiplexed()) {
socket = Internal.instance.deduplicate(connectionPool, address, this);
result = connection;
}
}
closeQuietly(socket);
eventListener.connectionAcquired(call, result);
return result;
}
復制代碼
~~~
從以上的源碼分析可知:
* 判斷當前的連接是否可以使用:流是否已經被關閉,并且已經被限制創建新的流;
* 如果當前的連接無法使用,就從連接池中獲取一個連接;
* 連接池中也沒有發現可用的連接,創建一個新的連接,并進行握手,然后將其放到連接池中。
在從連接池中獲取一個連接的時候,使用了 Internal 的 get() 方法。Internal 有一個靜態的實例,會在 OkHttpClient 的靜態代碼快中被初始化。我們會在 Internal 的 get() 中調用連接池的 get() 方法來得到一個連接。并且,從中我們明白了連接復用的一個好處就是省去了進行 TCP 和 TLS 握手的一個過程。因為建立連接本身也是需要消耗一些時間的,連接被復用之后可以提升我們網絡訪問的效率。
接下來,我們來詳細分析下ConnectionPool是如何實現連接管理的。
OkHttp 的緩存管理分成兩個步驟,一邊當我們創建了一個新的連接的時候,我們要把它放進緩存里面;另一邊,我們還要來對緩存進行清理。在 ConnectionPool 中,當我們向連接池中緩存一個連接的時候,只要調用雙端隊列的 add() 方法,將其加入到雙端隊列即可,而清理連接緩存的操作則交給線程池來定時執行。
~~~
private final Deque<RealConnection> connections = new ArrayDeque<>();
void put(RealConnection connection) {
assert (Thread.holdsLock(this));
if (!cleanupRunning) {
cleanupRunning = true;
// 使用線程池執行清理任務
executor.execute(cleanupRunnable);
}
// 將新建的連接插入到雙端隊列中
connections.add(connection);
}
private final Runnable cleanupRunnable = new Runnable() {
@Override public void run() {
while (true) {
// 內部調用 cleanup() 方法來清理無效的連接
long waitNanos = cleanup(System.nanoTime());
if (waitNanos == -1) return;
if (waitNanos > 0) {
long waitMillis = waitNanos / 1000000L;
waitNanos -= (waitMillis * 1000000L);
synchronized (ConnectionPool.this) {
try {
ConnectionPool.this.wait(waitMillis, (int) waitNanos);
} catch (InterruptedException ignored) {
}
}
}
}
};
long cleanup(long now) {
int inUseConnectionCount = 0;
int idleConnectionCount = 0;
RealConnection longestIdleConnection = null;
long longestIdleDurationNs = Long.MIN_VALUE;
// Find either a connection to evict, or the time that the next eviction is due.
synchronized (this) {
// 遍歷所有的連接
for (Iterator<RealConnection> i = connections.iterator(); i.hasNext(); ) {
RealConnection connection = i.next();
// If the connection is in use, keep searching.
// 遍歷所有的連接
if (pruneAndGetAllocationCount(connection, now) > 0) {
inUseConnectionCount++;
continue;
}
idleConnectionCount++;
// If the connection is ready to be evicted, we're done.
// 如果找到了一個可以被清理的連接,會嘗試去尋找閑置時間最久的連接來釋放
long idleDurationNs = now - connection.idleAtNanos;
if (idleDurationNs > longestIdleDurationNs) {
longestIdleDurationNs = idleDurationNs;
longestIdleConnection = connection;
}
}
// maxIdleConnections 表示最大允許的閑置的連接的數量,keepAliveDurationNs表示連接允許存活的最長的時間。
// 默認空閑連接最大數目為5個,keepalive 時間最長為5分鐘。
if (longestIdleDurationNs >= this.keepAliveDurationNs
|| idleConnectionCount > this.maxIdleConnections) {
// We've found a connection to evict. Remove it from the list, then close it below (outside
// of the synchronized block).
// 該連接的時長超出了最大的活躍時長或者閑置的連接數量超出了最大允許的范圍,直接移除
connections.remove(longestIdleConnection);
} else if (idleConnectionCount > 0) {
// A connection will be ready to evict soon.
// 閑置的連接的數量大于0,停頓指定的時間(等會兒會將其清理掉,現在還不是時候)
return keepAliveDurationNs - longestIdleDurationNs;
} else if (inUseConnectionCount > 0) {
// All connections are in use. It'll be at least the keep alive duration 'til we run again.
// 所有的連接都在使用中,5分鐘后再清理
return keepAliveDurationNs;
} else {
// No connections, idle or in use.
// 沒有連接
cleanupRunning = false;
return -1;
}
}
~~~
從以上的源碼分析可知,首先會對緩存中的連接進行遍歷,以尋找一個閑置時間最長的連接,然后根據該連接的閑置時長和最大允許的連接數量等參數來決定是否應該清理該連接。同時注意上面的方法的返回值是一個時間,如果閑置時間最長的連接仍然需要一段時間才能被清理的時候,會返回這段時間的時間差,然后會在這段時間之后再次對連接池進行清理。
### 四、總結
經過上面對OKHttp內部工作機制的一系列分析,我相信你已經對OKHttp已經有了一個比較深入的了解了。首先,我們會在請求的時候初始化一個Call的實例,然后執行它的execute()方法或enqueue()方法,內部最后都會執行到getResponseWithInterceptorChain()方法,這個方法里面通過攔截器組成的責任鏈,依次經過用戶自定義普通攔截器、重試攔截器、橋接攔截器、緩存攔截器、連接攔截器和用戶自定義網絡攔截器以及訪問服務器攔截器等攔截處理過程,來獲取到一個響應并交給用戶。其中,除了OKHttp的內部請求流程這點之外,緩存和連接這兩部分內容也是兩個很重要的點,相信經過本文的講解,讀者對著三部分重點內容已經有了自己的理解。后面,將會為大家帶來OKHttp的封裝框架Retrofit源碼的深入分析,敬請期待~
##### 參考鏈接:
* * *
1. OKHttp V3.12.0源碼
2. Android進階之光
3. [OKHttp源碼解析](https://www.jianshu.com/p/27c1554b7fee)
4. [Andriod 網絡框架 OkHttp 源碼解析](https://juejin.im/post/5bc89fbc5188255c713cb8a5#heading-10)
