[TOC]
前兩篇我們詳細地分析了Android的網絡底層框架OKHttp和封裝框架Retrofit的核心源碼,如果對OKHttp或Retrofit內部機制不了解的可以看看[Android主流三方庫源碼分析(一、深入理解OKHttp源碼)](https://juejin.im/post/5e1be39b6fb9a02fcd130d1f)和[Android主流三方庫源碼分析(二、深入理解Retrofit源碼)](https://juejin.im/post/5e1fb9386fb9a0300a4501a6),除了熱門的網絡庫之外,我們還分析了使用最廣泛的圖片加載框架Glide的加載流程,大家讀完這篇源碼分析實力會有不少提升,有興趣可以看看[Android主流三方庫源碼分析(三、深入理解Glide源碼)](https://juejin.im/post/5e2109e25188254c257c40c6)。本篇,我們將會來對目前Android數據庫框架中性能最好的GreenDao來進行較為深入地講解。
### 一、基本使用流程
#### 1、導入GreenDao的代碼生成插件和庫
~~~
// 項目下的build.gradle
buildscript {
...
dependencies {
classpath 'com.android.tools.build:gradle:2.3.0'
classpath 'org.greenrobot:greendao-gradle-plugin:3.2.1'
}
}
// app模塊下的build.gradle
apply plugin: 'com.android.application'
apply plugin: 'org.greenrobot.greendao'
...
dependencies {
...
compile 'org.greenrobot:greendao:3.2.0'
}
~~~
#### 2、創建一個實體類,這里為HistoryData
~~~
@Entity
public class HistoryData {
@Id(autoincrement = true)
private Long id;
private long date;
private String data;
}
~~~
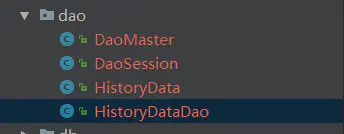
#### 3、選擇ReBuild Project,HistoryData會被自動添加Set/get方法,并生成整個項目的DaoMaster、DaoSession類,以及與該實體HistoryData對應的HistoryDataDao。
~~~
@Entity
public class HistoryData {
@Id(autoincrement = true)
private Long id;
private long date;
private String data;
@Generated(hash = 1371145256)
public HistoryData(Long id, long date, String data) {
this.id = id;
this.date = date;
this.data = data;
}
@Generated(hash = 422767273)
public HistoryData() {
}
public Long getId() {
return this.id;
}
public void setId(Long id) {
this.id = id;
}
public long getDate() {
return this.date;
}
public void setDate(long date) {
this.date = date;
}
public String getData() {
return this.data;
}
public void setData(String data) {
this.data = data;
}
}
~~~
這里點明一下這幾個類的作用:
* DaoMaster:所有Dao類的主人,負責整個庫的運行,內部的靜態抽象子類DevOpenHelper繼承并重寫了Android的SqliteOpenHelper。
* DaoSession:作為一個會話層的角色,用于生成相應的Dao對象、Dao對象的注冊,操作Dao的具體對象。
* xxDao(HistoryDataDao):生成的Dao對象,用于進行具體的數據庫操作。
#### 4、獲取并使用相應的Dao對象進行增刪改查操作
~~~
DaoMaster.DevOpenHelper devOpenHelper = new DaoMaster.DevOpenHelper(this, Constants.DB_NAME);
SQLiteDatabase database = devOpenHelper.getWritableDatabase();
DaoMaster daoMaster = new DaoMaster(database);
mDaoSession = daoMaster.newSession();
HistoryDataDao historyDataDao = daoSession.getHistoryDataDao();
// 省略創建historyData的代碼
...
// 增
historyDataDao.insert(historyData);
// 刪
historyDataDao.delete(historyData);
// 改
historyDataDao.update(historyData);
// 查
List<HistoryData> historyDataList = historyDataDao.loadAll();
~~~
本篇文章將會以上述使用流程來對GreenDao的源碼進行逐步分析,最后會分析下GreenDao中一些優秀的特性,讓讀者朋友們對GreenDao的理解有更一步的加深。
### 二、GreenDao使用流程分析
#### 1、創建數據庫幫助類對象DaoMaster.DevOpenHelper
~~~
DaoMaster.DevOpenHelper devOpenHelper = new DaoMaster.DevOpenHelper(this, Constants.DB_NAME);
~~~
創建GreenDao內部實現的數據庫幫助類對象devOpenHelper,核心源碼如下:
~~~
public class DaoMaster extends AbstractDaoMaster {
...
public static abstract class OpenHelper extends DatabaseOpenHelper {
...
@Override
public void onCreate(Database db) {
Log.i("greenDAO", "Creating tables for schema version " + SCHEMA_VERSION);
createAllTables(db, false);
}
}
public static class DevOpenHelper extends OpenHelper {
...
@Override
public void onUpgrade(Database db, int oldVersion, int newVersion) {
Log.i("greenDAO", "Upgrading schema from version " + oldVersion + " to " + newVersion + " by dropping all tables");
dropAllTables(db, true);
onCreate(db);
}
}
}
~~~
DevOpenHelper自身實現了更新的邏輯,這里是棄置了所有的表,并且調用了OpenHelper實現的onCreate方法用于創建所有的表,其中DevOpenHelper繼承于OpenHelper,而OpenHelper自身又繼承于DatabaseOpenHelper,那么,這個DatabaseOpenHelper這個類的作用是什么呢?
~~~
public abstract class DatabaseOpenHelper extends SQLiteOpenHelper {
...
// 關注點1
public Database getWritableDb() {
return wrap(getWritableDatabase());
}
public Database getReadableDb() {
return wrap(getReadableDatabase());
}
protected Database wrap(SQLiteDatabase sqLiteDatabase) {
return new StandardDatabase(sqLiteDatabase);
}
...
// 關注點2
public Database getEncryptedWritableDb(String password) {
EncryptedHelper encryptedHelper = checkEncryptedHelper();
return encryptedHelper.wrap(encryptedHelper.getWritableDatabase(password));
}
public Database getEncryptedReadableDb(String password) {
EncryptedHelper encryptedHelper = checkEncryptedHelper();
return encryptedHelper.wrap(encryptedHelper.getReadableDatabase(password));
}
...
private class EncryptedHelper extends net.sqlcipher.database.SQLiteOpenHelper {
...
protected Database wrap(net.sqlcipher.database.SQLiteDatabase sqLiteDatabase) {
return new EncryptedDatabase(sqLiteDatabase);
}
}
~~~
其實,DatabaseOpenHelper也是實現了SQLiteOpenHelper的一個幫助類,它內部可以獲取到兩種不同的數據庫類型,一種是標準型的數據庫**StandardDatabase**,另一種是加密型的數據庫**EncryptedDatabase**,從以上源碼可知,它們內部都通過wrap這樣一個包裝的方法,返回了對應的數據庫類型,我們大致看一下StandardDatabase和EncryptedDatabase的內部實現。
~~~
public class StandardDatabase implements Database {
// 這里的SQLiteDatabase是android.database.sqlite.SQLiteDatabase包下的
private final SQLiteDatabase delegate;
public StandardDatabase(SQLiteDatabase delegate) {
this.delegate = delegate;
}
@Override
public Cursor rawQuery(String sql, String[] selectionArgs) {
return delegate.rawQuery(sql, selectionArgs);
}
@Override
public void execSQL(String sql) throws SQLException {
delegate.execSQL(sql);
}
...
}
public class EncryptedDatabaseStatement implements DatabaseStatement {
// 這里的SQLiteStatement是net.sqlcipher.database.SQLiteStatement包下的
private final SQLiteStatement delegate;
public EncryptedDatabaseStatement(SQLiteStatement delegate) {
this.delegate = delegate;
}
@Override
public void execute() {
delegate.execute();
}
...
}
~~~
StandardDatabase和EncryptedDatabase這兩個類內部都使用了**代理模式**給相同的接口添加了不同的具體實現,StandardDatabase自然是使用的Android包下的SQLiteDatabase,而EncryptedDatabaseStatement為了實現加密數據庫的功能,則使用了一個叫做**sqlcipher**的數據庫加密三方庫,**如果你項目下的數據庫需要保存比較重要的數據,則可以使用getEncryptedWritableDb方法來代替getdWritableDb方法對數據庫進行加密,這樣,我們之后的數據庫操作則會以代理模式的形式間接地使用sqlcipher提供的API去操作數據庫**。
#### 2、創建DaoMaster對象
~~~
SQLiteDatabase database = devOpenHelper.getWritableDatabase();
DaoMaster daoMaster = new DaoMaster(database);
~~~
首先,DaoMaster作為所有Dao對象的主人,它內部肯定是需要一個SQLiteDatabase對象的,因此,先由DaoMaster的幫助類對象devOpenHelper的getWritableDatabase方法得到一個標準的數據庫類對象database,再由此創建一個DaoMaster對象。
~~~
public class DaoMaster extends AbstractDaoMaster {
...
public DaoMaster(SQLiteDatabase db) {
this(new StandardDatabase(db));
}
public DaoMaster(Database db) {
super(db, SCHEMA_VERSION);
registerDaoClass(HistoryDataDao.class);
}
...
}
~~~
在DaoMaster的構造方法中,它首先執行了super(db, SCHEMA\_VERSION)方法,即它的父類AbstractDaoMaster的構造方法。
~~~
public abstract class AbstractDaoMaster {
...
public AbstractDaoMaster(Database db, int schemaVersion) {
this.db = db;
this.schemaVersion = schemaVersion;
daoConfigMap = new HashMap<Class<? extends AbstractDao<?, ?>>, DaoConfig>();
}
protected void registerDaoClass(Class<? extends AbstractDao<?, ?>> daoClass) {
DaoConfig daoConfig = new DaoConfig(db, daoClass);
daoConfigMap.put(daoClass, daoConfig);
}
...
}
~~~
在AbstractDaoMaster對象的構造方法中,除了記錄當前的數據庫對象db和版本schemaVersion之外,還創建了一個類型為**HashMap, DaoConfig>()的daoConfigMap對象用于保存每一個DAO對應的數據配置對象DaoConfig,并且Daoconfig對象存儲了對應的Dao對象所必需的數據**。最后,在DaoMaster的構造方法中使用了registerDaoClass(HistoryDataDao.class)方法將HistoryDataDao類對象進行了注冊,實際上,就是為HistoryDataDao這個Dao對象創建了相應的DaoConfig對象并將它放入daoConfigMap對象中保存起來。
#### 3、創建DaoSession對象
~~~
mDaoSession = daoMaster.newSession();
~~~
在DaoMaster對象中使用了newSession方法新建了一個DaoSession對象。
~~~
public DaoSession newSession() {
return new DaoSession(db, IdentityScopeType.Session, daoConfigMap);
}
~~~
在DaoSeesion的構造方法中,又做了哪些事情呢?
~~~
public class DaoSession extends AbstractDaoSession {
...
public DaoSession(Database db, IdentityScopeType type, Map<Class<? extends AbstractDao<?, ?>>, DaoConfig>
daoConfigMap) {
super(db);
historyDataDaoConfig = daoConfigMap.get(HistoryDataDao.class).clone();
historyDataDaoConfig.initIdentityScope(type);
historyDataDao = new HistoryDataDao(historyDataDaoConfig, this);
registerDao(HistoryData.class, historyDataDao);
}
...
}
~~~
首先,調用了父類AbstractDaoSession的構造方法。
~~~
public class AbstractDaoSession {
...
public AbstractDaoSession(Database db) {
this.db = db;
this.entityToDao = new HashMap<Class<?>, AbstractDao<?, ?>>();
}
protected <T> void registerDao(Class<T> entityClass, AbstractDao<T, ?> dao) {
entityToDao.put(entityClass, dao);
}
...
}
~~~
在AbstractDaoSession構造方法里面**創建了一個實體與Dao對象的映射集合**。接下來,在DaoSession的構造方法中還做了2件事:
* 1、**創建每一個Dao對應的DaoConfig對象**,這里是historyDataDaoConfig,**并且根據IdentityScopeType的類型初始化創建一個相應的IdentityScope**,根據type的不同,它有兩種類型,分別是**IdentityScopeObject**和**IdentityScopeLong**,它的作用是根據主鍵緩存對應的實體數據。當主鍵是數字類型的時候,如long/Long、int/Integer、short/Short、byte/Byte,則使用IdentityScopeLong緩存實體數據,當主鍵不是數字類型的時候,則使用IdentityScopeObject緩存實體數據。
* 2、**根據DaoSession對象和每一個Dao對應的DaoConfig對象,創建與之對應的historyDataDao對象**,由于這個項目只創建了一個實體類HistoryData,因此這里只有一個Dao對象historyDataDao,然后就是注冊Dao對象,其實就是將實體和對應的Dao對象放入entityToDao這個映射集合中保存起來了。
#### 4、插入源碼分析
~~~
HistoryDataDao historyDataDao = daoSession.getHistoryDataDao();
// 增
historyDataDao.insert(historyData);
~~~
這里首先在會話層DaoSession中獲取了我們要操作的Dao對象HistoryDataDao,然后插入了一個我們預先創建好的historyData實體對象。其中HistoryDataDao繼承了AbstractDao 。
~~~
public class HistoryDataDao extends AbstractDao<HistoryData, Long> {
...
}
~~~
那么,這個AbstractDao是干什么的呢?
~~~
public abstract class AbstractDao<T, K> {
...
public List<T> loadAll() {
Cursor cursor = db.rawQuery(statements.getSelectAll(), null);
return loadAllAndCloseCursor(cursor);
}
...
public long insert(T entity) {
return executeInsert(entity, statements.getInsertStatement(), true);
}
...
public void delete(T entity) {
assertSinglePk();
K key = getKeyVerified(entity);
deleteByKey(key);
}
...
}
~~~
看到這里,根據程序員優秀的直覺,大家應該能猜到,AbstractDao是所有Dao對象的基類,它實現了實體數據的操作如增刪改查。我們接著分析insert是如何實現的,在AbstractDao的insert方法中又調用了executeInsert這個方法。在這個方法中,第二個參里的statements是一個**TableStatements**對象,它是在AbstractDao初始化構造器時從DaoConfig對象中取出來的,是一個**根據指定的表格創建SQL語句的一個幫助類**。使用statements.getInsertStatement()則是獲取了一個插入的語句。而第三個參數則是判斷是否是主鍵的標志。
~~~
public class TableStatements {
...
public DatabaseStatement getInsertStatement() {
if (insertStatement == null) {
String sql = SqlUtils.createSqlInsert("INSERT INTO ", tablename, allColumns);
DatabaseStatement newInsertStatement = db.compileStatement(sql);
...
}
return insertStatement;
}
...
}
~~~
在TableStatements的getInsertStatement方法中,主要做了兩件事:
* 1、**使用SqlUtils創建了插入的sql語句**。
* 2、**根據不同的數據庫類型(標準數據庫或加密數據庫)將sql語句編譯成當前數據庫對應的語句**。
我們繼續往下分析executeInsert的執行流程。
~~~
private long executeInsert(T entity, DatabaseStatement stmt, boolean setKeyAndAttach) {
long rowId;
if (db.isDbLockedByCurrentThread()) {
rowId = insertInsideTx(entity, stmt);
} else {
db.beginTransaction();
try {
rowId = insertInsideTx(entity, stmt);
db.setTransactionSuccessful();
} finally {
db.endTransaction();
}
}
if (setKeyAndAttach) {
updateKeyAfterInsertAndAttach(entity, rowId, true);
}
return rowId;
}
~~~
這里首先是判斷數據庫是否被當前線程鎖定,如果是,則直接插入數據,否則為了避免死鎖,則開啟一個數據庫事務,再進行插入數據的操作。最后如果設置了主鍵,則在插入數據之后更新主鍵的值并將對應的實體緩存到相應的identityScope中,這一塊的代碼流程如下所示:
~~~
protected void updateKeyAfterInsertAndAttach(T entity, long rowId, boolean lock) {
if (rowId != -1) {
K key = updateKeyAfterInsert(entity, rowId);
attachEntity(key, entity, lock);
} else {
...
}
}
protected final void attachEntity(K key, T entity, boolean lock) {
attachEntity(entity);
if (identityScope != null && key != null) {
if (lock) {
identityScope.put(key, entity);
} else {
identityScope.putNoLock(key, entity);
}
}
}
~~~
接著,我們還是繼續追蹤主線流程,在executeInsert這個方法中調用了insertInsideTx進行數據的插入。
~~~
private long insertInsideTx(T entity, DatabaseStatement stmt) {
synchronized (stmt) {
if (isStandardSQLite) {
SQLiteStatement rawStmt = (SQLiteStatement) stmt.getRawStatement();
bindValues(rawStmt, entity);
return rawStmt.executeInsert();
} else {
bindValues(stmt, entity);
return stmt.executeInsert();
}
}
}
~~~
為了防止并發,這里使用了悲觀鎖保證了數據的一致性,在AbstractDao這個類中,大量使用了這種鎖保證了它的線程安全性。接著,如果當前是標準數據庫,則直接獲取stmt這個DatabaseStatement類對應的原始語句進行實體字段屬性的綁定和最后的執行插入操作。如果是加密數據庫,則直接使用當前的加密數據庫所屬的插入語句進行實體字段屬性的綁定和執行最后的插入操作。其中bindValues這個方法對應的實現類就是我們的HistoryDataDao類。
~~~
public class HistoryDataDao extends AbstractDao<HistoryData, Long> {
...
@Override
protected final void bindValues(DatabaseStatement stmt, HistoryData entity) {
stmt.clearBindings();
Long id = entity.getId();
if (id != null) {
stmt.bindLong(1, id);
}
stmt.bindLong(2, entity.getDate());
String data = entity.getData();
if (data != null) {
stmt.bindString(3, data);
}
}
@Override
protected final void bindValues(SQLiteStatement stmt, HistoryData entity) {
stmt.clearBindings();
Long id = entity.getId();
if (id != null) {
stmt.bindLong(1, id);
}
stmt.bindLong(2, entity.getDate());
String data = entity.getData();
if (data != null) {
stmt.bindString(3, data);
}
}
...
}
~~~
可以看到,這里對HistoryData的所有字段使用對應的數據庫語句進行了綁定操作。這里最后再提及一下,**如果當前數據庫是加密型時,則會使用最開始提及的DatabaseStatement的加密實現類EncryptedDatabaseStatement應用代理模式去使用sqlcipher這個加密型數據庫的insert方法**。
#### 5、查詢源碼分析
經過對插入源碼的分析,我相信大家對GreenDao內部的機制已經有了一些自己的理解,由于刪除和更新內部的流程比較簡單,且與插入源碼有異曲同工之妙,這里就不再贅述了。最后我們再分析下查詢的源碼,查詢的流程調用鏈較長,所以將它的核心流程源碼直接給出。
~~~
List<HistoryData> historyDataList = historyDataDao.loadAll();
public List<T> loadAll() {
Cursor cursor = db.rawQuery(statements.getSelectAll(), null);
return loadAllAndCloseCursor(cursor);
}
protected List<T> loadAllAndCloseCursor(Cursor cursor) {
try {
return loadAllFromCursor(cursor);
} finally {
cursor.close();
}
}
protected List<T> loadAllFromCursor(Cursor cursor) {
int count = cursor.getCount();
...
boolean useFastCursor = false;
if (cursor instanceof CrossProcessCursor) {
window = ((CrossProcessCursor) cursor).getWindow();
if (window != null) {
if (window.getNumRows() == count) {
cursor = new FastCursor(window);
useFastCursor = true;
} else {
...
}
}
}
if (cursor.moveToFirst()) {
...
try {
if (!useFastCursor && window != null && identityScope != null) {
loadAllUnlockOnWindowBounds(cursor, window, list);
} else {
do {
list.add(loadCurrent(cursor, 0, false));
} while (cursor.moveToNext());
}
} finally {
...
}
}
return list;
}
~~~
最終,loadAll方法將會調用到loadAllFromCursor這個方法,首先,如果**當前的游標cursor是跨進程的cursor**,并且cursor的行數沒有偏差的話,則使用一個加快版的**FastCursor**對象進行游標遍歷。接著,不管是執行loadAllUnlockOnWindowBounds這個方法還是直接加載當前的數據列表list.add(loadCurrent(cursor, 0, false)),最后都會調用到這行list.add(loadCurrent(cursor, 0, false))代碼,很明顯,loadCurrent方法就是加載數據的方法。
~~~
final protected T loadCurrent(Cursor cursor, int offset, boolean lock) {
if (identityScopeLong != null) {
...
T entity = lock ? identityScopeLong.get2(key) : identityScopeLong.get2NoLock(key);
if (entity != null) {
return entity;
} else {
entity = readEntity(cursor, offset);
attachEntity(entity);
if (lock) {
identityScopeLong.put2(key, entity);
} else {
identityScopeLong.put2NoLock(key, entity);
}
return entity;
}
} else if (identityScope != null) {
...
T entity = lock ? identityScope.get(key) : identityScope.getNoLock(key);
if (entity != null) {
return entity;
} else {
entity = readEntity(cursor, offset);
attachEntity(key, entity, lock);
return entity;
}
} else {
...
T entity = readEntity(cursor, offset);
attachEntity(entity);
return entity;
}
}
~~~
我們來理解下loadCurrent這個方法內部的執行策略。**首先,如果有實體數據緩存identityScopeLong/identityScope,則先從緩存中取,如果緩存中沒有,會使用該實體對應的Dao對象,這里的是HistoryDataDao,它在內部根據游標取出的數據新建了一個新的HistoryData實體對象返回。**
~~~
@Override
public HistoryData readEntity(Cursor cursor, int offset) {
HistoryData entity = new HistoryData( //
cursor.isNull(offset + 0) ? null : cursor.getLong(offset + 0), // id
cursor.getLong(offset + 1), // date
cursor.isNull(offset + 2) ? null : cursor.getString(offset + 2) // data
);
return entity;
}
~~~
**最后,如果是非identityScopeLong緩存類型,即是屬于identityScope的情況下,則還會在identityScope中將上面獲得的數據進行緩存。如果沒有實體數據緩存的話,則直接調用readEntity組裝數據返回即可。**
注意:對于GreenDao緩存的特性,可能會出現沒有拿到最新數據的bug,因此,如果遇到這種情況,可以使用DaoSession的clear方法刪除緩存。
### 三、GreenDao是如何與ReactiveX結合?
首先,看下與rx結合的使用流程:
~~~
RxDao<HistoryData, Long> xxDao = daoSession.getHistoryDataDao().rx();
xxDao.insert(historyData)
.observerOn(AndroidSchedulers.mainThread())
.subscribe(new Action1<HistoryData>() {
@Override
public void call(HistoryData entity) {
// insert success
}
});
~~~
在AbstractDao對象的.rx()方法中,創建了一個默認執行在io線程的rxDao對象。
~~~
@Experimental
public RxDao<T, K> rx() {
if (rxDao == null) {
rxDao = new RxDao<>(this, Schedulers.io());
}
return rxDao;
}
~~~
接著分析rxDao的insert方法。
~~~
@Experimental
public Observable<T> insert(final T entity) {
return wrap(new Callable<T>() {
@Override
public T call() throws Exception {
dao.insert(entity);
return entity;
}
});
}
~~~
起實質作用的就是這個wrap方法了,在這個方法里面主要是調用了RxUtils.fromCallable(callable)這個方法。
~~~
@Internal
class RxBase {
...
protected <R> Observable<R> wrap(Callable<R> callable) {
return wrap(RxUtils.fromCallable(callable));
}
protected <R> Observable<R> wrap(Observable<R> observable) {
if (scheduler != null) {
return observable.subscribeOn(scheduler);
} else {
return observable;
}
}
...
}
~~~
在RxUtils的fromCallable這個方法內部,其實就是**使用defer這個延遲操作符來進行被觀察者事件的發送,主要目的就是為了確保Observable被訂閱后才執行**。最后,如果調度器scheduler存在的話,將通過外部的wrap方法將執行環境調度到io線程。
~~~
@Internal
class RxUtils {
@Internal
static <T> Observable<T> fromCallable(final Callable<T> callable) {
return Observable.defer(new Func0<Observable<T>>() {
@Override
public Observable<T> call() {
T result;
try {
result = callable.call();
} catch (Exception e) {
return Observable.error(e);
}
return Observable.just(result);
}
});
}
}
~~~
### 四、總結
在分析完GreenDao的核心源碼之后,我發現,GreenDao作為最好的數據庫框架之一,是有一定道理的。**首先,它通過使用自身的插件配套相應的freemarker模板生成所需的靜態代碼,避免了反射等消耗性能的操作。其次,它內部提供了實體數據的映射緩存機制,能夠進一步加快查詢速度。對于不同數據庫對應的SQL語句,也使用了不同的DataBaseStatement實現類結合代理模式進行了封裝,屏蔽了數據庫操作等繁瑣的細節。最后,它使用了sqlcipher提供了加密數據庫的功能,在一定程度確保了安全性,同時,結合RxJava,我們便能更簡潔地實現異步的數據庫操作**。GreenDao源碼分析到這里就真的完結了,下一篇,筆者將會對RxJava的核心源碼進行細致地講解,以此能讓大家對RxJava有一個更為深入的理解。
##### 參考鏈接:
* * *
1、GreenDao V3.2.2源碼
2、[GreenDao源碼分析](https://mp.weixin.qq.com/s?__biz=MzIwMTAzMTMxMg==&mid=2649492577&idx=1&sn=b35b0ef0f3769efa8c5d49fc5d60dd80&chksm=8eec879eb99b0e8881dd83cac912192df742ad547ccd274b7fccd2995edd08b095e1fd556cfe&scene=38#wechat_redirect)
3、[GreenDao源碼分析](http://www.voidcn.com/article/p-ksrtulcy-brp.html)
鏈接:https://juejin.im/post/5e44b3c2e51d4526ec0d2b71
