## 環境準備
* node.js([官網地址](https://nodejs.org/en/))
* vue-cli 3.x ([官網地址](https://cli.vuejs.org/zh/guide/installation.html))
* 一個熟悉的代碼編輯器
## 初始化項目
vue create vue-electron-demo
```
?????Vue CLI v3.8.4
????? Please pick a preset: (Use arrow keys)
??????default (babel, eslint)?
????> Manually select features
```
選擇“Manually select features” (自定義安裝)。
```
? Check the features needed for your project:
?????(*) Babel
?????( ) TypeScript
?????( ) Progressive Web App (PWA) Support
?????(*) Router
?????(*) Vuex
?????(*) CSS Pre-processors
?????(*) Linter / Formatter
????>( ) Unit Testing
?????( ) E2E Testing
```
這里選擇了常用的模塊,請根據實際需求進行選擇。
```
? Use history mode for router? (Requires proper server setup for index fallback?
????in production) (Y/n)??n
```
如果選擇了router,這里會詢問是否使用history模式。
vue-router 默認使用hash模式(即通過url#hash來跳轉頁面),使用URL的hash來模擬一個完整的 URL,當URL改變時,頁面不會重新加載。
如果使用history,URL就像正常的url,例如 yoursite.com/user/id ,比較好看。但是還需要后臺配置支持。
這里我們選擇“n”。
```
? Pick a CSS pre-processor (PostCSS, Autoprefixer and CSS Modules are supported by default):
??????Sass/SCSS (with dart-sass)
??????Sass/SCSS (with node-sass)
????> Less
??????Stylus
```
選擇CSS預處理模塊,這里我們使用“Less”。
```
? Pick a linter / formatter config:
??????ESLint with error prevention only
??????ESLint + Airbnb config
????> ESLint + Standard config
??????ESLint + Prettier
```
選擇ESLint代碼格式檢查工具的配置,選擇“ESLint + Standard config”,標準配置。
```
? Pick additional lint features: (Press to select, to toggle all, to invert selection)
????>(*) Lint on save
?????( ) Lint and fix on commit
```
Line on save表示在保存代碼的時候,進行格式檢查。
Lint and fix on commit表示在git commit的時候自動糾正格式。
這里只選擇“Lint on save”。
```
? Where do you prefer placing config for Babel, ESLint, etc.?
??????In dedicated config files
????> In package.json
```
這里問把 babel, eslint 這些配置文件放哪?
In dedicated config files 表示獨立文件
In package.json 表示放在package.json里
這里選擇“In package.json”。
```
? Save this as a preset for future projects? (y/N) N
```
然后耐心等待項目安裝完成
## 安裝electron
進入項目根目錄,執行`vue add electron-builder`
此過程較慢,需耐心等待,或嘗試手動安裝可參考[鏈接](https://juejin.im/post/5d1abff7f265da1bb80c47e3#heading-7)
執行以下命令,開始編譯APP,并啟動開發環境APP:
`npm run electron:serve`
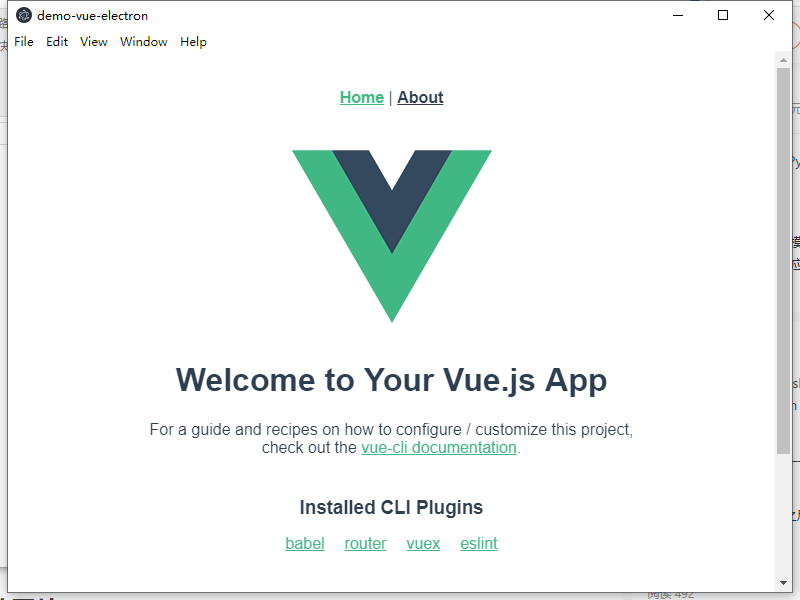
編譯成功后,就會出現開發環境的APP了。
## 打包項目
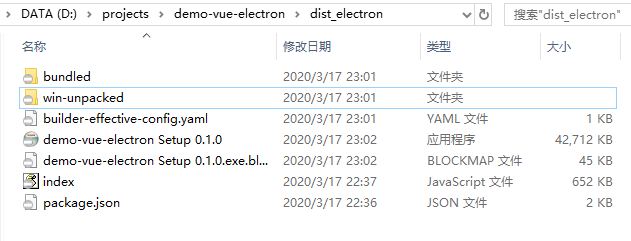
進入項目根目錄,執行`npm run electron:build`
打包后的目錄為:`demo-vue-electron\\dist\_electron`,其中demo-vue-electron Setup 0.1.0.exe為安裝包,win-unpacked目錄中有可直接執行的.exe
## 配置項目
配置ESLint代碼格式檢查工具
在項目根目錄下創建.eslintrc.js (注意文件名前面有個“.”)
```
module.exports = {
??????root: true,
??????env: {
???? node: true
??????},
??????'extends': [
???? 'plugin:vue/essential',
???? '@vue/standard'
??????],
??????rules: {
????'no-debugger': process.env.NODE_ENV === 'production' ? 'error' : 'off',
????// 不檢測語句末尾的分號
????'semi': ['off', 'always'],
????// 強制縮進為2個空格
????'indent': ['error', 2],
????// 關閉函數名稱跟括號之間的空格檢測
????'space-before-function-paren': 0,
????// 忽略大括號內的空格
????'object-curly-spacing': 0
??????},
??????parserOptions: {
???? parser: 'babel-eslint'
??????}
????}
```
[更多配置參考](https://cloud.tencent.com/developer/section/1135570)
配置vue
在項目根目錄下創建vue.config.js,粘貼以下代碼:
```
const path = require('path');
????function resolve (dir) {
??????return path.join(__dirname, dir);
????}
????module.exports = {
??????publicPath: './',
??????devServer: {
????// can be overwritten by process.env.HOST
????host: '0.0.0.0',??
????port: 8080
??????},
??????chainWebpack: config => {
????config.resolve.alias
??????.set('@', resolve('src'))
??????.set('src', resolve('src'))
??????.set('common', resolve('src/common'))
??????.set('components', resolve('src/components'));
??????}
????};
```
[更多配置參考](https://cli.vuejs.org/zh/config/)
