
## 概覽
1. 創建Spring Boot項目
2. 引入activiti等依賴包
3. 安裝activiti designer
4. 繪制流程
5. 編寫activiti 工作流代碼
#### 環境
* 開發IDE:Eclipse
* 操作系統: Windows
* Java 8
* Spring Boot 2.3.3
## 創建Spring Boot項目
使用 Spring Boot在線項目生成器創建項目。
在瀏覽器進入如下地址:[https://start.spring.io/](https://start.spring.io/)
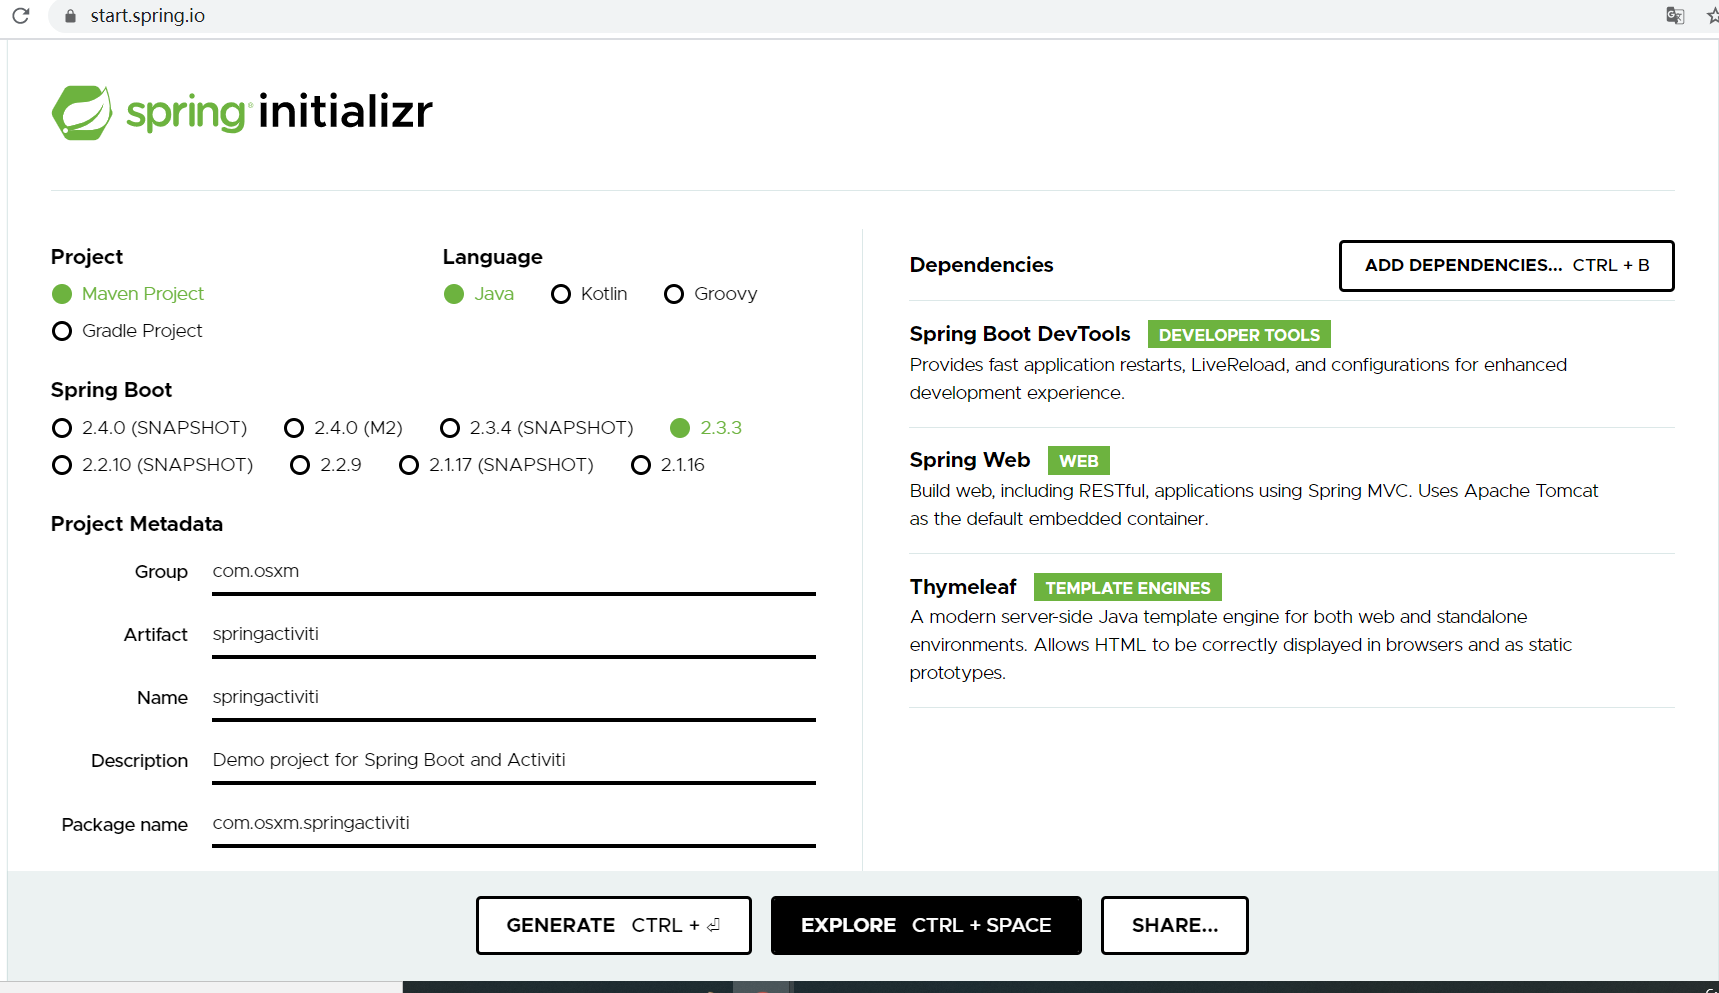
* 使用Maven管理依賴包
* 輸入項目的包名、項目名
* Java版本選擇 8
* 依賴項選擇
- Spring Web
- Thymeleaf :模板框架
- Spring Boot DevTools
以上設定完成,點擊 GENERATE按鈕后會下載一個 .zip的壓縮文件。將此壓縮文件解壓到Eclipse的工作區, 在Eclipse中導入該Maven項目。
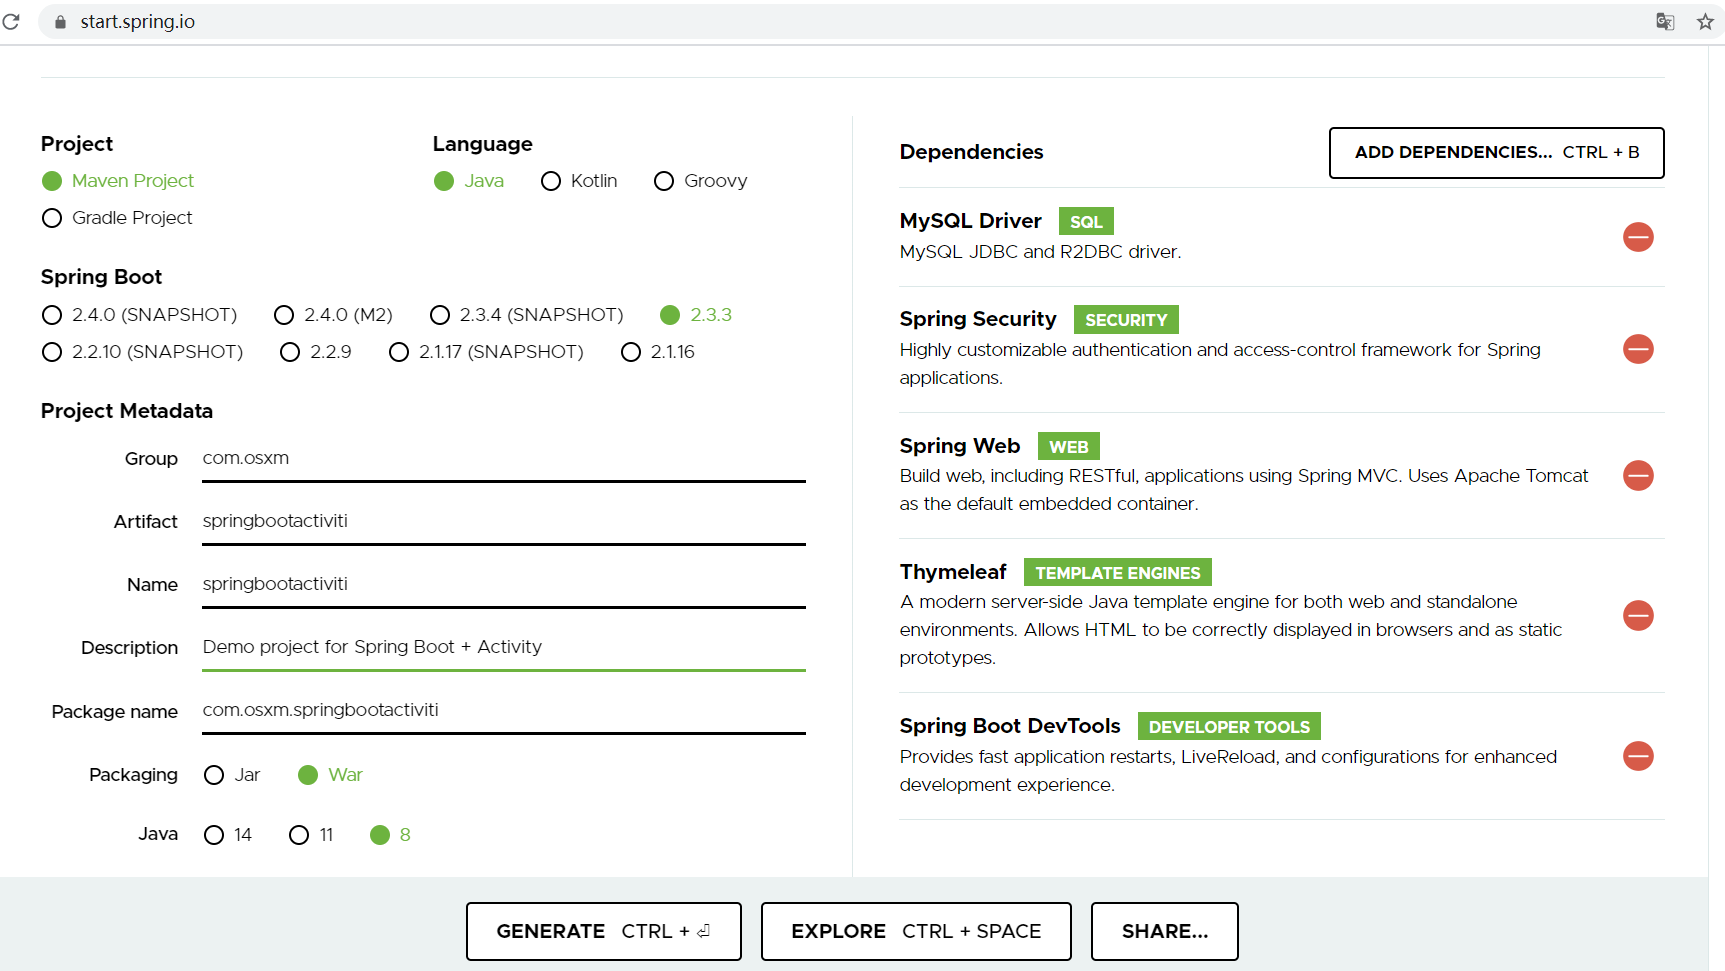
## 引入activiti等依賴包
除了上面選擇的Spring Web、Thymeleaf 等依賴包,此處還導入以下依賴包:
* Activiti 相關依賴包
* druid 阿里的數據庫連接池:必須
* fastjson 阿里的JSON數據格式轉換
* Swagger 生成接口文檔的工具,也可以用來調用和測試接口。
導入的配置如下:
```
<!-- 阿里數據庫連接池 -->
<dependency>
<groupId>com.alibaba</groupId>
<artifactId>druid</artifactId>
<version>1.1.23</version>
</dependency>
<!-- JSON 數據轉換 -->
<dependency>
<groupId>com.alibaba</groupId>
<artifactId>fastjson</artifactId>
<version>1.2.73</version>
</dependency>
<!-- Activiti -->
<dependency>
<groupId>org.activiti.dependencies</groupId>
<artifactId>activiti-dependencies</artifactId>
<version>7.1.0.M6</version>
<type>pom</type>
</dependency>
<dependency>
<groupId>org.activiti</groupId>
<artifactId>activiti-spring-boot-starter</artifactId>
<version>7.1.0.M6</version>
</dependency>
<dependency>
<groupId>org.activiti</groupId>
<artifactId>activiti-image-generator</artifactId>
<version>7.1.0.M6</version>
</dependency>
<!-- Swagger -->
<dependency>
<groupId>io.springfox</groupId>
<artifactId>springfox-swagger2</artifactId>
<version>3.0.0</version>
</dependency>
<dependency>
<groupId>io.springfox</groupId>
<artifactId>springfox-swagger-ui</artifactId>
<version>3.0.0</version>
</dependency>
```
## 安裝activiti designer
activiti designer是Eclipse的插件, 用來設計和繪制activiti 流程圖,不過該插件自2015年8月之后就沒有再更新,版本也定格在Activiti Designer 5.18.0。
在線安裝的地址是: https://github.com/Activiti/Activiti-Designer/releases , 不過總是會安裝不成功, 所以建議使用離線安裝的方式,先下載插件的壓縮文件,在到Eclipse中安裝。
下載地址是:
http://www.activiti.org/designer/archived/activiti-designer-5.18.0.zip
下載之后, 在Eclipse的插件安裝頁面,點擊 “Archive”按鈕選擇下載的.zip 文件。
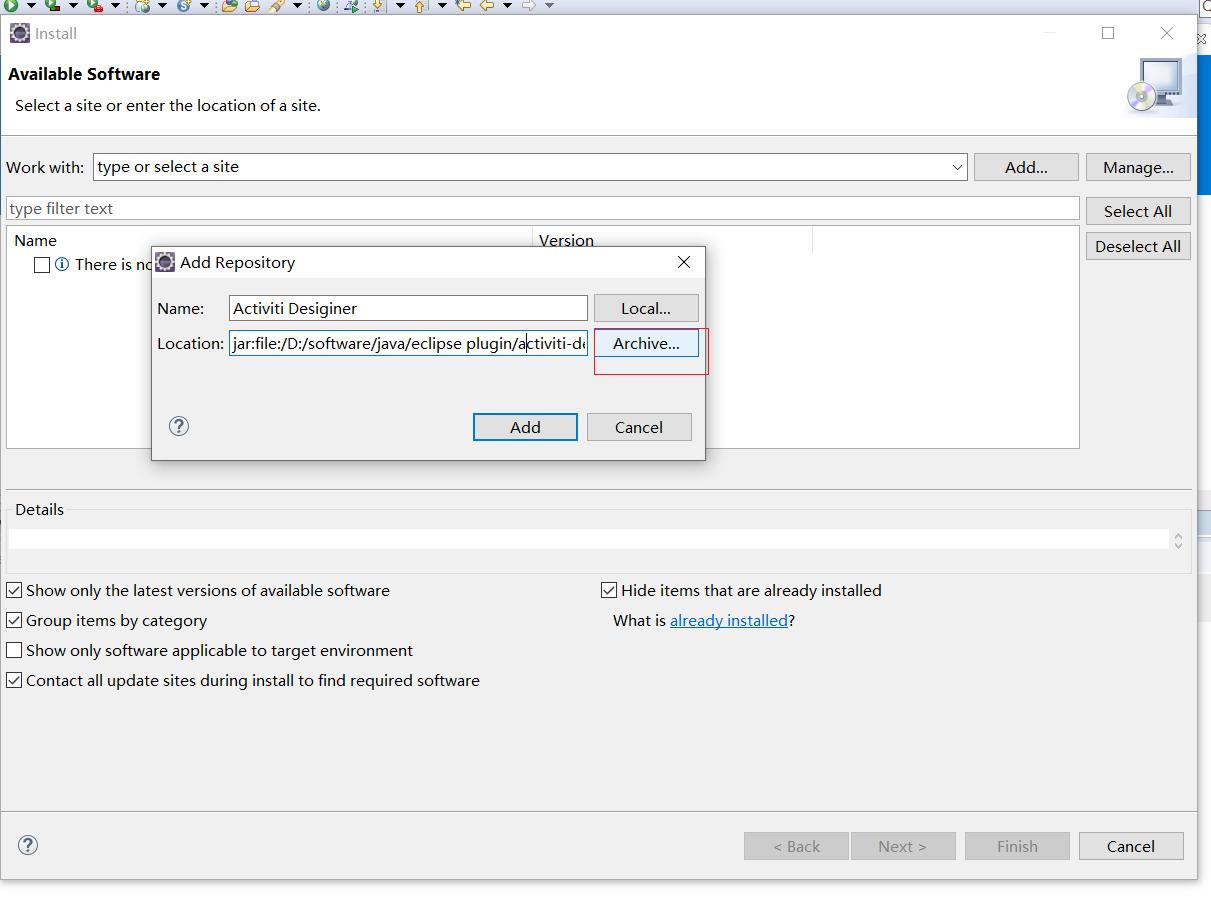
勾選需要安裝的組件后點擊Finish。

接下來會出現同意協議等窗口,直接下一步即可完成安裝。
安裝完成,重啟Eclipse。
## 繪制流程
在項目的src/main/resources目錄下創建 processes子目錄,創建完成的目錄結構如下:
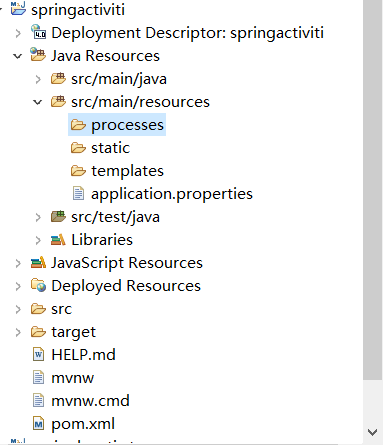
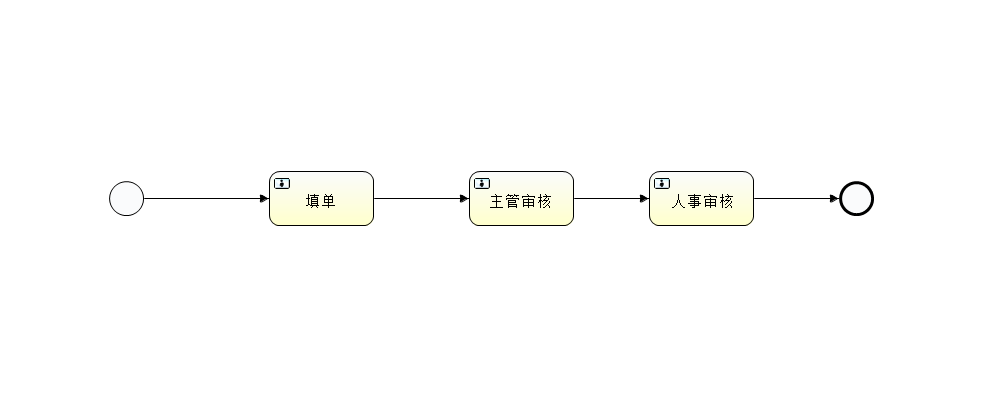
在processes下添加一個簡單的請假流程圖。
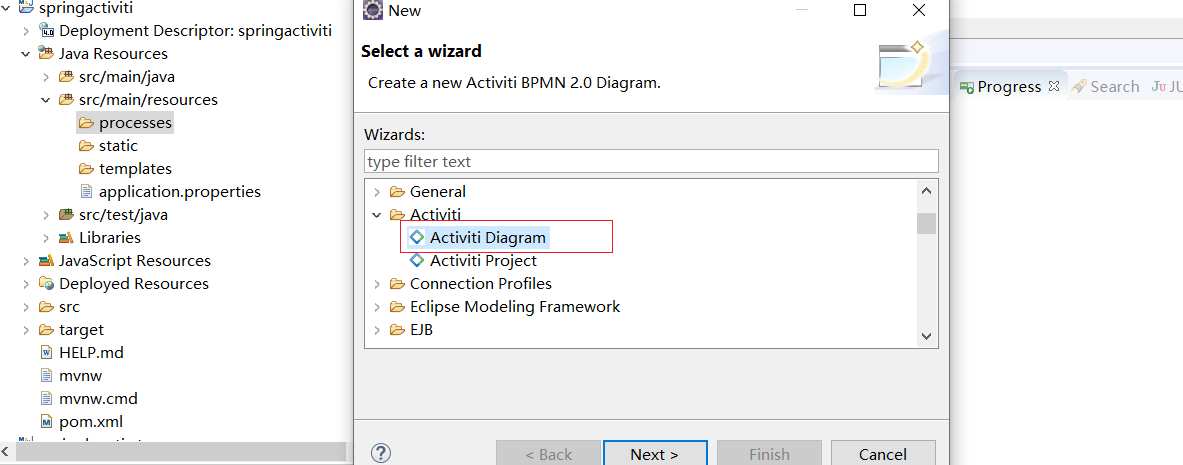
流程圖文件的命名為 TimeOff, 在Eclipse中繪制如下:
## 編寫activiti 工作流代碼
待續
## 問題:
```
java.sql.SQLException: The server time zone value '?й???????' is unrecognized or represents more than one time zone. You must configure either the server or JDBC driver (via the 'serverTimezone' configuration property) to use a more specifc time zone value if you want to utilize time zone support.
```
serverTimezone=UTC
```
url: jdbc:mysql://localhost:3306/activitiflow?useUnicode=true&characterEncoding=utf-8&serverTimezone=UTC
```
##問題2
```
WARN 17864 --- [nio-8080-exec-7] o.s.web.servlet.PageNotFound : No mapping for GET /sw.js
```
https://www.jianshu.com/p/dcf227d53ab5
- 引入篇
- 基礎篇
- 快速入手
- 名詞解釋
- Vue語法
- Vue安裝
- Vue實例
- 模板語法
- 計算屬性和偵聽器
- Class與Style綁定
- 條件渲染
- 列表渲染
- 事件處理
- 表單輸入綁定
- 組件基礎
- 進階篇
- 常用模塊
- 單文件組件
- 快速學會Vue Router路由
- Vue Route 進階使用
- Vuex 與狀態管理
- Axios
- Mock.js
- data數據顯示在頁面
- Vue生命周期
- Vue按需加載組件
- 國際化
- 頁面加載進度條 -NProgress
- 自定義主題顏色
- 開發篇
- Vue入門——創建并運行一個Vue項目
- Vue + Element UI 項目創建
- 使用Vue ui項目創建工具在網頁中創建Vue項目
- Vue項目創建入門實例
- Vue CLI
- 創建項目
- 使用Visual Studio Code 開發Vue項目
- 高級篇
- 組件深入
- Vue+Element
- Vue + ElementUI 主題顏色切換
- 工具篇
- 在線代碼編輯器
- 開發工具(IDE,集成開發環境)
- npm(JavaScript包管理工具)介紹
- Node.js(npm)在Windows下安裝
- webpack介紹
- webpack快速實例
- webpack
- 快速入門實例
- 安裝
- 概念
- Nodejs
- 基礎
- npm
- 命令參考
- 命令
- 模塊安裝
- Babel
- 問題解決篇
- ERROR Failed to get response from https://registry.yarnpkg.com/vue-cli-version -marker
- Vue常見問題
- You are using the runtime-only build of Vue where the template compiler is not
- yarn 報unable to get local issuer certificate
- yarn There appears to be trouble with your network connection. Retrying
- Expected Boolean, got String with value "true".
- 項目篇
- 項目創建
- 項目設計
- 頁面
- 開發問題
- 后端
- Spring Boot + Activiti 工作流框架搭建之一
- Spring Boot + Activiti 工作流框架搭建之二
- 工作流
- Java流程框架
- Activiti
- 頁面風格
- green
- blue
- orange
- 參考篇
- 好的Git項目
- Vue的在線js
- 指令
- 開發說明
- JavaScript 高級
- export和import
- JS模塊化規范對比以及在Node.js的實現
- Storage
- ES2015
- scss
- CSS、Sass、SCSS