
[TOC]
## **1. 為什么要模塊化**
* 由于使用單一狀態樹,應用的所有狀態會集中到一個比較大的對象。當應用變得非常復雜時,store 對象就有可能變得相當臃腫。
* 為了解決以上問題,Vuex 允許我們將 store 分割成**模塊(module)**。每個模塊擁有自己的 state、mutation、action、getter、甚至是嵌套子模塊——從上至下進行同樣方式的分割:
## **2. 模塊入門**
### **2.1 單文件多module**
用vue create 創建的簡單demo
1. `main.js`
~~~
import Vue from "vue";
import App from "./App.vue";
import router from "./router";
import store from "./store";
Vue.config.productionTip = false;
new Vue({
router,
store,
render: h => h(App)
}).$mount("#app");
~~~
2. `store/index.js`
~~~
import Vue from "vue";
import Vuex from "vuex";
Vue.use(Vuex);
const moduleA = {
state: () => ({
conut: 11,
message: '我是A模塊'
}),
mutations: {},
actions: {},
getters: {}
}
const moduleB = {
state: () => ({
message: '我來自B模塊-_-',
}),
mutations: {},
actions: {}
}
export default new Vuex.Store({
state: {},
mutations: {},
actions: {},
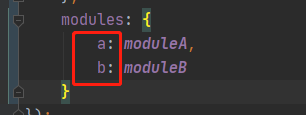
modules: { //modules中添加模塊
a: moduleA,
b: moduleB
}
});
~~~
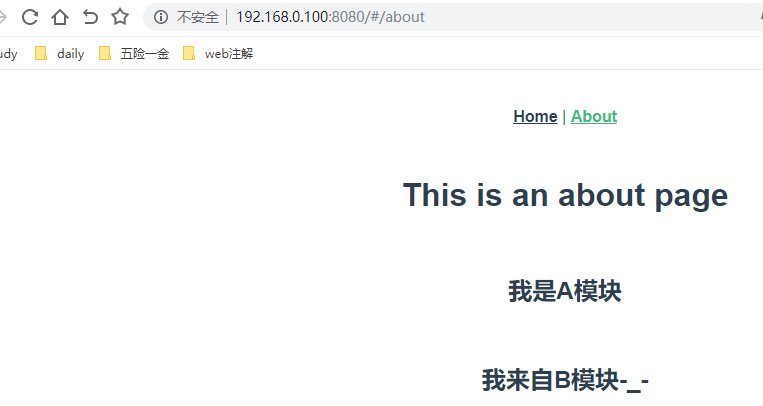
3. `about.js`
~~~
<template>
<div class="about">
<h1>This is an about page</h1>
<br>
<h2>
{{this.$store.state.a.message}}
</h2>
<br>
<h2>
{{this.$store.state.b.message}}
</h2>
</div>
</template>
~~~
**注意:模塊中mutation、getters和actions接收的參數是本地化的state,即本身的數據**
### **2.2 一個module一個文件**
上邊的例子顯然不符合vuex木塊化的初衷,store/index.js文件還是很bloated,所以我們要把模塊拆出來,成單個的module文件
例如:將a和b模塊拆出來,對應store下邊連個目錄
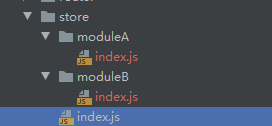
1. `store/moduleA/index.js`
~~~
export const moduleA = {
state: () => ({
conut: 11,
message: '我是A模塊'
}),
mutations: {},
actions: {},
getters: {}
}
~~~
2. `store/moduleB/index.js`
~~~
export const moduleB = {
state: () => ({
message: '我來自B模塊-_-',
}),
mutations: {},
actions: {}
}
~~~
3. store/index.js
~~~
import Vue from "vue";
import Vuex from "vuex";
Vue.use(Vuex);
import {moduleA} from './moduleA'
import {moduleB} from './moduleB'
export default new Vuex.Store({
state: {},
mutations: {},
actions: {},
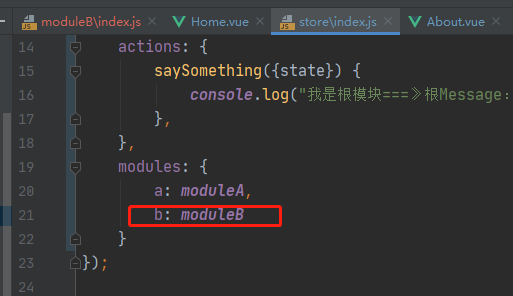
modules: {
a: moduleA,
b: moduleB
}
});
~~~
**`import {moduleA} from './moduleA'` 默認加載moduleA目錄下的index.js文件
如果有其他文件,直接加文件名即可,例如`import {moduleA} from './moduleA/test'` 加載moduleA目錄下的test.js文件**
### **2.3 子模塊獲取根模塊的state**
注意:在開啟和未開始名稱空間后,訪問的區別,此時getters,actions和mutions都是注冊到全局命名空間中的
1. 對于模塊內部的 action,局部狀態通過`context.state`暴露出來,根節點狀態則為`context.rootState`:
2. 對于模塊內部的 `getter`,根節點狀態會作為第三個參數暴露出來:
#### 2.3.1 getters訪問
1. `moduleA/index.js`
~~~
getters: {
rootMessages(state, getters, rootState) {
console.log("huoquget");
return state.count + rootState.rootMessage
}
}
~~~
2. 訪問方式
1)使用`this.$store.getters.rootMessages`直接訪問
2)使用`mapGetters`輔助函數
~~~
<script>
import {mapGetters} from 'vuex' //引入輔助函數
export default {
computed: {
...mapGetters(['rootMessages'])
}
}
</script>
~~~
` ...mapGetters(['rootMessages']) `名稱一致簡寫,否則
可可以寫成別名的方式
~~~
computed: {
// ...mapGetters(['rootMessages']) 簡寫形式
...mapGetters({
roots: 'rootMessages' //別名:getter屬性
})
}
~~~
全js
~~~
export const moduleA = {
state: () => ({
count: 11,
message: '我是A模塊'
}),
mutations: {},
actions: {
rootAction({state, rootState}) {
console.log("根Message:" + rootState.message + "mokuaiA" + state)
},
},
getters: {
rootMessages(state, getters, rootState) {
console.log("huoquget");
return state.count + rootState.rootMessage
}
}
}
~~~
about.js
~~~
<template>
<div class="about">
<h1>This is an about page</h1>
<br>
<h2>
{{this.$store.state.a.message}}
</h2>
<br>
<h2>
{{this.$store.state.b.message}}
</h2>
<h1>
<!-- this. 去掉也可以,訪問getter1 -->
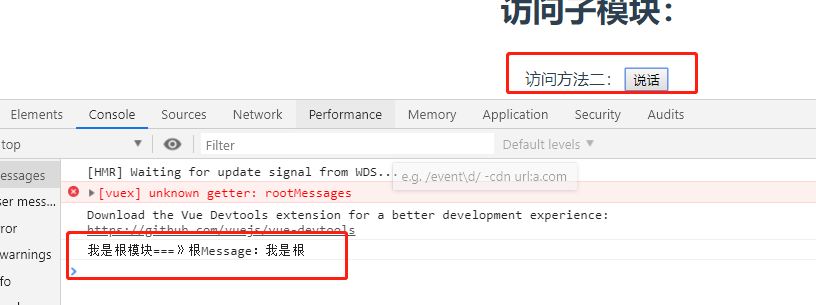
訪問子模塊:{{this.$store.getters.rootMessages}}
</h1>
<br>
訪問方法二:{{rootMessages}}
<!-- 訪問方法二起別名:{{roots}} -->
</div>
</template>
<script>
import {mapGetters} from 'vuex'
export default {
computed: {
...mapGetters(['rootMessages']) //簡寫形式
// ...mapGetters({ //別名方式
// roots: 'rootMessages' //別名:getter屬性
// })
}
}
</script>
~~~
由此可以看出,getters是注冊到全局空間當中了
## 3. 模塊的名稱空間
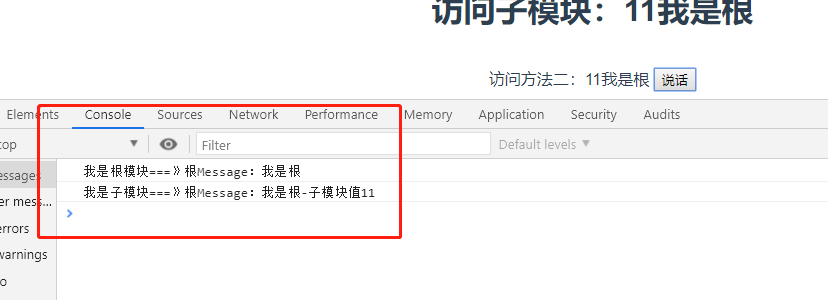
### 3.1 案例引出
1. store/index.js
~~~
actions: {
saySomething({state,rootState}) {
console.log("我是根模塊===》根Message:" + state.rootMessage)
},
},
~~~
2. moduleA/index.js
~~~
actions: {
saySomething({state}) {
console.log("我是子模塊===》根Message:" + rootState.rootMessage + "-子模塊值" + state.count)
},
~~~
根模塊和子模塊A都有一個action方法 saySomething
about.vue
~~~
<button @click="submit">說話</button>
<script>
import {mapGetters, mapActions} from 'vuex'
export default {
methods: {
...mapActions(['saySomething']),
submit() {
this.saySomething();
}
}
}
</script>
~~~
如下圖:當點擊按鈕時,發現兩個方法都被觸發了,這就是模塊化后,子module與父module都在一個名稱空間帶來的問題。
### **3.2 引入名稱空間**
* 默認情況下,模塊內部的 action、mutation 和 getter 是注冊在**全局命名空間**的——這樣使得多個模塊能夠對同一 mutation 或 action 作出響應。
* 如果希望你的模塊具有更高的封裝度和復用性,你可以通過添加`namespaced: true`的方式使其成為帶命名空間的模塊。當模塊被注冊后,它的所有 getter、action 及 mutation 都會自動根據模塊注冊的路徑調整命名。例如上邊的問題,可以通過增加名稱空間來解決
模塊A
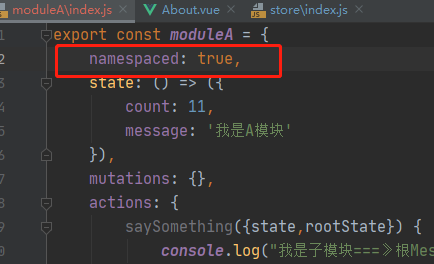
此時點擊按鈕,只會調用父模塊的方法
#### **3.2.1 那如何調用子組件的action,mution和gettters呢?**
就是調用方法的時候 '模塊名/屬性名',如:
1)調用actions
dispatch('a/saySomething')
2) 調用getter
getters['a/isAdmin']
3)調用mutations
commit('a/add')
完整
模塊A
~~~
export const moduleA = {
namespaced: true,
state: () => ({
count: 11,
message: '我是A模塊'
}),
mutations: {
add(state){
console.log("mutations - add執行")
state.count++;
}
},
actions: {
saySomething() {
console.log("action - saySomething執行")
},
},
getters: {
rootMessages(state, getters, rootState) {
console.log("getter 執行");
return state.count + rootState.rootMessage
}
}
}
~~~
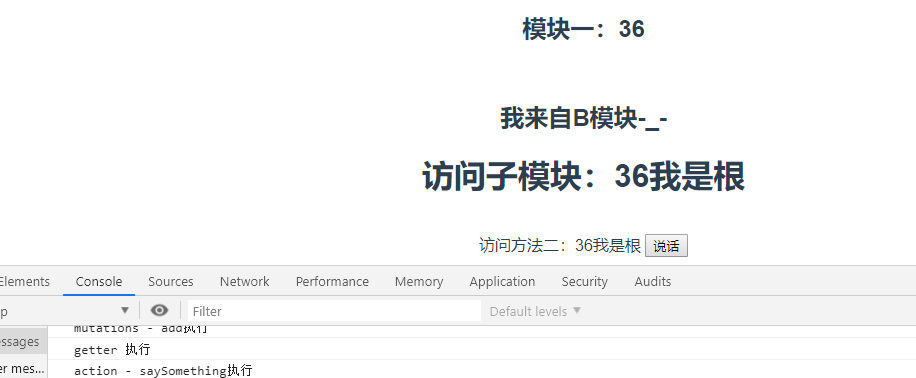
about.vue
~~~
<template>
<div class="about">
<h1>This is an about page</h1>
<br>
<h2>
模塊一:{{this.$store.state.a.count}}
</h2>
<br>
<h2>
{{this.$store.state.b.message}}
</h2>
<h1>
<!-- this. 去掉也可以,訪問getter1 -->
<!-- 訪問子模塊:{{this.$store.getters.rootMessages}}-->
訪問子模塊:{{this.$store.getters['a/rootMessages']}}
</h1>
<br>
訪問方法二:{{rootMessages}}
<!-- 訪問方法二起別名:{{roots}} -->
<button @click="submit">說話</button>
</div>
</template>
<script>
import {mapGetters, mapActions} from 'vuex'
export default {
computed: {
...mapGetters({rootMessages: 'a/rootMessages'}) //簡寫形式
// ...mapGetters({ //別名方式
// roots: 'rootMessages' //別名:getter屬性
// })
},
methods: {
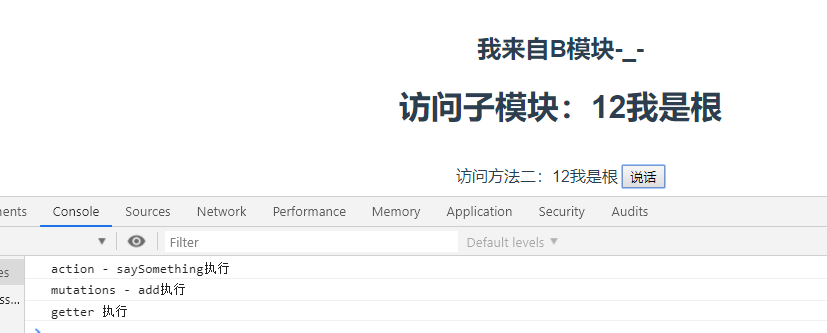
...mapActions(['saySomething']),
submit() {
// this.saySomething();
this.$store.dispatch('a/saySomething');
this.$store.commit('a/add');
this.$store.getters['a/rootMessages'];
}
}
}
</script>
~~~
點擊按鈕,觸發
#### 3.2.1 在帶命名空間的模塊內訪問全局內容(Global Assets)
如果你希望使用全局 state 和 getter,`rootState`和`rootGetters`會作為第三和第四參數傳入 getter,也會通過`context`對象的屬性傳入 action。
~~~
modules: {
foo: {
namespaced: true,
getters: {
// 在這個模塊的 getter 中,`getters` 被局部化了
// 你可以使用 getter 的第四個參數來調用 `rootGetters`
someGetter (state, getters, rootState, rootGetters) {
getters.someOtherGetter // -> 'foo/someOtherGetter'
rootGetters.someOtherGetter // -> 'someOtherGetter'
},
someOtherGetter: state => { ... }
},
actions: {
// 在這個模塊中, dispatch 和 commit 也被局部化了
// 他們可以接受 `root` 屬性以訪問根 dispatch 或 commit
someAction ({ dispatch, commit, getters, rootGetters }) {
getters.someGetter // -> 'foo/someGetter'
rootGetters.someGetter // -> 'someGetter'
dispatch('someOtherAction') // -> 'foo/someOtherAction'
dispatch('someOtherAction', null, { root: true }) // -> 'someOtherAction'
commit('someMutation') // -> 'foo/someMutation'
commit('someMutation', null, { root: true }) // -> 'someMutation'
},
someOtherAction (ctx, payload) { ... }
}
}
}
~~~
#### 在帶命名空間的模塊注冊全局 action
若需要在帶命名空間的模塊注冊全局 action,你可添加`root: true`,并將這個 action 的定義放在函數`handler`中。例如:
~~~
{
actions: {
someOtherAction ({dispatch}) {
dispatch('someAction')
}
},
modules: {
foo: {
namespaced: true,
actions: {
someAction: {
root: true,
handler (namespacedContext, payload) { ... } // -> 'someAction'
}
}
}
}
}
~~~
#### **3.2.3 帶命名空間的綁定函數**
當使用`mapState`,`mapGetters`,`mapActions`和`mapMutations`這些函數來綁定帶命名空間的模塊時,寫起來可能比較繁瑣:
~~~
computed: {
...mapState({
a: state => state.some.nested.module.a,
b: state => state.some.nested.module.b
})
},
methods: {
...mapActions([
'some/nested/module/foo', // -> this['some/nested/module/foo']()
'some/nested/module/bar' // -> this['some/nested/module/bar']()
])
}
~~~
對于這種情況,你可以將模塊的空間名稱字符串作為第一個參數傳遞給上述函數,這樣所有綁定都會自動將該模塊作為上下文。于是上面的例子可以簡化為:
~~~
computed: {
...mapState('some/nested/module', {
a: state => state.a,
b: state => state.b
})
},
methods: {
...mapActions('some/nested/module', [
'foo', // -> this.foo()
'bar' // -> this.bar()
])
}
~~~
### **3.3 `createNamespacedHelpers`**
### 3.3.1 子組件中使用模塊
* 創建基于某個命名空間輔助函數。它返回一個對象,對象里有新的綁定在給定命名空間值上的組件綁定輔助函數:
* 上邊調用actons,mutations和getters、state都需要路徑,有了createNamespacedHelpers工具,可以幫我們自動創建名稱空間,引入空間的mapGetters、mapState、mapMutations和mapActions輔助函數
B模塊
~~~
export const moduleB = {
namespaced: true, //開啟名稱空間
state: () => ({
message: '我來自B模塊-_-',
count: 100
}),
mutations: {
add(state){
console.log("mutations B模塊 - add執行")
state.count++;
}
},
actions: {
saySomething() {
console.log("action B模塊- saySomething執行")
},
},
getters: {
rootMessages(state, getters, rootState) {
console.log("getter B模塊 執行");
return state.count + rootState.rootMessage
}
}
}
~~~
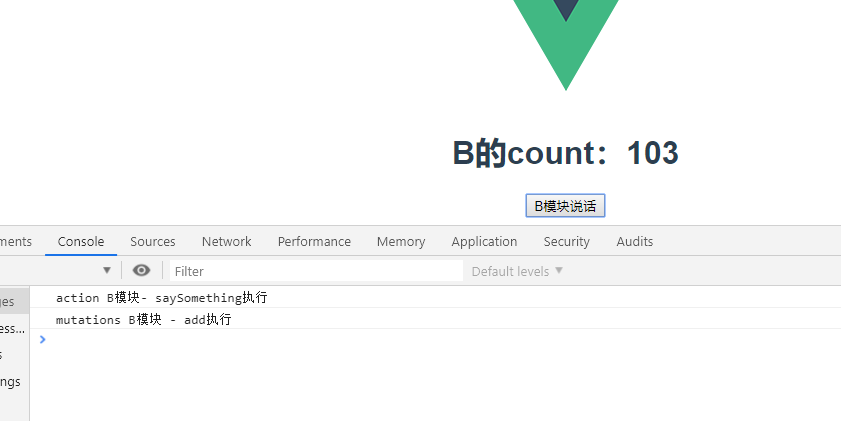
`home.vue`
~~~
<template>
<div class="home">
<img alt="Vue logo" src="../assets/logo.png"/>
<h1>B的count:{{count}}</h1>
<button @click="submit">B模塊說話</button>
</div>
</template>
<script>
import {createNamespacedHelpers} from 'vuex'
const {mapState, mapActions,mapMutations} = createNamespacedHelpers('b')
export default {
name: "Home",
components: {},
computed: {
...mapState(['count', 'message'])
},
methods: {
...mapActions(['saySomething']),
...mapMutations(['add']),
submit() {
this.saySomething();
this.add();
}
}
};
</script>
~~~
注意;createNamespacedHelpers('b')中的b,代表的是父木塊中注冊的子模塊
點擊按鈕,count加1,action之類的都執行了
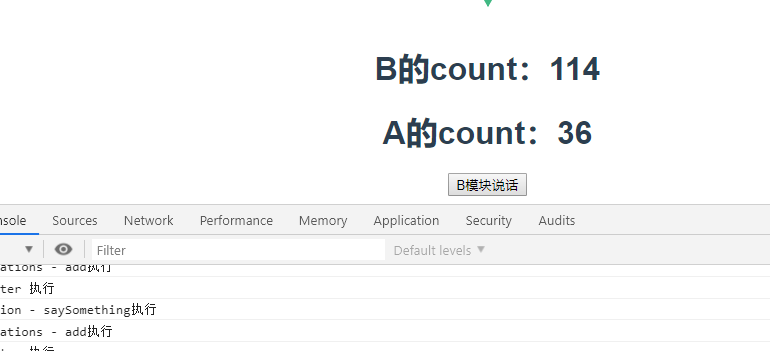
#### 3.3.2 引入多個名稱空間
例如在上邊的例子中,再引入A模塊(但是要起別名)
home.vue
~~~
<template>
<div class="home">
<img alt="Vue logo" src="../assets/logo.png"/>
<h1>B的count:{{count}}</h1>
<h1>A的count:{{countA}}</h1>
<button @click="submit">B模塊說話</button>
</div>
</template>
<script>
import {createNamespacedHelpers} from 'vuex'
const {mapState, mapActions,mapMutations} = createNamespacedHelpers('b')
const {mapState: mapStateA,mapMutations: mapMutationsA} = createNamespacedHelpers('a')
export default {
name: "Home",
components: {},
computed: {
...mapState(['count', 'message']),
...mapStateA({countA: 'count'}) //A模塊別名
},
methods: {
...mapActions(['saySomething']),
...mapMutations(['add']),
...mapMutationsA({addA:'add'}), //A模塊別名
submit() {
this.saySomething();
this.add();
this.addA(); //調用A模塊
}
}
};
</script>
~~~
home頁
about頁
由上可以看出數據兩個頁同步了
- vue
- 為什么要學vue
- 數據雙向綁定
- vue指令
- v-bind創建HTML節點屬性
- v-on綁定事件
- v-cloak
- v-text
- v-for和key屬性
- v-if和v-show
- 案例1
- 自定義指令
- vue樣式
- vue生命周期
- vue過濾器
- 自定義鍵盤修飾符
- 跨域請求
- vue組件
- 組件基礎
- 引入vue文件組件
- 引入render函數作為組件
- 兄弟間組件通信
- 組件函數數據傳遞練習
- 路由
- 數據監聽
- webpack
- vue校驗
- vue筆記
- form表單中input前部分默認輸入,切不可修改
- mixins
- 部署到nginx
- scope
- render
- 下載文件
- vue動態組件
- axios
- Promise
- vue進階
- node-vue-webpack搭建
- vue事件
- 插槽
- vuex
- vuex基礎
- vuex命名空間
- HTML遞歸?
- this.$nextTick異步更新dom
- elementui
- table
- 修改element ui樣式
- form
- 優質博客
- vuex state數據與form元素綁定
- es6
- Promise