
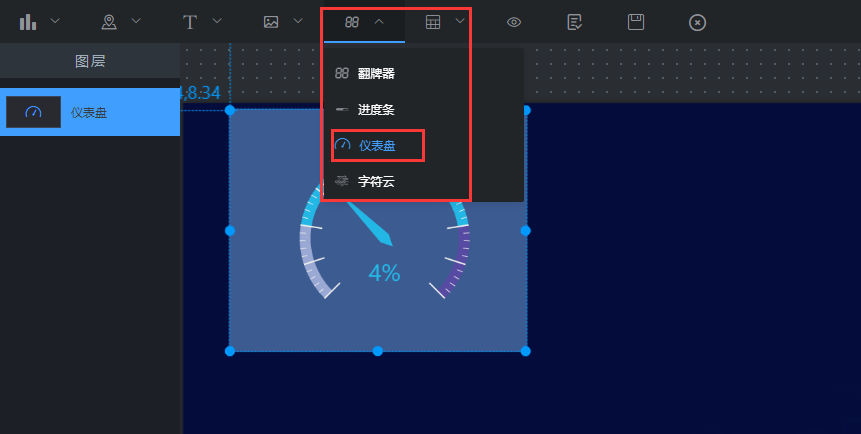
### 儀盤表組件就是設置儀盤效果的組件,效果圖如圖5.21。點擊“”圖標,再點擊“儀盤表”,即可創建儀盤表,如圖5.22;


## **一、組件名稱設置**
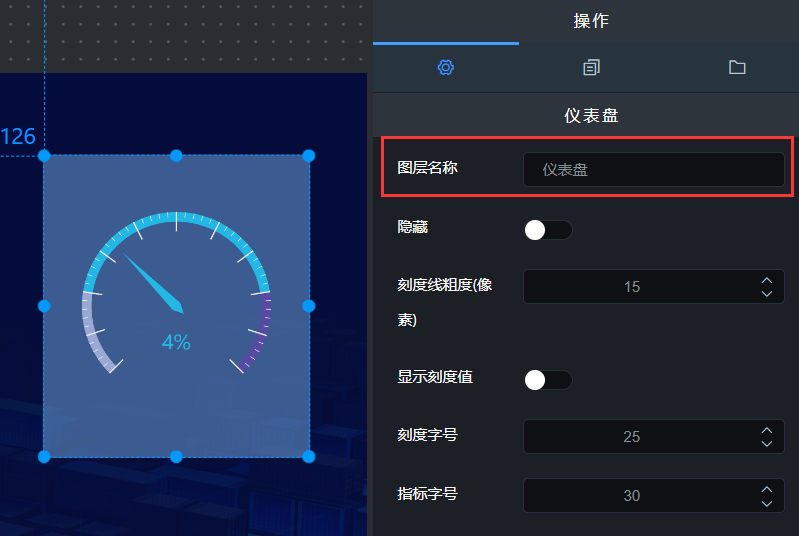
### 選中該儀盤表組件,在操作界面右側的“圖層名稱”處可修改組件的名稱,如圖5.23。(名稱最好要設置一下,方便后期組件管理)

## **二、基本樣式設置**
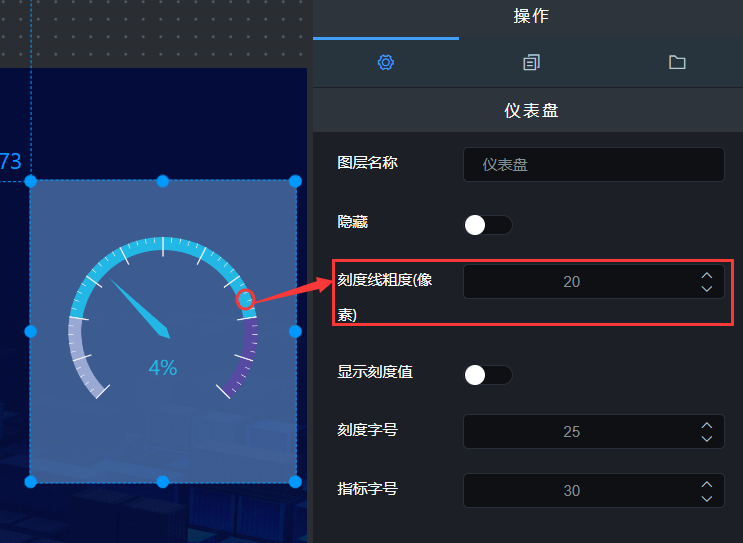
### 1\. 刻度線粗度(像素)
### 選中該儀盤表組件,在操作界面右側的“刻度線粗度(像素)”處可設置組件的輪播時間,如圖5.24;

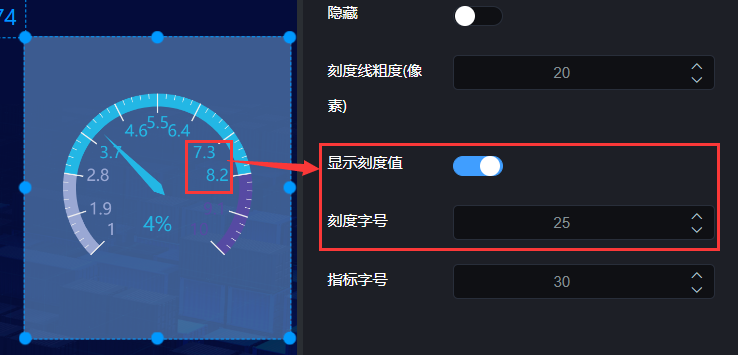
### 2\. 設置刻度值
### 選中該儀盤表組件,在操作界面右側,打開“顯示刻度”按鈕,可在儀盤表顯示刻度,設置字號處可修改刻度子的大小,如圖5.25。

### 3\. 顯示刻度線
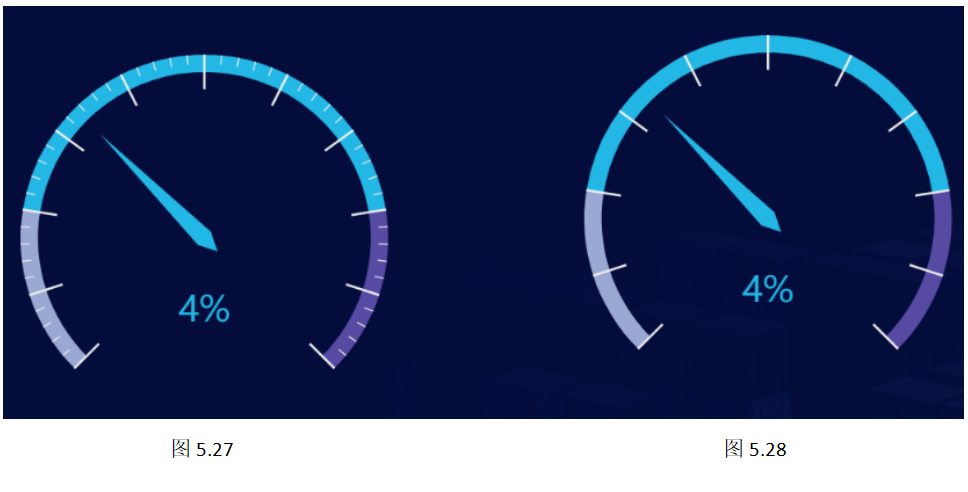
### 選中該儀盤表組件,在操作界面右側的“顯示刻度線”處可設置是否顯示刻度線,如圖5.26。(圖5.27為顯示刻度線樣式;圖5.28為不顯示刻度線樣式;)


### 3\. 指標字號
### 選中該儀盤表組件,在操作界面右側的“指標字號”處可設置指標名稱字的大小,如圖5.26。


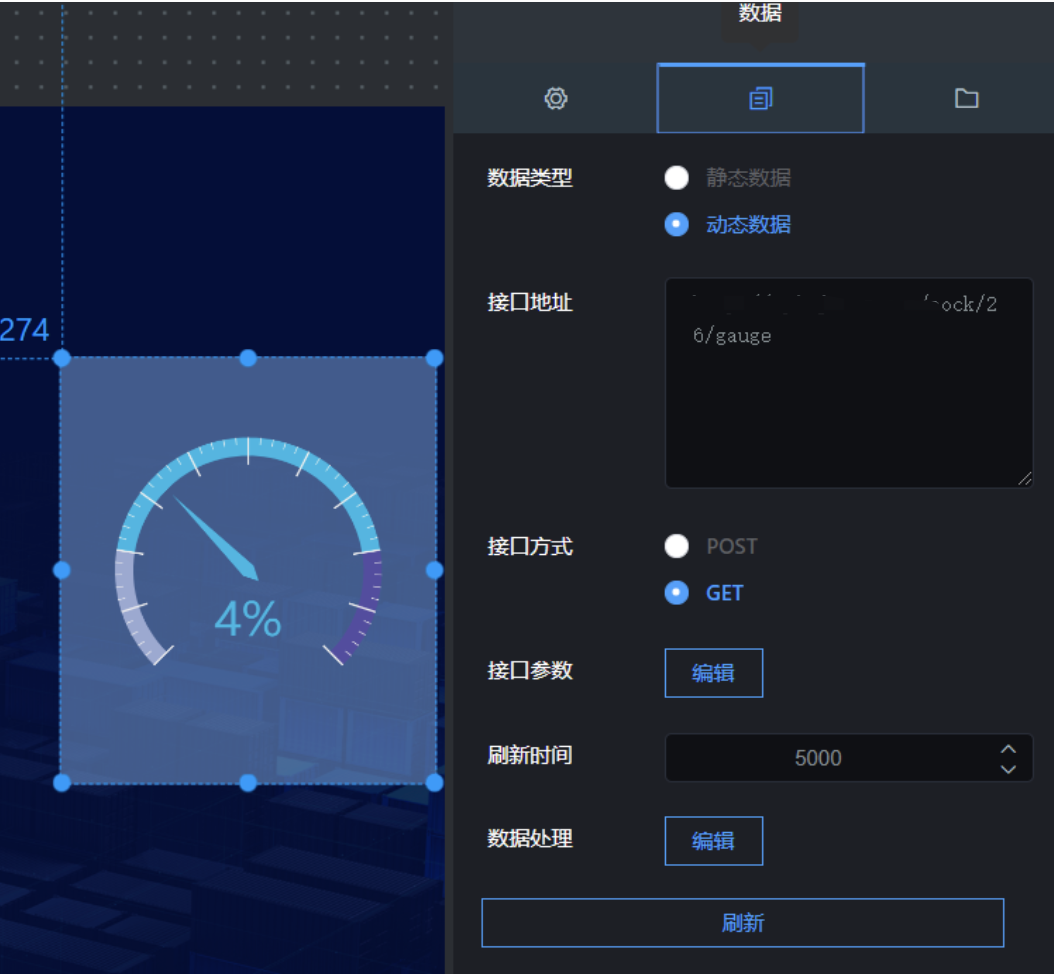
## **三、接口設置**
### 1\. 數據類型
### 數據類型分為靜態數據和動態數據;
* ### 靜態數據:寫死的數據;
* ### 動態數據:會隨著接口傳過來的數據實時變化;(一般這種比較常用)
### 2\. 接口地址
### (1)靜態數據,接口地址穿過來的內容要符合以下格式:
~~~
{
"min": 1,
"max": 10,
"label": "名稱",
"value": 2,
"unit": "%"
}
~~~
### (2)動態數據,接口地址穿過來的內容要符合以下格式:
~~~
{"data":{"min":1,"max":10,"label":"名稱","value":4,"unit":"%"}}
~~~
### 3\. 刷新時間
### 這個參數主要針對動態數據設置的,完成數據的實時更新。
* ### 如果你想設置成5秒刷新一次,可以將刷新時間設置成“5000”;
### 4\. 刷新數據
### 這個參數主要是重新請求以下接口,完成數據的更新。
- 文檔目錄
- 智能網關使用說明
- P411硬件使用手冊
- P42x硬件使用手冊
- P43x硬件使用手冊
- P45x硬件使用手冊
- EdgeLink軟件使用說明
- 智能網關功能說明
- 智能網關遠程管理
- 防火墻功能使用說明
- GPS定位功能使用說明
- 本地固件升級
- TCP透傳功能使用說明
- 工業云平臺使用說明
- 舊組態功能使用說明
- 新組態功能使用說明
- V P N服務
- 云平臺報警功能介紹
- 定時任務功能使用說明
- 視頻監控功能使用說明
- 定時任務實現網關防拆功能
- 微信小程序使用說明
- 組織管理功能使用說明
- 新平臺數據點表公式說明
- 舊平臺數據點表公式說明
- 大屏監控使用說明
- 基本操作
- 1.新建大屏
- 2.畫布介紹
- 3.添加組件
- 4.調整組件的圖層和位置
- 5.預覽、保存組件
- 6.修改大屏
- 組件使用說明
- 1.背景設置
- 2.圖表類組件
- 2.1柱圖形組件
- 2.2折線圖組件
- 2.3餅圖組件
- 2.4環形圖組件
- 2.5象形圖組件
- 2.6雷達圖組件
- 2.7散點圖組件
- 2.8漏斗圖組件
- 3.文本類組件
- 3.1文本框組件
- 3.2跑馬燈組件
- 3.3超鏈接組件
- 3.4實時時間組件
- 4.圖片類組件
- 4.1圖片組件
- 4.2圖片框組件
- 4.3輪播圖組件
- 4.4滑動組件
- 4.5iframe組件
- 4.6video組件
- 5.指標類組件
- 5.1翻牌器組件
- 5.2儀盤表組件
- 5.3字符云組件
- 5.4進度條組件
- 6.表格類組件
- 6.1表格組件
- 6.2選項卡組件
- 7.地圖類組件
- 7.1地圖組件
- 8.萬能組件
- 8.1堆疊條形圖
- 8.2正負條形圖
- 8.3雙向對比柱形圖
- 8.4圓形柱形圖
- 8.5嵌套餅圖
- 8.6矩形樹圖
- 8.7K線圖
- 組件數據
- 智能網關與電腦主機驅動列表
- ModbusRTU主站
- ModbusSlave軟件模擬ModbusRTU從站
- MCGS觸摸屏做ModbusRTU從站
- 威綸通觸摸屏做ModbusRTU從站
- 西門子S7-200 Smart ModbusRTU從站
- 艾莫迅PLC做ModbusRTU從站
- 亞控組態王做ModbusRTU從站
- 海為PLC做ModbusRTU從站
- 英威騰PLC ModbusRTU從站
- ModbusTCP主站
- ModbusSlave軟件模擬ModbusTCP從站
- MCGS觸摸屏做ModbusTCP從站
- 威綸通觸摸屏做ModbusTCP從站
- 西門子S7-200 Smart ModbusTCP數據采集
- 亞控組態王做ModbusTCP從站
- 創恒P700 DCS做Modbus TCP從站
- PLC自有協議主站
- 西門子S7-200 PPI
- 西門子S7-200 Smart以太網
- 西門子S7-1200 以太網
- 三菱FX協議
- 臺達
- 永宏
- 信捷XC
- ModbusRTU從站
- ModbusPoll軟件模擬ModbusRTU主站
- MCGS觸摸屏做ModbusRTU主站
- 威綸通觸摸屏做ModbusRTU主站
- 亞控組態王做ModbusRTU主站
- ModbusTCP從站
- ModbusPoll軟件模擬ModbusTCP主站
- MCGS觸摸屏做ModbusTCP主站
- 威綸通觸摸屏做ModbusTCP主站
- 亞控組態王做ModbusTCP主站
- 智能網關串口透傳
- 三菱PLC遠程上下載
- 英威騰PLC遠程上下載
- 臺達PLC遠程上下載
- 永宏PLC遠程上下載
- 信捷PLC遠程上下載
- 海為PLC遠程上下載
- HighLink軟件使用說明
- P401/P200系列DTU模塊使用說明
- P401使用說明書(圖)
- DTU配置工具使用說明
- 固件升級說明
- 串口透傳:組態王與西門子S7-200遠程采集
- P401應用西門子200遠程數據采集
- V P N應用:網口遠程上下載調試
- 西門子S7-200 SMART遠程上下載調試
- 西門子S7-1200遠程上下載調試
- 威綸通觸摸屏遠程上下載調試
- 昆侖通態觸摸屏遠程上下載調試
- HighLink方案遠程調試功能說明
- 同時連接不同網關下的網絡設備
- 第三方平臺數據接入
- 網關接入阿里云物聯網平臺
- 網關接入客戶自建MQTT服務器
- MQTT客戶端接入創恒云平臺
- 附錄I、錯誤碼說明
- 附錄II、獲取網關ID和設備ID
- HTTP API實現數據上報下發(新平臺)
- HTTP API實現數據上報下發(舊平臺)
- 網關接入華云RomaConnect云平臺
- 創恒云點表導出至華為云
- 常見問題
- 設備狀態顯示離線
- HighLink常見問題
- 232/485串口通信連接不上
- VPN遠程 常見問題 排查方法
- 數據采集常見問題
- 點表編寫常見問題
- DTU配置工具常見問題
- 本地無法進入網關管理頁面
- HighLink路由表常見問題
- AP和STA是什么意思
- 資料分享
- 常用MQTT客戶端介紹及使用
- Modbus協議
- LTE-CAT1介紹
- 物聯網卡問題總結
- 新老平臺差別說明
- 聯系我們
- 硬件定制開發
- 云平臺定制
- 應用案例