
[TOC]
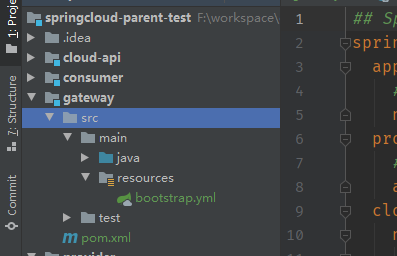
# 1. 創建gateway服務
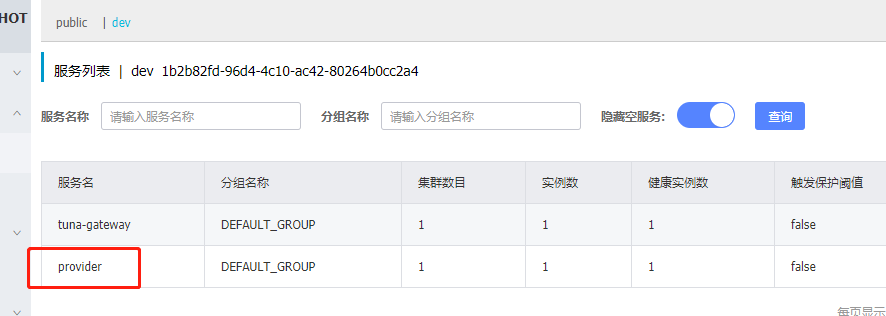
gateway需要從nacos獲取服務列表和配置
**1. 創建gateway模塊**
**2. pom**
~~~
<!--需要引入該jar才能使bootstrap配置文件生效-->
<dependency>
<groupId>org.springframework.cloud</groupId>
<artifactId>spring-cloud-context</artifactId>
</dependency>
<!--服務發現-->
<dependency>
<groupId>com.alibaba.cloud</groupId>
<artifactId>spring-cloud-starter-alibaba-nacos-discovery</artifactId>
</dependency>
<!--服務配置-->
<dependency>
<groupId>com.alibaba.cloud</groupId>
<artifactId>spring-cloud-starter-alibaba-nacos-config</artifactId>
</dependency>
<!--服務網關-->
<dependency>
<groupId>org.springframework.cloud</groupId>
<artifactId>spring-cloud-starter-gateway</artifactId>
</dependency>
~~~
3. 啟動類
~~~
@SpringBootApplication
@EnableDiscoveryClient
public class GatewayApplication {
public static void main(String[] args) {
SpringApplication.run(GatewayApplication.class, args);
}
}
~~~
4. bootstrap.yml
~~~
application:
# 應用名稱
name: gateway
profiles:
# 環境配置
active: dev
cloud:
nacos:
config:
# 配置中心地址
server-addr: 192.168.56.10:8848
# 配置文件格式
file-extension: yml
group: DEFAULT_GROUP
namespace: 1b2b82fd-96d4-4c10-ac42-80264b0cc2a4
~~~
4. gateway-dev.yml
配置nacos服務注冊中心和配置中心
```
server:
port: 8002
spring:
application:
name: tuna-gateway
cloud:
nacos:
discovery:
# 服務注冊地址
server-addr: 192.168.56.10:8848
namespace: 1b2b82fd-96d4-4c10-ac42-80264b0cc2a4
gateway:
discovery:
locator:
lowerCaseServiceId: true
enabled: true
routes:
# 認證中心
- id: provider-router
uri: lb://provider
predicates:
- Path=/test/**
```
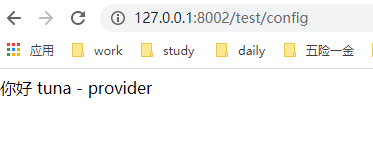
所有 到gateway上的請求,都會路由到服務名`provider`上
# 2. 路徑重寫
RewritePath GatewayFilter Factory
The RewritePath GatewayFilter Factory takes a path?regexp?parameter and a?replacement?parameter. This uses Java regular expressions for a flexible way to rewrite the request path.
application.yml.?
```
spring:
cloud:
gateway:
routes:
# =====================================
- id: rewritepath_route
uri: http://example.org
predicates:
- Path=/foo/**
filters:
- RewritePath=/foo/(?<segment>.*), /$\{segment}
```
For a request path of?/foo/bar, this will set the path to?/bar?before making the downstream request. Notice the?$\\?which is replaced with?$?because of the YAML spec.
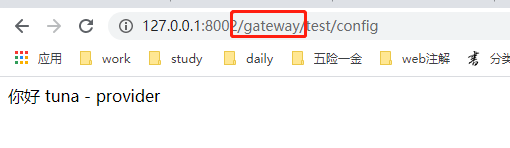
修改
```
routes:
# 認證中心
- id: provider-router
uri: lb://provider
predicates:
- Path=/gateway/**
filters:
- RewritePath=/gateway/(?<segment>.*), /$\{segment}
```
RewritePath要與 predicates:
中的path相同
# 3. 加入filter
## 3.1 普通filter
1. 定義filter,繼承
~~~
@Component
public class ValidateCodeFilter extends AbstractGatewayFilterFactory<Object> {
private final static String AUTH_URL = "/login";
private static final String CODE = "code";
@Override
public GatewayFilter apply(Object config) {
HashMap<Object, Object> res = new HashMap<>();
return (exchange, chain) -> {
ServerHttpRequest request = exchange.getRequest();
// 非登錄請求,不處理
if (!StringUtils.containsIgnoreCase(request.getURI().getPath(), AUTH_URL)) {
return chain.filter(exchange);
}
try {
List<String> code = exchange.getRequest().getQueryParams().get("code");
if (code.size() == 0)
throw new RuntimeException("非法用戶");
} catch (Exception e) {
ServerHttpResponse response = exchange.getResponse();
response.getHeaders().add("Content-Type", "application/json;charset=UTF-8");
return exchange.getResponse().writeWith(
Mono.just(response.bufferFactory().wrap(JSON.toJSONBytes(res.put("message", "請求失敗")))));
}
return chain.filter(exchange);
};
}
}
~~~
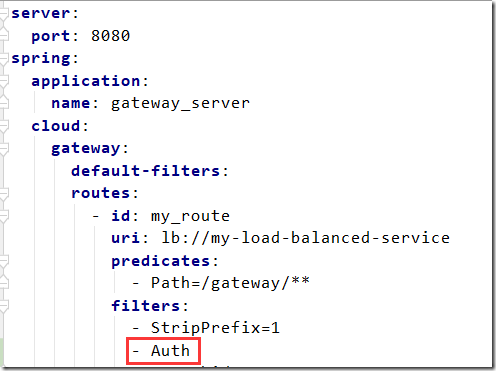
2. 修改配置,加入filter
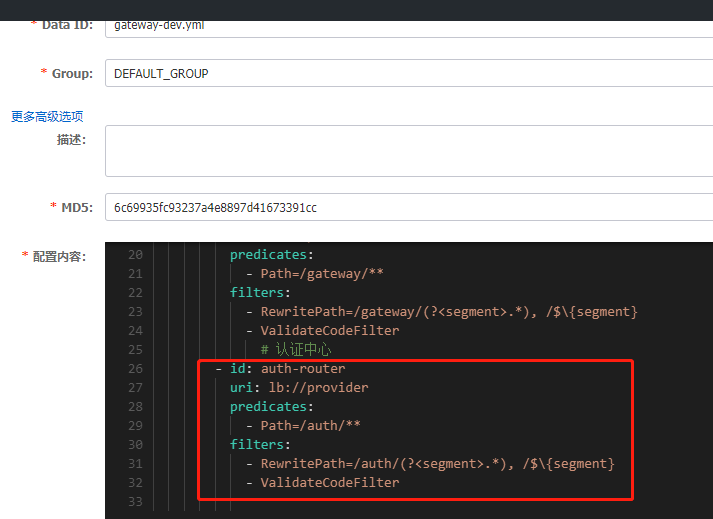
如圖配置,只對/auth/開頭的請求router進行過濾
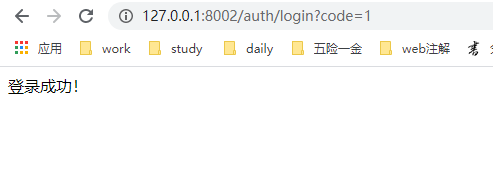
請求成功
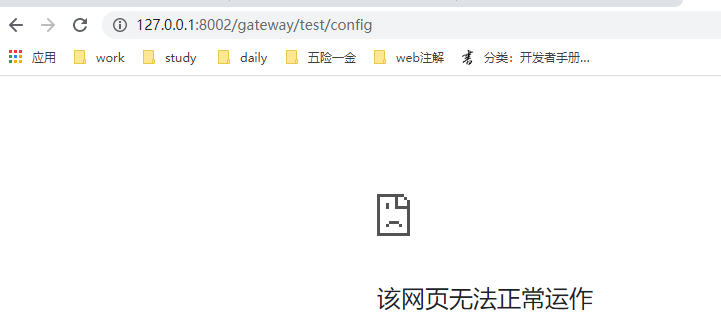
請求失敗

## 3.2 自定義全局filter
**無需配置,對所有的route都有效,可進行流量控制,權限等校驗**
~~~
@Component
public class TokenFilter implements GlobalFilter, Ordered {
@Override
public Mono<Void> filter(ServerWebExchange exchange, GatewayFilterChain chain) {
String token = exchange.getRequest().getQueryParams().getFirst("token");
if (token == null || token.isEmpty()) {
exchange.getResponse().setStatusCode(HttpStatus.UNAUTHORIZED);
return exchange.getResponse().setComplete();
}
return chain.filter(exchange);
}
@Override
public int getOrder() {
return -100;
}
}
~~~

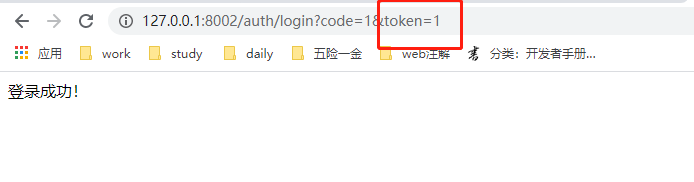
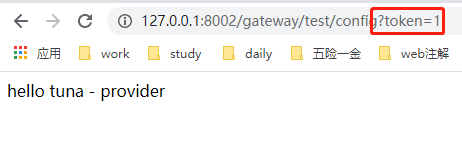
對auth和gateway兩個route都進行了攔截
## 3.3 自定義局部過濾器
局部過濾器,**需要在配置文件中配置,如果配置,則該過濾器才會生效**。
**主要實現GatewayFilter, Ordered接口,并通過AbstractGatewayFilterFactory的子類注冊到spring容器中,當然也可以直接繼承AbstractGatewayFilterFactory,在里面寫過濾器邏輯,還可以從配置文件中讀取外部數據。**
只需要在親請求處理之前和之后標記時間即可。注意此處演示的是使用配置類的形式:
~~~
package com.yefengyu.gateway.globalFilter;
import org.springframework.cloud.gateway.filter.GlobalFilter;
import org.springframework.context.annotation.Bean;
import org.springframework.context.annotation.Configuration;
import org.springframework.core.annotation.Order;
import reactor.core.publisher.Mono;
//全局過濾器,使用配置類形式,直接構造bean,使用注解完成Ordered接口功能,統計接口調用時間
@Configuration
public class GlobalGatewayFilterConfig
{
@Bean
@Order(-100)
public GlobalFilter elapsedGlobalFilter()
{
return (exchange, chain) -> {
//調用請求之前統計時間
Long startTime = System.currentTimeMillis();
return chain.filter(exchange).then().then(Mono.fromRunnable(() -> {
//調用請求之后統計時間
Long endTime = System.currentTimeMillis();
System.out.println(
exchange.getRequest().getURI().getRawPath() + ", cost time : " + (endTime - startTime) + "ms");
}));
};
}
}
~~~
局部過濾器-簡單的權限檢查**
* * *
權限檢查一般把信息存儲在某處,請求到來之后進行核對,有權限的請求將真正執行。
1、首先編寫一個工具類,對權限做管理。
~~~
package com.yefengyu.gateway.utitls;
import java.util.HashMap;
import java.util.Map;
public final class AuthUtil
{
private static Map<String, String> map = new HashMap<>();
private AuthUtil()
{
}
//程序啟動的時候加載權限的信息,比如從文件、數據庫中加載
public static void init()
{
map.put("tom", "123456");
}
//簡單判斷
public static boolean isPermitted(String name, String password)
{
return map.containsKey(name) && map.get(name).equals(password);
}
}
~~~
我們簡單的將權限信息放到map中保管,init方法是初始化方法,isPermitted是對外提供一個判斷是否有權限的方法。
2、服務啟動的時候,需要初始化權限map,因此主啟動類進行了修改:
~~~
package com.yefengyu.gateway;
import com.yefengyu.gateway.utitls.AuthUtil;
import org.springframework.boot.SpringApplication;
import org.springframework.boot.autoconfigure.SpringBootApplication;
import org.springframework.boot.context.event.ApplicationStartedEvent;
import org.springframework.context.ApplicationListener;
@SpringBootApplication
public class GatewayApplication
{
public static void main(String[] args)
{
SpringApplication springApplication = new SpringApplication(GatewayApplication.class);
springApplication.addListeners(new ApplicationListenerStarted());//增加監聽器
springApplication.run(args);
}
private static class ApplicationListenerStarted
implements ApplicationListener<ApplicationStartedEvent>
{
@Override
public void onApplicationEvent(ApplicationStartedEvent applicationStartedEvent)
{
//權限初始化數據
AuthUtil.init();
}
}
}
~~~
3、編寫一個局部過濾器,需要實現GatewayFilter, Ordered,實現相關的方法
~~~
package com.yefengyu.gateway.localFilter;
import com.yefengyu.gateway.utitls.AuthUtil;
import org.springframework.cloud.gateway.filter.GatewayFilter;
import org.springframework.cloud.gateway.filter.GatewayFilterChain;
import org.springframework.core.Ordered;
import org.springframework.http.HttpStatus;
import org.springframework.web.server.ServerWebExchange;
import reactor.core.publisher.Mono;
public class AuthGatewayFilter implements GatewayFilter, Ordered
{
@Override
public Mono<Void> filter(ServerWebExchange exchange, GatewayFilterChain chain)
{
//獲取header的參數
String name = exchange.getRequest().getHeaders().getFirst("name");
String password = exchange.getRequest().getHeaders().getFirst("password");
boolean permitted = AuthUtil.isPermitted(name, password);//權限比較
if (permitted)
{
return chain.filter(exchange);
}
else
{
exchange.getResponse().setStatusCode(HttpStatus.UNAUTHORIZED);
return exchange.getResponse().setComplete();
}
}
@Override
public int getOrder()
{
return 10;
}
}
~~~
4、接著需要把上面自定義的局部過濾器加入到過濾器工廠,并且注冊到spring容器中。
~~~
package com.yefengyu.gateway.localFilter;
import org.springframework.cloud.gateway.filter.GatewayFilter;
import org.springframework.cloud.gateway.filter.factory.AbstractGatewayFilterFactory;
import org.springframework.stereotype.Component;
@Component
public class AuthGatewayFilterFactory extends AbstractGatewayFilterFactory<Object>
{
@Override
public GatewayFilter apply(Object config)
{
return new AuthGatewayFilter();
}
}
~~~
5、在配置文件中進行配置,如果不配置則不啟用此過濾器規則。
- springcloud
- springcloud的作用
- springboot服務提供者和消費者
- Eureka
- ribbon
- Feign
- feign在微服務中的使用
- feign充當http請求工具
- Hystrix 熔斷器
- Zuul 路由網關
- Spring Cloud Config 分布式配置中心
- config介紹與配置
- Spring Cloud Config 配置實戰
- Spring Cloud Bus
- gateway
- 概念講解
- 實例
- GateWay
- 統一日志追蹤
- 分布式鎖
- 1.redis
- springcloud Alibaba
- 1. Nacos
- 1.1 安裝
- 1.2 特性
- 1.3 實例
- 1. 整合nacos服務發現
- 2. 整合nacos配置功能
- 1.4 生產部署方案
- 環境隔離
- 原理講解
- 1. 服務發現
- 2. sentinel
- 3. Seata事務
- CAP理論
- 3.1 安裝
- 分布式協議
- 4.熔斷和降級
- springcloud與alibba
- oauth
- 1. abstract
- 2. oauth2 in micro-service
- 微服務框架付費
- SkyWalking
- 介紹與相關資料
- APM系統簡單對比(zipkin,pinpoint和skywalking)
- server安裝部署
- agent安裝
- 日志清理
- 統一日志中心
- docker安裝部署
- 安裝部署
- elasticsearch 7.x
- logstash 7.x
- kibana 7.x
- ES索引管理
- 定時清理數據
- index Lifecycle Management
- 沒數據排查思路
- ELK自身組件監控
- 多租戶方案
- 慢查詢sql
- 日志審計
- 開發
- 登錄認證
- 鏈路追蹤
- elk
- Filebeat
- Filebeat基礎
- Filebeat安裝部署
- 多行消息Multiline
- how Filebeat works
- Logstash
- 安裝
- rpm安裝
- docker安裝Logstash
- grok調試
- Grok語法調試
- Grok常用表達式
- 配置中常見判斷
- filter提取器
- elasticsearch
- 安裝
- rpm安裝
- docker安裝es
- 使用
- 概念
- 基礎
- 中文分詞
- 統計
- 排序
- 倒排與正排索引
- 自定義dynamic
- 練習
- nested object
- 父子關系模型
- 高亮
- 搜索提示
- kibana
- 安裝
- docker安裝
- rpm安裝
- 整合
- 收集日志
- 慢sql
- 日志審計s
- 云
- 分布式架構
- 分布式鎖
- Redis實現
- redisson
- 熔斷和降級