# 快速構建&部署
>[info] 此文檔是最簡單快速部署文檔,個性化配置參考 [此文檔](詳細構建和配置.md)
## 一、配置后臺接口和編譯項目
1. 配置后臺接口地址
- 修改`.env.production`
```bash
VITE_GLOB_API_URL=/jeecgboot
VITE_GLOB_DOMAIN_URL=http://api3.boot.jeecg.com
```
>[warning] 重要提醒:請把`api3.boot.jeecg.com`換成自己的后臺域名。
2. 編譯打包項目
- 進入根目錄
```
cd jeecgboot-vue3
```
- 打包編譯
```
pnpm install
pnpm run build
```
- 打包成功

## 二、通過nginx部署前端
通過 nginx 配置請求轉發到后臺接口
>[info] 重要說明:
> - `boot3.jeecg.com`是官方Vue3前端演示地址,請把下面的`boot3.jeecg.com` 全部換成自己的前端域名。
> - `/jeecgboot/`對應的是 `步驟一.1`中的參數 `VITE_GLOB_API_URL`,這個可以不改避坑。
```
upstream boot3.jeecg.com {
server 127.0.0.1:80;
}
server {
listen 80;
server_name boot3.jeecg.com;
#前端打的dist資源存放目錄
root /srv/www/project;
location / {
# 用于配合 browserHistory使用
try_files $uri $uri/ /index.html;
}
location /jeecgboot/ {
#后臺接口地址(我們部署去掉了/jeecg-boot項目名,如果你有請加上)
proxy_pass http://127.0.0.1:8080/;
proxy_redirect off;
#真實IP獲取
proxy_set_header Host $host;
proxy_set_header X-Real-IP $remote_addr;
set $my_proxy_add_x_forwarded_for $proxy_add_x_forwarded_for;
if ($proxy_add_x_forwarded_for ~* "127.0.0.1"){
set $my_proxy_add_x_forwarded_for $remote_addr;
}
proxy_set_header X-Forwarded-For $my_proxy_add_x_forwarded_for;
}
error_page 500 502 503 504 /50x.html;
location = /50x.html {
root html;
}
}
```
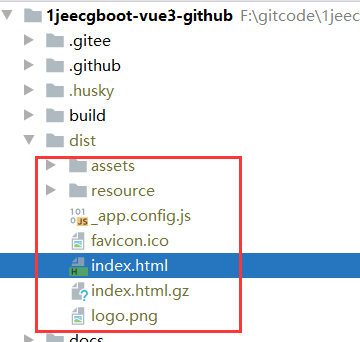
## 三、前端dist說明
將dist內容,放到服務器的 `/srv/www/project` 目錄下。
`/srv/www/project` 允許自定義,但需要與nginx里面的配置一致。
- 項目介紹
- 常見問題
- 開發環境準備
- 環境準備
- 啟動項目
- 切換Vue3路由
- 項目配置詳細說明
- 上線部署
- 快速構建&部署
- Docker鏡像啟動
- 項目配置
- 菜單配置
- 菜單緩存
- 積木報表菜單配置
- 首頁配置
- 國際化
- 菜單國際化
- 組件注冊
- 項目規范
- 跨域處理
- 樣式庫
- 圖標生成
- package依賴介紹
- 菜單TAB風格
- 備份文檔
- 詳細構建和配置
- 構建部署1.0
- 切換Mock接口
- 原生路由(作廢)
- 原生菜單(作廢)
- 頁面開啟緩存(作廢)
- 環境準備1.0
- 數據 mock&聯調
- UI組件
- Form 表單組件
- Table 表格
- Modal 彈窗
- Drawer 抽屜組件
- Icon 圖標組件
- Button 按鈕
- 更多基礎組件
- JSelectUser選擇用戶 ?
- JSelectPosition崗位選擇 ?
- JSelectDept部門選擇 ?
- JCheckbox ?
- JImportModal 列表導入彈窗組件
- JInput特殊查詢組件 ?
- JPopup彈窗選擇組件 ?
- JTreeSelect樹形下拉框 (異步加載) ?
- JAreaSelect 省市縣級聯組件
- JDictSelectTag 字典標簽 ?
- JEllipsis 超長截取顯示組件 ?
- JUpload 上傳組件 ?
- JEasyCron 定時表達式選擇組件 ?
- JInputPopup 多行輸入窗口組件 ?
- JSwitch 開關選擇組件 ?
- JTreeDict 分類字典樹形下拉組件 ?
- JSelectInput 可輸入下拉框 ?
- JEditor 富文本編輯器 ?
- JMarkdownEditor Markdown編輯器 ?
- JSearchSelect 字典表的搜索組件 ?
- JSelectUserByDept 根據部門選擇用戶 ?
- JVxeTable
- 組件配置文檔
- 自定義組件
- 封裝自定義組件
- 自定義組件增強
- 多級聯動配置
- 使用示例
- 常見問題解答
- JAreaLinkage 省市縣聯動組件 ?
- JCategorySelect 分類字典樹 ?
- JImageUpload 圖片上傳 ?
- JSelectMultiple 下拉多選 ?
- JSelectRole 選擇角色 ?
- JFormContainer 表單組件禁用 ?
- SuperQuery 高級查詢
- UserSelect 高級用戶選擇組件
- Basic
- Page
- Authority
- PopConfirmButton
- CollapseContainer
- ScrollContainer
- LazyContainer
- CodeEditor
- JsonPreview
- CountDown
- ClickOutSide
- CountTo
- Cropper
- Description
- FlowChart
- Upload
- Tree
- Excel
- Qrcode
- Markdown
- Loading
- Tinymce
- Time
- StrengthMeter
- Verify
- Transition
- VirtualScroll
- ContextMenu
- Preview
- Loading
- 前端權限
- 表單權限
- 顯隱控制 ?
- 禁用控制 ?
- 列表權限
- 按鈕權限控制
- 列字段顯隱控制
- 行編輯組件權限
- 顯隱控制
- 禁用控制
- 代碼生成
- Online在線代碼生成
- GUI代碼生成
- 代碼生成模板介紹
- vue3和vue3Native詳細說明
- 深入開發
- 定義Form新組件
- 自定義列表查詢
- 自定義表單布局
- 開發筆記
- 組件權限控制
- 使用Antd Vue原生Form
- 自定義圖表組件
- 自定義渲染函數
- 如何編寫mock接口
- 緩存用法
- 精簡版代碼制作
- 微前端(qiankun)集成
- 前端小技巧
- 表單整體禁用
- 彈框內下拉框錯位
- 界面如何設置響應式
- 抽屜(Drawer)寬度自適應
- 生成菜單腳本
- Online表單
- Online常見問題
- Online表單配置
- 配置參數說明
- 系統標準字段
- 表單類型-主子表|樹表
- 自定義查詢配置
- Online表單風格
- Online表單刪除說明
- Online聯合查詢配置
- online表單視圖功能說明
- Online表單開啟評論
- Online表單控件介紹
- 常用基礎控件
- 高級關聯記錄
- Online表單控件配置
- 基本配置
- 控件擴展配置
- 默認值表達式
- 自定義查詢配置
- 字段href
- 默認值(填值規則)
- 導入導出自定義規則
- Online表單權限配置
- 字段權限配置與授權
- 按鈕權限配置與授權
- 數據權限配置與授權
- 聯合查詢數據權限規則說明
- 在線增強
- 自定義按鈕
- SQL增強
- JS增強
- 按鈕觸發JS增強
- 列表Api
- 列表操作列前置事件
- 表單Api
- beforeSubmit事件
- loaded事件
- 表單值改變事件【單表/主表】
- 表單值改變事件【從表】
- 表單值改變事件【從改主】
- 控制字段顯示與隱藏
- js增強實現下拉聯動
- js增強控制下拉樹數據
- JS增強 觸發彈窗
- JS增強 http請求
- JS增強 方法定義
- 對接表單設計器后需注意
- JAVA增強
- 快速開始
- Online java增強 導入
- Online java增強 導出
- Online java增強 查詢
- Online Java增強 http-api
- 表單類
- 列表類
- 其他功能示例
- 導入數據庫表支持排除表
- 通過字段Href實現三級聯動
- excel數據導入支持校驗
- Online報表
- Online報表配置
- 配置成菜單
- 其他功能
- 推送消息
- ISO 8601書寫格式
- 系統消息跳轉至詳情表單
- 菜單【批量申請(自定義)】功能說明
- Online自動化測試
- online AI自動化測試數據制作
- Online AI自動化測試數據制作
- Online AI模型測試用例功能詳情
- JAVA后臺功能
- saas多租戶切換
- 新功能實現saas租戶隔離
- 第三方集成
- 敲敲云集成釘釘