# 快速配置國際化文本
## 例子
創建文件 `lang/zh_CN/components/modal.ts`的文件內容為
~~~
{
title: '標題';
}
~~~
則直接使用
```
const { t } = useI18n();
t('components.modal.title')
```
獲取國際化文本。
## 國際化配置代碼
*****
# 國際化原理講解
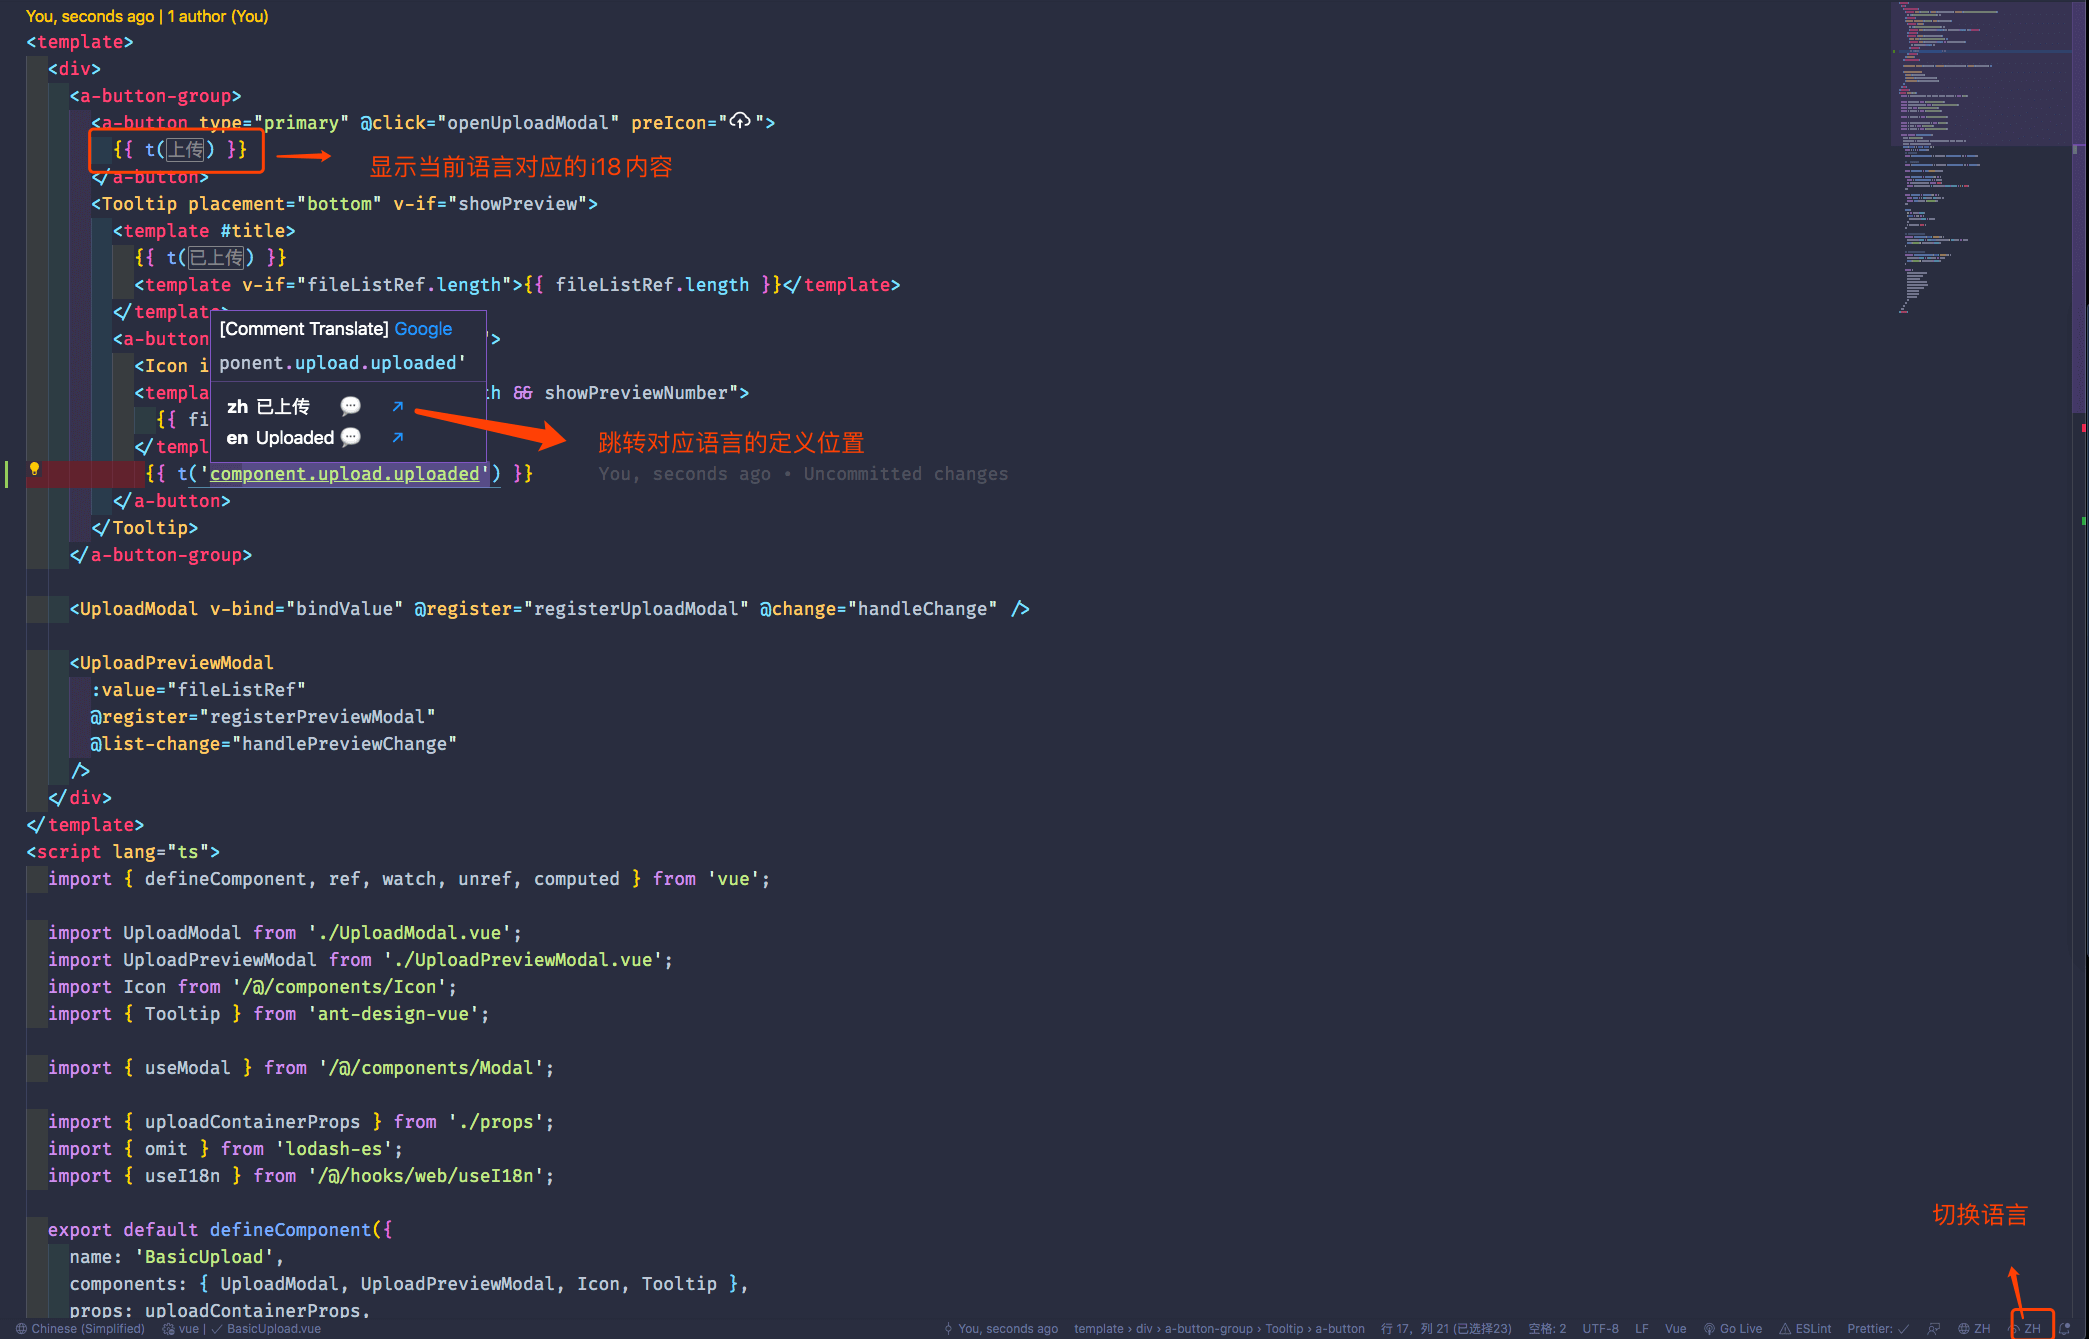
如果你使用的 vscode 開發工具,則推薦安裝 [I18n-ally](https://marketplace.visualstudio.com/items?itemName=Lokalise.i18n-ally) 這個插件
## I18n-ally 插件
安裝了該插件后,你的代碼內可以實時看到對應的語言內容
## 配置默認語言
在 [src/settings/localeSetting.ts]內可以配置默認語言
```ts
export const LOCALE: { [key: string]: LocaleType } = {
ZH_CN: 'zh_CN',
EN_US: 'en',
};
export const localeSetting: LocaleSetting = {
// 是否顯示語言選擇器
showPicker: true,
// 當前語言
locale: LOCALE.ZH_CN,
// 默認語言
fallback: LOCALE.ZH_CN,
// 允許的語言
availableLocales: [LOCALE.ZH_CN, LOCALE.EN_US],
};
// 配置語言列表
export const localeList: DropMenu[] = [
{
text: '簡體中文',
event: 'zh_CN',
},
{
text: 'English',
event: 'en',
},
];
```
## 配置
在 [src/locales/setupI18n.ts]內引入的 i18n 這個無需修改
### 語言文件
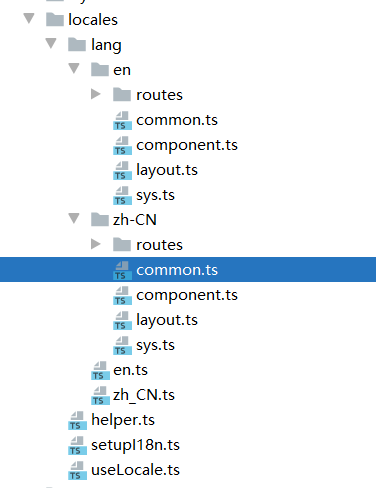
在 [src/locales/lang/] 可以配置具體的語言
```bash
# locales/lang/
# 中文語言
zh_CN:
component: 組件相關
layout: 布局相關
routes: 路由菜單相關
sys: 系統頁面相關
en: 同上
```
### 語言導入邏輯說明
1. 初始化
在 [src/locales/setupI18n] 內的根語言文件可以看到
```ts
const defaultLocal = await import(`./lang/${locale}.ts`);
```
這會導入 `src/locales/lang/{lang}.ts` 文件語言包,此文件會導入對應語言下的所有文件。
```ts
import { genMessage } from '../helper';
import antdLocale from 'ant-design-vue/es/locale/zh_CN';
import momentLocale from 'moment/dist/locale/zh-cn';
const modules = import.meta.globEager('./zh_CN/**/*.ts');
export default {
message: {
...genMessage(modules, 'zh_CN'),
antdLocale,
},
momentLocale,
momentLocaleName: 'zh-cn',
};
```
并將其按相應的目錄結構轉化為多層級的
例:
`lang/zh_CN/components/modal.ts` 的文件內容為
```ts
{
title: '標題';
}
```
則在使用的使用直接使用 `t('components.modal.title')` 進行獲取。
這樣做的好處在于更容易管理大型項目的多語言。如果不需要分模塊劃分,可以直接自己手動導入即可。
## 使用
引入項目自帶的 `useI18n` **注意不要引入 vue-i18n 的 useI18n**
```ts
import { useI18n } from '/@/hooks/web/useI18n';
const { t } = useI18n();
const title = t('components.modal.title');
```
## 切換語言
切換語言需要使用 [src/locales/useLocale.ts]
```ts
import { useLocale } from '/@/locales/useLocale';
const { changeLocale } = useLocale();
changeLocale('en');
```
## 新增
### 語言文件
在 [src/locales/lang/] 增加對應語言的文件即可
### 新增語言
目前項目自帶的語言只有 `zh_CN` 和 `en` 兩種
如果需要新增,按以下操作即可
1. 在 [src/locales/lang/]下新增相應的語言目錄及語言文件并引入 引入 ant-design-vue 和 moment 對應的語言包
2. 在 [types/config.d.ts]內加上預覽類型定義
3. 在 [src/settings/localeSetting.ts]修改語言配置
## 遠程讀取語言數據
目前項目會在 `src/main.ts` 內等待 `setupI18n` 這個函數執行完之后才會渲染界面,所以只需在 setupI18n 內發送 ajax 請求,將對應的數據設置到 i18n 實例上即可
```ts
// src/main.ts
await setupI18n(app);
app.mount('#app', true);
```
### setupI18n 函數
代碼: [src/locales/setupI18n/]
如下所示,這里會先設置一個默認語言,默認語言可以設置在本地,也可以在這里等待接口返回默認語言
```ts
// setup i18n instance with glob
export async function setupI18n(app: App) {
const options = await createI18nOptions();
i18n = createI18n(options) as I18n;
app.use(i18n);
}
async function createI18nOptions(): Promise<I18nOptions> {
const locale = localeStore.getLocale;
// 這里改成接口獲取
const defaultLocal = await import(`./lang/${locale}.ts`);
const message = defaultLocal.default?.message ?? {};
return {
legacy: false,
locale,
fallbackLocale: fallback,
messages: {
[locale]: message,
},
availableLocales: availableLocales,
sync: true,
silentTranslationWarn: true,
missingWarn: false,
silentFallbackWarn: true,
};
}
```
### changeLocale 函數
代碼: [src/locales/useLocale/]
當手動切換語言的時候會觸發 `useLocale` 函數,useLocale 也是異步函數,只需等待接口返回響應的數據后,再進行設置即可
```ts
async function changeLocale(locale: LocaleType) {
const globalI18n = i18n.global;
const currentLocale = unref(globalI18n.locale);
if (currentLocale === locale) return locale;
if (loadLocalePool.includes(locale)) {
setI18nLanguage(locale);
return locale;
}
// 這里改成接口獲取
const langModule = ((await import(`./lang/${locale}.ts`)) as any).default as LangModule;
if (!langModule) return;
const { message, momentLocale, momentLocaleName } = langModule;
globalI18n.setLocaleMessage(locale, message);
moment.updateLocale(momentLocaleName, momentLocale);
loadLocalePool.push(locale);
setI18nLanguage(locale);
return locale;
}
```
- 項目介紹
- 常見問題
- 開發環境準備
- 環境準備
- 啟動項目
- 切換Vue3路由
- 項目配置詳細說明
- 上線部署
- 快速構建&部署
- Docker鏡像啟動
- 項目配置
- 菜單配置
- 菜單緩存
- 積木報表菜單配置
- 首頁配置
- 國際化
- 菜單國際化
- 組件注冊
- 項目規范
- 跨域處理
- 樣式庫
- 圖標生成
- package依賴介紹
- 菜單TAB風格
- 備份文檔
- 詳細構建和配置
- 構建部署1.0
- 切換Mock接口
- 原生路由(作廢)
- 原生菜單(作廢)
- 頁面開啟緩存(作廢)
- 環境準備1.0
- 數據 mock&聯調
- UI組件
- Form 表單組件
- Table 表格
- Modal 彈窗
- Drawer 抽屜組件
- Icon 圖標組件
- Button 按鈕
- 更多基礎組件
- JSelectUser選擇用戶 ?
- JSelectPosition崗位選擇 ?
- JSelectDept部門選擇 ?
- JCheckbox ?
- JImportModal 列表導入彈窗組件
- JInput特殊查詢組件 ?
- JPopup彈窗選擇組件 ?
- JTreeSelect樹形下拉框 (異步加載) ?
- JAreaSelect 省市縣級聯組件
- JDictSelectTag 字典標簽 ?
- JEllipsis 超長截取顯示組件 ?
- JUpload 上傳組件 ?
- JEasyCron 定時表達式選擇組件 ?
- JInputPopup 多行輸入窗口組件 ?
- JSwitch 開關選擇組件 ?
- JTreeDict 分類字典樹形下拉組件 ?
- JSelectInput 可輸入下拉框 ?
- JEditor 富文本編輯器 ?
- JMarkdownEditor Markdown編輯器 ?
- JSearchSelect 字典表的搜索組件 ?
- JSelectUserByDept 根據部門選擇用戶 ?
- JVxeTable
- 組件配置文檔
- 自定義組件
- 封裝自定義組件
- 自定義組件增強
- 多級聯動配置
- 使用示例
- 常見問題解答
- JAreaLinkage 省市縣聯動組件 ?
- JCategorySelect 分類字典樹 ?
- JImageUpload 圖片上傳 ?
- JSelectMultiple 下拉多選 ?
- JSelectRole 選擇角色 ?
- JFormContainer 表單組件禁用 ?
- SuperQuery 高級查詢
- UserSelect 高級用戶選擇組件
- Basic
- Page
- Authority
- PopConfirmButton
- CollapseContainer
- ScrollContainer
- LazyContainer
- CodeEditor
- JsonPreview
- CountDown
- ClickOutSide
- CountTo
- Cropper
- Description
- FlowChart
- Upload
- Tree
- Excel
- Qrcode
- Markdown
- Loading
- Tinymce
- Time
- StrengthMeter
- Verify
- Transition
- VirtualScroll
- ContextMenu
- Preview
- Loading
- 前端權限
- 表單權限
- 顯隱控制 ?
- 禁用控制 ?
- 列表權限
- 按鈕權限控制
- 列字段顯隱控制
- 行編輯組件權限
- 顯隱控制
- 禁用控制
- 代碼生成
- Online在線代碼生成
- GUI代碼生成
- 代碼生成模板介紹
- vue3和vue3Native詳細說明
- 深入開發
- 定義Form新組件
- 自定義列表查詢
- 自定義表單布局
- 開發筆記
- 組件權限控制
- 使用Antd Vue原生Form
- 自定義圖表組件
- 自定義渲染函數
- 如何編寫mock接口
- 緩存用法
- 精簡版代碼制作
- 微前端(qiankun)集成
- 前端小技巧
- 表單整體禁用
- 彈框內下拉框錯位
- 界面如何設置響應式
- 抽屜(Drawer)寬度自適應
- 生成菜單腳本
- Online表單
- Online常見問題
- Online表單配置
- 配置參數說明
- 系統標準字段
- 表單類型-主子表|樹表
- 自定義查詢配置
- Online表單風格
- Online表單刪除說明
- Online聯合查詢配置
- online表單視圖功能說明
- Online表單開啟評論
- Online表單控件介紹
- 常用基礎控件
- 高級關聯記錄
- Online表單控件配置
- 基本配置
- 控件擴展配置
- 默認值表達式
- 自定義查詢配置
- 字段href
- 默認值(填值規則)
- 導入導出自定義規則
- Online表單權限配置
- 字段權限配置與授權
- 按鈕權限配置與授權
- 數據權限配置與授權
- 聯合查詢數據權限規則說明
- 在線增強
- 自定義按鈕
- SQL增強
- JS增強
- 按鈕觸發JS增強
- 列表Api
- 列表操作列前置事件
- 表單Api
- beforeSubmit事件
- loaded事件
- 表單值改變事件【單表/主表】
- 表單值改變事件【從表】
- 表單值改變事件【從改主】
- 控制字段顯示與隱藏
- js增強實現下拉聯動
- js增強控制下拉樹數據
- JS增強 觸發彈窗
- JS增強 http請求
- JS增強 方法定義
- 對接表單設計器后需注意
- JAVA增強
- 快速開始
- Online java增強 導入
- Online java增強 導出
- Online java增強 查詢
- Online Java增強 http-api
- 表單類
- 列表類
- 其他功能示例
- 導入數據庫表支持排除表
- 通過字段Href實現三級聯動
- excel數據導入支持校驗
- Online報表
- Online報表配置
- 配置成菜單
- 其他功能
- 推送消息
- ISO 8601書寫格式
- 系統消息跳轉至詳情表單
- 菜單【批量申請(自定義)】功能說明
- Online自動化測試
- online AI自動化測試數據制作
- Online AI自動化測試數據制作
- Online AI模型測試用例功能詳情
- JAVA后臺功能
- saas多租戶切換
- 新功能實現saas租戶隔離
- 第三方集成
- 敲敲云集成釘釘