
[TOC]
> ARouter不僅實現了對基礎組件的路由,而且其具有的Ioc功能也實現了對動作的路由,也就是跨模塊API調用!
> 可以理解為“通過URL找Class能實現的業務,ARouter都能實現”,這個概念要理解透徹!
## 使用
### 添加注解
~~~
// 在支持路由的頁面上添加注解(必選)
// 這里的路徑需要注意的是至少需要有兩級,/xx/xx
@Route(path = "/test/activity")
public class YourActivity extend Activity {
...
}
~~~
### 初始化SDK
~~~
if (isDebug()) { // 這兩行必須寫在init之前,否則這些配置在init過程中將無效
ARouter.openLog(); // 打印日志
ARouter.openDebug(); // 開啟調試模式(如果在InstantRun模式下運行,必須開啟調試模式!線上版本需要關閉,否則有安全風險)
}
ARouter.init(mApplication); // 盡可能早,推薦在Application中初始化
~~~
### 發起路由操作
~~~
// 1. 應用內簡單的跳轉(通過URL跳轉在'進階用法'中)
ARouter.getInstance().build("/test/activity").navigation();
// 2. 跳轉并攜帶參數
ARouter.getInstance().build("/test/1")
.withLong("key1", 666L)
.withString("key3", "888")
.withObject("key4", new Test("Jack", "Rose"))
.navigation();
~~~
## 源碼解析
* arouter-annotation: ARouter路由框架所使用的全部注解,及其相關類
* arouter-compiler:注解編譯處理器,引入“arouter-annotation”,在編譯器把注解標注的相關目標類生成映射文件
* arouter-api:實現路由控制
總的來說,就是arouter-annotation實現了路由表結構的定義,arouter-compiler在編譯期完成了 構造路由表邏輯的創建, arouter-api在運行期加載邏輯構建路由表,并實現路由控制
## arouter-annotation
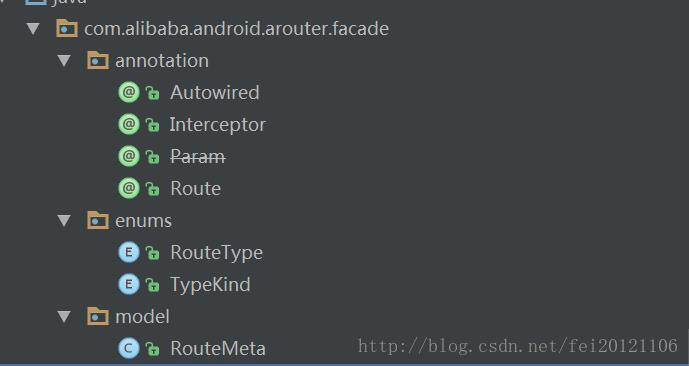
### @Route
@Route 是 ARouter 最重要的注解,也是路由最基本的節點,該注解主要用于描述路由中的路徑URL信息,使用該注解標注的類將被自動添加至路由表中。
~~~
@Target({ElementType.TYPE})
@Retention(RetentionPolicy.CLASS)
public @interface Route {
//路徑URL字符串
String path();
//組名,默認為一級路徑名;一旦被設置,跳轉時必須賦值
String group() default "";
//該路徑的名稱,用于產生JavaDoc
String name() default "undefined";
//額外配置的開關信息;譬如某些頁面是否需要網絡校驗、登錄校驗等
int extras() default Integer.MIN_VALUE;
//該路徑的優先級
int priority() default -
~~~
### RouteMeta路由元信息
如果全部路由信息認為是一張表格,那么RouteMeta就是表格的一行,代表路由表的一條元信息。
~~~
public class RouteMeta {
private RouteType type; // 路由的類型:
private Element rawType; // Raw type of route
private Class<?> destination; // 目標Class
private String path; // 路徑URL
private String group; // 分組
private int priority = -1; // 路由的優先級
private int extra; // 目標Class的額外配置開關信息;譬如某些頁面是否需要網絡校驗、登錄校驗等
private Map<String, Integer> paramsType; // 目標Class的需要注入的參數 的參數名稱:參數類型TypeKind
}
public enum RouteType {// 路由的類型
ACTIVITY(0, "android.app.Activity"),
SERVICE(1, "android.app.Service"),
PROVIDER(2, "com.alibaba.android.arouter.facade.template.IProvider"),
CONTENT_PROVIDER(-1, "android.app.ContentProvider"),
BOARDCAST(-1, ""),
METHOD(-1, ""),
FRAGMENT(-1, "android.app.Fragment"),
UNKNOWN(-1, "Unknown route type");
int id;
String className;
}
public enum TypeKind { //目標Class的需要注入的參數的參數類型
//基本類型
BOOLEAN,
BYTE,
SHORT,
INT,
LONG,
CHAR,
FLOAT,
DOUBLE,
//封裝類型
STRING,
PARCELABLE,
OBJECT; //使用Json解
~~~
?### @Interceptor攔截器注解
@Interceptor 是攔截器注解,攔截器是全應用全局的,不分module,只要集成進apk就起效
~~~
@Target({ElementType.TYPE})
@Retention(RetentionPolicy.CLASS)
public @interface Interceptor {
//該攔截器的優先級
int priority();
//該攔截器的名稱,用于產生JavaDoc
String name() default "Default";
}
~~~
### @Autowired自動裝載注解
@Autowired 是頁面跳轉時參數傳遞用的。目標Class中使用該注解標志的變量,會在頁面被路由打開的時候,在調用Inject(“`)后自動賦予傳遞的參數值
~~~
@Target({ElementType.FIELD})
@Retention(RetentionPolicy.CLASS)
public @interface Autowired {
// Mark param's name or service name.
String name() default "";
// If required, app will be crash when value is null.
// Primitive type wont be check!
boolean required() default false;
// Description of the field
String desc() default "No desc.";
~~~
## arouter-compiler注解編譯器
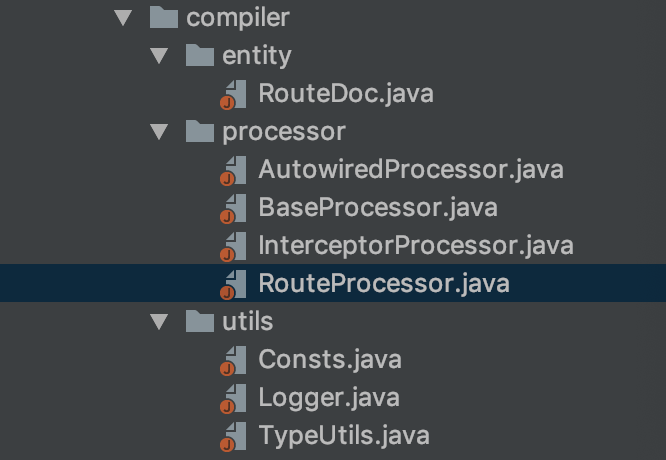
實現了“自動注冊映射關系”也就是在編譯期間自動生成映射文件,所以該module其實就是實現了一些注解處理器,目標在于生成映射文件與輔助文件(構造路由表邏輯的創建)
> 1\. 首先通過注解處理器掃出被標注的類文件;?
> 2\. 然后按照不同種類的源文件進行分類,這是因為ARouter是一個框架,其能夠提供的功能非常多,所以不僅僅提供了跳轉功能,它也能夠實現模塊之間的解耦,除此之外ARouter還能夠提供很多的功能,像剛才提到的攔截器可以實現自動注冊,其實ARouter中的所有組件都是自動注冊的?
> 3\. 在按照不同種類的源文件進行分類完成之后,就能夠按照固定的命名格式(工程名+$$+Group+$$+分組名)生成映射文件,這部分完成之后就意味著編譯期的部分已經結束了
> 版權聲明:本文為博主原創文章,轉載請附上博文鏈接!
一般來說arouter-compiler所產生的class文件有以下幾種:
1. 項目目錄下的 XXX$$工程名$$Autowired. 為自動裝載的輔助類,核心為inject函數,實現對目標對象的成員變量的賦值
2. routes目錄下,分別是
**工程名$$Group$$分組名 【組內的路由清單列表】**
(Map atlas?
包含了對應分組下的,路由URL與目標對象Class的映射關系;?
注意Router注解中無分組的話,默認以“/xx/xx”的第一個xx為分組名
**工程名$$Root$$$模塊名 【組別的清單列表】**
Map> routes?
包含了組名與對應組內的路由清單列表Class的映射關系?
是Arouter的“分組管理,按需加載”的實現。?
ARouter在初始化的時候只會一次性地加載所有的root結點,而不會加載任何一個Group結點,這樣就會極大地降低初始化時加載結點的數量?
那么什么時候加載分組結點呢?其實就是當某一個分組下的某一個頁面第一次被訪問的時候,整個分組的全部頁面都會被加載進去,這就是ARouter的按需加載
**工程名$$Providers$$模塊名 【Ioc的動作路由清單列表】**
Map providers?
PROVIDER 類型的路由節點的清單列表?
包含了使用依賴注入方式的某class(實現了IProvide接口的直接子類)的 路由URL 與class映射關系?
目標Class都實現了IProvider接口,借此實現部分路由轉到該清單中?
需要注意的是:Ioc動作路由清單其實只是 Route注解的一種特殊用法,總的來說,還是一種URL與目標類的映射關系?
其實想一下,依賴注入,無非也就是指定好目標接口的目標類,然而實例化后進行賦值。URL就是指定說明
**工程名$$Interceptors$$模塊名 【模塊內的攔截器清單列表】**
Map> interceptors?
包含了某個模塊下的攔截器 與 優先級的映射關系?
一個模塊下的所有攔截器都在該類中包含,無分組特性,所以直接以模塊名命名類文件
### Route注解處理
**定義**
~~~
@Route(path = "/test/activity1")
public class Test1Activity extends AppCompatActivity {
//```
}
~~~
那么官方處理器處理后生成的映射文件為

以工程名$$Group$$分組名 【組內的路由清單列表】
~~~
public class ARouter\$\$Group\$\$test implements IRouteGroup {
public ARouter\$\$Group\$\$test() {
}
public void loadInto(Map<String, RouteMeta> atlas) {
atlas.put("/test/activity1", RouteMeta.build(RouteType.ACTIVITY, Test1Activity.class, "/test/activity4", "test", (Map)null, -1, -2147483648));
}
}
~~~
### Autowired注解處理
定義
~~~
public class Test1Activity extends AppCompatActivity {
@Autowired
String name;
@Autowired
int age;
@Autowired(name = "boy")
boolean girl;
@Autowired
TestParcelable pac;
@Autowired
TestObj obj;
private long hig
~~~
生成
~~~
public class Test1Activity\$\$ARouter\$\$Autowired implements ISyringe {
private SerializationService serializationService;
public Test1Activity\$\$ARouter\$\$Autowired() {
}
public void inject(Object target) {
this.serializationService = (SerializationService)ARouter.getInstance().navigation(SerializationService.class);
Test1Activity substitute = (Test1Activity)target;
substitute.name = substitute.getIntent().getStringExtra("name");
substitute.age = substitute.getIntent().getIntExtra("age", 0);
substitute.girl = substitute.getIntent().getBooleanExtra("boy", false);
substitute.pac = (TestParcelable)substitute.getIntent().getParcelableExtra("pac");
if(null != this.serializationService) {
substitute.obj = (TestObj)this.serializationService.json2Object(substitute.getIntent().getStringExtra("obj"), TestObj.class);
} else {
Log.e("ARouter::", "You want automatic inject the field \'obj\' in class \'Test1Activity\' , then you should implement \'SerializationService\' to support object auto inject!");
}
substitute.url = substitute.getIntent().getStringExtra("url");
substitute.helloService = (HelloService)ARouter.getInstance().navigation(HelloService.class);
~~~
### Interceptor注解處理
~~~
@Interceptor(priority = 7)
public class Test1Interceptor implements IInterceptor {
//```
}
public class ARouter\$\$Interceptors\$\$app implements IInterceptorGroup {
public ARouter\$\$Interceptors\$\$app() {
}
public void loadInto(Map<Integer, Class<? extends IInterceptor>> interceptors) {
interceptors.put(Integer.valueOf(7), Test1Interceptor.class);
}
~~~
## arouter-api路由控制
ARouter 的初始化過程最重要的一步一定是把前面編譯產生的路由清單文件加載到內存,形成一個路由表,以供后面路由查找之用。
## 參考資料
[阿里開源路由框架ARouter的源碼分析](https://blog.csdn.net/fei20121106/article/details/73743235)
- Android
- 四大組件
- Activity
- Fragment
- Service
- 序列化
- Handler
- Hander介紹
- MessageQueue詳細
- 啟動流程
- 系統啟動流程
- 應用啟動流程
- Activity啟動流程
- View
- view繪制
- view事件傳遞
- choreographer
- LayoutInflater
- UI渲染概念
- Binder
- Binder原理
- Binder最大數據
- Binder小結
- Android組件
- ListView原理
- RecyclerView原理
- SharePreferences
- AsyncTask
- Sqlite
- SQLCipher加密
- 遷移與修復
- Sqlite內核
- Sqlite優化v2
- sqlite索引
- sqlite之wal
- sqlite之鎖機制
- 網絡
- 基礎
- TCP
- HTTP
- HTTP1.1
- HTTP2.0
- HTTPS
- HTTP3.0
- HTTP進化圖
- HTTP小結
- 實踐
- 網絡優化
- Json
- ProtoBuffer
- 斷點續傳
- 性能
- 卡頓
- 卡頓監控
- ANR
- ANR監控
- 內存
- 內存問題與優化
- 圖片內存優化
- 線下內存監控
- 線上內存監控
- 啟動優化
- 死鎖監控
- 崩潰監控
- 包體積優化
- UI渲染優化
- UI常規優化
- I/O監控
- 電量監控
- 第三方框架
- 網絡框架
- Volley
- Okhttp
- 網絡框架n問
- OkHttp原理N問
- 設計模式
- EventBus
- Rxjava
- 圖片
- ImageWoker
- Gilde的優化
- APT
- 依賴注入
- APT
- ARouter
- ButterKnife
- MMKV
- Jetpack
- 協程
- MVI
- Startup
- DataBinder
- 黑科技
- hook
- 運行期Java-hook技術
- 編譯期hook
- ASM
- Transform增量編譯
- 運行期Native-hook技術
- 熱修復
- 插件化
- AAB
- Shadow
- 虛擬機
- 其他
- UI自動化
- JavaParser
- Android Line
- 編譯
- 疑難雜癥
- Android11滑動異常
- 方案
- 工業化
- 模塊化
- 隱私合規
- 動態化
- 項目管理
- 業務啟動優化
- 業務架構設計
- 性能優化case
- 性能優化-排查思路
- 性能優化-現有方案
- 登錄
- 搜索
- C++
- NDK入門
- 跨平臺
- H5
- Flutter
- Flutter 性能優化
- 數據跨平臺