
[TOC]
# React Navigation
Doc:[https://reactnavigation.org/docs/en/navigating.html](https://reactnavigation.org/docs/en/navigating.html)
以下內容直接整理自最新版的英文文檔(只有 Windows 電腦所以只調試 Android):版本 3.x,還參考了:[https://www.jianshu.com/p/e69d248f2f0f](https://www.jianshu.com/p/e69d248f2f0f)
<span style="font-size: 20px;">Installation<span>
`npm install react-navigation`
`npm install react-native-gesture-handler react-native-reanimated`
如果使用的 React Native 版本是 0.60 或者更高,那么就不需要其他操作了。
## 導航器
導航器(Navigator)可以看作是一個普通的 React 組件,可以通過導航器來定義 APP 的導航結構,導航器還可以渲染通用元素,比如配置標題欄和選項卡欄,在 React-navigation 中有一下一些創建導航器的方法:
- createStackNavigator
- createSwitchNavigator
- createDrawerNavigator
- createBottomTabNavigator
- createMaterialBottomTabNavigator
- createMaterialTopTabNavigator
<span style="font-size: 20px;">與導航器相關的屬性<span>
* navigation prop(屏幕導航屬性):通過 navigation 可以完成屏幕之間的調度操作
* navigationOptions(屏幕導航選項):通過 navigationOptions 可以定制導航器顯示屏幕的方式(頭部標題,選項卡標簽等)
<span style="font-size: 20px;">基礎示例<span>
```js
// In App.js in a new project
import React from "react";
import { View, Text } from "react-native";
import { createStackNavigator, createAppContainer } from "react-navigation";
class HomeScreen extends React.Component {
render() {
return (
<View style={{ flex: 1, alignItems: "center", justifyContent: "center" }}>
<Text>Home Screen</Text>
</View>
);
}
}
const AppNavigator = createStackNavigator({
Home: {
screen: HomeScreen
}
});
export default createAppContainer(AppNavigator);
```
<span style="font-size: 20px;">導航跳轉<span>
`this.props.navigation`:navigation 將作為 prop 被傳遞給每個 Navigator 下的 screen component
`navigate('Details')`:作為 navigation 的方法,用于跳轉到另一個導航組件(與 createStackNavigator 中的對應);如果傳入一個未在 stack navigator 中定義的 name,那么什么都不會發生。
```js
import React from 'react';
import { Button, View, Text } from 'react-native';
import { createStackNavigator, createAppContainer } from 'react-navigation';
class HomeScreen extends React.Component {
render() {
return (
<View style={{ flex: 1, alignItems: 'center', justifyContent: 'center' }}>
<Text>Home Screen</Text>
<Button
title="Go to Details"
onPress={() => this.props.navigation.navigate('Details')}
/>
</View>
);
}
}
// ... other code from the previous section
```
>Let's suppose that we actually *want* to add another details screen. This is pretty common in cases where you pass in some unique data to each route (more on that later when we talk about`params`!). To do this, we can change`navigate`to`push`. This allows us to express the intent to add another route regardless of the existing navigation history.
考慮這么一種情況:我們要添加重復的 details screen(兩個 detail 頁),如果繼續使用`navigate`方法那么什么都不會發生;所以需要用`push`方法來代替:
```js
<Button
title="Go to Details... again"
onPress={() => this.props.navigation.push('Details')}
/>
```
>Each time you call`push`we add a new route to the navigation stack. When you call`navigate`it first tries to find an existing route with that name, and only pushes a new route if there isn't yet one on the stack.
<span style="font-size: 20px;">Going Back<span>
一般手機的頭部都會有一個回退按鈕,如果想手動觸發回退的行為可以使用`this.porps.navigation.goBack()`:
```js
class DetailsScreen extends React.Component {
render() {
return (
<View style={{ flex: 1, alignItems: 'center', justifyContent: 'center' }}>
<Text>Details Screen</Text>
<Button
title="Go to Details... again"
onPress={() => this.props.navigation.push('Details')}
/>
<Button
title="Go to Home"
onPress={() => this.props.navigation.navigate('Home')}
/>
<Button
title="Go back"
onPress={() => this.props.navigation.goBack()}
/>
</View>
);
}
}
```
可以在官網提供的示例進行體驗:[https://snack.expo.io/@react-navigation/going-back-v3](https://snack.expo.io/@react-navigation/going-back-v3)
<span style="font-size: 20px;">小結<span>
- `this.props.navigation.navigate('RouteName')`:將一個新的路由(route)推入導航器棧(stack navigator),如果該路由已存在于棧中則什么都不做,否則跳到對應的屏幕(screen)
- `this.props.navigation.push('RouteName')`:相比于`navigate`方法,其可以無限次地推入路由(無論名稱是否相同)。
- `this.props.navigation.goBack()`:如果需要手動觸發回退行為,可以使用該方法
- 如果要回到一個已經存在于棧中的屏幕(screen)可以使用`this.props.navigation.navigate('RouteName')`,如果要回到棧中的第一個屏幕可以使用`this.props.navigation.popToTop()`
- The`navigation`prop is available to all screen components (components defined as screens in route configuration and rendered by React Navigation as a route).
### 導航的生命周期
Consider a stack navigator with screens A and B. After navigating to A, its`componentDidMount`is called. When pushing B, its`componentDidMount`is also called, but A remains mounted on the stack and its`componentWillUnmount`is therefore not called.
When going back from B to A,`componentWillUnmount`of B is called, but`componentDidMount`of A is not because A remained mounted the whole time.
### 傳遞參數
1. Pass params to a route by putting them in an object as a second parameter to the`navigation.navigate`function:`this.props.navigation.navigate('RouteName', { /* params go here */ })`
2. Read the params in your screen component:`this.props.navigation.getParam(paramName, defaultValue)`.
```js
class HomeScreen extends React.Component {
render() {
return (
<View style={{ flex: 1, alignItems: 'center', justifyContent: 'center' }}>
<Text>Home Screen</Text>
<Button
title="Go to Details"
onPress={() => {
/* 1. Navigate to the Details route with params */
this.props.navigation.navigate('Details', {
itemId: 86,
otherParam: 'anything you want here',
});
}}
/>
</View>
);
}
}
class DetailsScreen extends React.Component {
render() {
/* 2. Get the param, provide a fallback value if not available */
const { navigation } = this.props;
const itemId = navigation.getParam('itemId', 'NO-ID');
const otherParam = navigation.getParam('otherParam', 'some default value');
return (
<View style={{ flex: 1, alignItems: 'center', justifyContent: 'center' }}>
<Text>Details Screen</Text>
<Text>itemId: {JSON.stringify(itemId)}</Text>
<Text>otherParam: {JSON.stringify(otherParam)}</Text>
<Button
title="Go to Details... again"
onPress={() =>
this.props.navigation.push('Details', {
itemId: Math.floor(Math.random() * 100),
})}
/>
<Button
title="Go to Home"
onPress={() => this.props.navigation.navigate('Home')}
/>
<Button
title="Go back"
onPress={() => this.props.navigation.goBack()}
/>
</View>
);
}
}
```
## 使用示例
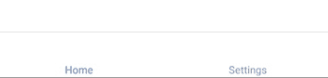
1、createBottomTabNavigator(底部 Tab 導航)
```js
import React from 'react'
import { Text, View } from 'react-native'
import { createBottomTabNavigator, createAppContainer } from 'react-navigation'
class HomeScreen extends React.Component {
render () {
return (
<View style={{ flex: 1, justifyContent: 'center', alignItems: 'center' }}>
<Text>Home!</Text>
</View>
)
}
}
class SettingsScreen extends React.Component {
render () {
return (
<View style={{ flex: 1, justifyContent: 'center', alignItems: 'center' }}>
<Text>Settings!</Text>
</View>
)
}
}
const TabNavigator = createBottomTabNavigator({
Home: { screen: HomeScreen },
Settings: { screen: SettingsScreen }
})
export default createAppContainer(TabNavigator)
```
<br />
2、createMaterialBottomTabNavigator()
# react-native-vector-icons
github: [https://github.com/oblador/react-native-vector-icons](https://github.com/oblador/react-native-vector-icons)
搜索需要使用的圖標:[https://oblador.github.io/react-native-vector-icons/](https://oblador.github.io/react-native-vector-icons/)
用途:在 RN 項目中使用 icon
`npm install react-native-vector-icons`
`react-native link react-native-vector-icons`:這個命令做一些與原生模塊的關聯?
step1:搜索以得到我們想要的圖標:

step2:引入該圖標所屬的組件`import NavigationUtil from "../navigator/NavigationUtil";`
step3:這么使用
```js
<MaterialIcons
name={'whatshot'}
size={26}
style={{color: tintColor}}
/>
```
| Prop | Description | Default |
| --- | --- | --- |
| **`size`** | Size of the icon, can also be passed as`fontSize`in the style object. | `12` |
| **`name`** | What icon to show, see Icon Explorer app or one of the links above. | *None* |
| **`color`** | Color of the icon. | *Inherited* |
# 與 redux 集成
`npm install react-navigation-redux-helpers`
- 序言 & 更新日志
- H5
- Canvas
- 序言
- Part1-直線、矩形、多邊形
- Part2-曲線圖形
- Part3-線條操作
- Part4-文本操作
- Part5-圖像操作
- Part6-變形操作
- Part7-像素操作
- Part8-漸變與陰影
- Part9-路徑與狀態
- Part10-物理動畫
- Part11-邊界檢測
- Part12-碰撞檢測
- Part13-用戶交互
- Part14-高級動畫
- CSS
- SCSS
- codePen
- 速查表
- 面試題
- 《CSS Secrets》
- SVG
- 移動端適配
- 濾鏡(filter)的使用
- JS
- 基礎概念
- 作用域、作用域鏈、閉包
- this
- 原型與繼承
- 數組、字符串、Map、Set方法整理
- 垃圾回收機制
- DOM
- BOM
- 事件循環
- 嚴格模式
- 正則表達式
- ES6部分
- 設計模式
- AJAX
- 模塊化
- 讀冴羽博客筆記
- 第一部分總結-深入JS系列
- 第二部分總結-專題系列
- 第三部分總結-ES6系列
- 網絡請求中的數據類型
- 事件
- 表單
- 函數式編程
- Tips
- JS-Coding
- Framework
- Vue
- 書寫規范
- 基礎
- vue-router & vuex
- 深入淺出 Vue
- 響應式原理及其他
- new Vue 發生了什么
- 組件化
- 編譯流程
- Vue Router
- Vuex
- 前端路由的簡單實現
- React
- 基礎
- 書寫規范
- Redux & react-router
- immutable.js
- CSS 管理
- React 16新特性-Fiber 與 Hook
- 《深入淺出React和Redux》筆記
- 前半部分
- 后半部分
- react-transition-group
- Vue 與 React 的對比
- 工程化與架構
- Hybird
- React Native
- 新手上路
- 內置組件
- 常用插件
- 問題記錄
- Echarts
- 基礎
- Electron
- 序言
- 配置 Electron 開發環境 & 基礎概念
- React + TypeScript 仿 Antd
- TypeScript 基礎
- React + ts
- 樣式設計
- 組件測試
- 圖標解決方案
- Storybook 的使用
- Input 組件
- 在線 mock server
- 打包與發布
- Algorithm
- 排序算法及常見問題
- 劍指 offer
- 動態規劃
- DataStruct
- 概述
- 樹
- 鏈表
- Network
- Performance
- Webpack
- PWA
- Browser
- Safety
- 微信小程序
- mpvue 課程實戰記錄
- 服務器
- 操作系統基礎知識
- Linux
- Nginx
- redis
- node.js
- 基礎及原生模塊
- express框架
- node.js操作數據庫
- 《深入淺出 node.js》筆記
- 前半部分
- 后半部分
- 數據庫
- SQL
- 面試題收集
- 智力題
- 面試題精選1
- 面試題精選2
- 問答篇
- 2025面試題收集
- Other
- markdown 書寫
- Git
- LaTex 常用命令
- Bugs