
[TOC]
為什么要重新搭建一遍`vue-element-admin`,我相信很多人平時工作,都是業務開發,沒有關注到工程構建中,或者公司有專人搞架構,反正諸多原因...,而個人因為工作非必要,也是心有余而力不足;或者有優秀的項目時,拉取下來學習,感覺都會了,并沒有動手嘗試逐一搭建;或許很多人在面試的時候,需要!!!
這段話是我走完下面所有步驟,反過來寫的,有以下收獲:
1. 工程搭建命令窗口不能選擇,可使用`winpty vue.cmd create`方式
2. 對`scss`配置和使用,解決版本問題
3. vsCode、Prettier和Eslint規則檢驗之間的配合
4. 動態路由的添加以及路由權限校驗
5. 動作(按鈕)權限檢驗方式:指令和表達式
6. layout組件群(布局組件集合)
7. 基礎主題色設置
8. svg圖標使用,并通過依賴合成雪碧圖
9. 登錄token和用戶信息處理(不適合單點登錄)
10. vuex使用,對modules進行合理的分配
展望:
1. [CDN方式引入](http://www.hmoore.net/book/vvmily_king/vvmily/preview/cdn%E5%BC%95%E5%85%A5%E9%85%8D%E7%BD%AE.md)
2. [一鍵打包部署到服務器](https://juejin.cn/post/6872914108979609614#heading-1)
### 1、檢查 vue-cli版本
執行命令 vue -V ,如果是全局安裝1.x或者2.x,需要先卸載 `npm uninstall vue-cli -g` ,后安裝 `npm install -g @vue/cli`
### 2、創建項目
vue create vvmily-admin-template 或者 vue ui
如果鍵盤上下鍵選擇不起作用,官方提供方式:winpty vue.cmd create vvmily-admin-template
注:vvmily-admin-template是項目名稱,可隨意命名。
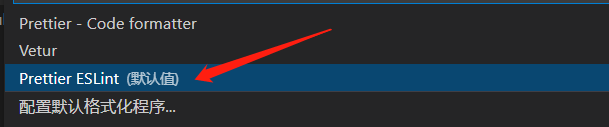
檢驗選擇:ESLint + Prettier
### 3、配置 Eslint + VsCode,統一風格
* **格式化文檔方式**
* **vsCode編輯器 setting.json文件配置**
```
"editor.formatOnSave":?true,?//?保存立即更改
"editor.codeActionsOnSave":?{
"source.fixAll.eslint":?true
},
//?eslint
"eslint.options":?{
"configFile":?".eslintrc.js"//?eslint的配置文件
},
"eslint.validate":?[ "javascript", "javascriptreact", "vue"],
"eslint.autoFixOnSave":?true
```
* **項目 .eslintrc.js 配置**
```
module.exports?=?{
root:true,
parserOptions:?{
parser:'babel-eslint',
sourceType:'module',
?? },
env:?{
browser:true,
node:true,
es6:true,
},
// extends參考: https://cn.eslint.org/docs/user-guide/configuring#specifying-environments
extends:?[ 'plugin:vue/recommended', 'eslint:recommended' ], // 代碼風格
rules: {
// ... 自定義規則,文檔參考:
//?https://github.com/vuejs/eslint-config-vue
//?https://github.com/vuejs/eslint-plugin-vue/blob/master/docs/rules/README.md
}
}
```
### 4、項目環境配置
* **多環境配置**
* **webpack優化**
* **CDN引入**
### 5、引入 Element-UI
```
importCookiesfrom'js-cookie'
importElementfrom'element-ui'
import'element-ui/lib/theme-chalk/index.css'
importenLangfrom'element-ui/lib/locale/lang/en'//?lang?i18n
Vue.use(Element,?{
size:Cookies.get('size')?||?'medium',?//?set?element-ui?default?size
locale:enLang//?如果使用中文,無需設置,請刪除
})
```
### 6、scss預處理
`vue-loader`可以解析 css預處理,不用配置,直接安裝 `npm install node-sass sass sass-loader --save-dev`即可使用。
* **踩坑1:**
1. 安裝出現問題`node-sass`安裝可能會因為版本太高而失敗,如果失敗,通過 `npm uninstall xxx`卸載,重裝低版本,如 `npm install node-sass@5.x --save-dev
`;
2. 出現 `inport 'xxx.scss'`報錯,同樣是因為 `sass-loader`安裝版本太高,可通過 `npm uninstall xxx`卸載,重裝低版本,如 `npm install sass-loader@6.0.7 --save-dev
`
本項目安裝
```
"node-sass":?"^5.0.0",
"sass":?"^1.35.1",
"sass-loader":?"^6.0.7",
```
截止以上,可以正常運行,可發現sass警告,看個人是否能接受。
* **踩坑2:**
最近發現一個警告,網上一查,說是版本太低?
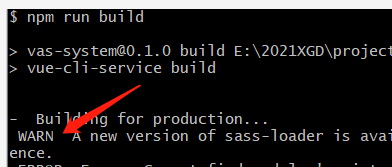
重新安裝高版本的`npm i sass-loader@8.0.0 -D
`,好家伙,這個警告確實不見了,但是又有問題了,一堆警告,雖然不影響使用,但是影響心情啊
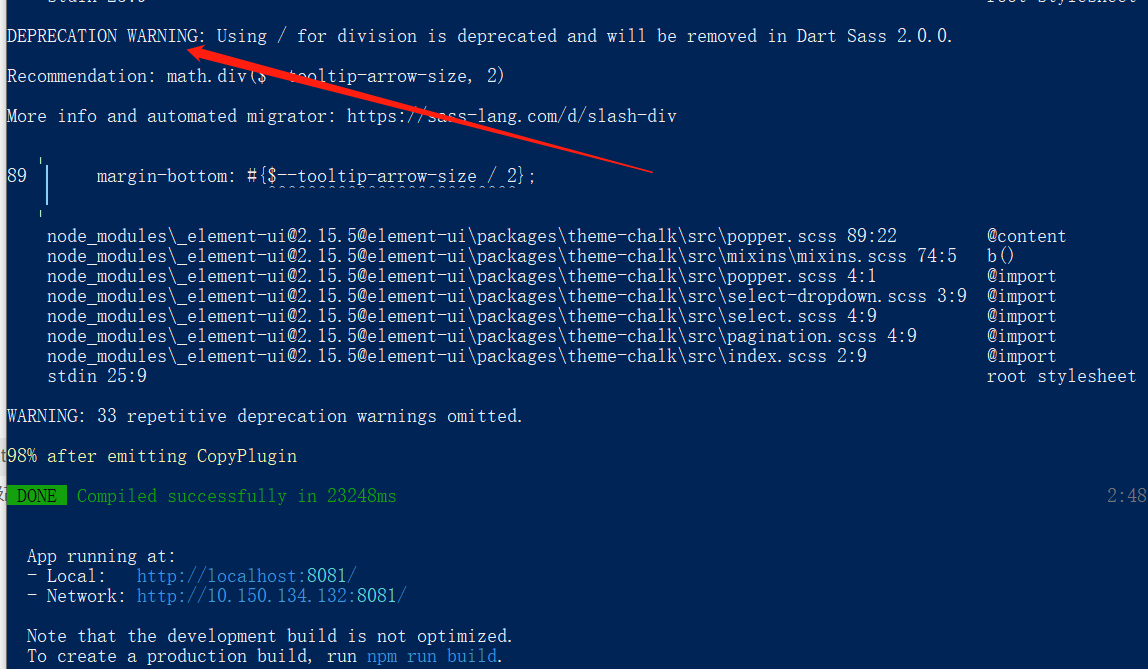
解決方法:把`"sass":"^1.35.1"`版本號變為`"sass":"~1.32.6"`。
備注:`package.json`中`^` 和 `~` 區別如下
`^` :`^1.35.1`,則會安裝 `1.x.x`最新版本,不會升級到 `2.0.0`;
`~`:`~1.32.6`,則會安裝 `1.32.x`最新版本,不回升級到 `1.33.0`。
### 7、圖標引入
* 安裝依賴 `npm install svg-sprite-loader -D`,將svg圖片合成雪碧圖,并在`vue.config.js`中配置一下依賴:
```
chainWebpack(config)?{
config.module.rule('svg').exclude.add(resolve('src/icons')).end() // 將該文件排除在外,比如防止url-loader等處理
// svg-sprite-loader將svg圖片合成雪碧圖
config.module
??????.rule('icons')
??????.test(/\\.svg$/)
??????.include.add(resolve('src/icons'))
??????.end()
??????.use('svg-sprite-loader')
??????.loader('svg-sprite-loader')
??????.options({
symbolId:'icon-[name]'
??????})
??????.end()
}
```
* svg圖標整合在文件 `icons/svg`下,
* 圖標和公共組件SvgIcon整合到`icons/index.js`,如下:
```
importVuefrom'vue'
importSvgIconfrom'@/components/SvgIcon'
Vue.component('svg-icon',?SvgIcon) // 全局注冊
constreq?=?require.context('./svg',?false,?/\\.svg$/)
constrequireAll?=?requireContext\=>requireContext.keys().map(requireContext)
requireAll(req)
```
### 8、更換主題色和動態換膚
* 主要利用scss的:export方式
```
import variables from'@/styles/element-variables.scss'
conststate?=?{
theme:variables.theme
}
```
```
// element-variables.scss
:export?{
??theme:?#ccc;
}
```
* 動態換膚,這個好像比我說的明白,啊哈哈
https://panjiachen.github.io/vue-element-admin-site/zh/guide/advanced/theme.html#%E5%8A%A8%E6%80%81%E6%8D%A2%E8%82%A4
* 如果你只是想簡單修改一下基本(主題)顏色,通過改變`element-variable.scss`文件變量,并且在main.js中引入,并且把默認主題文件`import?'element-ui/lib/theme-chalk/index.css'`去除,具體如圖:
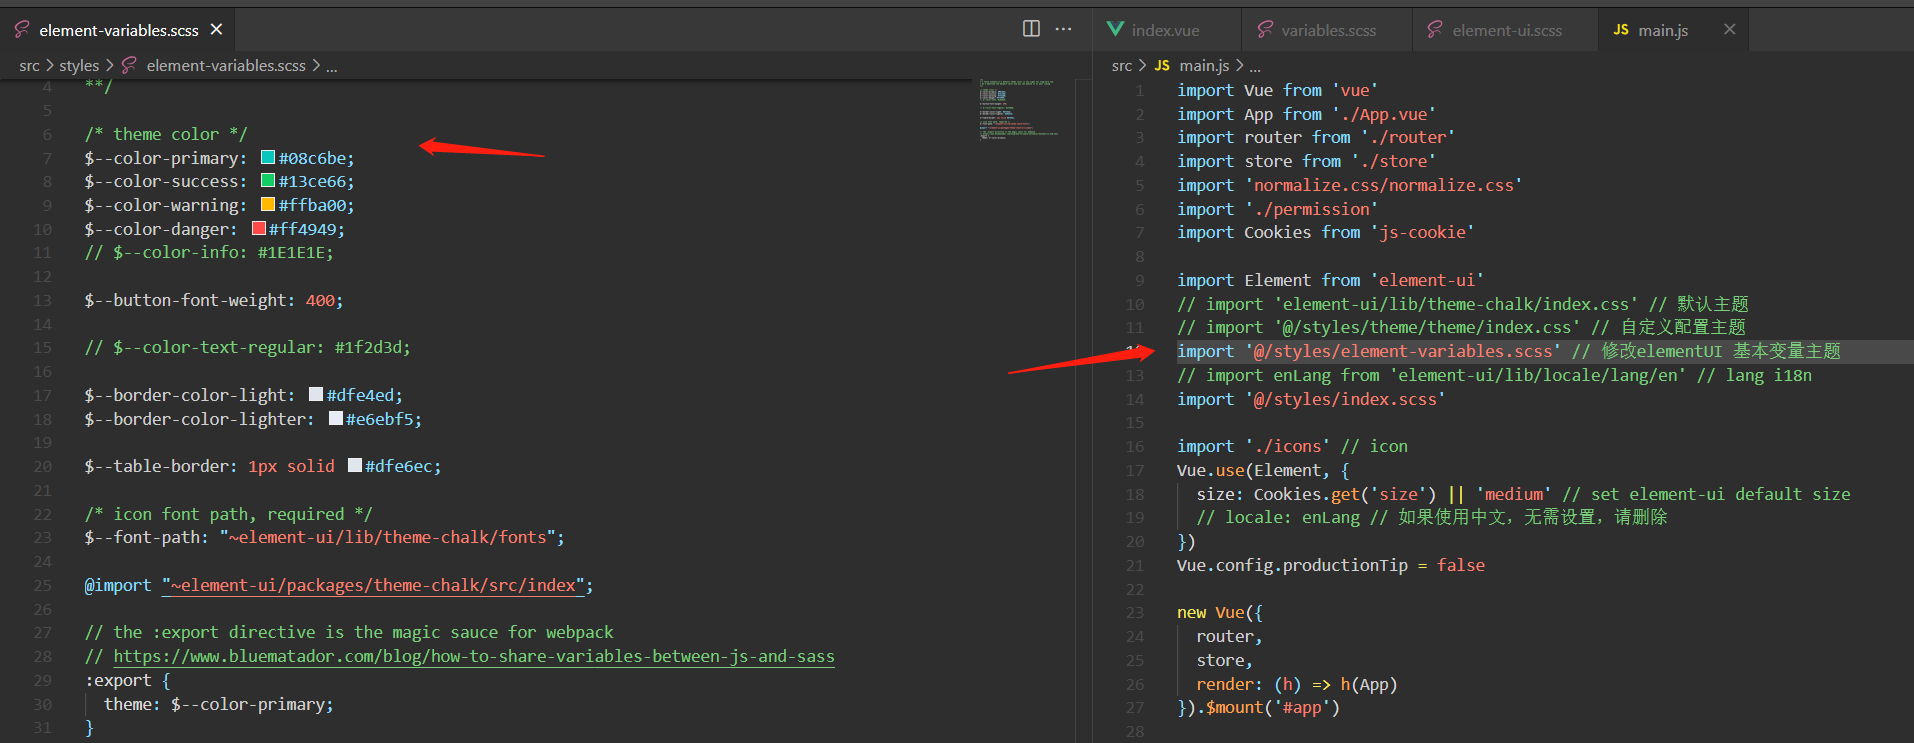
* 如上圖配置復雜的個性化自定義主題,可前往[自定義主題](https://element.eleme.cn/#/zh-CN/theme)配置,下載,引入即可。
### 9、引入 路由 Vue-Router
* **路由分兩類,是否需要通過權限檢驗**
constantRoutes路由,如:登錄,注冊,404,302等一些頁面,是不需要權限檢驗
asyncRoutes路由:存放權限校驗路由,通過router.addRoutes(vue2.2.0以后)動態添加
### 10、配置 Vuex
### 11、布局Layout
### 12、登錄頁面開發
* 思路:通過賬號密碼請求登錄Api,從而拿到token
### 13、權限校驗
* 登錄成功獲取token,則進行權限校驗,否則重置到登陸頁面
* 檢驗方法:路由鉤子`router.beforeEach()`和動態添加路由`router.addRoutes()`
```
router.beforeEach(async(to,?from,?next)?=>?{
const hasToken?=?getToken() // 獲取token
if?(hasToken)?{ // 當token存在,處理
if?(to.path?===?'/login')?{
next({?path:'/'?}) // 進入首頁
???? }?else?{
// 用于請求userInfo信息,且只(包括刷新)執行一次
// 關鍵:可通過任意userInfo等其他值,作為判斷,如:userInfo.userId
consthasRoles?=?store.getters.roles?&&?store.getters.roles.length?>?0
if?(hasRoles)?{
next()
?????? }?else?{
try?{
const?{?roles?}?=?awaitstore.dispatch('user/getInfo')
// 實際更多的是:accessRoutes應該得到asyncRoutes配置路由和后端Api返回的路由的并集
// 這里是通過用戶角色 roles,與 accessRoutes路由中 meta.roles 進行匹配
const accessRoutes?=?awaitstore.dispatch('permission/generateRoutes', roles)
router.addRoutes(accessRoutes)?//?動態添加路由
next({?...to,?replace:true?})
???????? }?catch?(error)?{
awaitstore.dispatch('user/resetToken')
next(`/login?redirect=${to.path}`)
????????}
??????}
????}
??}?else?{
if?(whiteList.indexOf(to.path)?!==?-1)?{
next()
???? }?else?{
next(`/login?redirect=${to.path}`)
???? }
??}
})
```
### 14、公共組件封裝
* 面包屑組件 Breadcrumb.vue
由于版本問題 `pathToRegexp.compile()`方法可能報undefined,如:
引入方式修改即可:
```
import * as pathToRegexp from 'path-to-regexp'
```
### 15、打包優化
* 優化一:
執行`npm run build`,可能會報錯,是缺少依賴了

安裝即可:`npm install script-ext-html-webpack-plugin -D`
* 優化二
安裝`npm install -D terser-webpack-plugin@4.2.3
`,[傳送](https://webpack.docschina.org/plugins/terser-webpack-plugin/)。
注意版本,默認安裝可能是`5.x.x`,這是適配webpack5的,如發現以下錯誤,重新安裝4.x.x即可
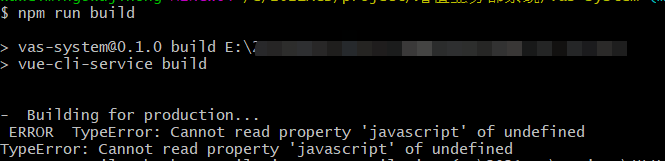
```
// 引入
const TerserPlugin = require('terser-webpack-plugin')
// 配置 ...
configureWebpack: {
optimization:
process.env.NODE_ENV === 'production'
? {
minimizer: [
new TerserPlugin({
terserOptions: {
ecma: undefined,
warnings: false,
parse: {},
compress: {
drop_console: true,
drop_debugger: false,
pure_funcs: ['console.log'] // 移除console
}
}
})
]
}
: {},
resolve: {
alias: {
'@': resolve('src')
}
}
},
```
* 優化三
**打包后部署到環境,icon偶爾會出現亂碼問題**
使用`node-sass`,替換`?"sass":?"1.26.2"`,
解決方法,執行以下兩步
?`set?SASS\_BINARY\_SITE=https://npm.taobao.org/mirrors/node-sass/` // 解決安裝不成功問題
?`npm?install?node-sass@4.14.1?-D`
注意:`"node-sass":?"^4.14.1"`,有可能安裝不成功
### 16、其他
Github:https://github.com/wwmingly/vvmily-admin-template
參考文檔:https://panjiachen.github.io/vue-element-admin-site/zh/
- 首頁
- 2021年
- 基礎知識
- 同源策略
- 跨域
- css
- less
- scss
- reset
- 超出文本顯示省略號
- 默認滾動條
- 清除浮動
- line-height與vertical-align
- box-sizing
- 動畫
- 布局
- JavaScript
- 設計模式
- 深淺拷貝
- 排序
- canvas
- 防抖節流
- 獲取屏幕/可視區域寬高
- 正則
- 重繪重排
- rem換算
- 手寫算法
- apply、call和bind原理與實現
- this的理解-普通函數、箭頭函數
- node
- nodejs
- express
- koa
- egg
- 基于nodeJS的全棧項目
- 小程序
- 常見問題
- ec-canvas之橫豎屏切換重繪
- 公眾號后臺基本配置
- 小程序發布協議更新
- 小程序引入iconfont字體
- Uni-app
- 環境搭建
- 項目搭建
- 數據庫
- MySQL數據庫安裝
- 數據庫圖形化界面常用命令行
- cmd命令行操作數據庫
- Redis安裝
- APP
- 控制縮放meta
- GIT
- 常用命令
- vsCode
- 常用插件
- Ajax
- axios-services
- 文章
- 如何讓代碼更加優雅
- 虛擬滾動
- 網站收藏
- 防抖節流之定時器清除問題
- 號稱破解全網會員的腳本
- 資料筆記
- 資料筆記2
- 公司面試題
- 服務器相關
- 前端自動化部署-jenkins
- nginx.conf配置
- https添加證書
- shell基本命令
- 微型ssh-deploy前端部署插件
- webpack
- 深入理解loader
- 深入理解plugin
- webpack注意事項
- vite和webpack區別
- React
- react+antd搭建
- Vue
- vue-cli
- vue.config.js
- 面板分割左右拖動
- vvmily-admin-template
- v-if與v-for那個優先級高?
- 下載excel
- 導入excel
- Echart-China-Map
- vue-xlsx(解析excel)
- 給elementUI的el-table添加骨架
- cdn引入配置
- Vue2.x之defineProperty應用
- 徹底弄懂diff算法的key作用
- 復制模板內容
- 表格操作按鈕太多
- element常用組件二次封裝
- Vue3.x
- Vue3快速上手(第一天)
- Vue3.x快速上手(第二天)
- Vue3.x快速上手(第三天)
- vue3+element-plus搭建項目
- vue3
- 腳手架
- vvmily-cli
- TS
- ts筆記
- common
- Date
- utils
- axios封裝
- 2022年
- HTML
- CSS基礎
- JavaScript 基礎
- 前端框架Vue
- 計算機網絡
- 瀏覽器相關
- 性能優化
- js手寫代碼
- 前端安全
- 前端算法
- 前端構建與編譯
- 操作系統
- Node.js
- 一些開放問題、智力題