
# 1. 前言
按照`Material Design`的理念,應用程序的界面不僅僅是一個平面,而應該是有立體效果的。在官方給出的示例中,最簡單且最具代表性的立面設計就是懸浮按鈕了。`FloatingActionButton`(簡稱,`FAB`)是`Material`庫中提供的一個控件,這個控件可以幫助我們比較輕松地實現懸浮按鈕的效果。它默認會使用`colorAccent`作為按鈕的顏色。
# 2. 使用
直接在`TestActivity`的布局文件中引入:
~~~
<?xml version="1.0" encoding="utf-8"?>
<!--如果要使用FAB,那么就需要使用androidx.coordinatorlayout.widget.CoordinatorLayout包裹起來-->
<androidx.coordinatorlayout.widget.CoordinatorLayout xmlns:android="http://schemas.android.com/apk/res/android"
xmlns:tools="http://schemas.android.com/tools"
xmlns:app="http://schemas.android.com/apk/res-auto"
android:layout_width="match_parent"
android:layout_height="match_parent"
tools:context=".MainActivity"
android:orientation="vertical">
<!--引入下拉刷新控件-->
<androidx.swiperefreshlayout.widget.SwipeRefreshLayout
android:id="@+id/swiperefreshLayout"
android:layout_width="match_parent"
android:layout_height="match_parent"
>
<!-- 將內容包裹起來 -->
<TextView
android:layout_width="wrap_content"
android:layout_height="?attr/actionBarSize"
android:text="測試下拉刷新"
/>
</androidx.swiperefreshlayout.widget.SwipeRefreshLayout>
<!--這里使用FAB懸浮按鈕-->
<com.google.android.material.floatingactionbutton.FloatingActionButton
android:layout_width="wrap_content"
android:layout_height="wrap_content"
android:src="@drawable/ic_baseline_add_24"
app:elevation="8dp"
android:layout_gravity="bottom|end"
android:layout_margin="16dp"
/>
</androidx.coordinatorlayout.widget.CoordinatorLayout>
~~~
需要注意的是,如果不使用`CoordinatorLayout`包裹起來,`FAB`不會顯示。
效果:
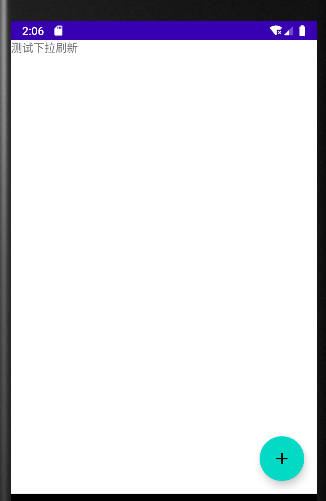
至于如何進行事件處理,`FAB`和普通的`Button`其實沒什么兩樣,都是調用`setOnClickListener()`方法來設置按鈕的點擊事件,這里就不再演示。
# 3. 修改顏色
可以在`xml`中直接修改:
~~~
<!--FAB懸浮按鈕-->
<com.google.android.material.floatingactionbutton.FloatingActionButton
android:layout_width="wrap_content"
android:layout_height="wrap_content"
android:layout_gravity="bottom|end"
android:layout_marginEnd="16dp"
android:layout_marginBottom="76dp"
android:src="@drawable/ic_baseline_add_24"
app:backgroundTint="@color/white"
app:elevation="8dp" />
~~~
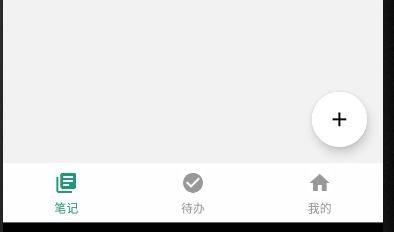
使用`app:backgroundTint`屬性指定即可。
效果:
- 介紹
- UI
- MaterialButton
- MaterialButtonToggleGroup
- 字體相關設置
- Material Design
- Toolbar
- 下拉刷新
- 可折疊式標題欄
- 懸浮按鈕
- 滑動菜單DrawerLayout
- NavigationView
- 可交互提示
- CoordinatorLayout
- 卡片式布局
- 搜索框SearchView
- 自定義View
- 簡單封裝單選
- RecyclerView
- xml設置點擊樣式
- adb
- 連接真機
- 小技巧
- 通過字符串ID獲取資源
- 自定義View組件
- 使用系統控件重新組合
- 旋轉菜單
- 輪播圖
- 下拉輸入框
- 自定義VIew
- 圖片組合的開關按鈕
- 自定義ViewPager
- 聯系人快速索引案例
- 使用ListView定義側滑菜單
- 下拉粘黏效果
- 滑動沖突
- 滑動沖突之非同向沖突
- onMeasure
- 繪制字體
- 設置畫筆Paint
- 貝賽爾曲線
- Invalidate和PostInvalidate
- super.onTouchEvent(event)?
- setShadowLayer與陰影效果
- Shader
- ImageView的scaleType屬性
- 漸變
- LinearGradient
- 圖像混合模式
- PorterDuffXfermode
- 橡皮擦效果
- Matrix
- 離屏繪制
- Canvas和圖層
- Canvas簡介
- Canvas中常用操作總結
- Shape
- 圓角屬性
- Android常見動畫
- Android動畫簡介
- View動畫
- 自定義View動畫
- View動畫的特殊使用場景
- LayoutAnimation
- Activity的切換轉場效果
- 屬性動畫
- 幀動畫
- 屬性動畫監聽
- 插值器和估值器
- 工具
- dp和px的轉換
- 獲取屏幕寬高
- JNI
- javah命令
- C和Java相互調用
- WebView
- Android Studio快捷鍵
- Bitmap和Drawable圖像
- Bitmap簡要介紹
- 圖片縮放和裁剪效果
- 創建指定顏色的Bitmap圖像
- Gradle本地倉庫
- Gradle小技巧
- RxJava+Okhttp+Retrofit構建網絡模塊
- 服務器相關配置
- node環境配置
- 3D特效