
先將所有代碼給大家看一下,避免學習過程出錯找不到問題。
admin/src/views/CategoryList.vue:
```
<template>
<div>
<h1>分類列表</h1>
<el-table :data="items">
<el-table-column prop="_id" label="ID" width="220">
</el-table-column>
<el-table-column prop="name" label="分類名稱">
</el-table-column>
<el-table-column
fixed="right"
label="操作"
width="100">
<template slot-scope="scope">
<el-button type="text" size="small" @click="$router.push('/categories/edit/' + scope.row._id)">編輯</el-button>
<el-button @click="remove(scope.row)" type="text" size="small">刪除</el-button>
</template>
</el-table-column>
</el-table>
</div>
</template>
<script>
export default {
data() {
return {
items: []
}
},
methods: {
async fetch(){
const res = await this.$http.get('categories')
this.items = res.data
},
remove(row){
this.$confirm('是否確定要刪除分類"' + row.name + '"?', '提示', {
confirmButtonText: '確定',
cancelButtonText: '取消',
type: 'warning'
}).then(async () => {
// 要想使用await,函數必須使用async
// await異步執行,待調用接口獲取數據完成后再將值傳給res,進行下一步操作
const res = await this.$http.delete('categories/' + row._id)
this.$message({
type: 'success',
message: '刪除成功!'
});
if(res.status == 200){
// 接口調用成功后,刷新頁面
this.fetch()
}
}).catch(() => {
this.$message({
type: 'info',
message: '已取消刪除'
});
});
}
},
created() {
this.fetch()
}
}
</script>
```
server/routes/admin/index.js:
```
module.exports = app => {
// 要想使用express,該文件就需要引入express
const express = require('express')
// 定義路由方法,將我們定義的路由掛載到express
const router = express.Router()
// 引入Category模型
const Category = require('../../models/Category')
// router掛載post方法,因為表單傳值時用的就是post傳值
// 接口地址是categories,接收的是分類功能(創建分類、修改分類、查詢分類列表)的操作
// 之后其他功能實現與此模板相同,與此功能平級
// 上傳數據(增)
router.post('/categories', async(req, res) => {
// 在里邊放該接口的具體操作,所有操作同級放置
// 數據來源是接受到的req中的body
// 為避免阻塞,要用異步操作,故加入await
const model = await Category.create(req.body)
// 接收返回值
res.send(model)
})
// 查詢數據(查)
router.get('/categories', async(req, res) => {
const items = await Category.find().limit(10)
res.send(items)
})
// 根據id查詢數據(查)
router.get('/categories/:id', async(req, res) => {
const model = await Category.findById(req.params.id)
res.send(model)
})
// 編輯數據(改)
router.put('/categories/:id', async(req, res) => {
const model = await Category.findByIdAndUpdate(req.params.id, req.body)
res.send(model)
})
// 刪除數據(刪)
router.delete('/categories/:id', async(req, res) => {
// 不需要返回值
await Category.findByIdAndDelete(req.params.id, req.body)
// 只發送一個bool值,表明刪除成功
res.send({
success: true
})
})
// 定義“admin/api”路由方法,掛載存入到router
app.use('/admin/api', router)
}
```
1.創建list頁面組件。
vue.js不同于以往html\css的開發方式,全程以組件為主體進行視覺呈現,其中.vue文件就是vue的單文件組件,開發方式就是包裝組件,然后將已開發的子組件引入父級組件中,從而進行進一步操作。現我們基本都會用前端框架進行視覺的呈現,很少用到css,其中css不可在vue組件中使用,后期我們需要的時候可能會用到.less文件,大家需要的話可以學習一下.less相關的引入方法。
進入正題:
(1)創建CategoryList.vue組件
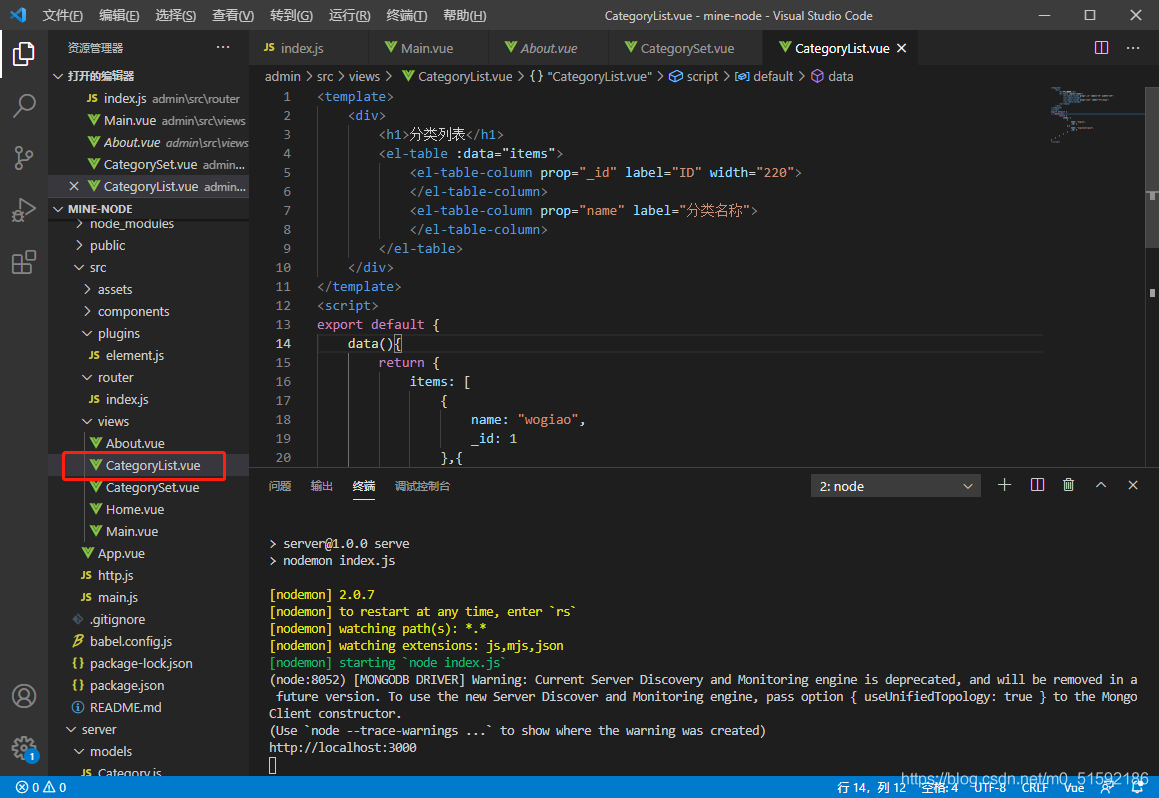
```
<template>
<div>
<h1>分類列表</h1>
<el-table :data="items">
<el-table-column prop="_id" label="ID" width="220">
</el-table-column>
<el-table-column prop="name" label="分類名稱">
</el-table-column>
</el-table>
</div>
</template>
<script>
export default {
data(){
return {
items: [
{
name: "wogiao",
_id: 1
},{
name: "yigiaowoligiao",
_id: 2
}
]
}
}
}
</script>
```
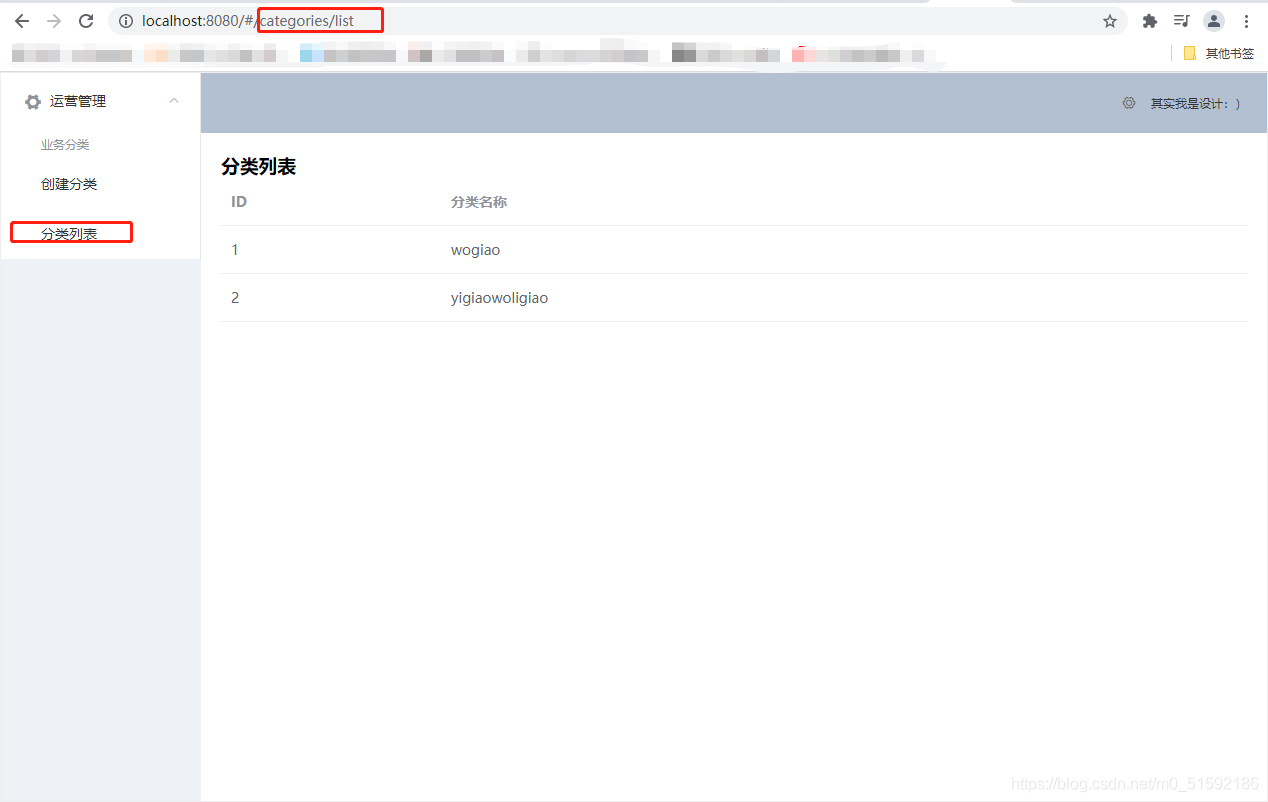
(2)在路由中引入
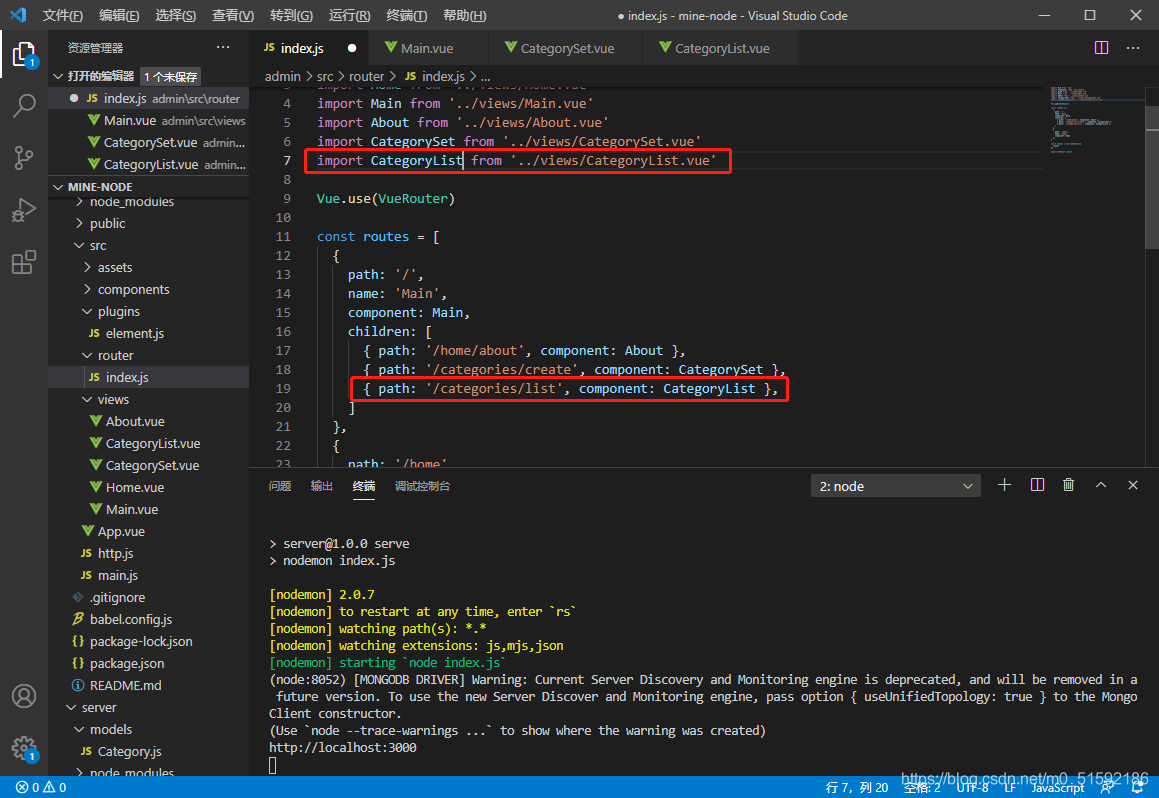
此時就可以在頁面中進入頁面了。
```
```
2.創建接口-刪改查
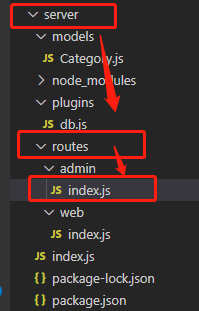
進入服務器端
```
cd server
```
```
npm run serve
```
找到服務端admin路由主文件
(1)查詢數據
上篇文章的上傳數據接口就是“增”,在下方并列寫下“查”的方法接口:
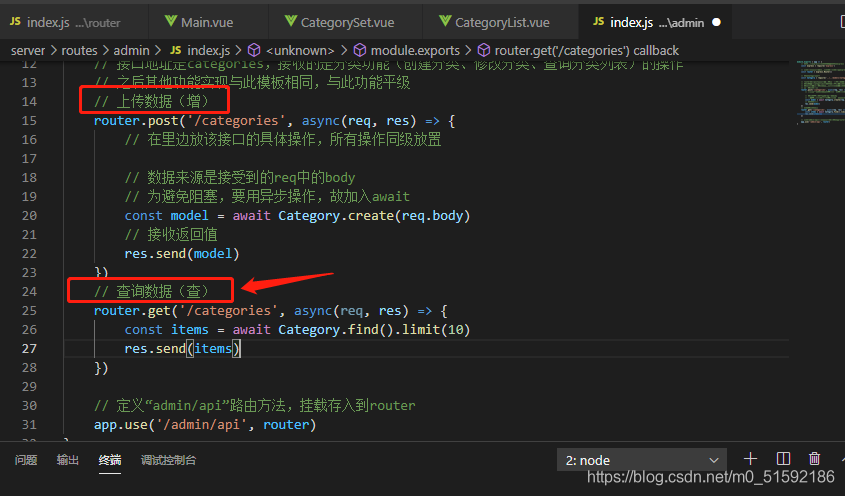
```
// 查詢數據(查)
router.get('/categories', async(req, res) => {
const items = await Category.find().limit(10)
res.send(items)
})
```
(2)根據id查詢數據(查)
```
// 根據id查詢數據(查)
router.get('/categories/:id', async(req, res) => {
const model= await Category.findById(req.params.id)
res.send(model)
})
```
(3)編輯數據-改
```
// 編輯數據(改)
router.put('/categories/:id', async(req, res) => {
const model = await Category.findByIdAndUpdate(req.params.id, req.body)
res.send(model)
})
```
(4)刪除數據-刪
```
// 刪除數據(刪)
router.delete('/categories/:id', async(req, res) => {
// 不需要返回值
await Category.findByIdAndDelete(req.params.id, req.body)
// 只發送一個bool值,表明刪除成功
res.send({
success: true
})
})
```
3.調用接口
(1)呈現數據到頁面-使用查詢接口
回到CategoryList.vue組件中,刪除items原始數據的內容,添加方法fetch(),且使用初始化鉤子函數created方法調用。
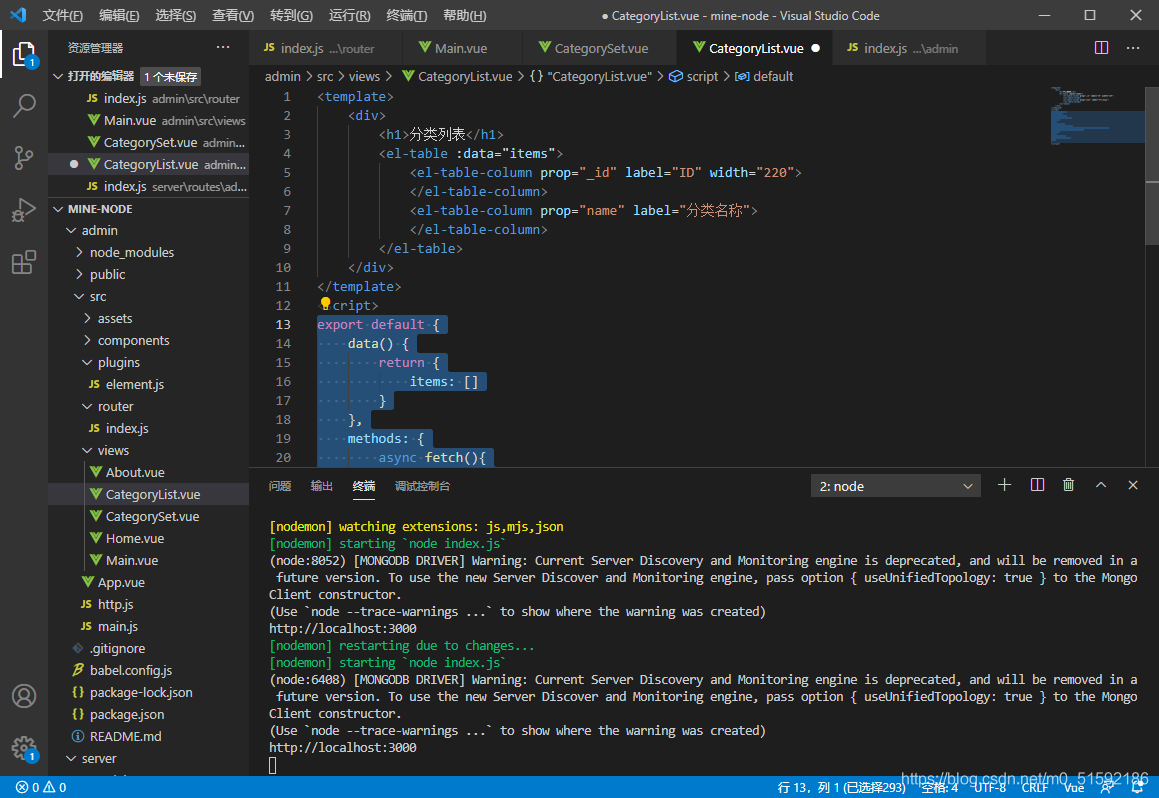
```
export default {
data() {
return {
items: []
}
},
methods: {
async fetch(){
const res = await this.$http.get('categories')
this.items = res.data
}
},
created() {
this.fetch()
}
}
```
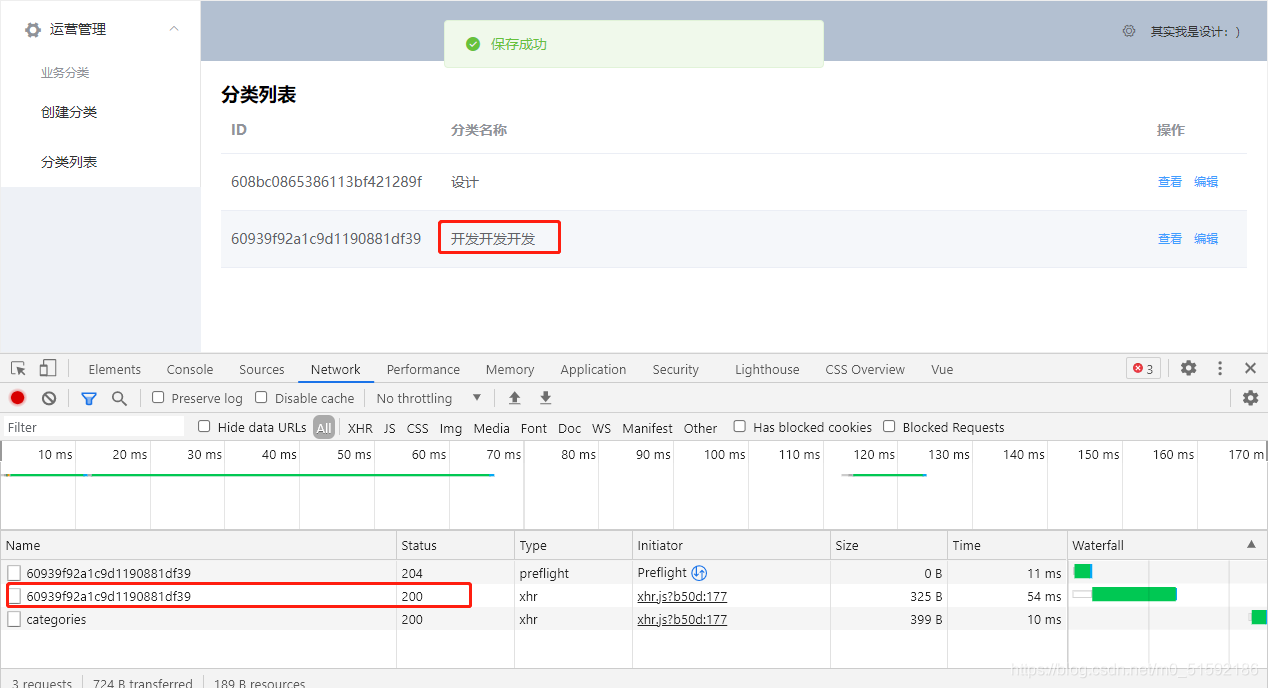
保存代碼后,頁面數據就改變了,打開網站開發面板檢查調用數據,發現接口調用沒問題。

回到創建分類頁面再次添加一個分類,測試:
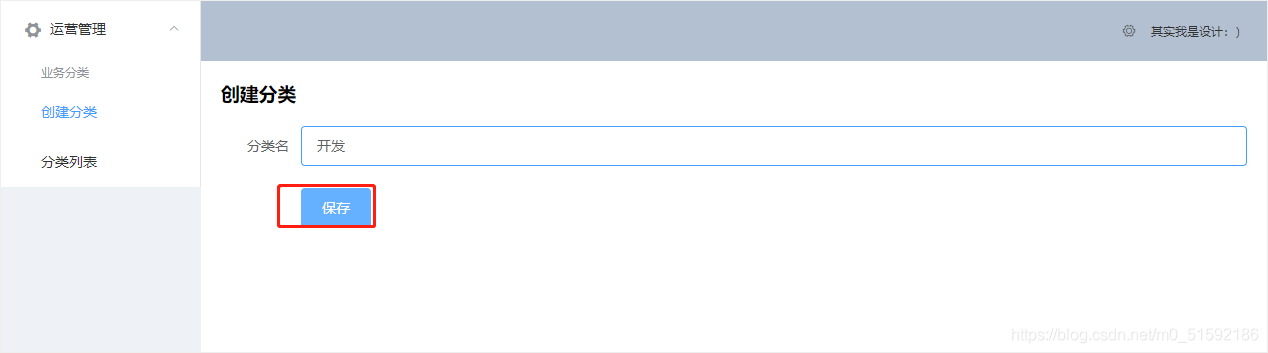
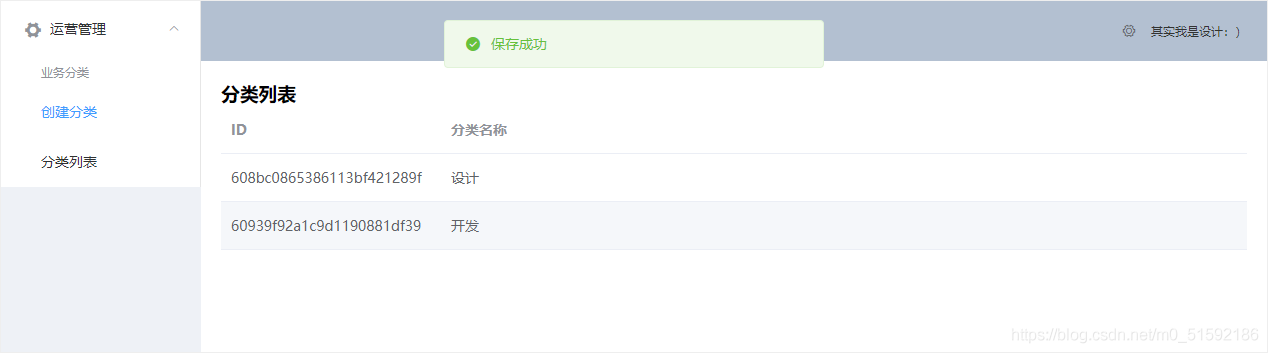
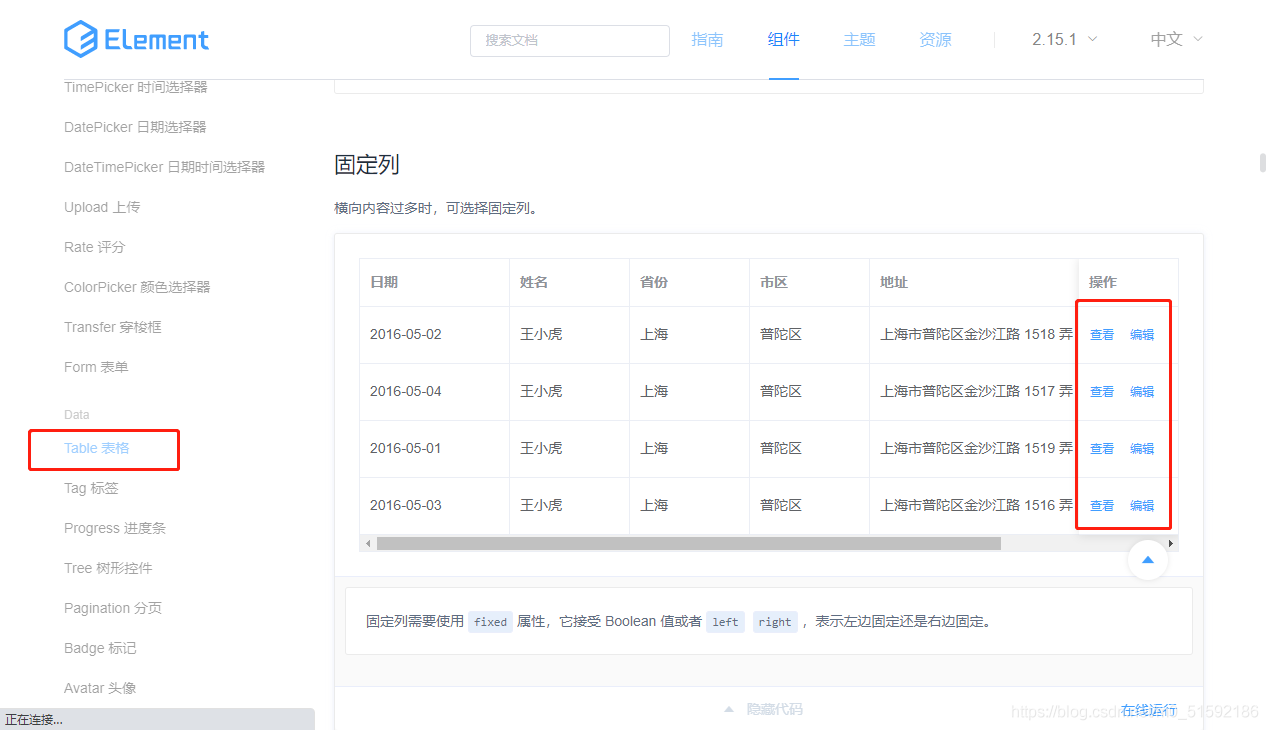
沒問題,到此查詢功能實現。
(2)顯示編輯前數據-根據id查詢接口(查)
在elementUI官網找到表格的按鈕代碼:
```
<el-table-column
fixed="right"
label="操作"
width="100">
<template slot-scope="scope">
<el-button @click="handleClick(scope.row)" type="text" size="small">查看</el-button>
<el-button type="text" size="small">編輯</el-button>
</template>
</el-table-column>
```
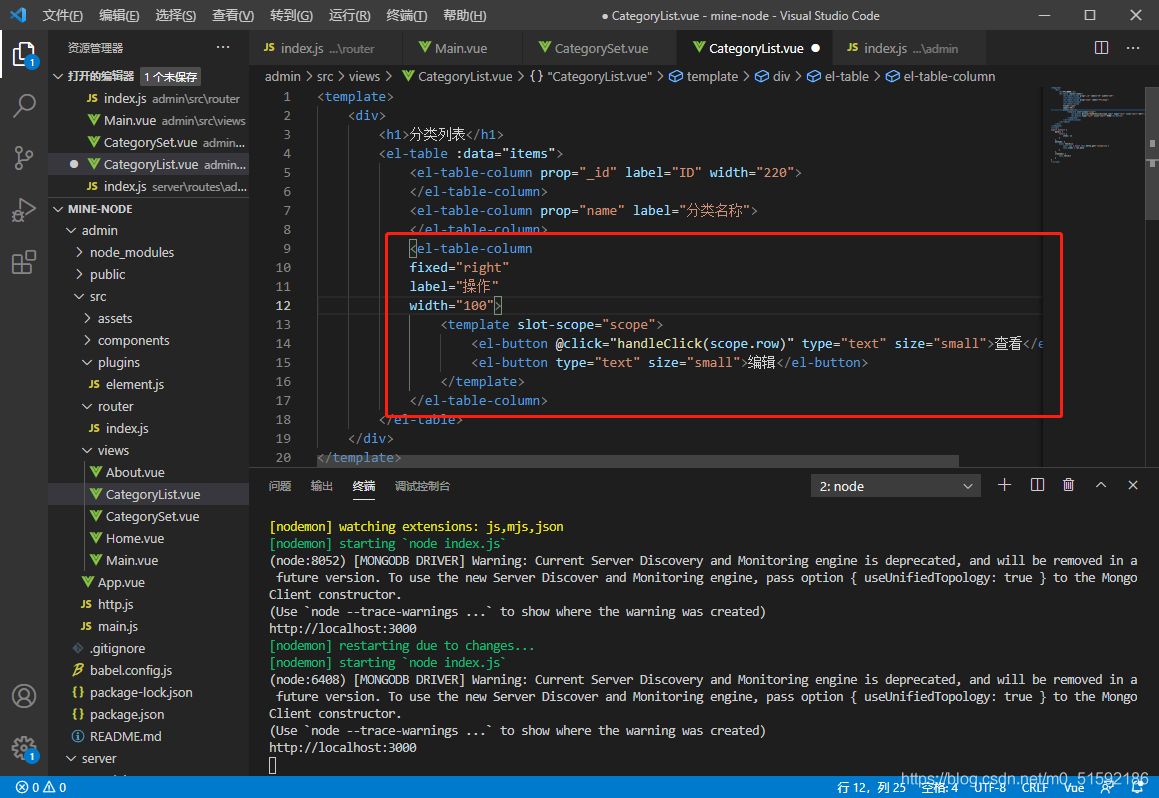
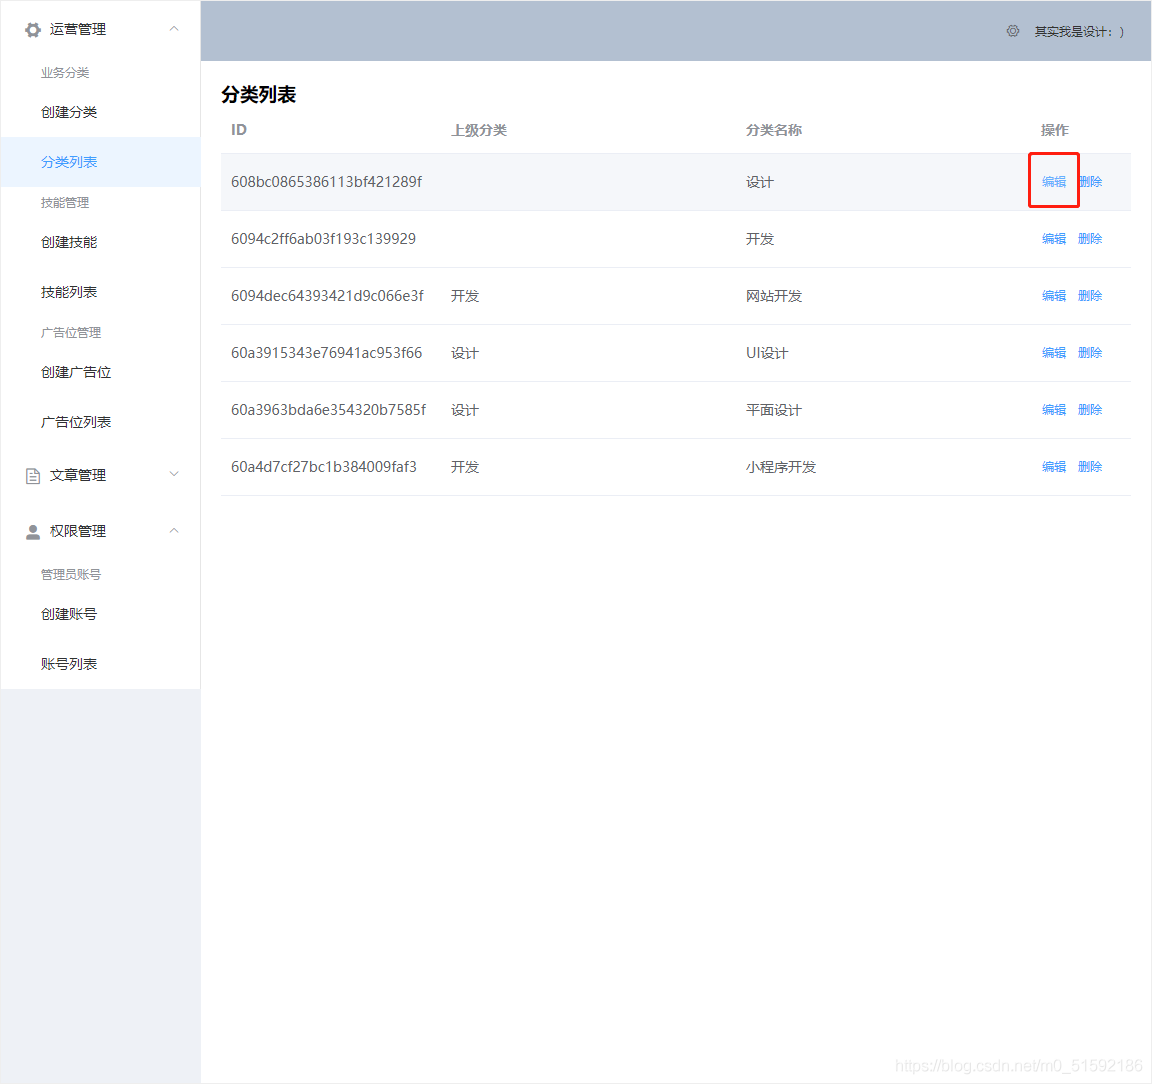
修改編輯按鈕,添加@click方法,傳入這個按鈕所在行的id:
```
<el-button type="text" size="small" @click="$router.push('/categories/edit/' + scope.row._id)">編輯</el-button>
```
在服務器端路由admin添加接口的路徑信息,由于修改分類的頁面與添加分類頁面相同,所以讓edit修改頁面地址指向同一個.vue組件CategorySet.vue。
同時最后要加一個props,指將鏈接傳入的url參數值傳入頁面內,可以在頁面內使用我們傳入的id。
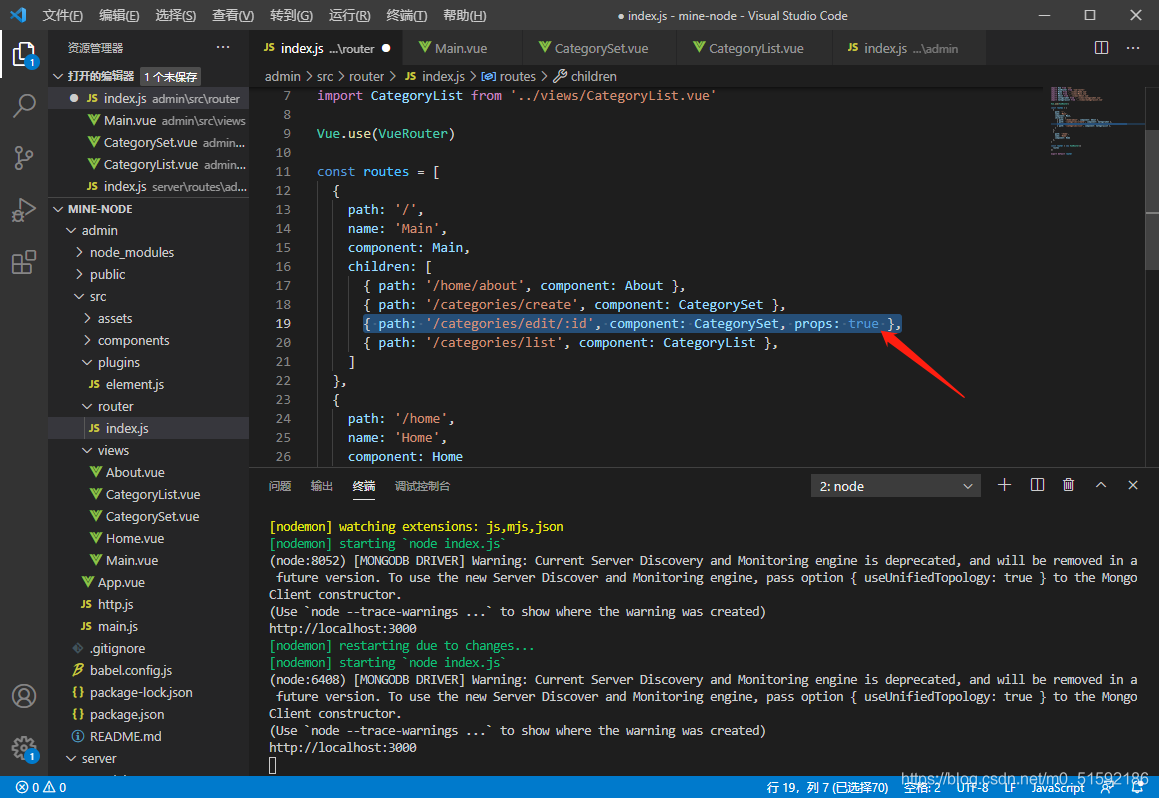
同時,頁面內要接收傳來的id,在CategorySet.vue作改動:
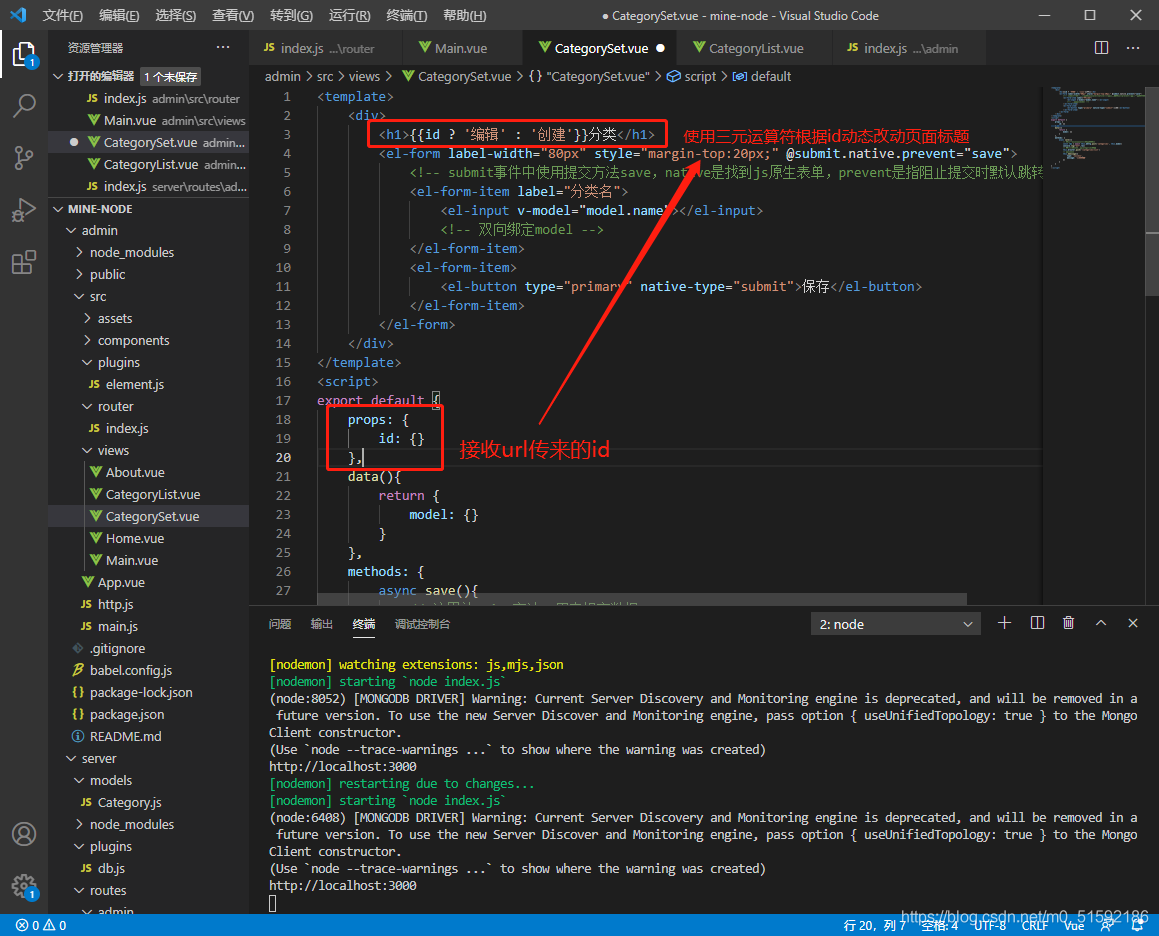
點擊按鈕跳轉:
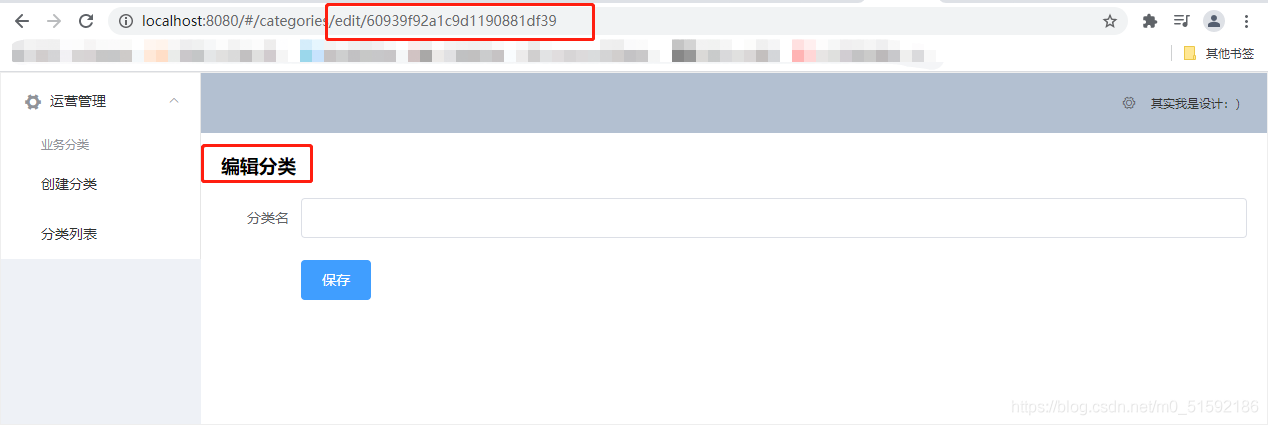
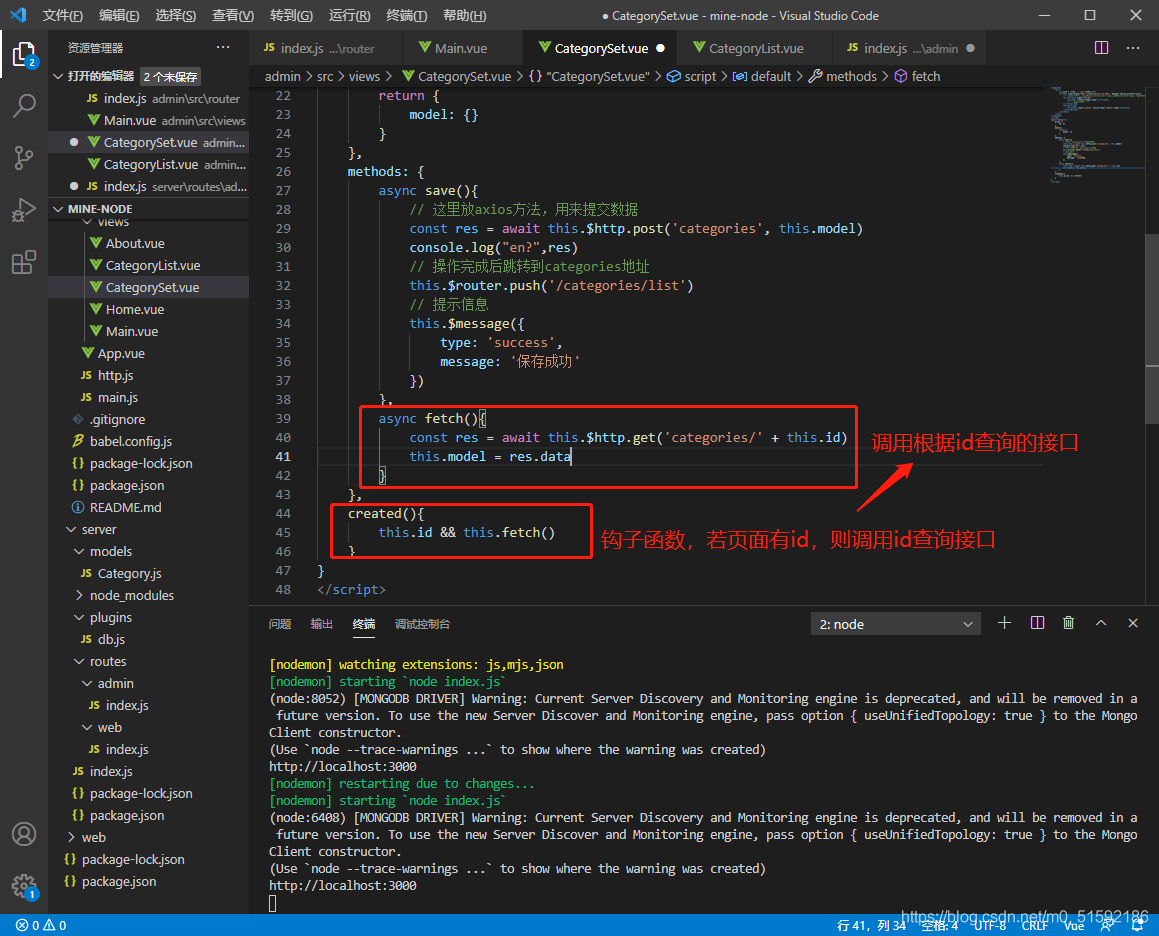
進入編輯頁面后,根據id查詢修改前的分類名,所以我們要調用根據id查詢的查詢接口,改動CategorySet.vue:
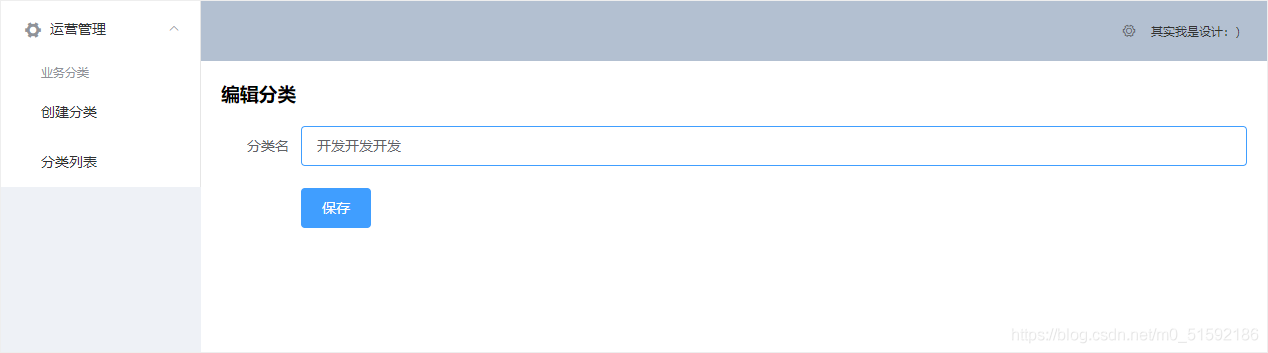
這樣,頁面原值就出現了:

(3)使用編輯接口(改)
改動原save()方法,如果頁面有id(編輯分類)則修改數據,若沒有id(新建分類)則創建數據。
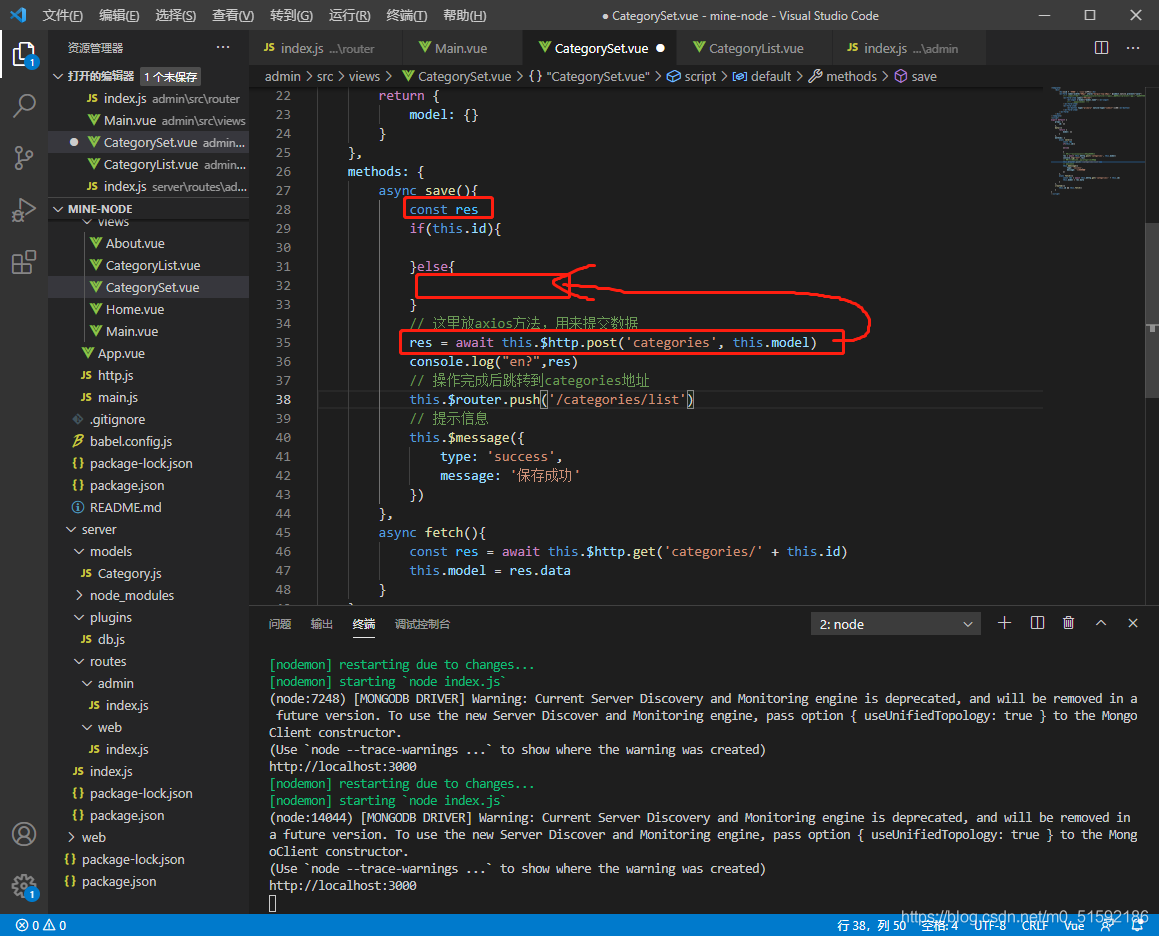
改動后save()方法:
```
async save(){
const res
if(this.id){
// 傳id值,表明修改哪一條數據
res = await this.$http.put('categories/' + this.id, this.model)
}else{
// 這里放axios方法,用來提交數據
res = await this.$http.post('categories', this.model)
}
// 操作完成后跳轉到categories地址
this.$router.push('/categories/list')
// 提示信息
this.$message({
type: 'success',
message: '保存成功'
})
},
```
測試一下,沒問題:
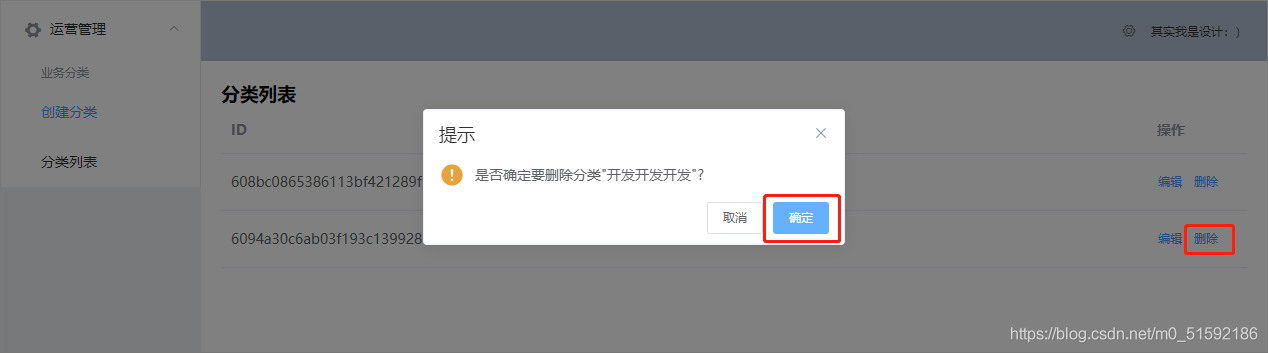
(4)使用刪除接口(刪)
首先,將“查看”按鈕改成“刪除”按鈕,由于我們多數制作刪除按鈕是要注意避免誤刪,所以在點擊刪除應該多一步是否確認刪除該條分類。因此與編輯保存后直接跳轉接口不同,在這里要點擊后跳轉remove()方法,將整行信息傳到方法中。
```
<el-button @click="remove(scope.row)" type="text" size="small">刪除</el-button>
```
然后,在methods中編寫remove()方法,在elementUI中找到messageBox彈框,使用其中的確認消息。
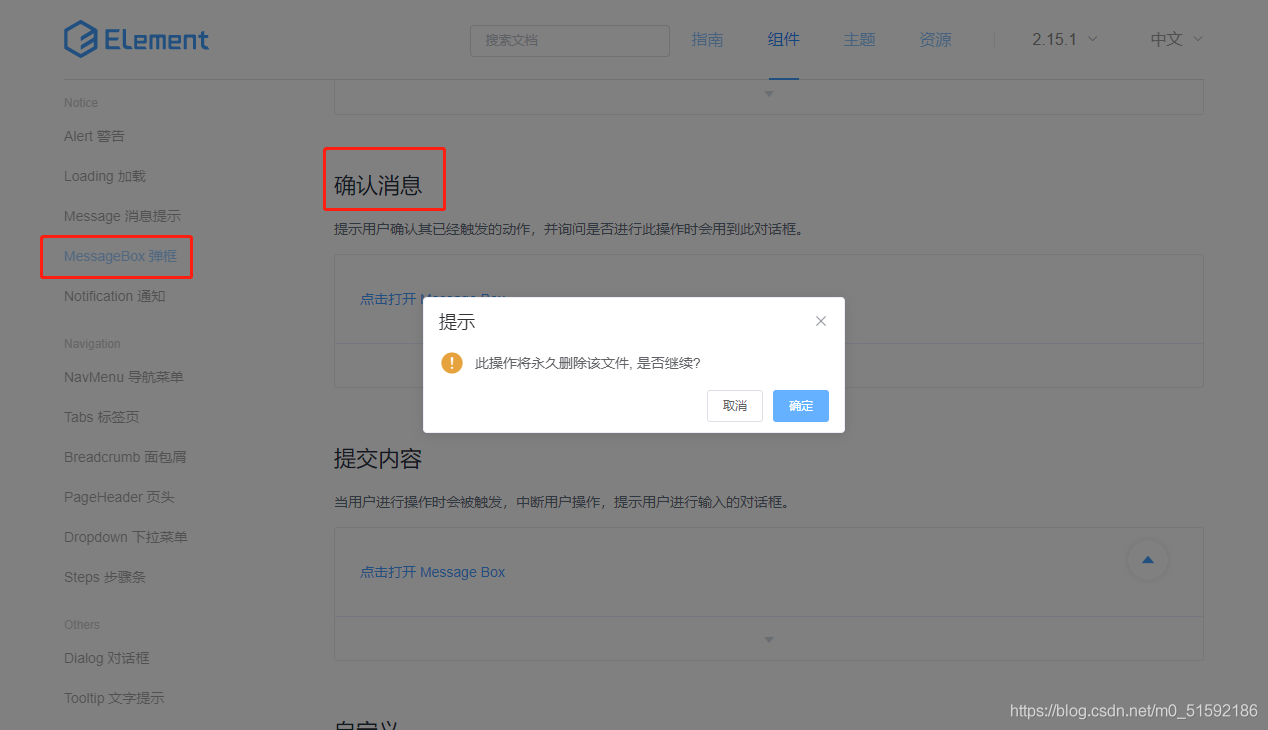
```
remove(row){
this.$confirm('是否確定要刪除分類"' + row.name + '"?', '提示', {
confirmButtonText: '確定',
cancelButtonText: '取消',
type: 'warning'
}).then(async () => {
// 要想使用await,函數必須使用async
// await異步執行,待調用接口獲取數據完成后再將值傳給res,進行下一步操作
const res = await this.$http.delete('categories/' + row._id)
this.$message({
type: 'success',
message: '刪除成功!'
});
if(res.status == 200){
// 接口調用成功后,刷新頁面
this.fetch()
}
}).catch(() => {
this.$message({
type: 'info',
message: '已取消刪除'
});
});
}
```
測試該功能:
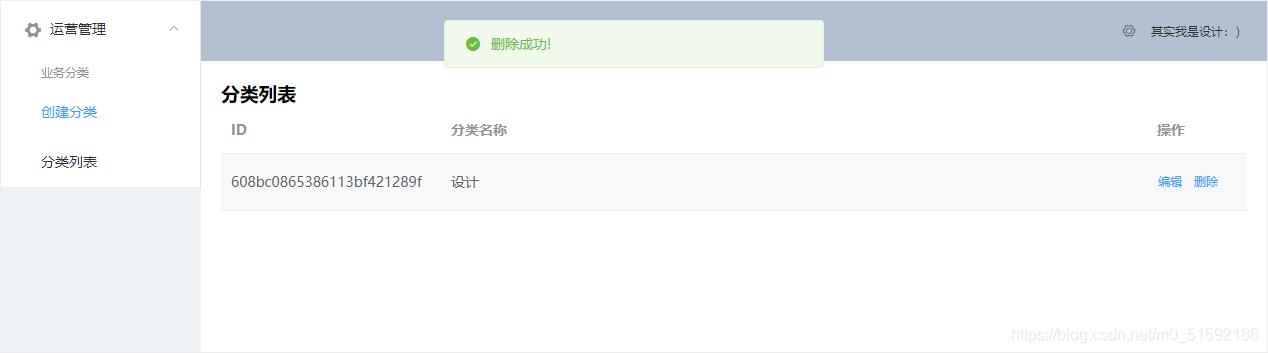
沒問題。
4.路由頁面的跳轉
如果我們編輯某一個分類,進入頁面后進入新建分類頁面,頁面中的數據依然是之前編輯的頁面:
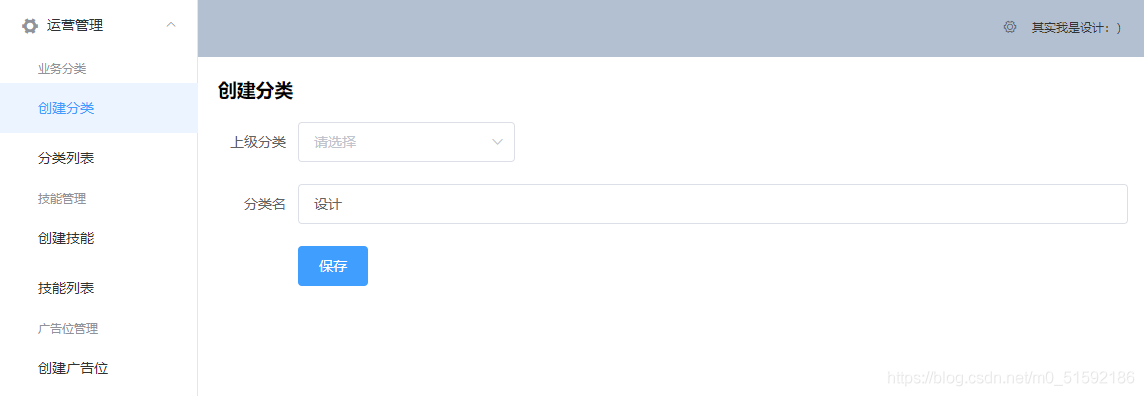
這是因為頁面的路由是以組件來區分的:
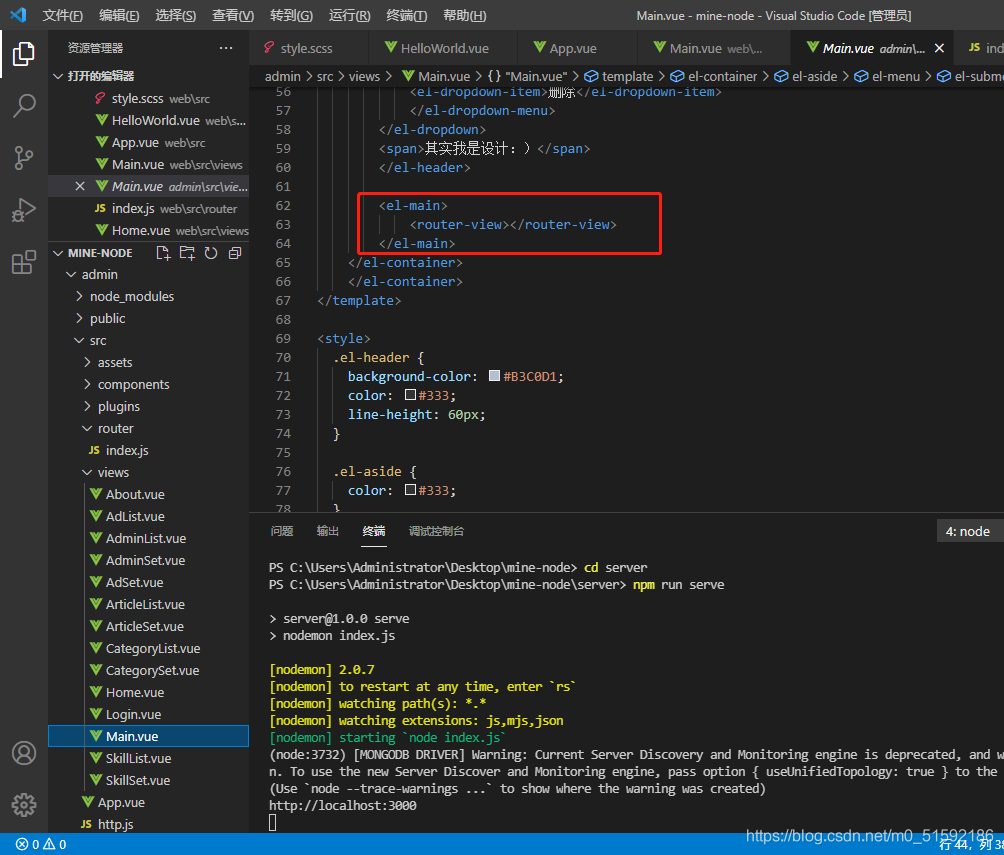
由于修改和新建分類使用的是同一個頁面,所以我們不可以使用組件來區分,應該用路由地址區分:
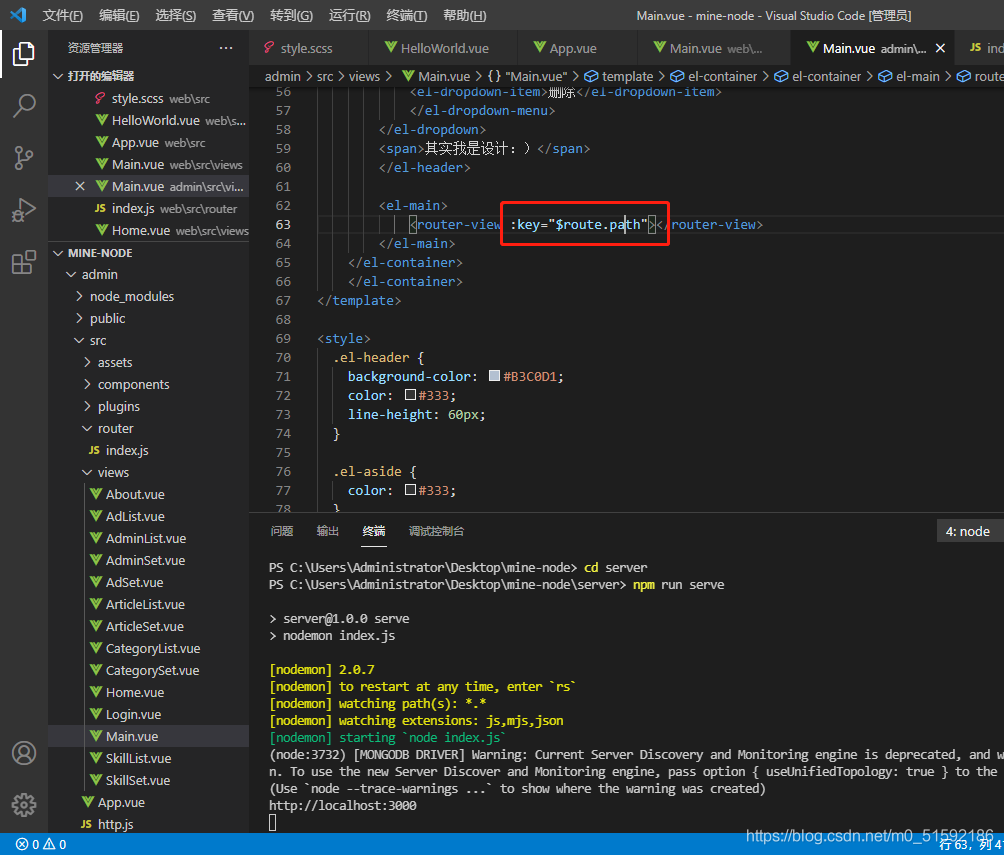
此時問題得以解決。
5.總結
到此,mongodb的增刪改查都學習完了。所有功能都可以照此相關接口完成,可以一步步制作我們的動態網站了。但是分類是一個網站內容的起始、根源,一切內容都以分類為進一步擴展。下篇文章我們學習mongodb的強大功能之一子分類,即分類的關聯(綁定)。
- tp6+vue
- 1.工具和本地環境
- 2.啟動項目
- 3.路由、模型與數據庫操作
- 4.優化后端接口,前端使用axios實現接口功能
- 5.用戶登錄,bcrypt(hash)加密與驗證
- 6.用戶登錄(二),token驗證
- 7.分類的模型關聯和通用CRUD接口
- 8.使用vue的markdown編輯器并批量上傳圖片
- Node.js + Vue.js
- 工具,本地環境
- 2.1啟動項目
- 3.element-ui和vue-router路由的安裝和使用
- 4.使用axios,并創建接口上傳數據到mongodb數據庫
- 5.mongoodb數據庫的“刪、改、查”操作
- 6.mongodb數據庫無限層級的數據關聯(子分類)
- 7.使用mongodb數據庫關聯多個分類(關聯多個數據)
- 8.server端使用通用CRUD接口
- 9.圖片上傳
- 10.vue的富文本編輯器(vue2-editor)
- 11.動態添加分欄上傳多組數據
- 12-1.管理員模塊
- 13-1.搭建前臺web端頁面
- 1.使用sass工具搭建前臺web端頁面
- 2.sass工具的變量
- 3.使用flex布局并開始搭建web端
- 4.vue廣告輪播圖,并使用接口引入數據
- 5.使用字體圖標(iconfont)
- 6.卡片組件的封裝
- 14-1.生產環境編譯
- 1.環境編譯
- 2.購買域名服務器并解析域名到服務器
- 3.nginx配置web服務器并安裝網站環境
- 4.git拉取代碼到服務器
- 5.配置Nginx反向代理
- 6.遷移本地數據到服務器(mongodump)
- uni
- 1.工具&本地環境
- 2.頁面制作
- 3.頁面制作、組件與輪播
- 4.頁面跳轉與橫向滑動
- 5.用戶授權登錄和用戶信息獲取
- 6.用戶注冊和數據存儲
- 7.用戶填寫表單信息