
1.下載組件包Vue-Awesome-Swiper并引入
[Vue-Awesome-Swiper](https://www.npmjs.com/package/vue-awesome-swiper)鏈接
```
cd web
npm i vue-awesome-swiper
```
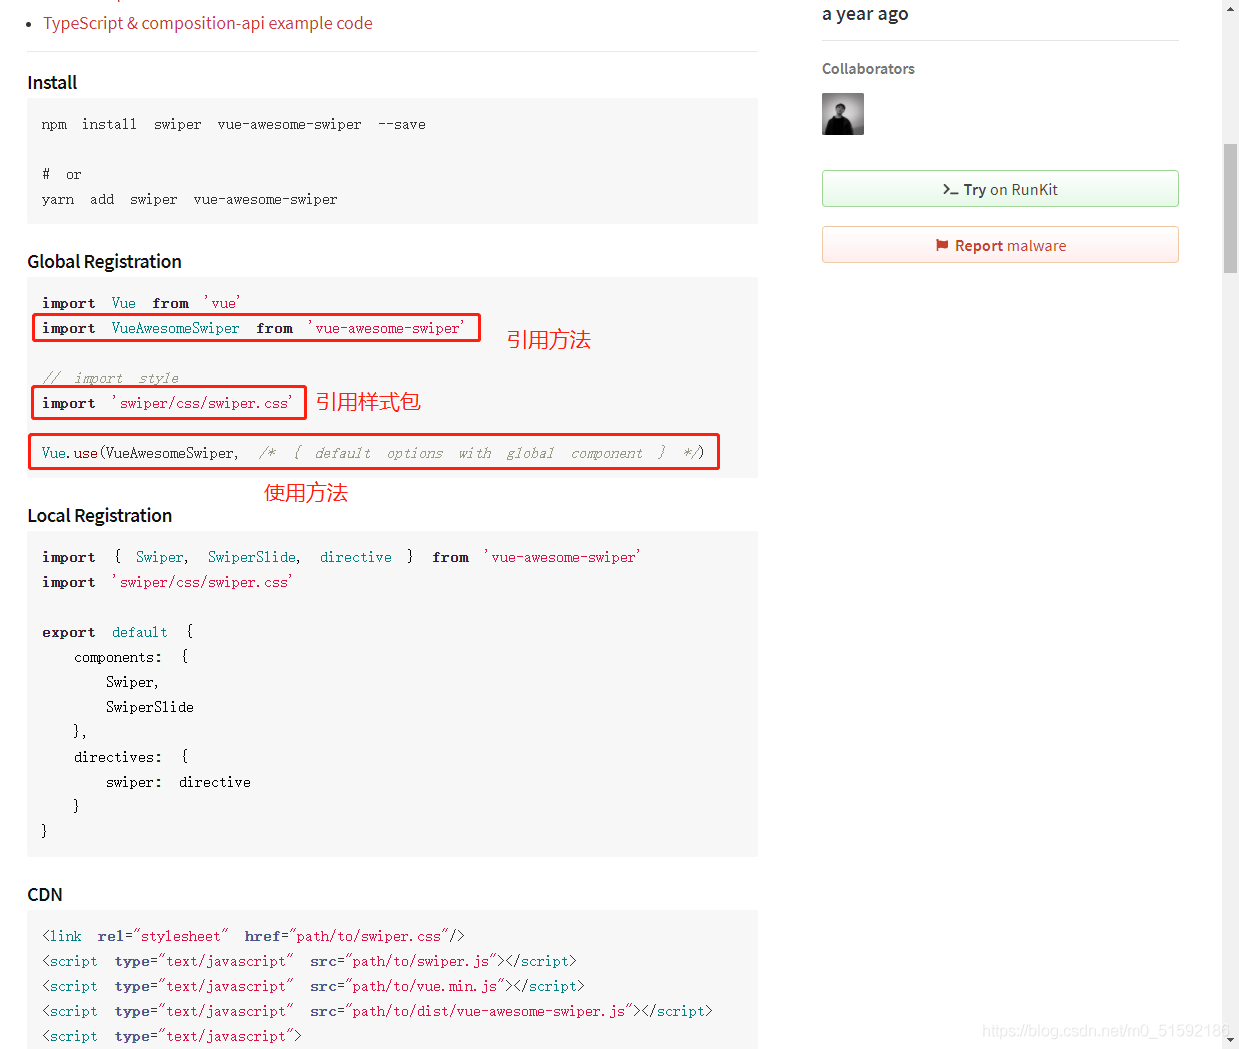
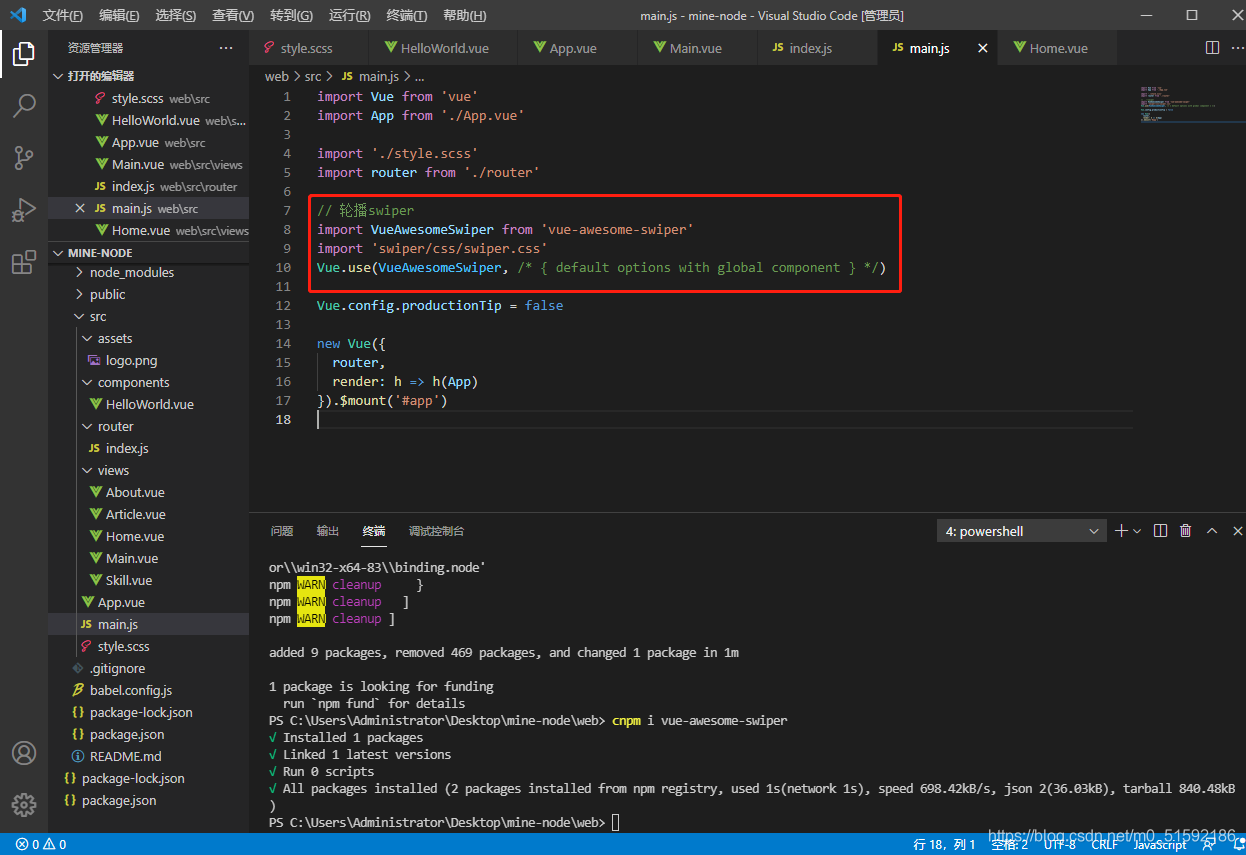
2.使用vue-swiper
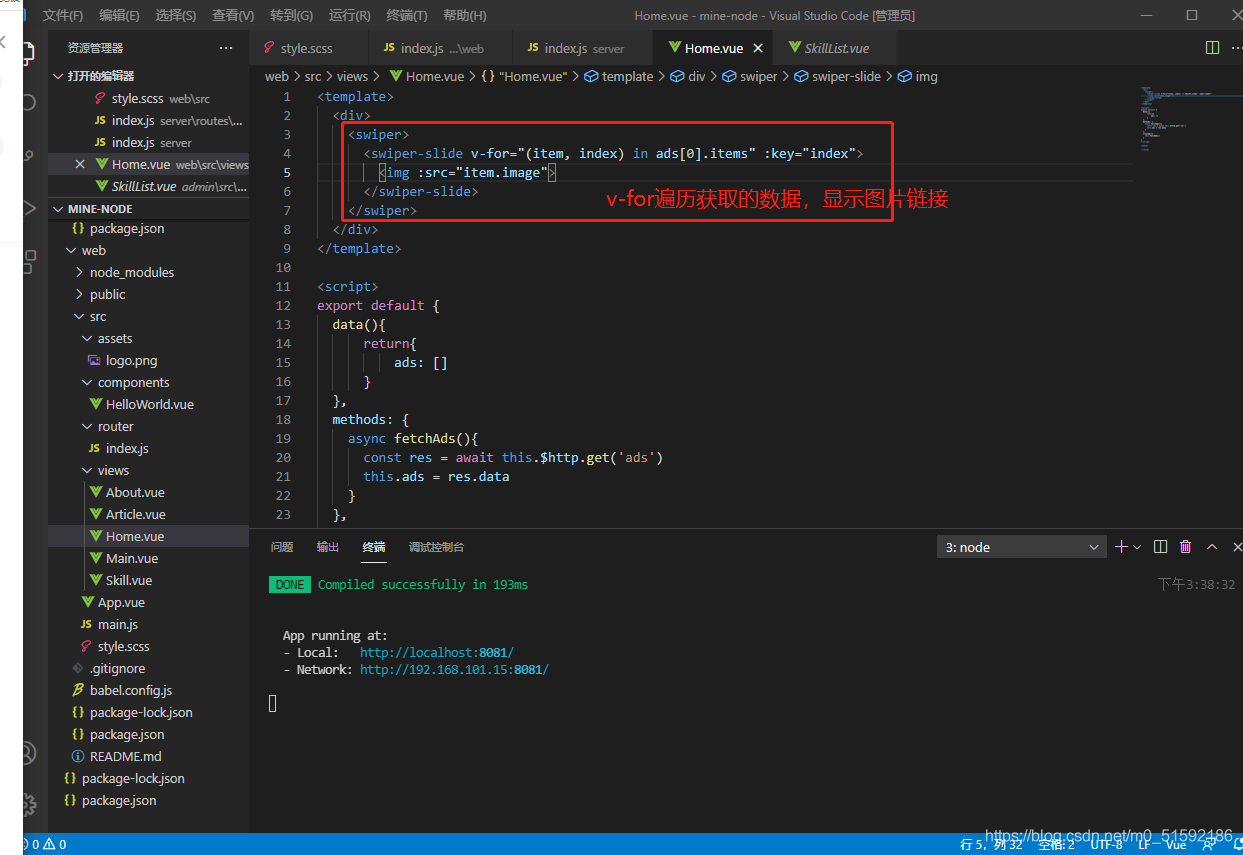
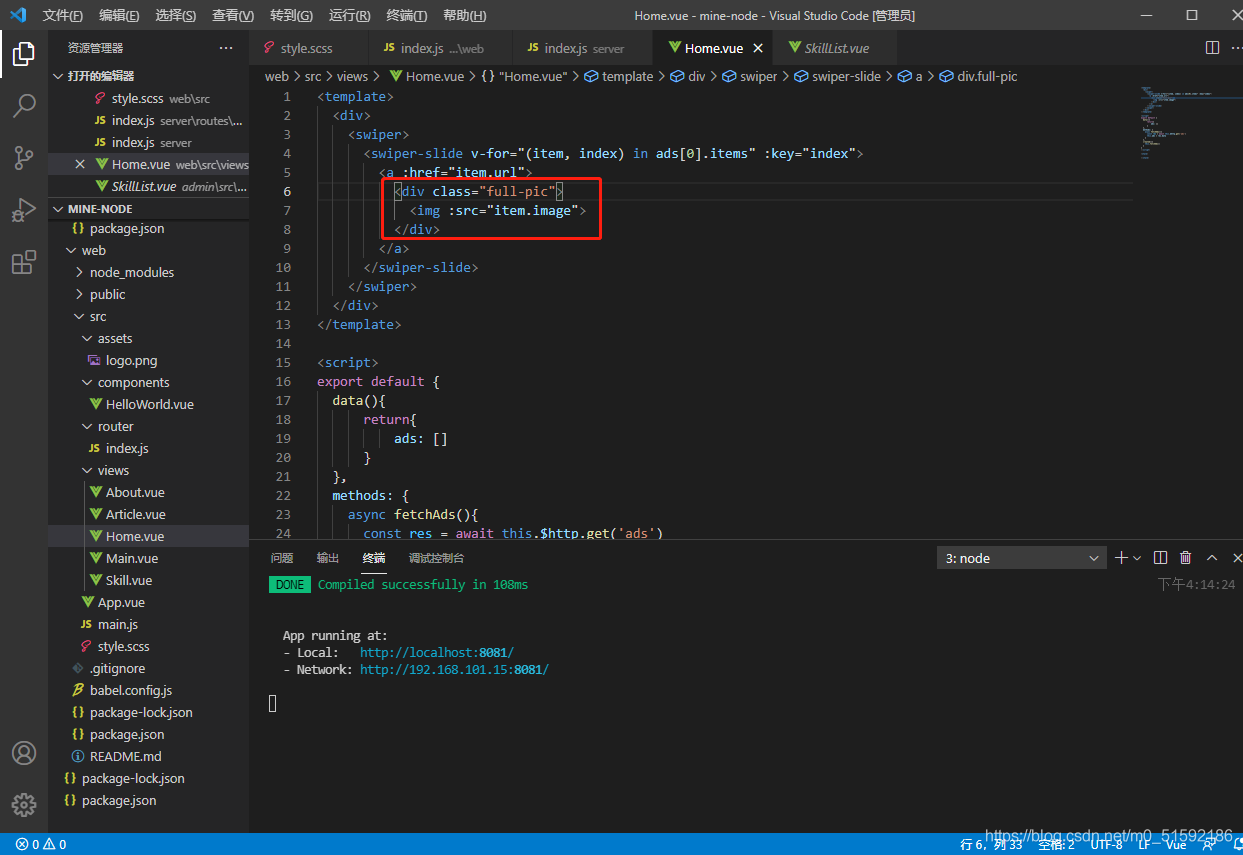
在首頁組件Home.vue中使用該組件,使用方法為外層 < swiper > 內部 < swiper-slide > 。
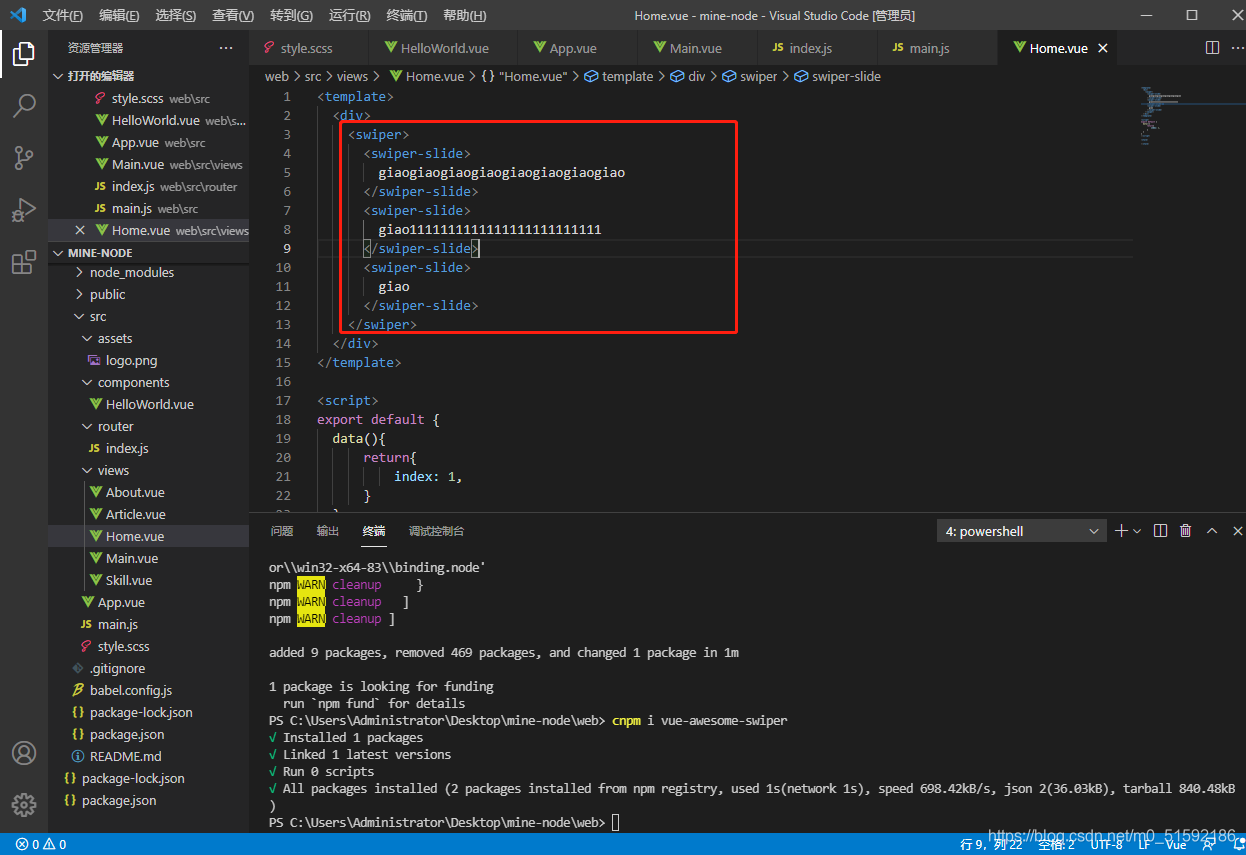
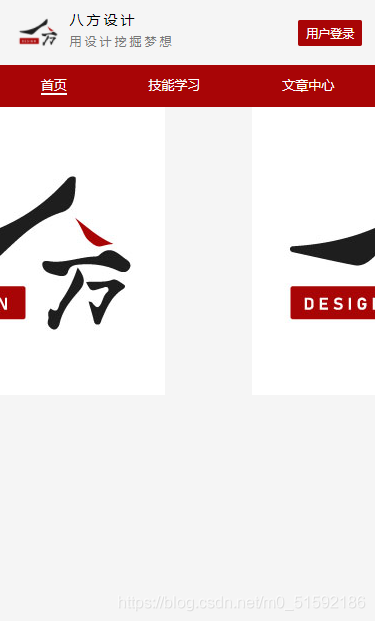
此時已經可以拖動輪播了:

3.引入廣告數據
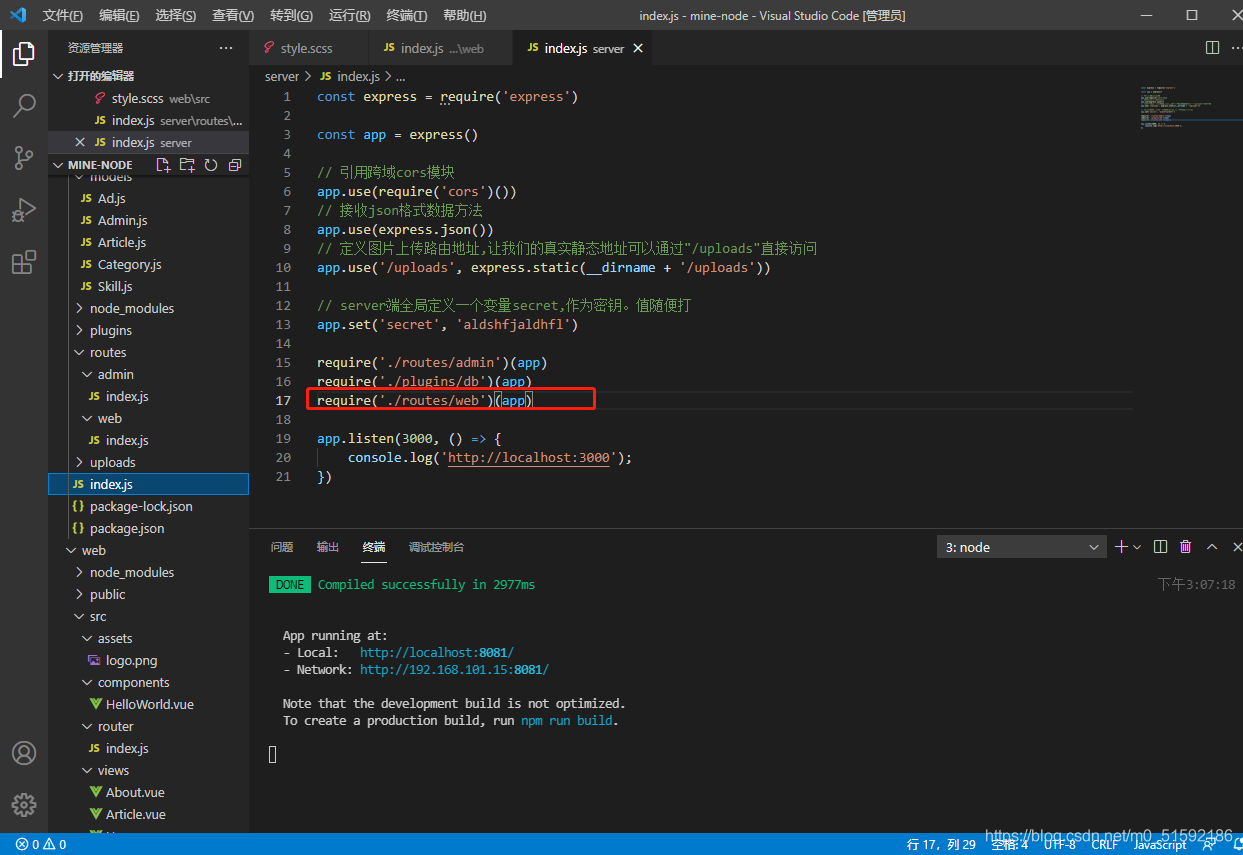
(1)在server端創建路由
與admin端相同,在server端找到最初創建的web端接口文件index.js,編寫web端路由:
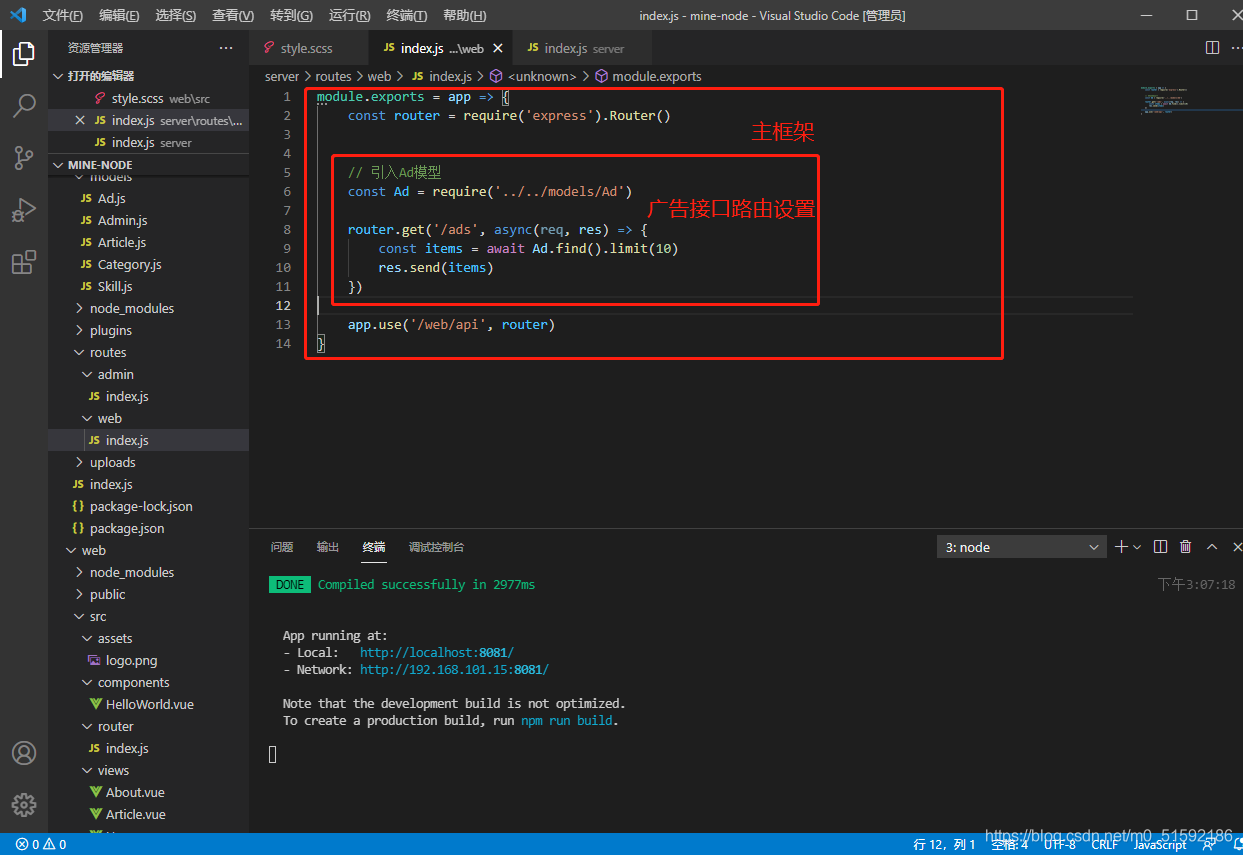
同時,在server端index.js文件中引入該web路由:
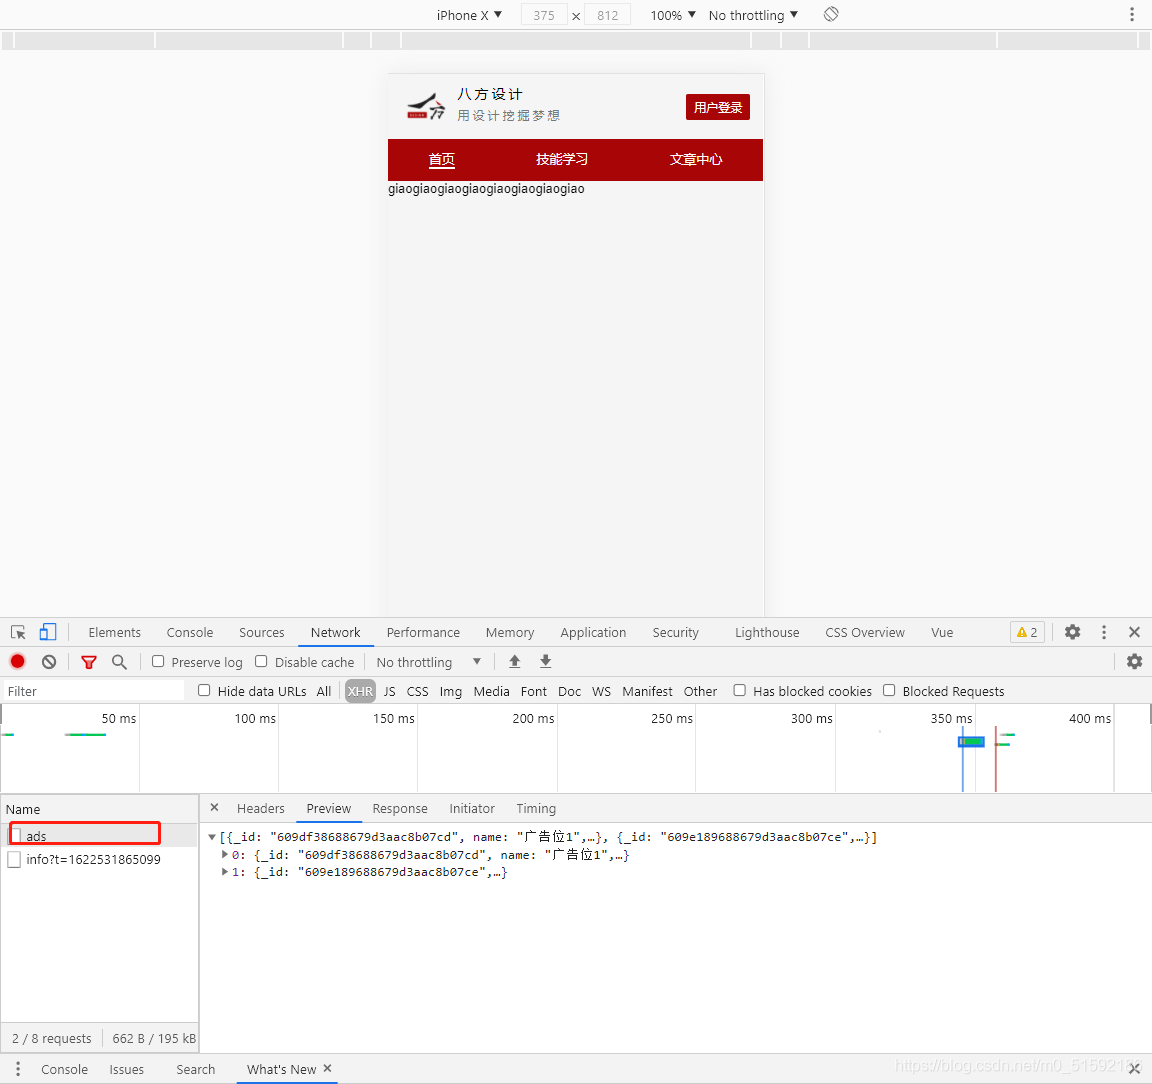
測試,輸入server端鏈接和路由地址:
localhost:3000/web/api/ads

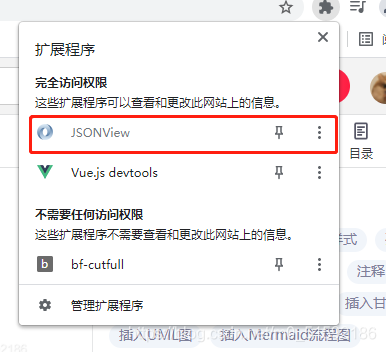
查詢到數據,沒問題。這里我用到的是jsonview插件,大家自行下載。
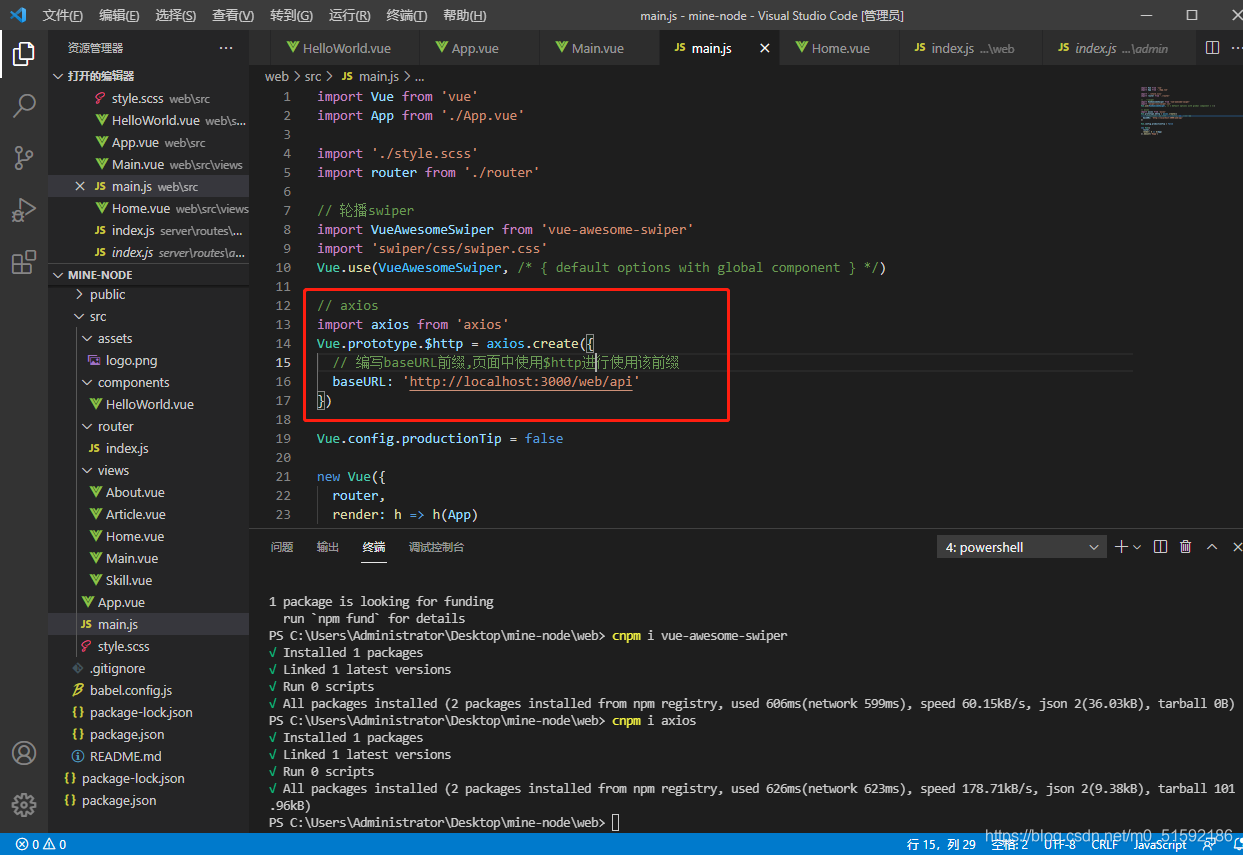
(2)在web端安裝并使用axios:
```
cd web
```
```
npm i axios
```
web端的main.js中引入axios并編寫接口:
(3)調用接口獲取數據:
到首頁頁面Home.vue,在js中調用接口:
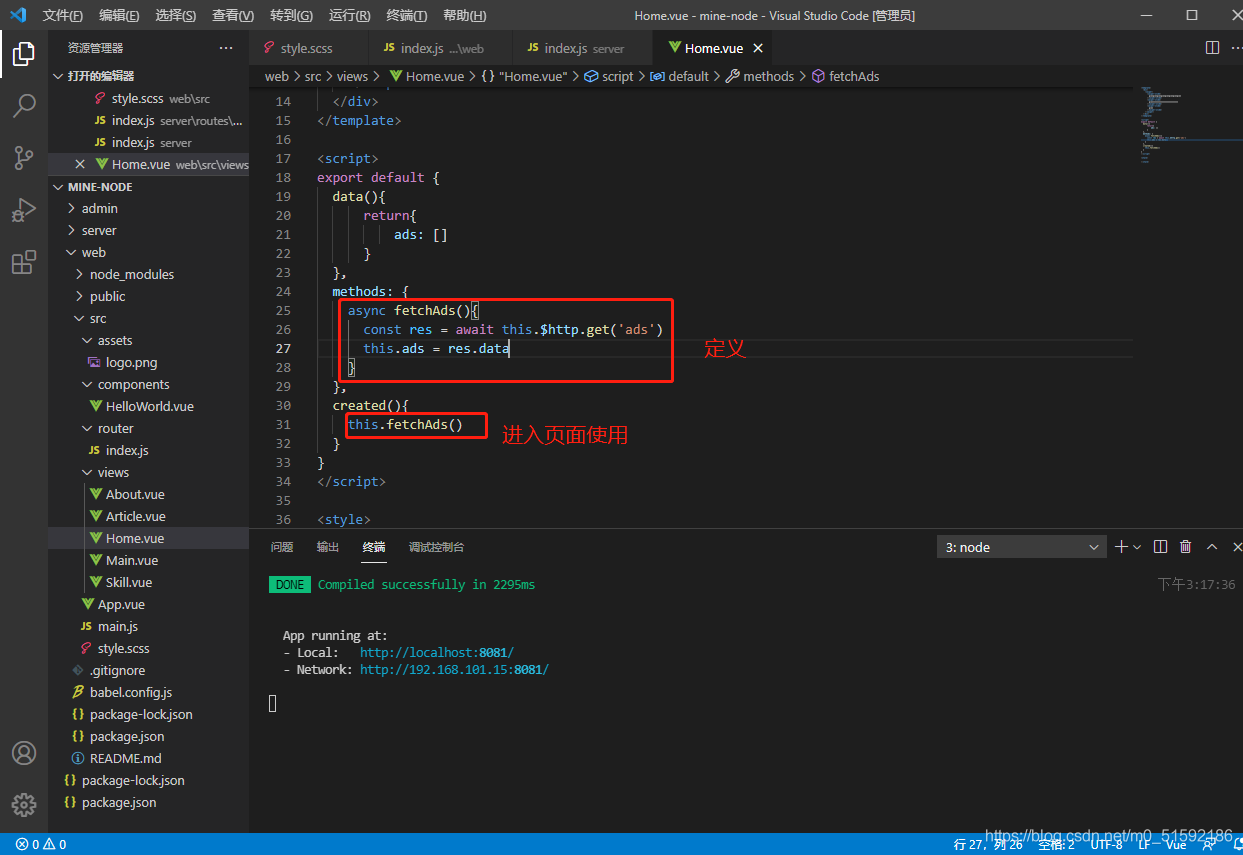
成功獲取數據:
在頁面中顯示數據:
此時圖片完成上傳,可輪播:
4.為輪播廣告添加樣式,進行修飾
(1)首先,廣告是有鏈接的,我們給圖片加鏈接使其可以跳轉。

我們在后臺修改鏈接信息:
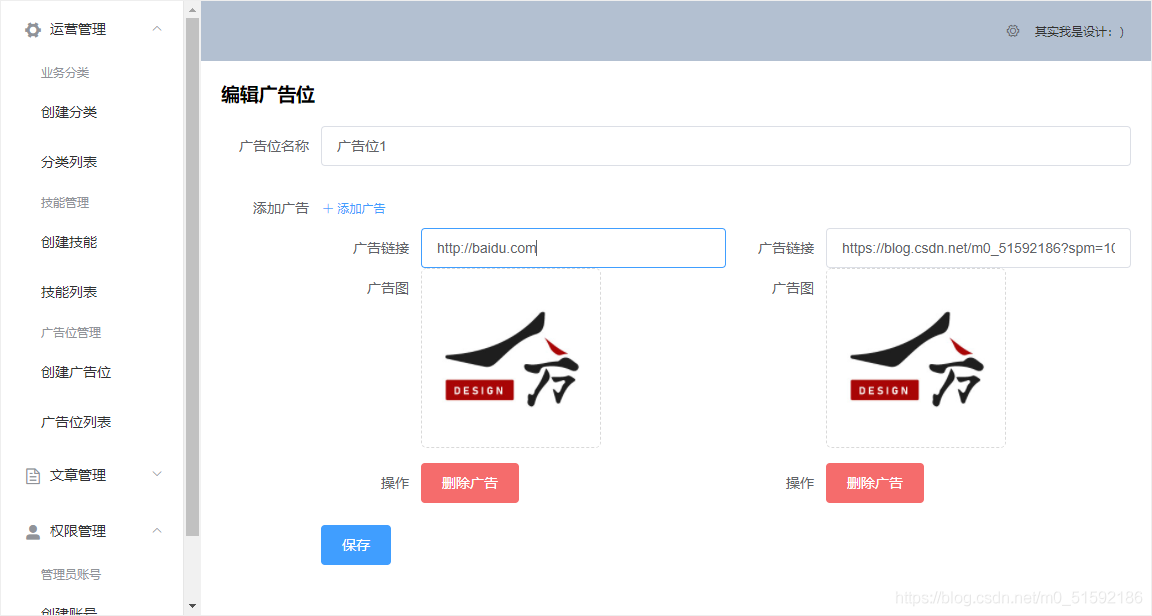
第一個廣告鏈接到百度,第二個到我的csdn主頁。
點擊跳轉,沒問題。
(2)固定圖片大小和位置,每次設置廣告時需要固定尺寸的話就太煩了,我們把它設置成占滿寬高并居中。
style.scss:
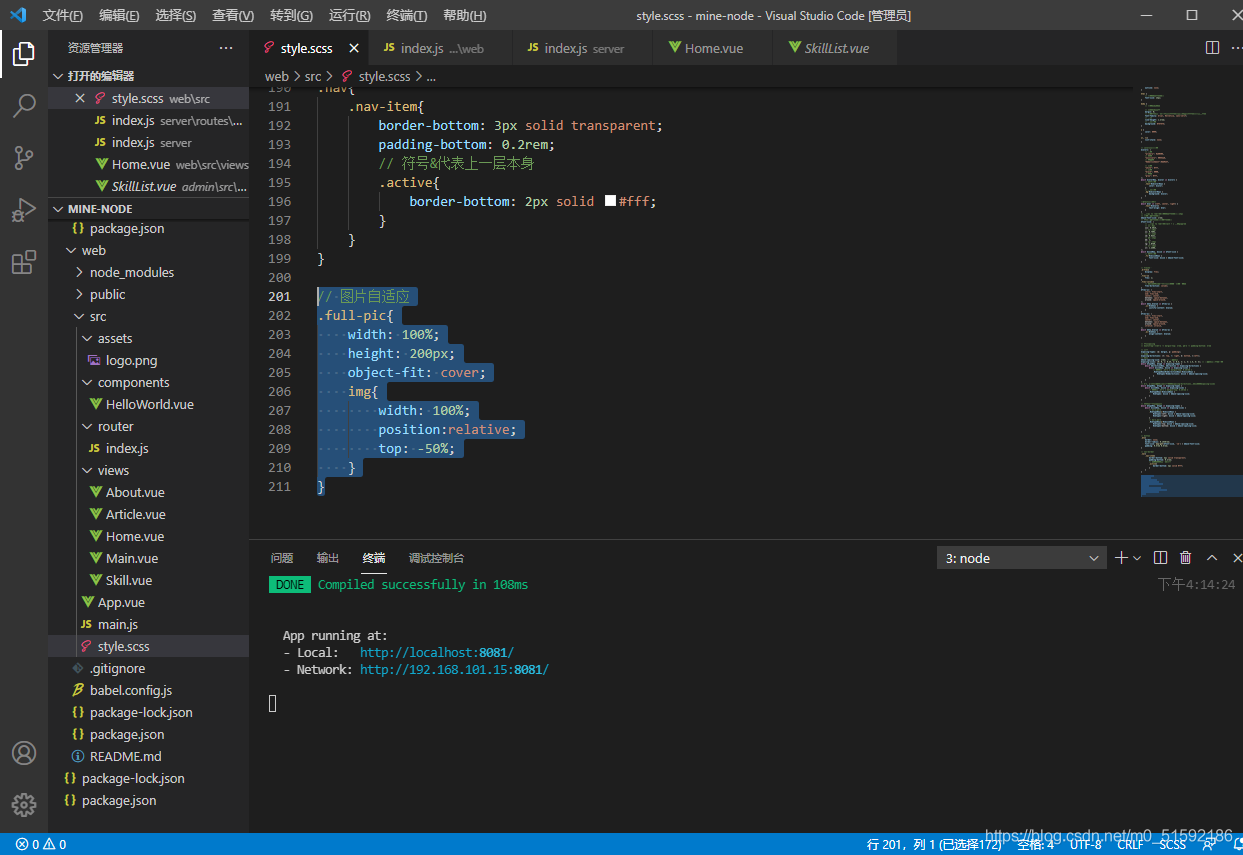
Home.vue使用sass樣式:
效果:

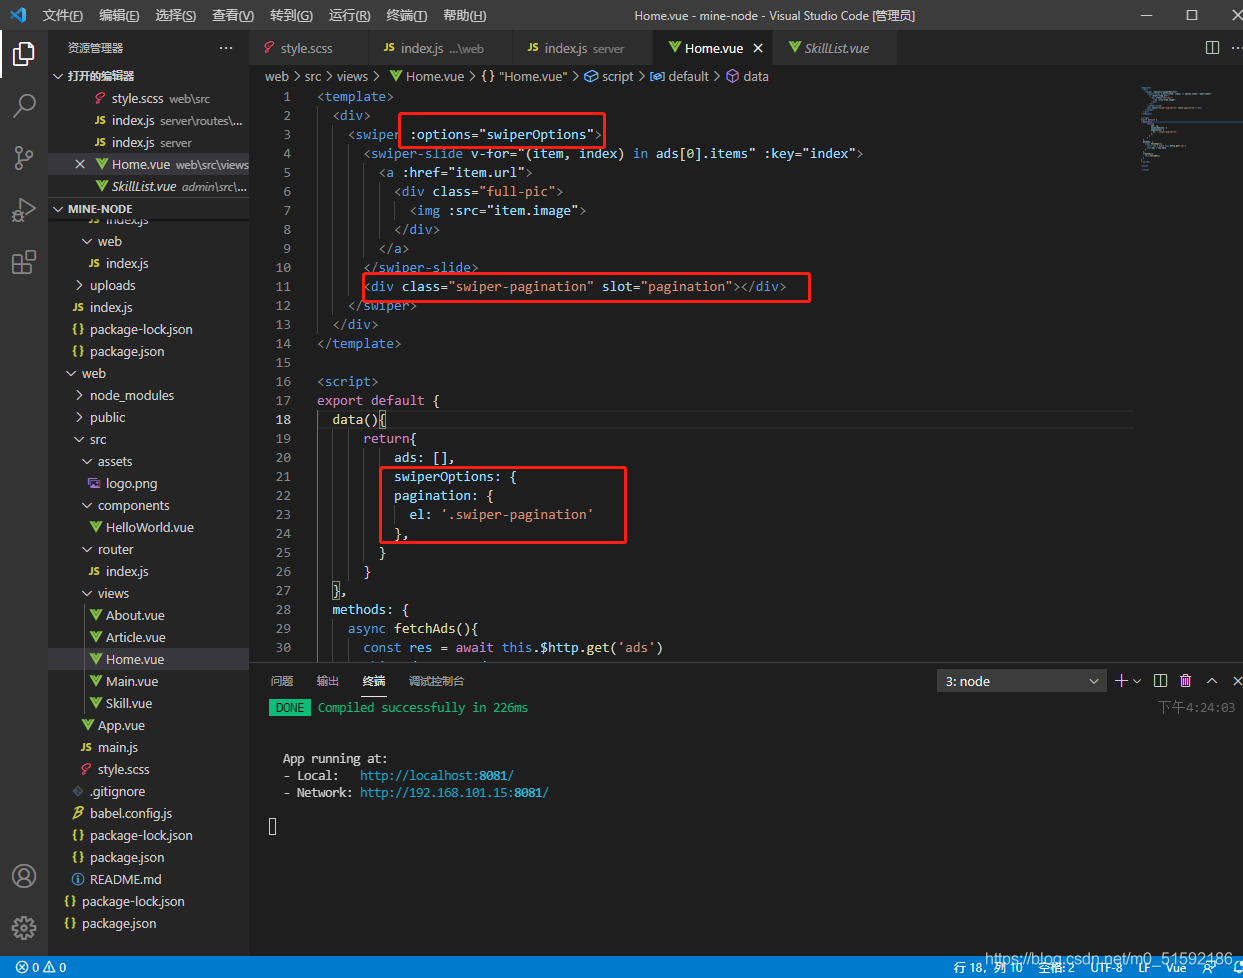
(3)補全輪播樣式
效果出現:

但如果這個頁面出現多個swiper輪播樣式的話,就無法區分幾個樣式了,所以我們給這個輪播圖起一個獨立類名,將其掛載到此類名:
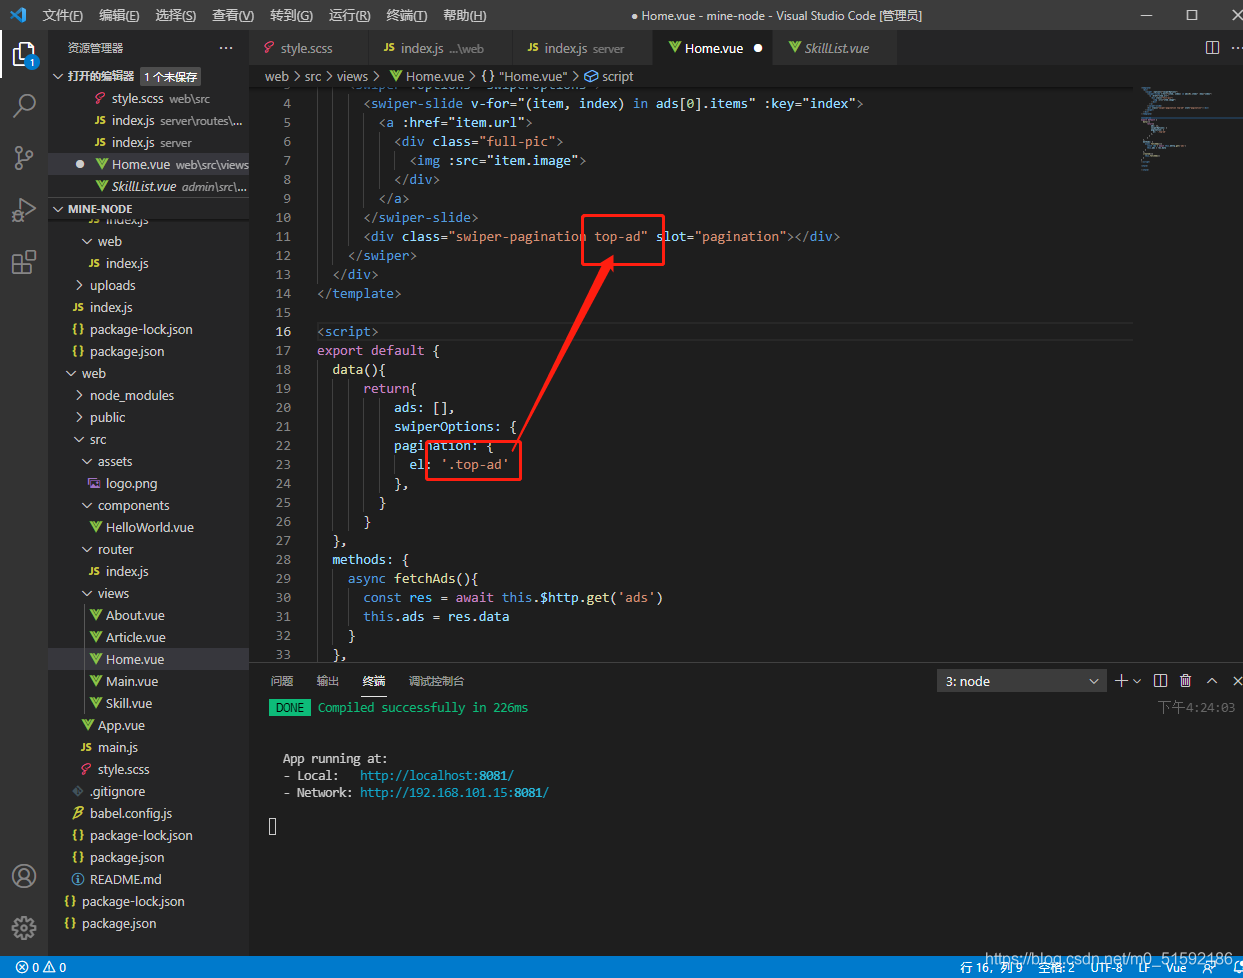
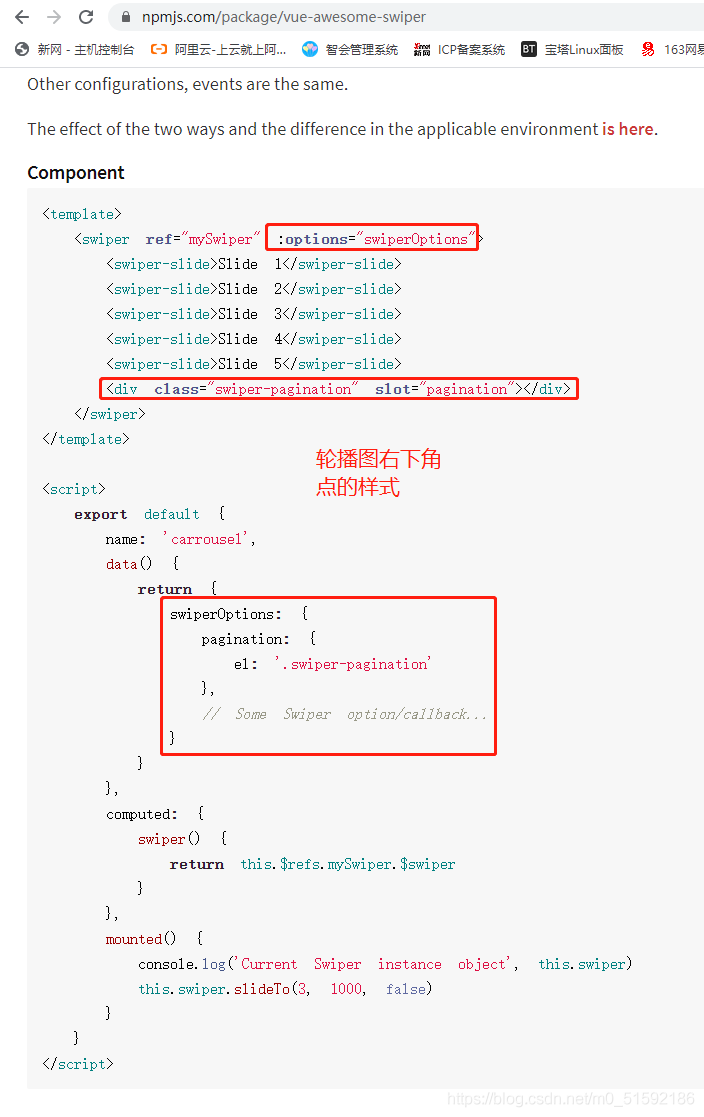
最后,修改輪播點的位置和顏色。
當我們為輪播點span標簽加text-right類名后,發現并沒有效果:
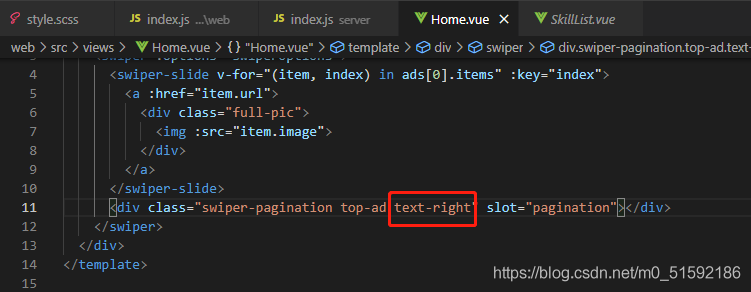
是因為這個組件中有更高級的css指令,設置的是text-align: center。
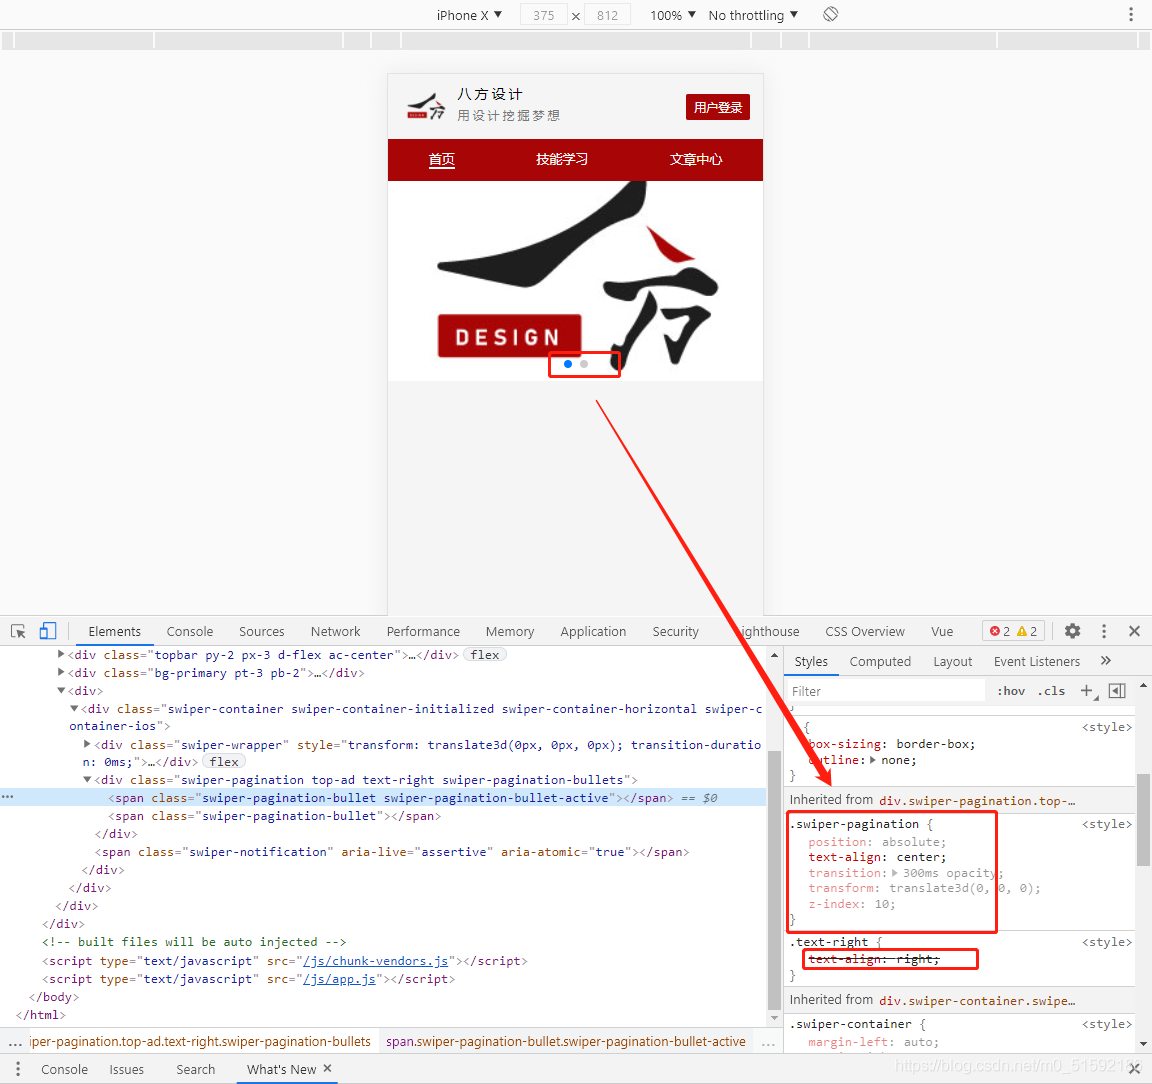
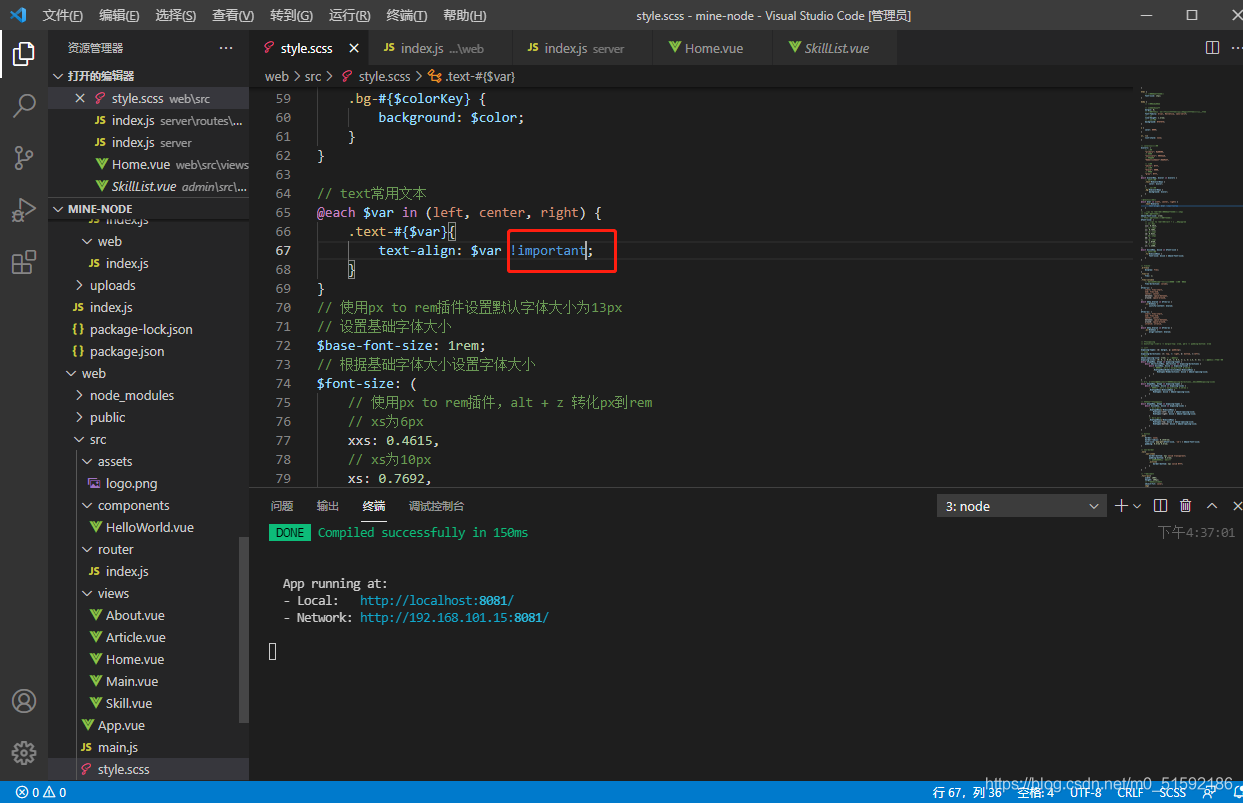
所以將我們設置的類名樣式設置為強制執行即可(!important):

修改顏色:
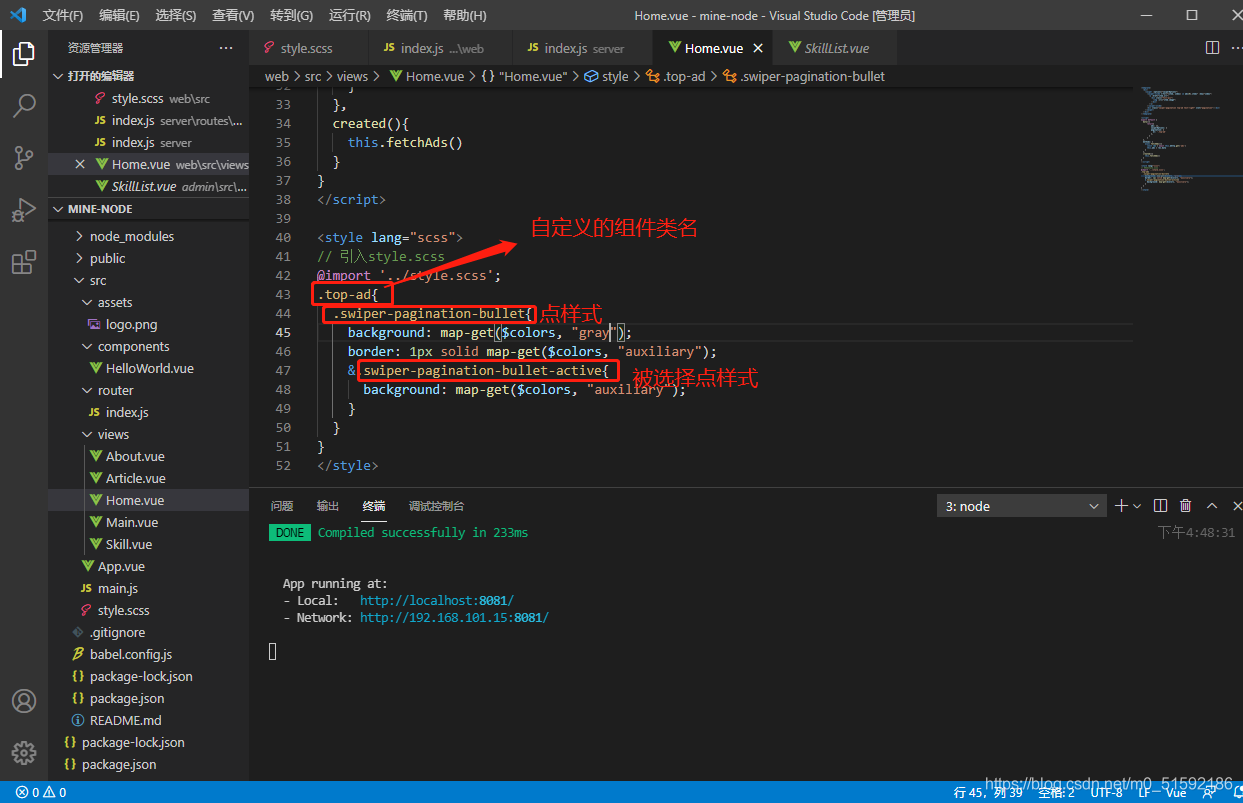
原組件的顏色與我設置的輔助色比較相近,普通點為灰色,被選點為輔助藍色,然后我還加了個輔助色邊框:

其它廣告輪播樣式大家參考包鏈接介紹。
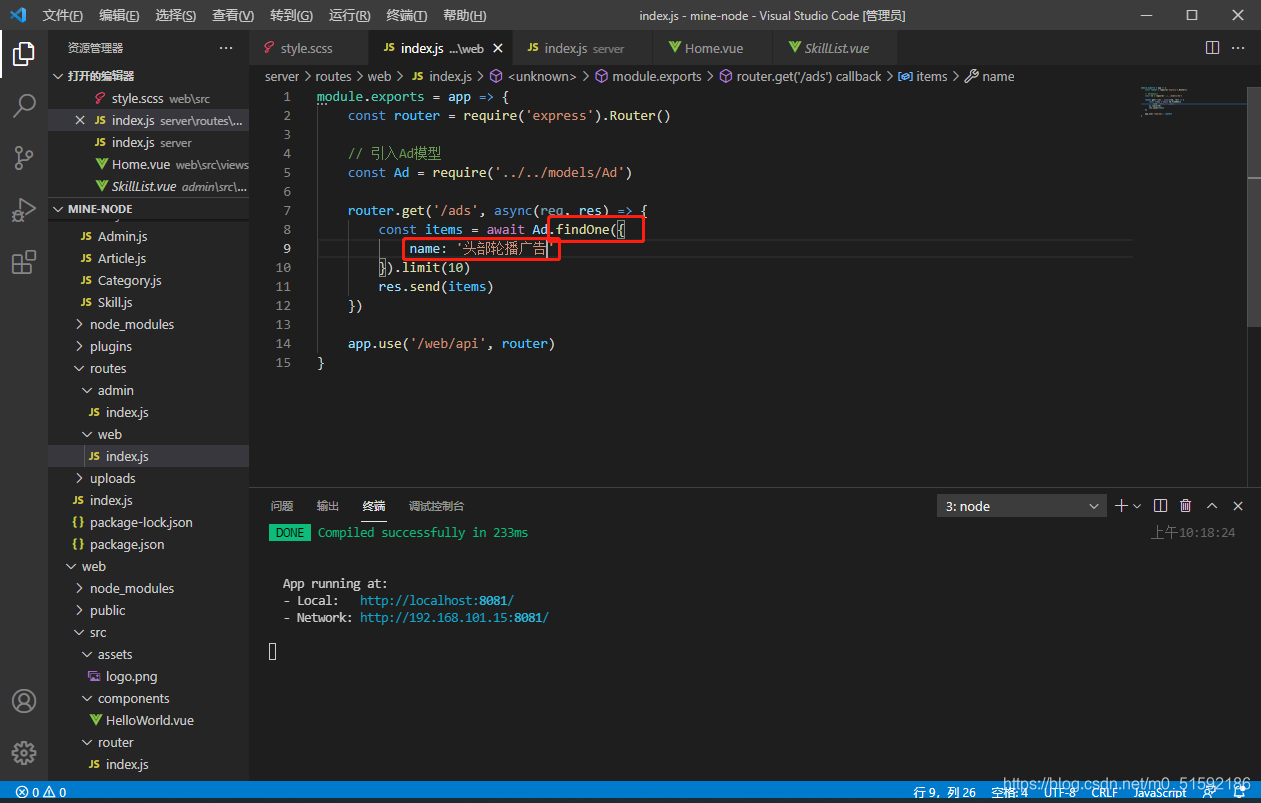
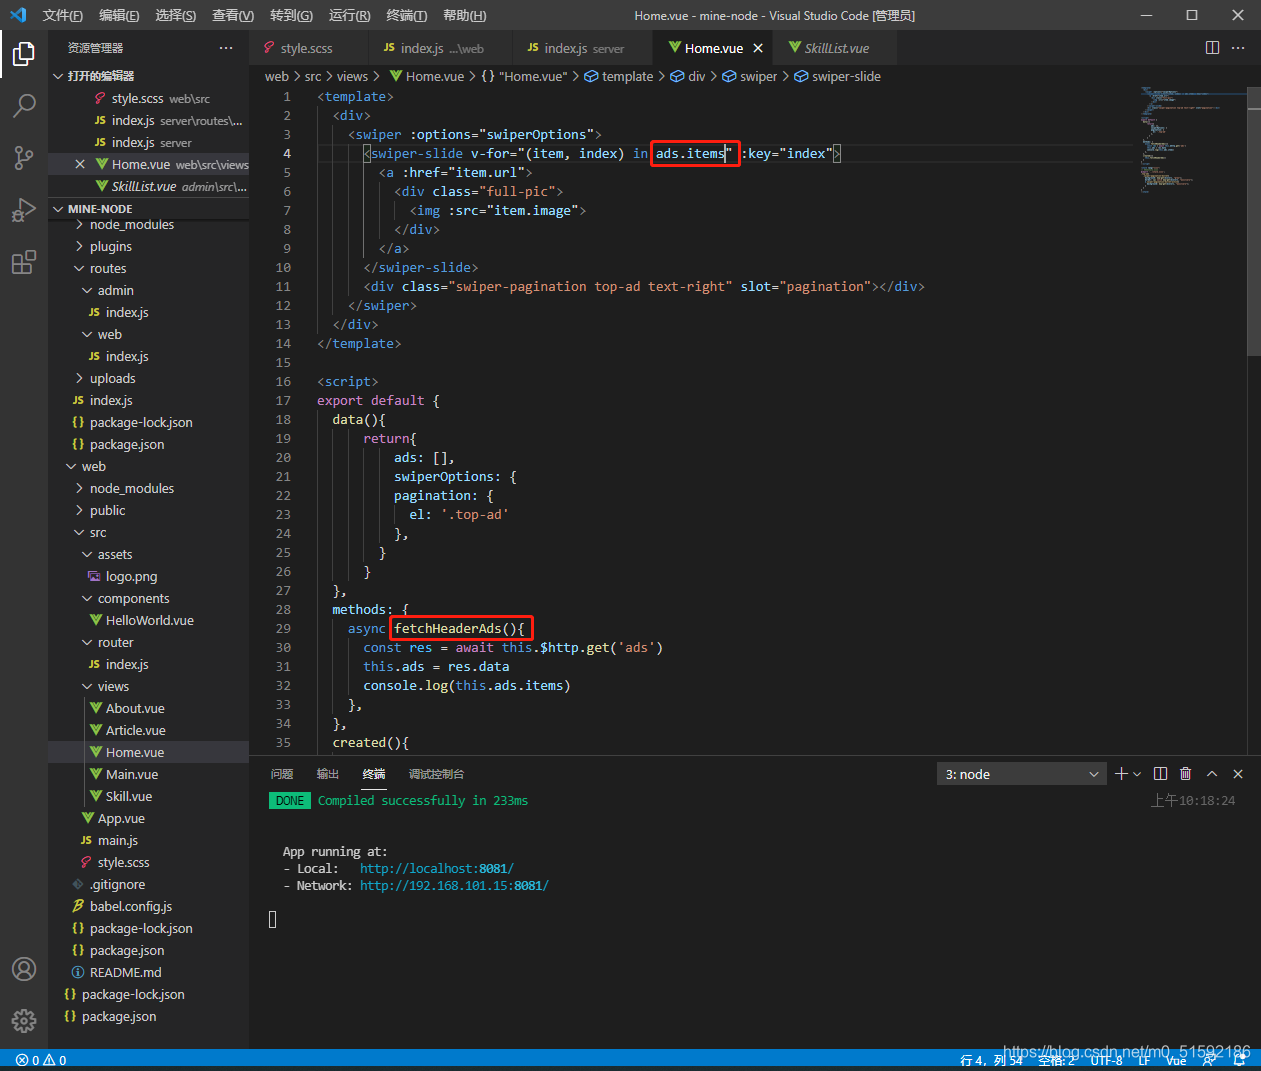
(4)精準查詢輪播圖廣告數據
之前想一次查詢所有廣告,并按需進行廣告位置放置,但發現查詢到的json數據是按數據庫查詢排序,如果按索引查找會有變化。
所以在server后臺接口位置做出整改,以廣告位名字查找單個廣告位數據:
web端展示數據也做一些改變:
大家可參照admin端類似方法進行封裝數據接口,同時優化自己的頁面,下一篇文章開始學習項目上線方法
- tp6+vue
- 1.工具和本地環境
- 2.啟動項目
- 3.路由、模型與數據庫操作
- 4.優化后端接口,前端使用axios實現接口功能
- 5.用戶登錄,bcrypt(hash)加密與驗證
- 6.用戶登錄(二),token驗證
- 7.分類的模型關聯和通用CRUD接口
- 8.使用vue的markdown編輯器并批量上傳圖片
- Node.js + Vue.js
- 工具,本地環境
- 2.1啟動項目
- 3.element-ui和vue-router路由的安裝和使用
- 4.使用axios,并創建接口上傳數據到mongodb數據庫
- 5.mongoodb數據庫的“刪、改、查”操作
- 6.mongodb數據庫無限層級的數據關聯(子分類)
- 7.使用mongodb數據庫關聯多個分類(關聯多個數據)
- 8.server端使用通用CRUD接口
- 9.圖片上傳
- 10.vue的富文本編輯器(vue2-editor)
- 11.動態添加分欄上傳多組數據
- 12-1.管理員模塊
- 13-1.搭建前臺web端頁面
- 1.使用sass工具搭建前臺web端頁面
- 2.sass工具的變量
- 3.使用flex布局并開始搭建web端
- 4.vue廣告輪播圖,并使用接口引入數據
- 5.使用字體圖標(iconfont)
- 6.卡片組件的封裝
- 14-1.生產環境編譯
- 1.環境編譯
- 2.購買域名服務器并解析域名到服務器
- 3.nginx配置web服務器并安裝網站環境
- 4.git拉取代碼到服務器
- 5.配置Nginx反向代理
- 6.遷移本地數據到服務器(mongodump)
- uni
- 1.工具&本地環境
- 2.頁面制作
- 3.頁面制作、組件與輪播
- 4.頁面跳轉與橫向滑動
- 5.用戶授權登錄和用戶信息獲取
- 6.用戶注冊和數據存儲
- 7.用戶填寫表單信息