
# 使用 TensorFlow 服務
在本節中,我們將向您展示如何設置 RNN 模型以預測 TensorFlow 上的垃圾郵件或火腿文本消息。我們將首先說明如何以 protobuf 格式保存模型,然后將模型加載到本地服務器,監聽端口`9000`以進行輸入。
## 做好準備
我們通過鼓勵讀者閱讀 [https://www.tensorflow.org/serving/serving_basic](https://www.tensorflow.org/serving/serving_basic) 上提供的 TensorFlow 服務網站上的官方文檔和簡短教程來開始本節。
對于這個例子,我們將在[第 9 章](../Text/68.html),循環神經網絡中重用我們在預測垃圾郵件中使用的大部分 RNN 代碼和 RNNs 秘籍。我們將更改模型保存代碼,以便將 protobuf 模型保存在使用 TensorFlow 服務所需的正確文件夾結構中。
> 請注意,本章中的所有腳本都應該從命令行 bash 提示符執行。
有關更新的安裝說明,請訪問官方安裝站點: [https://www.tensorflow.org/serving/setup](https://www.tensorflow.org/serving/setup) 。正常安裝就像向 Linux 源添加 gpg-key 并運行以下安裝命令一樣簡單:
```py
$ sudo apt install tensorflow-model-server
```
## 操作步驟
1. 在這里,我們將以與以前相同的方式開始,通過加載必要的庫并設置 TensorFlow 標志,如下所示:
```py
import os
import re
import io
import sys
import requests
import numpy as np
import tensorflow as tf
from zipfile import ZipFile
from tensorflow.python.framework import ops
ops.reset_default_graph()
# Define App Flags
tf.flags.DEFINE_string("storage_folder", "temp", "Where to store model and data.")
tf.flags.DEFINE_float('learning_rate', 0.0005, 'Initial learning rate.')
tf.flags.DEFINE_float('dropout_prob', 0.5, 'Per to keep probability for dropout.')
tf.flags.DEFINE_integer('epochs', 20, 'Number of epochs for training.')
tf.flags.DEFINE_integer('batch_size', 250, 'Batch Size for training.')
tf.flags.DEFINE_integer('rnn_size', 15, 'RNN feature size.')
tf.flags.DEFINE_integer('embedding_size', 25, 'Word embedding size.')
tf.flags.DEFINE_integer('min_word_frequency', 20, 'Word frequency cutoff.')
tf.flags.DEFINE_boolean('run_unit_tests', False, 'If true, run tests.')
FLAGS = tf.flags.FLAGS
```
1. 我們將以完全相同的方式繼續完成腳本。為簡潔起見,我們只會在訓練腳本中包含差異,這就是我們如何保存 protobuf 模型。這是通過在訓練完成后插入以下代碼來完成的:
> 請注意此代碼與教程代碼的相似之處。這里的主要區別在于模型名稱,版本號以及我們正在保存 RNN 而不是 CNN 的事實。
```py
# Save the finished model for TensorFlow Serving (pb file)
# Here, it's our storage folder / version number
out_path = os.path.join(tf.compat.as_bytes(os.path.join(storage_folder, '1')))
print('Exporting finished model to : {}'.format(out_path))
builder = tf.saved_model.builder.SavedModelBuilder(out_path)
# Build the signature_def_map.
classification_inputs = tf.saved_model.utils.build_tensor_info(x_data_ph)
classification_outputs_classes = tf.saved_model.utils.build_tensor_info(rnn_model_outputs)
classification_signature = (tf.saved_model.signature_def_utils.build_signature_def(
inputs={tf.saved_model.signature_constants.CLASSIFY_INPUTS:
classification_inputs},
outputs={tf.saved_model.signature_constants.CLASSIFY_OUTPUT_CLASSES:
classification_outputs_classes},
method_name=tf.saved_model.signature_constants.CLASSIFY_METHOD_NAME))
tensor_info_x = tf.saved_model.utils.build_tensor_info(x_data_ph)
tensor_info_y = tf.saved_model.utils.build_tensor_info(y_output_ph)
prediction_signature = (
tf.saved_model.signature_def_utils.build_signature_def(
inputs={'texts': tensor_info_x},
outputs={'scores': tensor_info_y},
method_name=tf.saved_model.signature_constants.PREDICT_METHOD_NAME))
legacy_init_op = tf.group(tf.tables_initializer(), name='legacy_init_op')
builder.add_meta_graph_and_variables(
sess, [tf.saved_model.tag_constants.SERVING],
signature_def_map={
'predict_spam': prediction_signature,
tf.saved_model.signature_constants.DEFAULT_SERVING_SIGNATURE_DEF_KEY:
classification_signature,
},
legacy_init_op=legacy_init_op)
builder.save()
print('Done exporting!')
```
1. 對我們來說,重要的是要意識到 TensorFlow Serving 需要特定的文件或文件夾結構來加載模型。該腳本將以以下格式安裝文件:
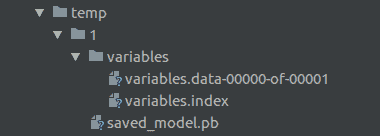
A screenshot of the directory structure that TensorFlow Serving expects.
上面的屏幕截圖顯示了所需的目錄結構。在其中,我們有我們定義的數據目錄`temp`,然后是我們的模型版本號`1`。在版本號目錄中,我們保存我們的 protobuf 模型和一個包含要保存的所需變量的`variables`文件夾。
> 我們應該知道,在我們的數據目錄中,TensorFlow 服務將查找整數文件夾。 TensorFlow 服務將自動啟動并在最大整數下獲取模型。這意味著要部署新模型,我們需要將其標記為版本 2,并將其粘貼在也標記為`2`的新文件夾下。然后,TensorFlow 服務將自動獲取模型。
1. 要啟動我們的服務器,我們使用端口,`model_name`和`model_base_path`參數調用命令`tensorflow_model_server`。然后,TensorFlow Serving 查找版本號文件夾并選擇最大版本編號的模型。然后它將它部署到機器上,命令通過作為參數給出的端口運行。在以下示例中,我們在本地計算機(`0.0.0.0`)上運行,并且接受的默認端口是`9000`:
```py
$ tensorflow_model_server --port=9000 --model_name=spam_ham --model_base_path=<directory of our code>/tensorflow_cookbook/10_Taking_TensorFlow_to_Production/06_Using_TensorFlow_Serving/temp/
2018-08-09 12:05:16.206712: I tensorflow_serving/model_servers/main.cc:153] Building single TensorFlow model file config: model_name: spam_ham model_base_path: .../temp/
2018-08-09 12:05:16.206874: I tensorflow_serving/model_servers/server_core.cc:459] Adding/updating models.
2018-08-09 12:05:16.206903: I tensorflow_serving/model_servers/server_core.cc:514] (Re-)adding model: spam_ham
2018-08-09 12:05:16.307681: I tensorflow_serving/core/basic_manager.cc:716] Successfully reserved resources to load servable {name: spam_ham version: 1}
2018-08-09 12:05:16.307744: I tensorflow_serving/core/loader_harness.cc:66] Approving load for servable version {name: spam_ham version: 1}
2018-08-09 12:05:16.307773: I tensorflow_serving/core/loader_harness.cc:74] Loading servable version {name: spam_ham version: 1}
2018-08-09 12:05:16.307829: I external/org_tensorflow/tensorflow/contrib/session_bundle/bundle_shim.cc:360] Attempting to load native SavedModelBundle in bundle-shim from: .../temp/1
2018-08-09 12:05:16.307867: I external/org_tensorflow/tensorflow/cc/saved_model/loader.cc:242] Loading SavedModel with tags: { serve }; from: .../temp/1
2018-08-09 12:05:16.313811: I external/org_tensorflow/tensorflow/core/platform/cpu_feature_guard.cc:141] Your CPU supports instructions that this TensorFlow binary was not compiled to use: AVX2 FMA
2018-08-09 12:05:16.325866: I external/org_tensorflow/tensorflow/cc/saved_model/loader.cc:161] Restoring SavedModel bundle.
2018-08-09 12:05:16.329290: I external/org_tensorflow/tensorflow/cc/saved_model/loader.cc:196] Running LegacyInitOp on SavedModel bundle.
2018-08-09 12:05:16.332936: I external/org_tensorflow/tensorflow/cc/saved_model/loader.cc:291] SavedModel load for tags { serve }; Status: success. Took 25074 microseconds.
2018-08-09 12:05:16.332972: I tensorflow_serving/servables/tensorflow/saved_model_warmup.cc:83] No warmup data file found at .../temp/1/assets.extra/tf_serving_warmup_requests
2018-08-09 12:05:16.333335: I tensorflow_serving/core/loader_harness.cc:86] Successfully loaded servable version {name: spam_ham version: 1}
2018-08-09 12:05:16.334678: I tensorflow_serving/model_servers/main.cc:323] Running ModelServer at 0.0.0.0:9000 ...
```
1. 我們現在可以將二進制數據提交給`<host>:9000`并返回顯示結果的 JSON 響應。我們可以通過任何機器和任何編程語言來完成。不必依賴客戶端擁有 TensorFlow 的本地副本是非常有用的。
## 工作原理
如果我們將早期的生產規模部分與前一部分進行比較,主要區別在于我們在主機上部署了可以響應傳入請求的模型服務器。前面的部分是一個很好的設置示例,用于執行批量結果或在可以加載 TensorFlow 的機器上工作,但秘籍不是很擅長部署可用的模型,可以進行計算,并將結果返回給任何客戶。在本節中,我們將了解如何處理這種體系結構,如下表所示:
| | 第 5 節 - 批量生產 | 第 6 節 - 通過 TensorFlow 服務生產 |
| --- | --- | --- |
| 優點 | 不依賴于網絡連接或主機 | 結果與客戶端結構無關,唯一的要求是 Numpy 數組的正確格式化二進制文件 |
| 缺點 | 客戶端必須具有 TensorFlow 和模型文件 | 依靠主機可用 |
| 理想的用途 | 大批量數據 | 生產服務始終可用,通常是小的請求 |
當然,每種方法的優缺點都值得商榷,兩者都能滿足每種情況的要求。還有許多其他可用的架構可以滿足不同的需求,例如 Docker,Kubernetes,Luigi,Django / Flask,Celery,AWS 和 Azure。
## 更多
本章未涉及的體系結構工具和資源的鏈接如下:
* 在 Docker 中使用 TensorFlow 服務: [https://www.tensorflow.org/serving/docker](https://www.tensorflow.org/serving/docker)
* 在 Kubernetes 中使用 TensorFlow 服務: [https://www.tensorflow.org/serving/serving_inception](https://www.tensorflow.org/serving/serving_inception)
* Luigi,批量作業的管道工具: [https://github.com/spotify/luigi](https://github.com/spotify/luigi)
* 在 Flask 中使用 TensorFlow: [https://guillaumegenthial.github.io/serving.html](https://guillaumegenthial.github.io/serving.html)
* 用于分布式任務排隊的 Python 框架: [http://www.celeryproject.org/community/](http://www.celeryproject.org/community/)
* 如何在 TensorFlow 模型中使用 AWS lambdas: [https://aws.amazon.com/blogs/machine-learning/how-to-deploy-deep-learning-models-with-aws-lambda-and-tensorflow/](https://aws.amazon.com/blogs/machine-learning/how-to-deploy-deep-learning-models-with-aws-lambda-and-tensorflow/)
- TensorFlow 入門
- 介紹
- TensorFlow 如何工作
- 聲明變量和張量
- 使用占位符和變量
- 使用矩陣
- 聲明操作符
- 實現激活函數
- 使用數據源
- 其他資源
- TensorFlow 的方式
- 介紹
- 計算圖中的操作
- 對嵌套操作分層
- 使用多個層
- 實現損失函數
- 實現反向傳播
- 使用批量和隨機訓練
- 把所有東西結合在一起
- 評估模型
- 線性回歸
- 介紹
- 使用矩陣逆方法
- 實現分解方法
- 學習 TensorFlow 線性回歸方法
- 理解線性回歸中的損失函數
- 實現 deming 回歸
- 實現套索和嶺回歸
- 實現彈性網絡回歸
- 實現邏輯回歸
- 支持向量機
- 介紹
- 使用線性 SVM
- 簡化為線性回歸
- 在 TensorFlow 中使用內核
- 實現非線性 SVM
- 實現多類 SVM
- 最近鄰方法
- 介紹
- 使用最近鄰
- 使用基于文本的距離
- 使用混合距離函數的計算
- 使用地址匹配的示例
- 使用最近鄰進行圖像識別
- 神經網絡
- 介紹
- 實現操作門
- 使用門和激活函數
- 實現單層神經網絡
- 實現不同的層
- 使用多層神經網絡
- 改進線性模型的預測
- 學習玩井字棋
- 自然語言處理
- 介紹
- 使用詞袋嵌入
- 實現 TF-IDF
- 使用 Skip-Gram 嵌入
- 使用 CBOW 嵌入
- 使用 word2vec 進行預測
- 使用 doc2vec 進行情緒分析
- 卷積神經網絡
- 介紹
- 實現簡單的 CNN
- 實現先進的 CNN
- 重新訓練現有的 CNN 模型
- 應用 StyleNet 和 NeuralStyle 項目
- 實現 DeepDream
- 循環神經網絡
- 介紹
- 為垃圾郵件預測實現 RNN
- 實現 LSTM 模型
- 堆疊多個 LSTM 層
- 創建序列到序列模型
- 訓練 Siamese RNN 相似性度量
- 將 TensorFlow 投入生產
- 介紹
- 實現單元測試
- 使用多個執行程序
- 并行化 TensorFlow
- 將 TensorFlow 投入生產
- 生產環境 TensorFlow 的一個例子
- 使用 TensorFlow 服務
- 更多 TensorFlow
- 介紹
- 可視化 TensorBoard 中的圖
- 使用遺傳算法
- 使用 k 均值聚類
- 求解常微分方程組
- 使用隨機森林
- 使用 TensorFlow 和 Keras