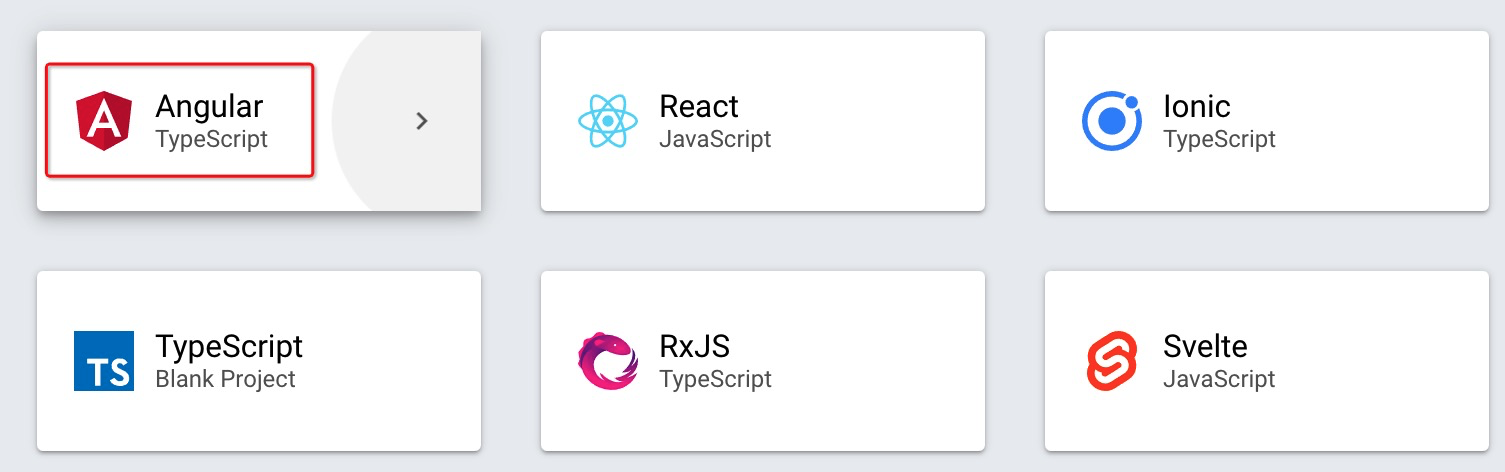
在本地開發前,可以先來到線上感受一下 angular。 打開[https://stackblitz.com](https://stackblitz.com/)并如圖點擊:

接下來選擇Angular
稍等片刻,頁面啟動功能后有三部分組成:
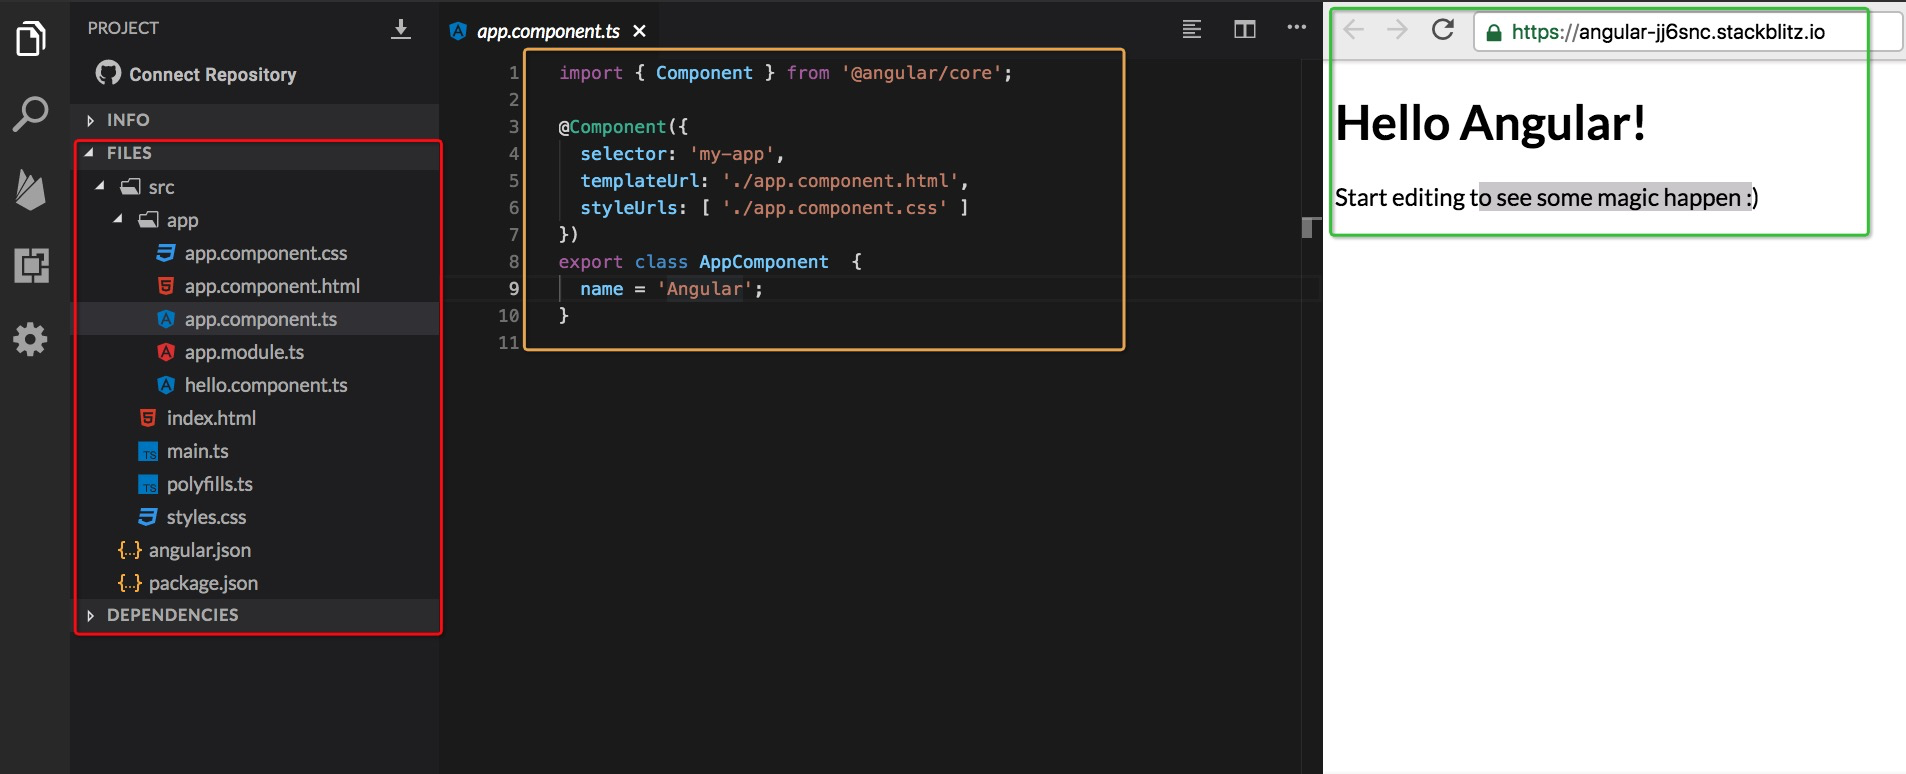
從左至右為:文件目錄區、代碼區、閱覽區。
在最左側的文件目錄中,通過觀察發現與以前接觸jquery項目略有不同:jquery或其它的傳統項目,一般由主體的三個文件組件:html、css及js文件。比如:[jquery示例](https://codepen.io/shivasurya/pen/FatiB),再比如[vue示例](https://codepen.io/wa23/pen/pObyrq)、[angularjs示例](https://codepen.io/chrisoncode/pen/xFcdI);而angular一個最簡單的demo,竟然使用了10多個文件,而且有的文件竟然有上100行。不得不說這的確是由于angular的特點而帶來了上手難度大的缺點。在這種情況下手工來一行行代碼來初始一個項目便顯示不現實了。這好比以前只要掌握基本的打鐵技術就可以制造用來耕種的農具一樣,在現在農業高度自動化的時代,僅靠手工已然制造不出聯合收割機了。
Anguar當然也想到了這個問題。Anguar已經友善的提供了`Angular-cli`,有了這個工具便可以輕松的來初始化一個angular項目了。
> 如果你僅僅是學習前臺,那么完全可以在參考[angular中文網入門教程](https://www.angular.cn/start)的基礎上使用stackblitz提供的在線環境。
# angular-cli
`Angular-cli`( `cli` = `command line interface` 命令行接)是一個用于生產`Anuglar`應用程序的智能生產線,在開發`Angular`之前,我們必須首先安裝`Angular-cli`。
> 和生活中的生產線一線,如果沒有它一些產品也是可以生產的,只是生產效率和質量難以得到控制罷了。
## 安裝
`npm install -g @angular/cli@8.3.4 --registry=https://registry.npm.taobao.org`
```shell
panjiedeMac-Pro:~ panjie$ npm install -g @angular/cli@8.3.4 --registry=https://registry.npm.taobao.org
/usr/local/bin/ng -> /usr/local/lib/node_modules/@angular/cli/bin/ng
> @angular/cli@8.3.4 postinstall /usr/local/lib/node_modules/@angular/cli
> node ./bin/postinstall/script.js
+ @angular/cli@8.3.4
added 7 packages from 5 contributors, removed 1322 packages and updated 236 packages in 18.462s
```
## 驗證
`ng --version`
```shell
panjiedeMac-Pro:~ panjie$ ng --version
_ _ ____ _ ___
/ \ _ __ __ _ _ _| | __ _ _ __ / ___| | |_ _|
/ △ \ | '_ \ / _` | | | | |/ _` | '__| | | | | | |
/ ___ \| | | | (_| | |_| | | (_| | | | |___| |___ | |
/_/ \_\_| |_|\__, |\__,_|_|\__,_|_| \____|_____|___|
|___/
Angular CLI: 8.3.4
Node: 10.16.3
OS: darwin x64
Angular:
...
Package Version
------------------------------------------------------
@angular-devkit/architect 0.803.4
@angular-devkit/core 8.3.4
@angular-devkit/schematics 8.3.4
@schematics/angular 8.3.4
@schematics/update 0.803.4
rxjs 6.4.0
```
> 官方教程中的命令是`npm install -g @angular/cli`,在這被改動成`npm install -g @angular/cli@8.3.4 --registry=https://registry.npm.taobao.org`主要是為了統一版本及解決慢網絡問題。
# 項目初始化
一、首先打開D盤建立angularStudy文件夾,并使用shell進入該文件夾。
>[info] OSX及Liunx用戶,推薦使用`~/angularStudy`文件夾。 `~/`表示當前登錄用戶文件夾,在OSX中位于`/Users/當前登錄用戶`;在Windows中,默認位于`C:/Users/當前登錄用戶`;在ubuntu中,默認位于`/usr/home/當前登錄用戶`。
二、然后運行以下命令:
`ng new hello-world`
第一個提示問我們是否添加`Anguar routing`,輸入`y`,回車。
```
panjiedeMac-Pro:angularStudy panjie$ ng new hello-world
? Would you like to add Angular routing? (y/N) y
```
接著使用上下鍵選擇`Sass`,回車。
```
panjiedeMac-Pro:angularStudy panjie$ ng new hello-world
? Would you like to add Angular routing? Yes
? Which stylesheet format would you like to use?
CSS
SCSS [ https://sass-lang.com/documentation/syntax#scss ]
? Sass [ https://sass-lang.com/documentation/syntax#the-indented-syntax ]
Less [ http://lesscss.org ]
Stylus [ http://stylus-lang.com ]
```
最后是耐心的等待,等待的時間取決于你的網絡環境及CPU配置情況。安裝完成后,得到如下提示表示安裝成功。
```
added 1456 packages from 1071 contributors and audited 18840 packages in 165.665s
found 0 vulnerabilities
Successfully initialized git.
```
## 慢網絡問題
解決慢網絡的方法有很多種,這貌似已經成為了一門專門的學問,在此我們給出最笨的一種。
前面的幾個步驟與正常網絡相同,即:`ng new hello-world` -> `y` -> `sass`。回車后,會顯示自動為我們創建了一些文件,并開始進行網絡請求安裝第三方包。
```
CREATE hello-world/e2e/protractor.conf.js (810 bytes)
CREATE hello-world/e2e/tsconfig.json (214 bytes)
CREATE hello-world/e2e/src/app.e2e-spec.ts (644 bytes)
CREATE hello-world/e2e/src/app.po.ts (262 bytes)
? ?????????????????? ? fetchMetadata: sill pacote range manifest for aria-query@^3.0.0 fetched in 8`
```
此時使用Ctrl-C組合鍵來終止安裝,接下來在`shell`中進入`hello-world`文件夾。使用`npm install --registry=https://registry.npm.taobao.org`來繼續完成安裝。
```
panjiedeMac-Pro:hello-world panjie$ npm install --registry=https://registry.npm.taobao.org
up to date in 7.226s
```
## 驗證
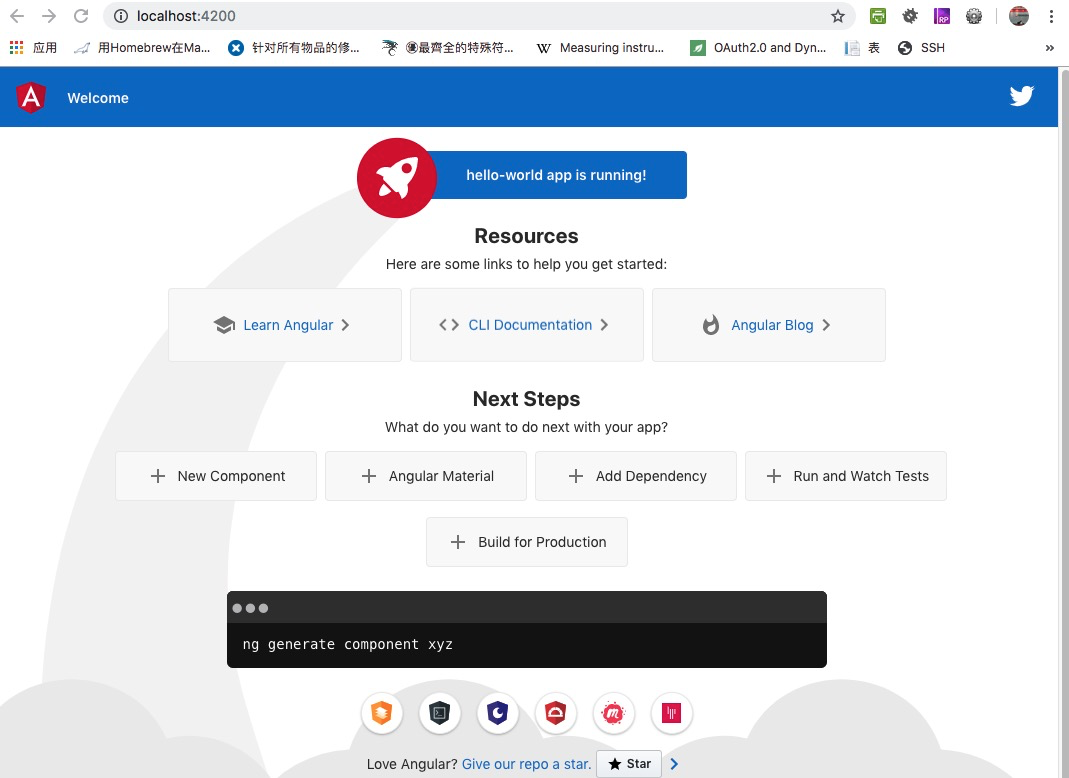
在`hello-world`文件夾中,使用`ng serve --open`來啟動第一個`angular`應用并在瀏覽器中查看效果。
```
panjiedeMac-Pro:hello-world panjie$ ng serve --open
10% building 3/3 modules 0 active? ?wds?: Project is running at http://localhost:4200/webpack-dev-server/
? ?wds?: webpack output is served from /
? ?wds?: 404s will fallback to //index.html
chunk {main} main.js, main.js.map (main) 49.4 kB [initial] [rendered]
chunk {polyfills} polyfills.js, polyfills.js.map (polyfills) 264 kB [initial] [rendered]
chunk {runtime} runtime.js, runtime.js.map (runtime) 6.15 kB [entry] [rendered]
chunk {styles} styles.js, styles.js.map (styles) 10.1 kB [initial] [rendered]
chunk {vendor} vendor.js, vendor.js.map (vendor) 4.08 MB [initial] [rendered]
Date: 2019-09-18T07:16:28.646Z - Hash: 7f1e5facc82a553e3e7b - Time: 6999ms
** Angular Live Development Server is listening on localhost:4200, open your browser on http://localhost:4200/ **
? ?wdm?: Compiled successfully.
```
編譯成功后瀏覽器自動打開了頁面:[http://localhost:4200/](http://localhost:4200/)
# Hello Angular
使用最喜愛的編輯器打開`hello-world`文件夾,找到`src/app/app.component.html`,只保留最后一行,其它的代碼全部刪除:
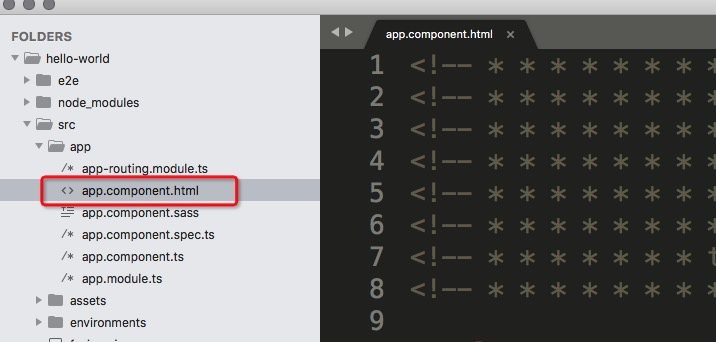
刪除后代碼:
```html
<router-outlet></router-outlet>
```
加入Hello Angular!
```html
<h1 style="text-align: center; margin-top: 100px;">
Hello Angular!
</h1>
<router-outlet></router-outlet>
```
使用ctrl+s保存文件后,瀏覽器將自動刷新展示最新的效果。
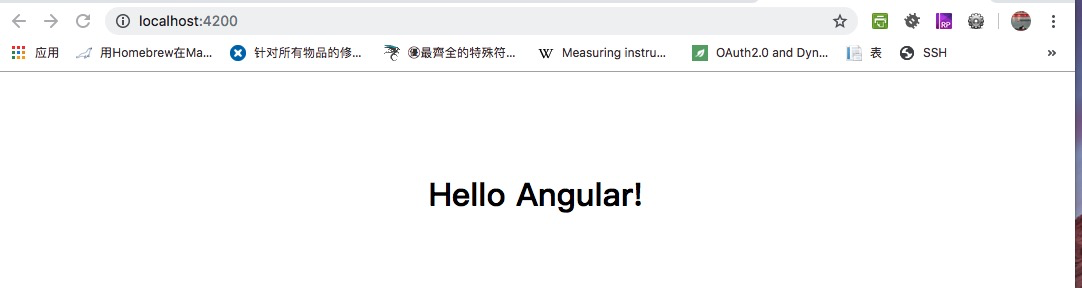
至此:熟悉的Hello World展現在我們的面前。恭喜你,已經邁出了堅實的第一步。
# 參考文檔
[https://www.angular.cn/guide/setup-local](https://www.angular.cn/guide/setup-local)
[www.angular.cn](https://www.angular.cn/guide/setup-local)
- 序言
- 第一章:Hello World
- 第一節:Angular準備工作
- 1 Node.js
- 2 npm
- 3 WebStorm
- 第二節:Hello Angular
- 第三節:Spring Boot準備工作
- 1 JDK
- 2 MAVEN
- 3 IDEA
- 第四節:Hello Spring Boot
- 1 Spring Initializr
- 2 Hello Spring Boot!
- 3 maven國內源配置
- 4 package與import
- 第五節:Hello Spring Boot + Angular
- 1 依賴注入【前】
- 2 HttpClient獲取數據【前】
- 3 數據綁定【前】
- 4 回調函數【選學】
- 第二章 教師管理
- 第一節 數據庫初始化
- 第二節 CRUD之R查數據
- 1 原型初始化【前】
- 2 連接數據庫【后】
- 3 使用JDBC讀取數據【后】
- 4 前后臺對接
- 5 ng-if【前】
- 6 日期管道【前】
- 第三節 CRUD之C增數據
- 1 新建組件并映射路由【前】
- 2 模板驅動表單【前】
- 3 httpClient post請求【前】
- 4 保存數據【后】
- 5 組件間調用【前】
- 第四節 CRUD之U改數據
- 1 路由參數【前】
- 2 請求映射【后】
- 3 前后臺對接【前】
- 4 更新數據【前】
- 5 更新某個教師【后】
- 6 路由器鏈接【前】
- 7 觀察者模式【前】
- 第五節 CRUD之D刪數據
- 1 綁定到用戶輸入事件【前】
- 2 刪除某個教師【后】
- 第六節 代碼重構
- 1 文件夾化【前】
- 2 優化交互體驗【前】
- 3 相對與絕對地址【前】
- 第三章 班級管理
- 第一節 JPA初始化數據表
- 第二節 班級列表
- 1 新建模塊【前】
- 2 初識單元測試【前】
- 3 初始化原型【前】
- 4 面向對象【前】
- 5 測試HTTP請求【前】
- 6 測試INPUT【前】
- 7 測試BUTTON【前】
- 8 @RequestParam【后】
- 9 Repository【后】
- 10 前后臺對接【前】
- 第三節 新增班級
- 1 初始化【前】
- 2 響應式表單【前】
- 3 測試POST請求【前】
- 4 JPA插入數據【后】
- 5 單元測試【后】
- 6 惰性加載【前】
- 7 對接【前】
- 第四節 編輯班級
- 1 FormGroup【前】
- 2 x、[x]、{{x}}與(x)【前】
- 3 模擬路由服務【前】
- 4 測試間諜spy【前】
- 5 使用JPA更新數據【后】
- 6 分層開發【后】
- 7 前后臺對接
- 8 深入imports【前】
- 9 深入exports【前】
- 第五節 選擇教師組件
- 1 初始化【前】
- 2 動態數據綁定【前】
- 3 初識泛型
- 4 @Output()【前】
- 5 @Input()【前】
- 6 再識單元測試【前】
- 7 其它問題
- 第六節 刪除班級
- 1 TDD【前】
- 2 TDD【后】
- 3 前后臺對接
- 第四章 學生管理
- 第一節 引入Bootstrap【前】
- 第二節 NAV導航組件【前】
- 1 初始化
- 2 Bootstrap格式化
- 3 RouterLinkActive
- 第三節 footer組件【前】
- 第四節 歡迎界面【前】
- 第五節 新增學生
- 1 初始化【前】
- 2 選擇班級組件【前】
- 3 復用選擇組件【前】
- 4 完善功能【前】
- 5 MVC【前】
- 6 非NULL校驗【后】
- 7 唯一性校驗【后】
- 8 @PrePersist【后】
- 9 CM層開發【后】
- 10 集成測試
- 第六節 學生列表
- 1 分頁【后】
- 2 HashMap與LinkedHashMap
- 3 初識綜合查詢【后】
- 4 綜合查詢進階【后】
- 5 小試綜合查詢【后】
- 6 初始化【前】
- 7 M層【前】
- 8 單元測試與分頁【前】
- 9 單選與多選【前】
- 10 集成測試
- 第七節 編輯學生
- 1 初始化【前】
- 2 嵌套組件測試【前】
- 3 功能開發【前】
- 4 JsonPath【后】
- 5 spyOn【后】
- 6 集成測試
- 7 @Input 異步傳值【前】
- 8 值傳遞與引入傳遞
- 9 @PreUpdate【后】
- 10 表單驗證【前】
- 第八節 刪除學生
- 1 CSS選擇器【前】
- 2 confirm【前】
- 3 功能開發與測試【后】
- 4 集成測試
- 5 定制提示框【前】
- 6 引入圖標庫【前】
- 第九節 集成測試
- 第五章 登錄與注銷
- 第一節:普通登錄
- 1 原型【前】
- 2 功能設計【前】
- 3 功能設計【后】
- 4 應用登錄組件【前】
- 5 注銷【前】
- 6 保留登錄狀態【前】
- 第二節:你是誰
- 1 過濾器【后】
- 2 令牌機制【后】
- 3 裝飾器模式【后】
- 4 攔截器【前】
- 5 RxJS操作符【前】
- 6 用戶登錄與注銷【后】
- 7 個人中心【前】
- 8 攔截器【后】
- 9 集成測試
- 10 單例模式
- 第六章 課程管理
- 第一節 新增課程
- 1 初始化【前】
- 2 嵌套組件測試【前】
- 3 async管道【前】
- 4 優雅的測試【前】
- 5 功能開發【前】
- 6 實體監聽器【后】
- 7 @ManyToMany【后】
- 8 集成測試【前】
- 9 異步驗證器【前】
- 10 詳解CORS【前】
- 第二節 課程列表
- 第三節 果斷
- 1 初始化【前】
- 2 分頁組件【前】
- 2 分頁組件【前】
- 3 綜合查詢【前】
- 4 綜合查詢【后】
- 4 綜合查詢【后】
- 第節 班級列表
- 第節 教師列表
- 第節 編輯課程
- TODO返回機制【前】
- 4 彈出框組件【前】
- 5 多路由出口【前】
- 第節 刪除課程
- 第七章 權限管理
- 第一節 AOP
- 總結
- 開發規范
- 備用