在上個小節中,我們自行完了選擇班級組件的開發。在開發的過程中相信大家大量的參考了教師選擇組件。那不難會發現幾個共同點:
* [ ] 兩者均顯示name字段
* [ ] 兩者在初始化時,均請求了一個獲取全部數據的地址
* [ ] 兩者在判斷應該選中某個對象時,均采用的是對`id`的值進行對比
* [ ] 兩者大量的代碼都是相同的
那么問題來了:我們是否可以建立一個公用的組件,然后利用向該組件中傳入的不同的參數以達到復用的目的呢? ---- **抽離**。在前面的章節的學習過程中,我們已經使用過**抽離**方法進行過代碼的重構。所謂**抽離**簡單來講就是從原來的方法中把一些共用的代碼拿出來。就像極了現實生活的大規模生產,比如生產汽車時會把各個車型**共用**的發動機、變速箱拿出來單獨的進行開發。各個車型在使用時,只需要按照發動機和變速箱的接口規則與其進行對接即可。我們當前的情景也是一樣,把兩個選擇組件共用的部分單獨的抽離出來進行單獨的開發符合我們**不造重復的輪子**的思想。
一般我們**抽離**的步驟如下(假設有A、B組件共用了大量的代碼):
* [ ] 初始化新單元(組件、方法、類等)C
* [ ] 復制任意原單元中(A或B)的所有代碼
* [ ] 在C中,A、B共用的代碼保持不變
* [ ] 在C中,A、B不同的代碼做接口(輸入或輸出)
## 初始化新單元
我們在app下新建一個新模塊core,并在該模塊中建立一個select組件。
```
panjiedeMac-Pro:core panjie$ tree
.
├── core.module.ts
└── select
├── select.component.html
├── select.component.sass
├── select.component.spec.ts
└── select.component.ts
```
### 復制調整代碼
接下來我們把教師選擇組件的代碼拿過來,并適當的改改變量的名字。
core/select/select.component.html
```
<select id="objectSelect" [formControl]="objectSelect" (change)="onChange()" [compareWith]="compareFn">
<option *ngFor="let object of objects" [ngValue]="object">
{{object.name}}
</option>
</select>
```
core/select/select.component.ts
```
import {Component, EventEmitter, Input, OnInit, Output} from '@angular/core';
import {Teacher} from '../../norm/entity/Teacher';
import {FormControl} from '@angular/forms';
import {HttpClient} from '@angular/common/http';
@Component({
selector: 'app-select',
templateUrl: './select.component.html',
styleUrls: ['./select.component.sass']
})
export class SelectComponent implements OnInit {
/*所有教師*/
objects: Array<{id: number, name: string}>; ★
objectSelect: FormControl;
@Output() selected = new EventEmitter<{id: number, name: string}>(); ★ ?
@Input() object: { id: number }; ?
constructor(private httpClient: HttpClient) {
}
/**
* 獲取所有的教師,并傳給V層
*/
ngOnInit() {
this.objectSelect = new FormControl(this.object);
const url = 'http://localhost:8080/Teacher';
this.httpClient.get(url)
.subscribe((teachers: Array<Teacher>) => {
this.objects = teachers;
});
}
/**
* 比較函數,標識用哪個字段來比較兩個教師是否為同一個教師
* @param t1 源
* @param t2 目標
*/
compareFn(t1: {id: number}, t2: {id: number}) {
return t1 && t2 ? t1.id === t2.id : t1 === t2;
}
onChange() {
this.selected.emit(this.objectSelect.value);
}
}
```
* ? 定義了輸出的最小格式(實際可能輸出的字段數會更多)
* ? 定義了輸入的最小格式(實際輸入的字段數多也是允許的)
core/select/select.component.spec.ts
```
import { async, ComponentFixture, TestBed } from '@angular/core/testing';
import { SelectComponent } from './select.component';
import {Teacher} from '../../norm/entity/Teacher';
import {BrowserModule, By} from '@angular/platform-browser';
import {ReactiveFormsModule} from '@angular/forms';
import {HttpClientTestingModule, HttpTestingController} from '@angular/common/http/testing';
fdescribe('core select SelectComponent', () => {
let component: SelectComponent; ★
let fixture: ComponentFixture<SelectComponent>; ★
const teachers = new Array(new Teacher(1, 'panjie', '潘杰'),
new Teacher(2, 'zhangxishuo', '張喜碩'));
beforeEach(async(() => {
TestBed.configureTestingModule({
declarations: [SelectComponent], ★
imports: [
BrowserModule,
ReactiveFormsModule,
HttpClientTestingModule
]
})
.compileComponents();
}));
beforeEach(() => {
fixture = TestBed.createComponent(SelectComponent); ★
component = fixture.componentInstance;
fixture.detectChanges();
});
/*斷言發請了后臺請求,模擬返回數據后,斷言V層的select個數為2*/
it('獲取教師列表后選擇教師', () => {
expectInit();
const htmlSelectElement: HTMLSelectElement = fixture.debugElement.query(By.css('#objectSelect')).nativeElement; ★
expect(htmlSelectElement.length).toBe(2);
testOptionValue(htmlSelectElement);
});
/**
* 斷言option的值與teacher中name的相同
* 循環teachers數組。斷言與option的值一一相等
* @param htmlSelectElement html元素
*/
const testOptionValue = (htmlSelectElement: HTMLSelectElement) => {
const htmlOptionElements: HTMLCollectionOf<HTMLOptionElement> = htmlSelectElement.options;
for (let i = 0; i < teachers.length; i++) {
const htmlOptionElement: HTMLOptionElement = htmlOptionElements.item(i);
console.log(htmlOptionElement.text);
expect(htmlOptionElement.text).toEqual(teachers[i].name);
}
};
/**
* 1. 模擬返回數據給教師列表
* 2. 觀察彈射器
* 3. 模擬點擊第0個option
* 4. 斷言觀察到的數據是教師列表的第一個教師
*/
it('測試組件彈射器', () => {
expectInit();
component.selected.subscribe((teacher: Teacher) => {
console.log('data emit', teacher);
expect(teacher.name).toEqual(teachers[0].name);
});
const htmlSelectElement: HTMLSelectElement = fixture.debugElement.query(By.css('#objectSelect')).nativeElement; ★
htmlSelectElement.value = htmlSelectElement.options[0].value;
htmlSelectElement.dispatchEvent(new Event('change'));
fixture.detectChanges();
});
/**
* 斷言組件進行了初始化
* 訪問了正確的后臺地址
*/
const expectInit = () => {
const httpTestingController: HttpTestingController = TestBed.get(HttpTestingController);
const req = httpTestingController.expectOne('http://localhost:8080/Teacher');
expect(req.request.method).toEqual('GET');
req.flush(teachers);
fixture.detectChanges();
};
});
```
你可能一定性更改不到位,那么可以一點點的復制過來。按單元測試提示的錯誤進行修正。單元測試通過,說明整體的復制是有效的。
### 剝離后臺請求地址(AB不同)
程序開發的過程其實就是抽象的過程,是總結相同的部分或是總結不同的部分的過程。相同的部分`<{id: number, name: string}>`我們已經剝離的出來,不同的部分是請求的地址,我們將其做為輸入項呈現。
core/select/select.component.ts
```
@Input() url: string;?
/**
* 獲取所有的對象,并傳給V層
*/
ngOnInit() {
this.objectSelect = new FormControl(this.object);
this.httpClient.get(this.url?)
.subscribe((objects: Array<{id: number; name: string}>) => {
this.objects = objects;
});
}
```
* ? 將請求地址做為input傳入
同步修正單元測試:
```
beforeEach(() => {
fixture = TestBed.createComponent(SelectComponent);
component = fixture.componentInstance;
component.url = 'http://localhost:8080/Teacher'; ?
fixture.detectChanges();
});
```
* 設置組件的URL地址
最后我們去除單元測試中的teacher痕跡。
```
import {async, ComponentFixture, TestBed} from '@angular/core/testing';
import {SelectComponent} from './select.component';
import {BrowserModule, By} from '@angular/platform-browser';
import {ReactiveFormsModule} from '@angular/forms';
import {HttpClientTestingModule, HttpTestingController} from '@angular/common/http/testing';
fdescribe('core select SelectComponent', () => {
let component: SelectComponent;
let fixture: ComponentFixture<SelectComponent>;
const url = 'http://localhost:8080/test'; ★
const objects = new Array({id: 1, name: '潘杰'}, {id: 2, name: '張喜碩'}); ★
beforeEach(async(() => {
TestBed.configureTestingModule({
declarations: [SelectComponent],
imports: [
BrowserModule,
ReactiveFormsModule,
HttpClientTestingModule
]
})
.compileComponents();
}));
beforeEach(() => {
fixture = TestBed.createComponent(SelectComponent);
component = fixture.componentInstance;
component.url = url; ★
fixture.detectChanges();
});
/*斷言發請了后臺請求,模擬返回數據后,斷言V層的select個數為2*/
it('獲取教師列表后選擇對象', () => {
expectInit();
const htmlSelectElement: HTMLSelectElement = fixture.debugElement.query(By.css('#objectSelect')).nativeElement;
expect(htmlSelectElement.length).toBe(2);
testOptionValue(htmlSelectElement);
});
/**
* 斷言option的值與對象中name的相同
* 循環teachers數組。斷言與option的值一一相等
* @param htmlSelectElement html元素
*/
const testOptionValue = (htmlSelectElement: HTMLSelectElement) => {
const htmlOptionElements: HTMLCollectionOf<HTMLOptionElement> = htmlSelectElement.options;
for (let i = 0; i < objects.length; i++) {
const htmlOptionElement: HTMLOptionElement = htmlOptionElements.item(i);
console.log(htmlOptionElement.text);
expect(htmlOptionElement.text).toEqual(objects[i].name);
}
};
/**
* 1. 模擬返回數據給教師列表
* 2. 觀察彈射器
* 3. 模擬點擊第0個option
* 4. 斷言觀察到的數據是教師列表的第一個教師
*/
it('測試組件彈射器', () => {
expectInit();
component.selected.subscribe((object: { id: number, name: string }) => { ★
console.log('data emit', object);
expect(object.name).toEqual(objects[0].name);
});
const htmlSelectElement: HTMLSelectElement = fixture.debugElement.query(By.css('#objectSelect')).nativeElement;
htmlSelectElement.value = htmlSelectElement.options[0].value;
htmlSelectElement.dispatchEvent(new Event('change'));
fixture.detectChanges();
});
/**
* 斷言組件進行了初始化
* 訪問了正確的后臺地址
*/
const expectInit = () => {
const httpTestingController: HttpTestingController = TestBed.get(HttpTestingController);
const req = httpTestingController.expectOne(url); ★
expect(req.request.method).toEqual('GET');
req.flush(objects);
fixture.detectChanges();
};
});
```
### 將參數抽離為對象
在前面的代碼中,我們大量的使用`{id:number; name: string}`類型。原則上,只要這個類型出現的頻率大于1次,那么我們就應該向上抽搞了為對象。為此,我們在core/select/select.component.ts建立Select對象。
```
export class SelectComponent implements OnInit {
/*所有對象*/
objects: Array<Select>; ★
objectSelect: FormControl;
@Output() selected = new EventEmitter<Select>(); ★
/**
* 獲取所有的對象,并傳給V層
*/
ngOnInit() {
this.objectSelect = new FormControl(this.object);
this.httpClient.get(this.url)
.subscribe((objects: Array<Select>) => { ★
this.objects = objects;
});
}
}
/**
* 選擇
*/
export? class Select {
id: number;
name: string;
constructor(id: number, name: string) { ?
this.id = id;
this.name = name;
}
}
```
* ? 使用export后其它外部文件中的類才可以使用import將其引用,否則只能在本類內部使用。
* ? 使用此方法構造以保證后期一旦該select發生變更,可以借助angular編譯器來快速的定位其它引用該組件的代碼。
## 較驗效果
如果想使得其它模塊引用Core模塊中的Select組件,則需要將Select進行export。
core/core.module.ts
```
@NgModule({
declarations: [SelectComponent],
imports: [
CommonModule,
ReactiveFormsModule ★
],
exports: [
SelectComponent ★
]
})
export class CoreModule { }
```
然后我們來到選擇班級組件,直接在該組件中引用選擇組件。
## 引入Select組件
以選擇班級組件為例,我們將剛剛的Select公用組件進行引入。
student/klass-select/klass-select.component.ts
```
import {Component, EventEmitter, Input, OnInit, Output} from '@angular/core';
import {Klass} from '../../norm/entity/Klass';
@Component({
selector: 'app-klass-select',
templateUrl: './klass-select.component.html',
styleUrls: ['./klass-select.component.sass']
})
export class KlassSelectComponent implements OnInit {
@Output() selected = new EventEmitter<Klass>(); ①
@Input() klass: Klass; ②
url = 'http://localhost:8080/Klass?name='; ?
constructor() {
}
ngOnInit() {
}
onSelected(klass: Klass): void { ①
this.selected.emit(klass);
}
}
```
* ① Select組件彈射給本組件,則本組件繼續往上彈
* ② 接收變量變直接賦值給Select組件
* ? 定義url數據初始化地址
student/klass-select/klass-select.component.html
```
<app-select
[url]="url"
(selected)="onSelected($event)"
[object]="klass"></app-select>
```
student/klass-select/klass-select.component.spec.ts
```
import {async, ComponentFixture, TestBed} from '@angular/core/testing';
import {KlassSelectComponent} from './klass-select.component';
import {CoreModule} from '../../core/core.module';
import {HttpClientTestingModule, HttpTestingController} from '@angular/common/http/testing';
import {Klass} from '../../norm/entity/Klass';
import {By} from '@angular/platform-browser';
import Spy = jasmine.Spy;
import SpyObj = jasmine.SpyObj;
describe('student KlassSelectComponent', () => {
let component: KlassSelectComponent;
let fixture: ComponentFixture<KlassSelectComponent>;
let httpTestingController: HttpTestingController;
beforeEach(async(() => {
TestBed.configureTestingModule({
declarations: [KlassSelectComponent],
imports: [CoreModule?, HttpClientTestingModule]
})
.compileComponents();
}));
beforeEach(() => {
fixture = TestBed.createComponent(KlassSelectComponent);
component = fixture.componentInstance;
fixture.detectChanges();
});
/**
* 1. 斷言發請了請求
* 2. 模擬返回數據
* 3. 訂閱彈出的班級
* 4. 改變select的值
* 5. 斷言訂閱的語句被成功的執行過了
*/
fit('should create', () => {
expect(component).toBeTruthy();
httpTestingController = TestBed.get(HttpTestingController);
const req = httpTestingController.expectOne(component.url);
req.flush(new Array(
new Klass(1, '測試1', null),
new Klass(2, '測試2', null)));
fixture.detectChanges();
let called = false; ?
component.selected.subscribe((klass: Klass) => {
expect(klass.id).toBe(1); ①
called = true; ?
});
const htmlSelectElement: HTMLSelectElement = fixture.debugElement.query(By.css('select')).nativeElement;
htmlSelectElement.value = htmlSelectElement.options[0].value;
htmlSelectElement.dispatchEvent(new Event('change'));
fixture.detectChanges();
expect(called).toBe(true); ??
});
});
```
* ? 引用CoreModule
* ? 斷言①是被執行過的。如果①沒有被執行過,則最終called值為false,從而?將無法通過
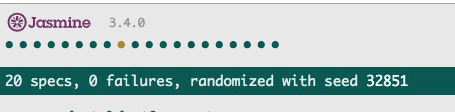
測試通過。
**小測試**請結合本小節的內容,完成選擇教師組件的重構,以使選擇教師組件共用Select組件。
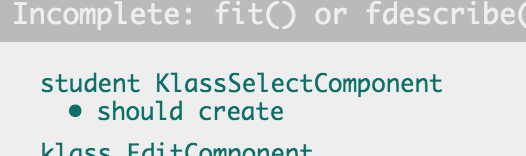
## 測試整個項目
最后,我們測試整個項目,在測試過程中我們發現了兩處錯誤。

但我們好像按提示找不到這個IndexComponent,因為我們有好多這樣的組件。最后找遍了整個項目,發現其位于klass模塊下,我們找到它并在它的測試描述中給它起個更容易識別的名字:
klass/index/index.component.spec.ts
```
describe('klass -> IndexComponent', () => {
```
這樣下次它再報錯的時候,就會這樣顯示:

這樣我們就能快速的找到它了。
我們在特定報錯的方法前加個`f`來修正下這個錯誤,看是單元測試沒有及時變更還是的確組件發生了異常。
提示我們不能夠在undefined上讀取一個name屬性。經排查:我在單元測試中沒有出現`name`屬性;在C層中也未使用該屬性;最終在V層中找到兩處使用該屬性的地方:
klass/index/index.component.html
```
<td>{{klass.name}}</td>
<td>{{klass.object.name}}</td>
```
而報這種錯誤,要不然klass為undefined,否則klass.object為undefined。然后我突然聯想起了,在前面進行代碼復制的時候,我使用快捷方式修改過變量的名稱,將teacher修改為了object,而webstorm則進行了誤操作將此V層中的字段也一并修改了。天,如果沒有單元測試我相信我們是發現不了該錯誤的。這就是單元測試的魅力,當我們懷著沖動的心情瞎搞時,它站在后面能夠給我們堅而有力的保障!
修正為:
```
<td>{{klass.name}}</td>
<td>{{klass.teacher.name}}</td>
```
再測試整個效果,通過!此時可以放心的提交代碼了。
# 參考文檔
| 名稱 | 鏈接 | 預計學習時長(分) |
| --- | --- | --- |
| 源碼地址 | [https://github.com/mengyunzhi/spring-boot-and-angular-guild/releases/tag/step4.5.3](https://github.com/mengyunzhi/spring-boot-and-angular-guild/releases/tag/step4.5.3) | - |
- 序言
- 第一章:Hello World
- 第一節:Angular準備工作
- 1 Node.js
- 2 npm
- 3 WebStorm
- 第二節:Hello Angular
- 第三節:Spring Boot準備工作
- 1 JDK
- 2 MAVEN
- 3 IDEA
- 第四節:Hello Spring Boot
- 1 Spring Initializr
- 2 Hello Spring Boot!
- 3 maven國內源配置
- 4 package與import
- 第五節:Hello Spring Boot + Angular
- 1 依賴注入【前】
- 2 HttpClient獲取數據【前】
- 3 數據綁定【前】
- 4 回調函數【選學】
- 第二章 教師管理
- 第一節 數據庫初始化
- 第二節 CRUD之R查數據
- 1 原型初始化【前】
- 2 連接數據庫【后】
- 3 使用JDBC讀取數據【后】
- 4 前后臺對接
- 5 ng-if【前】
- 6 日期管道【前】
- 第三節 CRUD之C增數據
- 1 新建組件并映射路由【前】
- 2 模板驅動表單【前】
- 3 httpClient post請求【前】
- 4 保存數據【后】
- 5 組件間調用【前】
- 第四節 CRUD之U改數據
- 1 路由參數【前】
- 2 請求映射【后】
- 3 前后臺對接【前】
- 4 更新數據【前】
- 5 更新某個教師【后】
- 6 路由器鏈接【前】
- 7 觀察者模式【前】
- 第五節 CRUD之D刪數據
- 1 綁定到用戶輸入事件【前】
- 2 刪除某個教師【后】
- 第六節 代碼重構
- 1 文件夾化【前】
- 2 優化交互體驗【前】
- 3 相對與絕對地址【前】
- 第三章 班級管理
- 第一節 JPA初始化數據表
- 第二節 班級列表
- 1 新建模塊【前】
- 2 初識單元測試【前】
- 3 初始化原型【前】
- 4 面向對象【前】
- 5 測試HTTP請求【前】
- 6 測試INPUT【前】
- 7 測試BUTTON【前】
- 8 @RequestParam【后】
- 9 Repository【后】
- 10 前后臺對接【前】
- 第三節 新增班級
- 1 初始化【前】
- 2 響應式表單【前】
- 3 測試POST請求【前】
- 4 JPA插入數據【后】
- 5 單元測試【后】
- 6 惰性加載【前】
- 7 對接【前】
- 第四節 編輯班級
- 1 FormGroup【前】
- 2 x、[x]、{{x}}與(x)【前】
- 3 模擬路由服務【前】
- 4 測試間諜spy【前】
- 5 使用JPA更新數據【后】
- 6 分層開發【后】
- 7 前后臺對接
- 8 深入imports【前】
- 9 深入exports【前】
- 第五節 選擇教師組件
- 1 初始化【前】
- 2 動態數據綁定【前】
- 3 初識泛型
- 4 @Output()【前】
- 5 @Input()【前】
- 6 再識單元測試【前】
- 7 其它問題
- 第六節 刪除班級
- 1 TDD【前】
- 2 TDD【后】
- 3 前后臺對接
- 第四章 學生管理
- 第一節 引入Bootstrap【前】
- 第二節 NAV導航組件【前】
- 1 初始化
- 2 Bootstrap格式化
- 3 RouterLinkActive
- 第三節 footer組件【前】
- 第四節 歡迎界面【前】
- 第五節 新增學生
- 1 初始化【前】
- 2 選擇班級組件【前】
- 3 復用選擇組件【前】
- 4 完善功能【前】
- 5 MVC【前】
- 6 非NULL校驗【后】
- 7 唯一性校驗【后】
- 8 @PrePersist【后】
- 9 CM層開發【后】
- 10 集成測試
- 第六節 學生列表
- 1 分頁【后】
- 2 HashMap與LinkedHashMap
- 3 初識綜合查詢【后】
- 4 綜合查詢進階【后】
- 5 小試綜合查詢【后】
- 6 初始化【前】
- 7 M層【前】
- 8 單元測試與分頁【前】
- 9 單選與多選【前】
- 10 集成測試
- 第七節 編輯學生
- 1 初始化【前】
- 2 嵌套組件測試【前】
- 3 功能開發【前】
- 4 JsonPath【后】
- 5 spyOn【后】
- 6 集成測試
- 7 @Input 異步傳值【前】
- 8 值傳遞與引入傳遞
- 9 @PreUpdate【后】
- 10 表單驗證【前】
- 第八節 刪除學生
- 1 CSS選擇器【前】
- 2 confirm【前】
- 3 功能開發與測試【后】
- 4 集成測試
- 5 定制提示框【前】
- 6 引入圖標庫【前】
- 第九節 集成測試
- 第五章 登錄與注銷
- 第一節:普通登錄
- 1 原型【前】
- 2 功能設計【前】
- 3 功能設計【后】
- 4 應用登錄組件【前】
- 5 注銷【前】
- 6 保留登錄狀態【前】
- 第二節:你是誰
- 1 過濾器【后】
- 2 令牌機制【后】
- 3 裝飾器模式【后】
- 4 攔截器【前】
- 5 RxJS操作符【前】
- 6 用戶登錄與注銷【后】
- 7 個人中心【前】
- 8 攔截器【后】
- 9 集成測試
- 10 單例模式
- 第六章 課程管理
- 第一節 新增課程
- 1 初始化【前】
- 2 嵌套組件測試【前】
- 3 async管道【前】
- 4 優雅的測試【前】
- 5 功能開發【前】
- 6 實體監聽器【后】
- 7 @ManyToMany【后】
- 8 集成測試【前】
- 9 異步驗證器【前】
- 10 詳解CORS【前】
- 第二節 課程列表
- 第三節 果斷
- 1 初始化【前】
- 2 分頁組件【前】
- 2 分頁組件【前】
- 3 綜合查詢【前】
- 4 綜合查詢【后】
- 4 綜合查詢【后】
- 第節 班級列表
- 第節 教師列表
- 第節 編輯課程
- TODO返回機制【前】
- 4 彈出框組件【前】
- 5 多路由出口【前】
- 第節 刪除課程
- 第七章 權限管理
- 第一節 AOP
- 總結
- 開發規范
- 備用