C層的功能相較于前面的單元較多,我們本次單元測試粒度最小化原則分別就:table列表、選擇班級組件、條件查詢以及分頁展開開發及單元測試。
# table列表
本組件中table列表將在以下幾種情況下更新:①組件初始化時 ②用戶點擊查詢按鈕時 ③用戶點擊分頁時。因此應該為table列表更新單獨建立一個方法,以滿足多條件下調用。
student/index/index.component.ts
```
export class IndexComponent implements OnInit {
...
/**
* 加載數據
*/
loadData() {
const queryParams = { // ①
page: this.params.page,
size: this.params.size,
klassId: this.params.klass.id, ?
name: this.params.name.value,
sno: this.params.sno.value
};
this.studentService.page(queryParams)
.subscribe((response: { totalPages: number, content: Array<Student> }) => {
this.pageStudent = response;
});
}
ngOnInit() {
this.loadData();
}
```
* ① 構造適用于StudentService.page方法的類型
* ? 此處有錯誤,會觸發一個IDE的錯語提醒

## `:`與`=`
在ts中`:`與`=`均可對變理進行定義。更確切的講`:`用來定義變量的類型;而`=`則是進行賦值,在賦值的過程中按賦的值的類型來確認變量的類型。
比如:
```
let a: number; // ①
console.log(a); // ②
a = 3;
console.log(a); // 3
```
* ① 定義a的類型為number,值為undefined
* ② 打印undefined
以上代碼等價于:
```
let a = 3; // ①
```
* ① 由于3的類型是number,所以TS可以推斷中a的類型為number。
如果使用以下語句則會報錯:
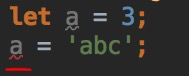
將某個變量的賦值或聲明為對象也是同樣的道理。但由于`{}`在ts中的特殊性,在`:`與`=`分別代表不同的含意。比如:
`a = {}`中的`{}`代表a的值是一個`空對象`,而`a: {}`中的`{}`代表a的類型是一個`對象類型`
所以當我們使用以下代碼時:
```
/* 查詢參數 */
params = {
page: 0,
size: 2,
klass: Klass,
name: new FormControl(),
sno: new FormControl()
};
```
由于使用是`params =`,那么此時`{}`代表一個對象,對`{}`中的值分別代表`屬性名`及`屬性值`。則上述代碼解讀為:params的值是一個對象,這個對象的page屬性的值為0,size屬性的值為2,klass屬性的**值**為Klass。
而這便是發生錯誤的源泉,我們使用`klass: Klass`的本意是:klass屬性的**類型**為Klass,而此時被ts解讀的含意與我們的本意并不相同。
假設我們使用`:`來替換`=`定義params的類型,則會發生以下錯誤:
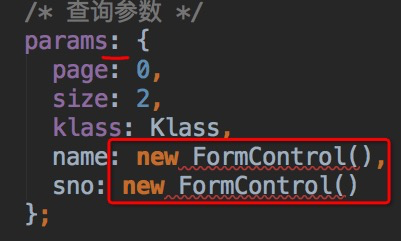
這是由于當使用`params :`時,`{}`代表一個對象類型,而這個對象類型中的每一個,均代表`屬性名`及`屬性類型`,故上述代碼應該被解讀為:params的類型是一個對象,這個對象中的page屬性的類型是`0`, size的屬性是`2`,klass屬性是`Klass`,**name的屬性是`new FormControl()`**。由于`new FormControl()`并不能做為屬性類型出現,所以便發生了上圖的錯誤提示。我們可以將其改為:
```
params: {
page: 0,
size: 2,
klass: Klass,
name: FormControl,
sno: FormControl
};
```
此時錯誤提示消息。但由于`page: 0`被解讀為**page字段的類型為`0`**,所以當我們對其進行賦值時也會提示錯語:

上述代碼將3賦予page屬性,但3的類型為number,而page屬性聲明類型為`0`。由于`number !== 0`,所以類型并不相符,進而發生了如上錯誤。這也是在初期使用ts進行變量的初始化時常常出現的問題,避免這個問題發生則需要記往以下規則:**賦值時使用常用的`=`,聲明類型時使用`:`**
則params初始化的代碼應該修正為:
```
/* 查詢參數 */
params = {
page: 0,
size: 2,
klass: Klass, ?
klass: new Klass(null , null, null), ?
name: new FormControl(),
sno: new FormControl()
};
```
## 單元測試
在3.4.4小節中我們已經使用spy及Stub分別進行了組件依賴于服務的單元測試。spy的優點在于可以更加輕松的構造測試服務;而Stub在于可以進行復用。所以如果在測試過程中我們的對某個服務僅依賴一次那么應該使用更為簡單的spy,如果我們不確定對該服務的依賴次數,那么推薦使用Stub。在此,我們使用Stub的方法來生成測試用的StudentService。使用終端來到app/service文件夾,并使用`ng g service studentStub --skip-tests`命令來生成一個供測試用的StudentStubService.
```
panjiedeMac-Pro:service panjie$ ng g service studentStub --skip-tests?
CREATE src/app/service/student-stub.service.ts (140 bytes)
panjiedeMac-Pro:service panjie$
```
* ? 在生成時忽略生成單元測試文件
該服務僅用于單元測試,所以刪除`Injectable`注解后保留最原始的部分即可:
```
/**
* 學生服務測試樁
*/
export class StudentStubService {
constructor() {
}
}
```
### 增加測試方法page
```
/**
* 學生服務測試樁
*/
import {Observable, of★} from 'rxjs';
import {Student} from '../norm/entity/student';
import {Klass} from '../norm/entity/Klass';
export class StudentStubService {
constructor() {
}
/* 傳入參數緩存 */
pageParamsCache: { sno?: string, name?: string, klassId?: number, page?: number, size?: number }; ①
/**
* page模擬方法
* @param params 查詢參數
*/
page(params: { sno?: string, name?: string, klassId?: number, page?: number, size?: number })
: Observable<{ totalPages: number, content: Array<Student> }> {
this.pageParamsCache = params; ①
const mockResult = { ②
totalPages: 100,
content: new Array<Student>(
new Student({id: 1, name: 'testStudent', sno: 'testStudentSno', klass: new Klass(1, 'testKlass', null)}),
new Student({id: 2, name: 'testStudent1', sno: 'testStudentSno1', klass: new Klass(2, 'testKlass1', null)}))
};
return of(mockResult)?;
}
}
```
* ① 參數緩存,用于斷言調用page方法時的傳入的參數是否符合預期
* ② 構造模擬返回結果
* ? 使用of()方法模擬返回觀察者對象
### 使用Stub服務
有了模擬的學生服務后,我們在列表組件的測試方法中使用該模擬服務替換真實的服務:
student/index/index.component.spec.ts
```
describe('Student -> IndexComponent', () => {
...
beforeEach(async(() => {
TestBed.configureTestingModule({
declarations: [IndexComponent, KlassSelectComponent],
imports: [
ReactiveFormsModule,
FormsModule,
CoreModule,
HttpClientTestingModule],
providers: [
{provide: StudentService, useClass: StudentStubService} ?
]
})
.compileComponents();
}));
```
* ? 當測試中需要提供StudentService時,使用StudentStubService進行替換
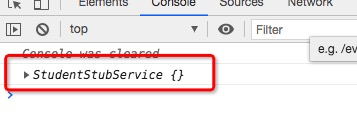
為了確認上述替換服務的代碼是生效的,我們在組件的構造函數中打印該服務:
student/index/index.component.spec.ts
```
constructor(private studentService: StudentService) {
console.log(studentService);
}
```
## 測試TABLE初始化
Table初始化成功應該有以下標志:①使用預期的參數請求了StudentService(Stub) ② 正確地渲染了V層。下面我們按測試粒度最小化的原則,分別對上述兩點進行測試。
### 發起請求測試
student/index/index.component.spec.ts
```
describe('Student -> IndexComponent', () => {
...
fit('組件初始化發起請求測試', () => {
/* 獲取請求參數 */
const studentService: StudentStubService = TestBed.get(StudentService);
const queryParam = studentService.pageParamsCache;
/* 斷言傳入的參數值與組件中的參數值相同 */
expect(queryParam.name).toEqual(component.params.name.value);
expect(queryParam.sno).toEqual(component.params.sno.value);
expect(queryParam.klassId).toEqual(component.params.klass.id);
expect(queryParam.page).toEqual(component.params.page);
expect(queryParam.size).toEqual(component.params.size);
});
});
```
### 正確地渲染了V層
student/index/index.component.spec.ts
```
describe('Student -> IndexComponent', () => {
...
fit('組件初始化V層渲染', () => {
/* 獲取table元素 */
const tableElement = fixture.debugElement.query(By.css('table'));
const table: HTMLTableElement = tableElement.nativeElement;
/* 斷言總行數及第一行的內容綁定符合預期 */
const row = 1;
let col = 0;
expect(table.rows.length).toBe(3);
expect(table.rows.item(row).cells.length).toBe(6);
expect(table.rows.item(row).cells.item(col++).innerText).toBe('');
expect(table.rows.item(row).cells.item(col++).innerText).toBe('1');
expect(table.rows.item(row).cells.item(col++).innerText).toBe('testStudent');
expect(table.rows.item(row).cells.item(col++).innerText).toBe('testStudentSno');
expect(table.rows.item(row).cells.item(col++).innerText).toBe('testKlass');
expect(table.rows.item(row).cells.item(col++).innerText).toBe('');
});
});
```
# 選擇班級組件
選擇班級組件依賴于core/select中的選擇組件,該組件在初始化時會像特定的URL進行相應的數據請求。所以如果需要在測試時使選擇班級組件生效,則需要對此URL請求設定模似返回值。
> **注意:** 受于篇幅的限制,引處采用了一種非常LOW的測試模式,將到在后面的教程中對其進行修正。
student/index/index.component.spec.ts
```
describe('Student -> IndexComponent', () => {
...
fit('選擇班級組件', () => {
/* 獲取請求 */
const httpTestingController = TestBed.get(HttpTestingController);
const req: TestRequest = httpTestingController.expectOne('http://localhost:8080/Klass?name=');
expect(req.request.method).toEqual('GET');
/* 模擬返回值 */
const mockResult = new Array<Klass>(
new Klass(1, 'testKlass', null),
new Klass(2, 'testKlass2', null)
);
req.flush(mockResult);
fixture.detectChanges(); ★
/* 獲取select元素 */
const debugElement = fixture.debugElement.query(By.css('select'));
const select: HTMLSelectElement = debugElement.nativeElement;
/* 選中首個選項 */
select.value = select.options[0].value;
select.dispatchEvent(new Event('change'));
fixture.detectChanges(); ★
/* 斷言選中的值傳給了C層 */
expect(component.params.klass).toEqual(mockResult[0]);
});
});
```
* ★ 數據發生變更后調用detectChanges()重新渲染界面
測試結果:
```
Error: Expected $.id = null to equal 1.
Expected $.name = null to equal 'testKlass'.
```
表明當用戶選擇完班級后并未將數據綁定到C層的查詢參數中。
## 修正列表組件
在組件初始化的過程中并沒有編寫班級選擇組件的功能性代碼,遂導致了單元測試代碼未通過,修正如下:
student/index/index.component.html
```
<label>班級:<app-klass-select [klass]="params.klass" (selected)="onSelectKlass($event)"?></app-klass-select></label>
```
student/index/index.component.ts
```
export class IndexComponent implements OnInit {
...
/* 選擇班級 */
onSelectKlass(klass: Klass) {
this.params.klass = klass;
}
}
```
單元測試通過。說明選擇班級后對應將選擇的班級綁定到了C層。
# 條件查詢
在條件查詢的測試中,注意項為:① 姓名、學號兩個input是否成功的綁定到了C層 ② 點擊查詢按鈕后,是否成功地向M層發起了請求。
## input綁定測試
student/index/index.component.spec.ts
```
describe('Student -> IndexComponent', () => {
...
fit('姓名、學號input輸入測試', () => {
/* 利用前期抽向出的表單測試類,對表單進行測試 */
const formTest = new FormTest(fixture); ①
expect(formTest.setInputValue('input[name="name"]', 'studentName')).toBe(true);②
expect(formTest.setInputValue('input[name="sno"]', 'studentSno')).toBe(true);
fixture.detectChanges();
/* 斷言選中的值傳給了C層 */
expect(component.params.name.value).toEqual('studentName'); ③
expect(component.params.sno.value).toEqual('studentSno'); ③
});
});
```
* ① 在構造函數中將當前夾具傳入
* ② 成功的對input賦值,將返回true
* ③ 斷言對input設置的值,成功的傳遞給了C層
測試結果:
```
Error: Expected false to be true.
```
顯示的該測試報告并不友好,我們僅知道在執行formTest.setInputValue時未如期的返回正確的結果,卻無法直接的得到錯誤提示信息。
我們找到testing/FormTest.ts中對應的代碼段,發現只所以返回了false,是由于沒有根據css選擇器找到對應的html元素造成的。
testing/FormTest.ts
```
export class FormTest<T> {
...
/**
* 設置input的值
* @param fixture 夾具
* @param cssSelector CSS選擇器
* @param value 要設置的值
* @return 成功true 失敗false
*/
static setInputValue(fixture: ComponentFixture<any>, cssSelector: string, value: string): boolean {
const selectorElement = this.getSelectorElement(fixture, cssSelector);
if (isNull(selectorElement)) {
return false; ★
}
const htmlInputElement: HTMLInputElement = selectorElement.nativeElement;
htmlInputElement.value = value;
htmlInputElement.dispatchEvent(new Event('input'));
return true;
}
```
* ★ 當未找到相關元素時,返回了false。
### Error
在typescript中,使用`throw new Error(String message)`來拋出異常信息:
```
export class FormTest<T> {
...
static setInputValue(fixture: ComponentFixture<any>, cssSelector: string, value: string): boolean {
...
if (isNull(selectorElement)) {
return false; ?
throw new Error(`未找到css選器${cssSelector}對應的html元素`); ?
}
}
```
此時當在單元測試中發生未找到相關元素的情況時,便可以直接在單元測試的界面上查看到上述信息了。

當然了,此時setInputValue方法描述也可由`執行成功返回true,失敗返回false`同步變更為`執行成功返回void,不成功拋出異常`了(暫時不變更)。
### 修正組件
打開V層文件為input表單增加name屬性,這樣更加規范也更有利于測試。
student/index/index.component.html
```
<label>姓名:<input name="name"★ [formControl]="params.name" type="text" /></label>
<label>學號:<input name="sno"★ [formControl]="params.sno" type="text" /></label>
```
* ★ 添加name屬性
## 查詢按鈕測試
用戶點擊查詢按鈕后,應該測試以下兩點:① 查詢參數是否傳入M層 ② M層的返回值是否被組件接收
student/index/index.component.spec.ts
```
describe('Student -> IndexComponent', () => {
fit('查詢按鈕點擊測試', () => {
/* 組件參數賦值 */
component.params.name.setValue('studentName');
component.params.sno.setValue('sno');
component.params.klass = new Klass(1, null, null);
component.params.page = 3;
component.params.size = 20;
/* 點擊按鈕 */
const formTest = new FormTest(fixture);
formTest.clickButton('button');
/* 獲取傳入參數 */
const studentService: StudentStubService = TestBed.get(StudentService);
const queryParam = studentService.pageParamsCache;
/* ①查詢參數是否傳入M層 */
expect(queryParam.name).toEqual(component.params.name.value);
expect(queryParam.sno).toEqual(component.params.sno.value);
expect(queryParam.klassId).toEqual(component.params.klass.id);
expect(queryParam.page).toEqual(component.params.page);
expect(queryParam.size).toEqual(component.params.size);
/* ②M層的返回值是否被組件接收 */
});
});
```
測試結果:
```
Error: Expected null to equal 'studentName'.
```
### 完善功能
該結果說明name查詢參數沒有并成功的傳入到StudentService,依此我們對應修正該組件代碼。
student/index/index.component.ts
```
export class IndexComponent implements OnInit {
/* 查詢 */
onQuery() {
this.loadData(); ①
}
```
* ① 直接調用數據加載函數
# spyOn
代碼寫到這突然地發現如果繼續這么寫測試代碼的話,則會與組件初始化的代碼高度的相同。原因如下:
```
ngOnInit() {
this.loadData();
}
/* 查詢 */
onQuery() {
this.loadData();
}
```
在初始化及查詢的代碼中,我們均調用了`this.loadData()`方法。也就是說我們完成可以換一種思路進行測試:① 測試this.loadData()符合預期 ② 測試`ngOnInit()`方法成功的調用了`loadData()`方法 ③ 測試`onQuery()`方法成功的調用了`loadData()`方法。
① 測試this.loadData()符合預期 我們已經在前面測試組件初始化時測試過了。那么②③這種方法的調用又該如何測試呢?為了解決這個問題,angular為我們提供了spyOn()方法。
## 在方法上添加間諜
清空測試用例`查詢按鈕點擊測試`的代碼后,重新使用spyOn來進行組織。
student/index/index.component.spec.ts
```
describe('Student -> IndexComponent', () => {
fit('查詢按鈕點擊測試', () => {
spyOn(component, 'onQuery'); ?
/* 點擊按鈕 */
const formTest = new FormTest(fixture);
formTest.clickButton('button');
expect(component.onQuery).toHaveBeenCalled();
/* 由于原onQuery()已經失效。所以點擊查詢按鈕雖然成功的觸發了onQuery()方法。但此方法卻是一個間諜,該間諜并沒有進行數據轉發? */
// expect(component.loadData).toHaveBeenCalled(); // 執行此方法將得到一個異常,因為數據已被間諜攔截,該間諜并未調用loadData方法
});
});
```
* ? 在組件的onQuery方法上設置間諜。當調用組件的onQuery()方法時,將由間諜提供服務。以此同時原onQuery()將失效
* ? 這像極了諜戰片:我們在敵人情報網的關鍵位置安插了一個間諜,此間諜得到情報后,選擇將情報就地銷毀而非向原組織的上級報告
### 測試onQuery方法
具體onQuery是否調用了loadData,則可以新建另一個測試用例來完成測試。
student/index/index.component.spec.ts
```
describe('Student -> IndexComponent', () => {
...
fit('onQuery', () => {
spyOn(component, 'loadData');
component.onQuery();
expect(component.loadData).toHaveBeenCalled(); ①
});
});
```
* ① 斷言此loadData間諜被調用了1次
# 分頁
分頁是一款應用的必備功能,一個完善的分頁功能相對復雜,在此我們的目的完成一個**經典**款。和前面的單元測試思想相同,在測試中我們爭取把測試的粒度控制到最小。

依原型對①當前頁 ②總頁數 ③每頁大小 ④首頁 ⑤上一頁 ⑥頁碼 ⑦ 下一頁 ⑧尾頁 分別建立測試用例。
## 引入bootstrap分頁樣式
在本章的第一節項目已經引入了流行的樣式bootstrap,分頁組件是bootstrap下標準的組件之一。在正式的開發分頁以前,我們找到bootstrap分頁組件的示例代碼,并嘗試將其引入到當前組件中:
```
</table>
<div *ngIf="pageStudent">第{{params.page}}/{{pageStudent.totalPages}}頁 每頁{{params.size}}條 首頁 上一頁 1 2 3 下一頁 尾頁</div>?
<div *ngIf="pageStudent" class="row"> ?
<div class="col-4">
第{{params.page}}/{{pageStudent.totalPages}}頁 每頁{{params.size}}條
</div>
<div class="col-8">
<nav>
<ul class="pagination">
<li class="page-item disabled">
<span class="page-link">Previous</span>
</li>
<li class="page-item"><a class="page-link" href="#">1</a></li>
<li class="page-item active">
<span class="page-link">
2
<span class="sr-only">(current)</span>
</span>
</li>
<li class="page-item"><a class="page-link" href="#">3</a></li>
<li class="page-item">
<a class="page-link" href="#">Next</a>
</li>
</ul>
</nav>
</div>
</div> ?
```
效果如下:

## 當前頁、總頁數、每頁大小
在單元測試中如果想到某個元素進行測試并斷言,前提是可能精確的在頁面中的找到該元素。為此,我們為分頁信息增加id屬性:
student/index/index.component.html
```
<div class="col-4" id="pageInfo★">
第{{params.page}}/{{pageStudent.totalPages}}頁 每頁{{params.size}}條
</div>
```
* ★ 定義id
### 單元測試
student/index/index.component.spec.ts
```
describe('Student -> IndexComponent', () => {
...
fit('當前頁、總頁數、每頁大小', () => {
/* 獲取分頁信息 */
const debugElement = fixture.debugElement.query(By.css('#pageInfo'));
const pageInfoDiv: HTMLDivElement = debugElement.nativeElement;
const text = pageInfoDiv.textContent; ?
console.log(text); ①
/* 斷言綁定了C層的分頁值 */
expect(text).toContain(`第${component.params.page}/${component.pageStudent.totalPages}頁`); ?
expect(text).toContain(`每頁${component.params.size}條`);
});
});
```
* ? 獲取div元素中的文本內容
* ① 首次使用在控制臺打印其信息,以更好的掌握該數據值
* ? 斷言獲取的字符串中包含了預期的值
## 首頁
首頁主要考慮幾個功能點:①當前頁如果就是首頁,則該按鈕應該被禁用 ②當擊首頁按鈕成功設置C導層params.page = 0 ③ 點擊后重新發起數據請求。首次進行類似功能的開發,開發步驟為:先開發功能代碼再按測試代碼進行功能修正。
### 功能代碼
student/index/index.component.html
```
...
<ul class="pagination">
<li class="page-item" [ngClass]="{'disabled': params.page === 0}"? (click)="onPage(0)"①>
<span class="page-link">Previous</span> ?
<span class="page-link">首頁</span> ?
</li>
...
```
* ? 動態設置宿主元素(li)的樣式值,當params.page的值為0時,添加disabled樣式
* ① 點擊該元素時,向C層傳值
對應的C層代碼:
student/index/index.component.ts
```
export class IndexComponent implements OnInit {
...
/**
* 點擊分頁按鈕
* @param page 要請求的頁碼
*/
onPage(page: number) {
this.params.page = page;
this.loadData();
}
}
```
### 樣式測試
student/index/index.component.spec.ts
```
describe('Student -> IndexComponent', () => {
...
fit('分頁 -> 首頁樣式測試', () => {
/* 獲取首頁按鈕 */
const debugElement = fixture.debugElement.query(By.css('ul.pagination > li:first-child'));
const htmlliElement: HTMLLIElement? = debugElement.nativeElement;
console.log(htmlliElement);①
/* 當前頁為首頁,則添加禁用樣式 */
component.params.page = 0;
fixture.detectChanges(); ★
expect(htmlliElement.classList.contains('disabled')).toBe(true); ?
/* 當前頁非首頁,則移除禁用樣式 */
component.params.page = 1;
fixture.detectChanges(); ★
expect(htmlliElement.classList.contains('disabled')).toBe(false); ?
});
});
```
* ? Li元素
* ① 首次或不太熟悉時,打印元素到控制臺以查看詳情
* ? 斷言樣式中包括disabled
* ? 斷言樣式中不包括disabled
### 點擊測試
student/index/index.component.spec.ts
```
describe('Student -> IndexComponent', () => {
...
fit('分頁 -> 點擊首頁測試', () => {
spyOn(component, 'onPage'); ①
/* 獲取首頁按鈕并點擊 */
const formTest = new FormTest(fixture);
formTest.clickButton('ul.pagination > li:first-child');
expect(component.onPage).toHaveBeenCalledWith(0);?
});
```
* ① 建立間諜
* ? 斷言onPage方法被調用,而且被調用時傳入的參數值為0
### onPage功能測試
student/index/index.component.spec.ts
```
describe('Student -> IndexComponent', () => {
...
fit('onPage 功能測試', () => {
spyOn(component, 'loadData'); ①
component.params.page = 4; ②
component.onPage(3); ③
expect(component.params.page).toEqual(3); ④
expect(component.loadData).toHaveBeenCalled(); ⑤
});
```
* ① 建立間諜
* ② 初始化page
* ③ 調用
* ④ 對結果進行斷言
* ⑤ 對調用loadData方法進行斷言
## 上一頁
功能點:①當前頁為首頁時,禁用 ②調用onPage方法,傳入值為當前頁 -1
### 功能開發
student/index/index.component.ts
```
<nav>
<ul class="pagination">
<li class="page-item" [ngClass]="{'disabled': params.page === 0}" (click)="onPage(0)">
<span class="page-link">首頁</span>
</li>
<li class="page-item" [ngClass]="{'disabled': params.page === 0}" (click)="onPage(params - 1)"①>
<span class="page-link">上一頁</span>
</li>
```
* ① 將當前頁-1后傳入
### 樣式測試
由于前面已經測試onPage方法是否可能的調用了loadData方法,所以此處我們只需要測試onPage方法的傳入值是否正確即可。
student/index/index.component.spec.ts
```
describe('Student -> IndexComponent', () => {
...
fit('上一頁 樣式測試', () => {
/* 獲取首頁按鈕 */
const debugElement = fixture.debugElement.query(By.css('ul.pagination > li:nth-child(2)')); ?
const htmlliElement: HTMLLIElement = debugElement.nativeElement;
console.log(htmlliElement);
/* 當前頁為首頁,則添加禁用樣式 */
component.params.page = 0;
fixture.detectChanges();
expect(htmlliElement.classList.contains('disabled')).toBe(true);
/* 當前頁非首頁,則移除禁用樣式 */
component.params.page = 1;
fixture.detectChanges();
expect(htmlliElement.classList.contains('disabled')).toBe(false);
});
});
```
* ? nth-child(n)表示選中第n個元素,但與我們習慣的0基不同,該選擇器是1基的。如果我們選擇第2個li元素則直接輸入2即可,無需進行減1處理。
### 點擊測試
student/index/index.component.spec.ts
```
describe('Student -> IndexComponent', () => {
...
fit('上一頁 點擊測試', () => {
spyOn(component, 'onPage');
component.params.page = 3; ①
fixture.detectChanges();
/* 獲取上一頁按鈕并點擊 */
const formTest = new FormTest(fixture);
formTest.clickButton('ul.pagination > li:nth-child(2)'); ②
expect(component.onPage).toHaveBeenCalledWith(2);
});
});
```
* ① 當前頁為3,則上一頁按鈕可點擊
* ② 點擊上一頁
* ③ 斷言傳入的參數值為2(第3頁的上一頁為第2頁)
測試結果我們得到了如下異常:
```
Error: Expected spy onPage to have been called with [ 2 ] but actual calls were [ NaN ].
```
通過檢查V層的代碼我們發現誤把`params.page - 1`寫成了`params`。
修正如下:
student/index/index.component.ts
```
<li class="page-item" [ngClass]="{'disabled': params.page === 0}" (click)="onPage(params - 1)"> ?
<li class="page-item" [ngClass]="{'disabled': params.page === 0}" (click)="onPage(params.page - 1)"> ?
<span class="page-link">上一頁</span>
</li>
```
修正后單元測試通過。
## 頁碼C層
在實現頁碼的功能時,我們首先想到的是使用類似于`for(let i = 0; i < totalPages; i++)`的形式在前臺來循環輸出各個頁碼,但angular的ngFor并不支持這樣做,所以我們換一種思路:在C層中生成頁碼的數組,比如我們需要1,2,3,4,5頁,則在C層中生成Array(1,2,3,4,5);然后在前臺使用ngFor來循環輸出該數組。
頁碼所需要考慮的問題較多,在開始之前需要簡單的想一下我們所需要處理的問題 -- Head First, Coding Second。
* 輸出的頁碼總數最多不超過N(暫時設定為5)個。總頁數不超過5頁時,全部輸出,總頁數大于5頁時,則最多輸出5頁。比如共20頁,當前頁為第10頁,則輸出為: 8 9 10 11 12
* 當前頁禁止點擊,其它頁可點擊,比如:[2] [3] 4 [5] [6]
* 當前頁起始2頁時,比如當前頁為2,則顯示為:[1] 2 [3] [4] [5]
* 當前頁為終了2頁時,比如共10頁,當前頁為最后1頁,則顯示為:[6] [7] [8] [9] 10
為此,擬制流程圖如下:
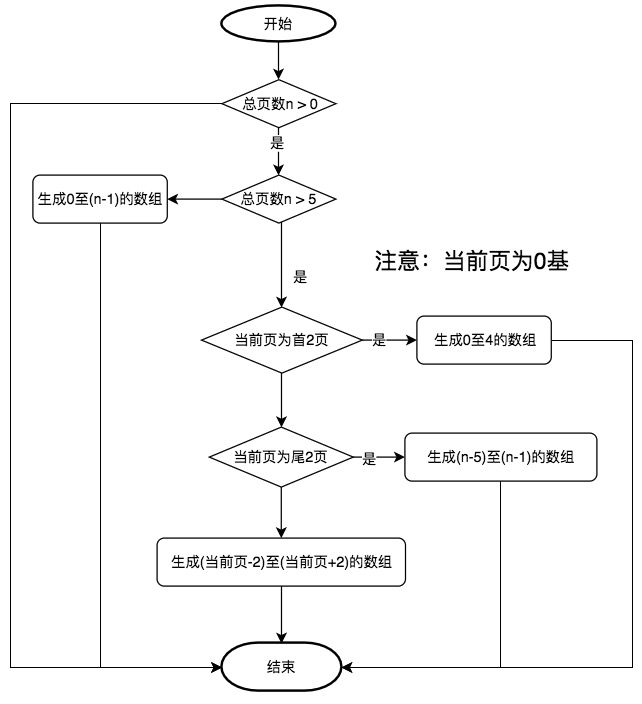
該流程圖主要有幾個判斷語句及一個生成X到Y的數組的方法組成,依此接下來按流程分步進行開發。
### 生成由X到Y的數組
student/index/index.component.ts
```
export class IndexComponent implements OnInit {
...
/**
* 生成頁碼
* @param begin 開始頁碼
* @param end 結束頁碼
*/
makePages(begin: number, end: number): Array<number> {
const result = new Array<number>();
for (; begin <= end; begin++) {
result.push(begin);
}
return result;
}
}
```
接下來對此功能進行測試:
student/index/index.component.spec.ts
```
describe('Student -> IndexComponent', () => {
...
fit('makePages', () => {
/* 更好的做法是使用兩個隨機的數字進行測試 */
const result = component.makePages(0, 4);
expect(result.length).toEqual(5);
/* 斷言起始為0 */
expect(result[0]).toEqual(0);
/* 斷言后一個元素比前一個元素大1 */
for (let i = 0; i < 4; i++) {
expect(result[i] + 1).toEqual(result[i + 1]);
}
});
});
```
### 按總頁數生成分頁數據
有了按起始值生成分頁數組的方法后,按流程圖繼承新建根據當前頁及總頁數的不同值來生成分頁數組。
student/index/index.component.ts
```
export class IndexComponent implements OnInit {
/* 分頁數據 */
pages: Array<number>;
...
/**
* 生成分頁數據
* @param currentPage 當前頁
* @param totalPages 總頁數
*/
makePagesByTotalPages(currentPage: number, totalPages: number): Array<number> {
if (totalPages > 0) {
/* 總頁數小于5 */
if (totalPages <= 5) {
return this.makePages(0, totalPages);
}
/* 首2頁 */
if (currentPage < 2) {
return this.makePages(0, 5);
}
/* 尾2頁 */
if (currentPage > totalPages - 3) {
return this.makePages(totalPages - 5, totalPages - 1);
}
/* 總頁數大于5,且為中間頁碼*/
return this.makePages(currentPage - 2, currentPage + 2);
}
return new Array();
}
```
此方法有多種條件,我們力求在單元測試中使用不同的測試數據調用該方法而使得該方法中所有的IF條件中的代碼均被執行一次,達到測試覆蓋率為100%的目標。
student/index/index.component.spec.ts
```
describe('Student -> IndexComponent', () => {
...
fit('makePagesByTotalPages', () => {
/* 總頁數為0 */
expect(component.makePagesByTotalPages(0, 0).length).toEqual(0);
/* 總頁數小于等于5 */
expect(component.makePagesByTotalPages(2, 5).length).toEqual(5);
expect(component.makePagesByTotalPages(2, 5)[0]).toEqual(0);
/* 總頁數大于5,首2頁 */
expect(component.makePagesByTotalPages(1, 10).length).toEqual(5);
expect(component.makePagesByTotalPages(1, 10)[4]).toEqual(4);
/* 總頁數大于5,尾2頁 */
expect(component.makePagesByTotalPages(8, 10).length).toEqual(5);
expect(component.makePagesByTotalPages(8, 10)[4]).toEqual(9);
/* 總頁數大于5, 中間頁 */
expect(component.makePagesByTotalPages(5, 10).length).toEqual(5);
expect(component.makePagesByTotalPages(5, 10)[0]).toEqual(3);
});
});
```
保存文件后單元測試自動運行,同時反饋給了我們的一個錯誤:

該錯誤提示:測試代碼中預期的值為5,但實際的返回是6。該錯誤位于:index.component.spec.ts文件夾的第234行(由于你的學習的代碼與教程中的不可能完全一樣,所以你本地提示的行數可能是其它值,這是正常的):
student/index/index.component.spec.ts
```
describe('Student -> IndexComponent', () => {
...
...
/* 總頁數小于等于5 */
expect(component.makePagesByTotalPages(2, 5).length).toEqual(5); ★
expect(component.makePagesByTotalPages(2, 5)[0]).toEqual(0);
```
為了更清晰的得知調用component.makePagesByTotalPages(2, 5)的返回值,在此行上加入console.log來進行數據打印:
student/index/index.component.spec.ts
```
describe('Student -> IndexComponent', () => {
...
...
/* 總頁數小于等于5 */
console.log(component.makePagesByTotalPages(2, 5)); ?
expect(component.makePagesByTotalPages(2, 5).length).toEqual(5); ★
expect(component.makePagesByTotalPages(2, 5)[0]).toEqual(0);
```
打印的值如下:
```
LOG: [0, 1, 2, 3, 4, 5]
```
當調用`component.makePagesByTotalPages(2, 5)`時表示當前頁為第3頁,總頁數為5頁。則期待打印的數組值應該:`[0,1, 2, 3, 4]`。故此得知在相應的代碼進行數據輸出時,終止的值應該在原值的基礎上做-1處理。回來功能代碼進行修正:
student/index/index.component.ts
```
export class IndexComponent implements OnInit {
...
/* 總頁數小于5 */
if (totalPages <= 5) {
return this.makePages(0, totalPages); ?
return this.makePages(0, totalPages - 1); ?
}
```
再次運行單元測試,發現仍有錯誤報出:

依照剛才的方法,再次進行修正:
student/index/index.component.ts
```
export class IndexComponent implements OnInit {
...
/* 首2頁 */
if (currentPage < 2) {
return this.makePages(0, 5); ?
return this.makePages(0, 4); ?
}
```
最終測試通過。表明在C層中編寫的功能性代碼是符合預期的,這正是單元測試的魅力所在:在代碼編寫階段發現并及時的修正錯誤。
### V層綁定
最后,我們在每次數據加載完成后調用此頁碼生成方法,并將其返回值綁定給V層:
student/index/index.component.ts
```
export class IndexComponent implements OnInit {
/* 分頁數據 */
pages: Array<number>; ①
...
loadData() {
...
this.studentService.page(queryParams)
.subscribe((response: { totalPages: number, content: Array<Student> }) => {
this.pageStudent = response;
this.pages = this.makePagesByTotalPages(this.params.page, response.totalPages); ②
});
}
```
* ① 使用`:`來定義數據類型
* ② 每次數據重新加載后,重新生成分頁信息
student/index/index.component.spec.ts
```
describe('Student -> IndexComponent', () => {
...
fit('loadData', () => {
const mockResult = new Array<number>(); ①
spyOn(component, 'makePagesByTotalPages').and.returnValue(mockResult); ②
component.loadData();
expect(component.makePagesByTotalPages).toHaveBeenCalled();
expect(component.pages).toBe(mockResult); ③
});
```
* ① 初始化模擬返回值
* ② 建立間諜并設置該間諜的返回值(當該間諜被調用時,以此值返回給調用者)
* ③ `toBe` = `就是`。斷言當前組件的分頁信息就是剛剛間諜設置的返回值
## 頁碼V層
C層的功能完成后,繼續來完成V層。V層的主要功能是根據C層的pages值及當前頁進行渲染。功能點主要有:①渲染的個數要與C層的個數相同 ②程序員使用的頁碼雖然為0基,但用戶習慣于1基 ③點擊對頁的應碼時應該觸發C層onPage方法 ④當前頁的樣式應該區別于非當前頁。下面,按上述功能點分別開發:
### 渲染個數
TDD測試驅開發,先嘗試寫寫單元測試代碼:
student/index/index.component.spec.ts
```
describe('Student -> IndexComponent', () => {
...
fit('頁碼渲染個數', () => {
component.pages = new Array<number>(3, 4, 5, 6, 7);
fixture.detectChanges();
/* 獲取首頁按鈕 */
const debugElement = fixture.debugElement.query(By.css('ul.pagination')); ①
const ulElement: HTMLUListElement = debugElement.nativeElement;
/* 斷言分頁個數 */
console.log(ulElement.getElementsByTagName('li')); ②
expect(ulElement.childNodes.length).toEqual(9); ③
});
});
```
* ① 通過css選擇器獲取分頁的ul元素
* ② 獲取ul元素下的所有li元素。首次使用控制臺打印信息
* ③ `首頁 上一頁 3 4 5 6 7 下頁 尾頁` 共9個分頁信息。
功能代碼中先補充下一頁及尾頁:
student/index/index.component.html
```
<li class="page-item">
<a class="page-link" href="#">Next</a> ?
<a class="page-link" href="#">下一頁</a> ?
</li>
<li class="page-item"> ?
<a class="page-link" href="#">尾頁</a>
</li> ?
</ul>
```
再進行循環輸出:
student/index/index.component.html
```
<li class="page-item" [ngClass]="{'disabled': params.page === 0}" (click)="onPage(params.page - 1)">
<span class="page-link">上一頁</span>
</li>
<li *ngFor="let page of pages">
<a class="page-link" href="#">3</a>
</li>
<li class="page-item">
<a class="page-link" href="#">下一頁</a>
</li>
```

單元測試通過,說明生成的頁碼數量符合預期。
### 頁碼號
C層給V層的頁碼號為0,1,2,3...,在輸出時應該轉換為1,2,3
student/index/index.component.html
```
<li *ngFor="let page of pages">
<a class="page-link" href="#">3</a> ?
<a class="page-link" href="#">{{page + 1}}</a> ?
</li>
```

效果有了,再進行單元測試以保證本功能在以后項目的更新過程中也是可用的。頁碼號與頁碼渲染個數兩個單元測試基于相同的前提:設置C層的頁碼,渲染V層最終獲取UL元素。本著**不造重復的輪子**的原則將其公用的代碼抽離如下:
student/index/index.component.spec.ts
```
describe('Student -> IndexComponent', () => {
...
/**
* V層分頁測試BEFORE
*/
const viewPageBefore = (): HTMLUListElement => {
component.pages = new Array<number>(3, 4, 5, 6, 7);
fixture.detectChanges();
/* 獲取分頁 */
const debugElement = fixture.debugElement.query(By.css('ul.pagination'));
return HTMLUListElement = debugElement.nativeElement;
};
fit('頁碼渲染個數', () => {
const ulElement: HTMLUListElement = viewPageBefore(); ①
/* 斷言分頁個數 */
console.log(ulElement.getElementsByTagName('li'));
expect(ulElement.getElementsByTagName('li').length).toEqual(9);
});
```
* ① 在此處調用抽離的方法
測試頁碼號用例:
student/index/index.component.spec.ts
```
describe('Student -> IndexComponent', () => {
...
fit('測試頁碼號', () => {
const ulElement: HTMLUListElement = viewPageBefore();
const liElements: HTMLCollection = ulElement.getElementsByTagName('li'); ?
/* 依次獲取第3 4 5 6 7頁,斷言對應的頁碼為4,5,6,7,8 */
for (let i = 2; i < 7; i++) {
console.log(liElements[i].textContent); ①
expect(liElements[i].textContent).toContain((i + 2).toString()); ②
}
});
```
* ? 通過getElementsByTagName方法獲取到的返回值類型為:HTMLCollection
* ① 首次使用在控制臺中進行打印
* ② 使用contains方法適用更為寬泛,比如后面即將使用的當前面`<span class="page-link">2<span class="sr-only">(current)</span></span>`。在不考慮當前頁的情況下此處使用toEqual亦可。
### 點擊觸發onPage方法
單元測試中依次點擊幾個頁碼,并依次斷言以頁碼值調用C層的onPage()方法,測試用例如下:
student/index/index.component.spec.ts
```
describe('Student -> IndexComponent', () => {
...
fit('頁碼點擊測試', () => {
const ulElement: HTMLUListElement = viewPageBefore();
const liElements: HTMLCollection = ulElement.getElementsByTagName('li');
spyOn(component, 'onPage');
for (let i = 2; i < 7; i++) {
const htmlLiElement = liElements[i] as HTMLLIElement; ?
htmlLiElement.click();
expect(component.onPage).toHaveBeenCalledWith(i + 1); ?
}
});
});
```
* ? 使用as進行數據類型的強制轉換。與JAVA不同,此處即使是類型不相符也不會報錯(但可能后續的功能會失效【了解即可】)
* ? 依次點擊3,4,5,6,7頁,傳給onPage的值也是3,4,5,6,7
功能代碼相對簡單:
student/index/index.component.html
```
<li *ngFor="let page of pages" (click)="onPage(page)"?>
<a class="page-link" href="#">{{page + 1}}</a>
</li>
```
### 選中當前頁
第一次完成某效果時,參考官方的文檔是最簡單有效的方式。正式動手寫之前先瀏覽下bootstrap的示例代碼:

有了示例代碼,功能性的代碼也就不難了。
student/index/index.component.html
```
<li class="page-item"★ [ngClass]="{'active': params.page === page}"① *ngFor="let page of pages" (click)="onPage(page)">
<a class="page-link" href="#" *ngIf="page !== params.page"②>{{page + 1}}</a>
<span class="page-link" *ngIf="page === params.page"③>{{page + 1}}<span class="sr-only">(current)</span></span>
</li>
```
* ① 頁碼為當前頁時,增加active樣式
* ② 非當前頁時,顯示可點擊的分頁
* ③ 當前頁時,顯示不可點擊的分頁
對應的單元測試代碼如下:
student/index/index.component.spec.ts
```
describe('Student -> IndexComponent', () => {
...
fit('選中當前頁測試', () => {
component.params.page = 4; ①
const ulElement: HTMLUListElement = viewPageBefore();
});
});
```
* ① 模擬第4頁為當前頁,單元測試查看效果:

確認效果后,繼續使用單元測試對此效果進行確認:
student/index/index.component.spec.ts
```
describe('Student -> IndexComponent', () => {
...
fit('選中當前頁測試', () => {
component.params.page = 4;
const ulElement: HTMLUListElement = viewPageBefore();
const liElements: HTMLCollection = ulElement.getElementsByTagName('li');
/* 斷言只有ul元素下只有一個active子元素,且該子元素的位置符合預期 */
expect(ulElement.getElementsByClassName('active').length).toBe(1); ①
const htmlLiElement = liElements[3] as HTMLLIElement; ②
expect(htmlLiElement.classList.contains('active')).toBe(true); ②
/* 斷言該li元素中存在class為sr-only的元素 */
const elements = htmlLiElement.getElementsByClassName('sr-only');
console.log(elements);
expect(elements.length).toEqual(1);
expect(elements[0].textContent).toContain('(current)'); ③
});
});
```
* ① ul下僅有一個class=active的li元素
* ② 該元素對頁的page值為4
* ③ 當前頁中存在sr-only樣式的元素,元素內容為(current)
至此,頁碼開發基本完畢。
## 下一頁
此方法與上一頁類似,將params.page替換為pageStudent.totalPages即可,請自行完成。
提示:CSS選擇器 匹配同類型中的倒數第 2 個同級兄弟元素為`:nth-last-child(n)`,`n`同樣為1基。
## 尾頁
此方法與首頁類似,請自行完成。
提示:CSS選擇器 最后一個元素為`:last-of-type`
# 總結
本小節我們大量的應用了粒度最小的化的測試方法,將每個功能點盡力的拆分一個個獨立可測試的小的功能。在相對復雜的一些功能中,匯制了流程圖來幫助我們梳理功能的邏輯處理。后依流程圖對功能點進行拆分,進而對每個小的功能點獨立進行開發測試。雖然有些單元測試的語法我們第一次使用,但由于每個測試用例中的代碼量均不大,所以在學習及閱讀過程中并不址分費力。而且更重要的是:單元測試代碼隨時保障了功能代碼的可用性。
# 參考文檔
| 名稱 | 鏈接 | 預計學習時長(分) |
| --- | --- | --- |
| 源碼地址 | [https://github.com/mengyunzhi/spring-boot-and-angular-guild/releases/tag/step4.6.8](https://github.com/mengyunzhi/spring-boot-and-angular-guild/releases/tag/step4.6.8) | - |
| bootstrap grid | [https://getbootstrap.net/docs/layout/grid/](https://getbootstrap.net/docs/layout/grid/) | 5 |
| bootstrap pagination | [https://getbootstrap.net/docs/components/pagination/](https://getbootstrap.net/docs/components/pagination/) | 5 |
| spyOn | [https://jasmine.github.io/api/3.3/global.html#spyOn](https://jasmine.github.io/api/3.3/global.html#spyOn) | 5 |
| HTMLDivElement | [https://developer.mozilla.org/zh-CN/docs/Web/API/HTMLDivElement](https://developer.mozilla.org/zh-CN/docs/Web/API/HTMLDivElement) | 5 |
| Node.textContent | [https://developer.mozilla.org/zh-CN/docs/Web/API/Node/textContent](https://developer.mozilla.org/zh-CN/docs/Web/API/Node/textContent) | 5 |
| HTMLLIElement | [https://developer.mozilla.org/zh-CN/docs/Web/API/HTMLLIElement](https://developer.mozilla.org/zh-CN/docs/Web/API/HTMLLIElement) | 5 |
| Element.classList | [https://developer.mozilla.org/zh-CN/docs/Web/API/Element/classList](https://developer.mozilla.org/zh-CN/docs/Web/API/Element/classList) | 5 |
| CSS 選擇器 | [https://www.runoob.com/cssref/css-selectors.html](https://www.runoob.com/cssref/css-selectors.html) | - |
- 序言
- 第一章:Hello World
- 第一節:Angular準備工作
- 1 Node.js
- 2 npm
- 3 WebStorm
- 第二節:Hello Angular
- 第三節:Spring Boot準備工作
- 1 JDK
- 2 MAVEN
- 3 IDEA
- 第四節:Hello Spring Boot
- 1 Spring Initializr
- 2 Hello Spring Boot!
- 3 maven國內源配置
- 4 package與import
- 第五節:Hello Spring Boot + Angular
- 1 依賴注入【前】
- 2 HttpClient獲取數據【前】
- 3 數據綁定【前】
- 4 回調函數【選學】
- 第二章 教師管理
- 第一節 數據庫初始化
- 第二節 CRUD之R查數據
- 1 原型初始化【前】
- 2 連接數據庫【后】
- 3 使用JDBC讀取數據【后】
- 4 前后臺對接
- 5 ng-if【前】
- 6 日期管道【前】
- 第三節 CRUD之C增數據
- 1 新建組件并映射路由【前】
- 2 模板驅動表單【前】
- 3 httpClient post請求【前】
- 4 保存數據【后】
- 5 組件間調用【前】
- 第四節 CRUD之U改數據
- 1 路由參數【前】
- 2 請求映射【后】
- 3 前后臺對接【前】
- 4 更新數據【前】
- 5 更新某個教師【后】
- 6 路由器鏈接【前】
- 7 觀察者模式【前】
- 第五節 CRUD之D刪數據
- 1 綁定到用戶輸入事件【前】
- 2 刪除某個教師【后】
- 第六節 代碼重構
- 1 文件夾化【前】
- 2 優化交互體驗【前】
- 3 相對與絕對地址【前】
- 第三章 班級管理
- 第一節 JPA初始化數據表
- 第二節 班級列表
- 1 新建模塊【前】
- 2 初識單元測試【前】
- 3 初始化原型【前】
- 4 面向對象【前】
- 5 測試HTTP請求【前】
- 6 測試INPUT【前】
- 7 測試BUTTON【前】
- 8 @RequestParam【后】
- 9 Repository【后】
- 10 前后臺對接【前】
- 第三節 新增班級
- 1 初始化【前】
- 2 響應式表單【前】
- 3 測試POST請求【前】
- 4 JPA插入數據【后】
- 5 單元測試【后】
- 6 惰性加載【前】
- 7 對接【前】
- 第四節 編輯班級
- 1 FormGroup【前】
- 2 x、[x]、{{x}}與(x)【前】
- 3 模擬路由服務【前】
- 4 測試間諜spy【前】
- 5 使用JPA更新數據【后】
- 6 分層開發【后】
- 7 前后臺對接
- 8 深入imports【前】
- 9 深入exports【前】
- 第五節 選擇教師組件
- 1 初始化【前】
- 2 動態數據綁定【前】
- 3 初識泛型
- 4 @Output()【前】
- 5 @Input()【前】
- 6 再識單元測試【前】
- 7 其它問題
- 第六節 刪除班級
- 1 TDD【前】
- 2 TDD【后】
- 3 前后臺對接
- 第四章 學生管理
- 第一節 引入Bootstrap【前】
- 第二節 NAV導航組件【前】
- 1 初始化
- 2 Bootstrap格式化
- 3 RouterLinkActive
- 第三節 footer組件【前】
- 第四節 歡迎界面【前】
- 第五節 新增學生
- 1 初始化【前】
- 2 選擇班級組件【前】
- 3 復用選擇組件【前】
- 4 完善功能【前】
- 5 MVC【前】
- 6 非NULL校驗【后】
- 7 唯一性校驗【后】
- 8 @PrePersist【后】
- 9 CM層開發【后】
- 10 集成測試
- 第六節 學生列表
- 1 分頁【后】
- 2 HashMap與LinkedHashMap
- 3 初識綜合查詢【后】
- 4 綜合查詢進階【后】
- 5 小試綜合查詢【后】
- 6 初始化【前】
- 7 M層【前】
- 8 單元測試與分頁【前】
- 9 單選與多選【前】
- 10 集成測試
- 第七節 編輯學生
- 1 初始化【前】
- 2 嵌套組件測試【前】
- 3 功能開發【前】
- 4 JsonPath【后】
- 5 spyOn【后】
- 6 集成測試
- 7 @Input 異步傳值【前】
- 8 值傳遞與引入傳遞
- 9 @PreUpdate【后】
- 10 表單驗證【前】
- 第八節 刪除學生
- 1 CSS選擇器【前】
- 2 confirm【前】
- 3 功能開發與測試【后】
- 4 集成測試
- 5 定制提示框【前】
- 6 引入圖標庫【前】
- 第九節 集成測試
- 第五章 登錄與注銷
- 第一節:普通登錄
- 1 原型【前】
- 2 功能設計【前】
- 3 功能設計【后】
- 4 應用登錄組件【前】
- 5 注銷【前】
- 6 保留登錄狀態【前】
- 第二節:你是誰
- 1 過濾器【后】
- 2 令牌機制【后】
- 3 裝飾器模式【后】
- 4 攔截器【前】
- 5 RxJS操作符【前】
- 6 用戶登錄與注銷【后】
- 7 個人中心【前】
- 8 攔截器【后】
- 9 集成測試
- 10 單例模式
- 第六章 課程管理
- 第一節 新增課程
- 1 初始化【前】
- 2 嵌套組件測試【前】
- 3 async管道【前】
- 4 優雅的測試【前】
- 5 功能開發【前】
- 6 實體監聽器【后】
- 7 @ManyToMany【后】
- 8 集成測試【前】
- 9 異步驗證器【前】
- 10 詳解CORS【前】
- 第二節 課程列表
- 第三節 果斷
- 1 初始化【前】
- 2 分頁組件【前】
- 2 分頁組件【前】
- 3 綜合查詢【前】
- 4 綜合查詢【后】
- 4 綜合查詢【后】
- 第節 班級列表
- 第節 教師列表
- 第節 編輯課程
- TODO返回機制【前】
- 4 彈出框組件【前】
- 5 多路由出口【前】
- 第節 刪除課程
- 第七章 權限管理
- 第一節 AOP
- 總結
- 開發規范
- 備用